# Transfer
Transfer is one of the end components in a call flow. When a call reaches it, the caller is blind-transferred to a destination you pick, and their journey through the current flow stops there. You can also play a prompt beforehand to let the caller know they are being moved.
:::note
A blind transfer hands the caller straight to the destination without checking whether it answers first. There is no consultation or announcement to the receiving party: once the transfer fires, the caller leaves this flow and cannot come back to it.
:::
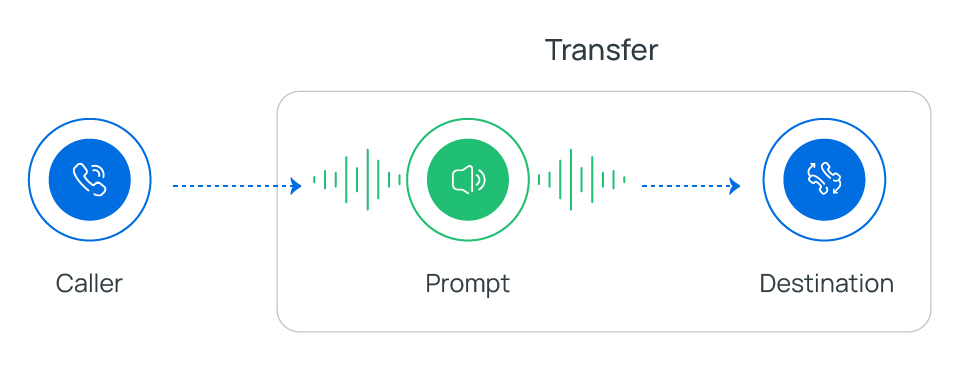
## Where you can send callers
A Transfer component can hand a call off to any of these destinations:
- Extension
- Extension Voicemail
- Ring Group
- Queue
- Group Voicemail
- Conference
- External Number
- Call Flow
- IVR (Interactive Voice Response, the automated menu that lets callers self-route by pressing keys)
- AI Receptionist
- Custom
## Prompts you can play
Before the transfer takes place, you can optionally play one of three prompt types:
- **Custom Prompt**: an existing custom prompt, or a new one you record from an extension or upload as an audio file.
- **Music on Hold (MoH)**: one of your configured Music on Hold entries.
- **Text to Speech (TTS)**: text you type, spoken aloud in the language and voice style you choose.
:::note
- Music on Hold prompts must already exist under **PBX Settings > Voice Prompt > Music on Hold** before you can select one here.

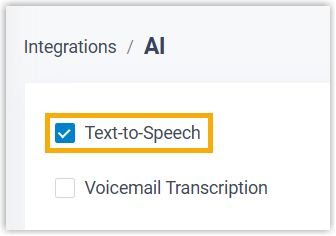
- Text to Speech is only available once you turn the feature on under **Integrations > AI**.
:::
## Configure the component
1. Drag the Transfer component onto your call flow, then click it to open its settings.
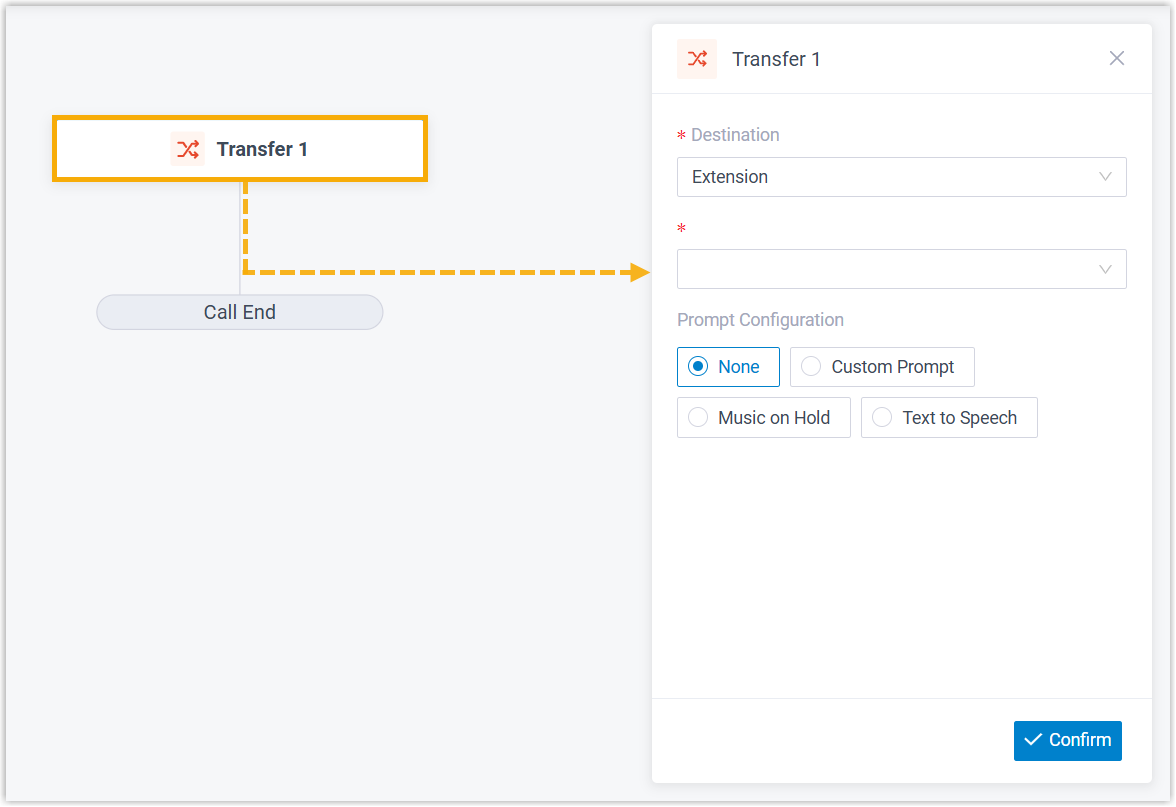
2. Use the **Destination** drop-down lists to choose where callers go.
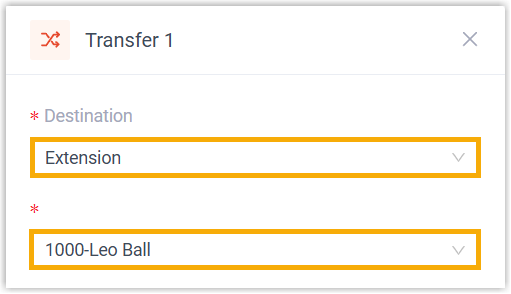
| Option | Sends the call to |
|--------|-------------------|
| Extension | A specific extension. |
| Extension Voicemail | A specific extension's voicemail box. |
| Ring Group | A specific ring group. |
| Queue | A specific queue. |
| Group Voicemail | A specific group voicemail box. |
| Conference | A specific conference. |
| External Number | A specific external number. |
| Call Flow | Another call flow. |
| IVR | A specific IVR. |
| AI Receptionist | A specific AI receptionist. |
| Custom | A destination you define yourself (see below). |
### Custom destinations
With **Custom** selected, define the target in one of two ways:
- **Enter a number directly**: type a value in the **Destination Number** field. It can be a regular phone number or a feature code.
- Regular number example: `1000` sends callers to internal extension 1000.
- Feature code example: `*781801` dials the feature code and logs the caller into queue 81801.
- **Build the number dynamically**: click the *fx* icon () and enter an expression. For example, `$HttpRequest1.responseContent` takes the on-duty number returned by an upstream **HTTP Request 1** component and routes the caller there.
:::note
- To transfer to a feature code, first enable **Dial Feature Code**.
- In-call feature codes are not supported as destinations, for example Record (`*1`), Park (`*5`, `*05`), Transfer (`*3`, `*03`), and Flip (`*01`).
- For the variables and functions you can use in an expression, see [Variables and Functions in Cloud Voice Expression](/pbx/call-flow-designer-guide/constants-and-variables-in-cloud-voice-cfd-expression/).
:::
If the custom destination has its own mailbox, an extension voicemail or a group voicemail, say, you can turn on **Transfer to Voicemail** to drop callers straight into it.
:::caution
For an **External Number** destination: when **Filter Number** is enabled (**PBX Settings > Preferences**), the system strips every special character except digits, `+`, `*`, and `#` from the custom number before it reaches the trunk.
:::
3. **Optional:** Add a prompt or a spoken message to announce the transfer.
**Custom Prompt**
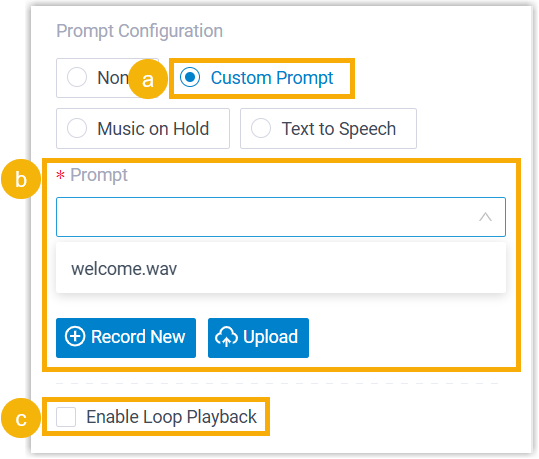
1. Click **Custom Prompt**.
2. Choose your prompt(s). Select an existing one from the **Prompt** list, or click **Record New** to capture one from an extension or **Upload** to add an audio file.
3. **Optional:** Select **Enable Loop Playback** to repeat the prompt(s).
:::note
- You can add up to **5** custom prompts.
- A newly recorded or uploaded prompt is saved to **PBX Settings > Voice Prompt > Custom Prompt**.
- A looped prompt stops if the next connected component has its own prompt, which then takes over.
:::
**Music on Hold**
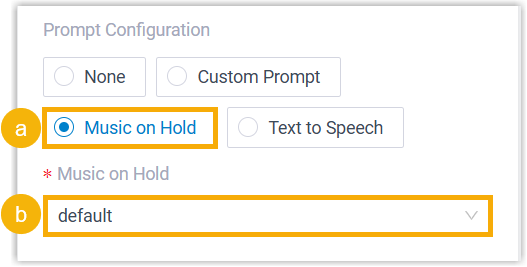
1. Select **Music on Hold**.
2. Pick an entry from the **Music on Hold** list.
**Text to Speech (TTS)**
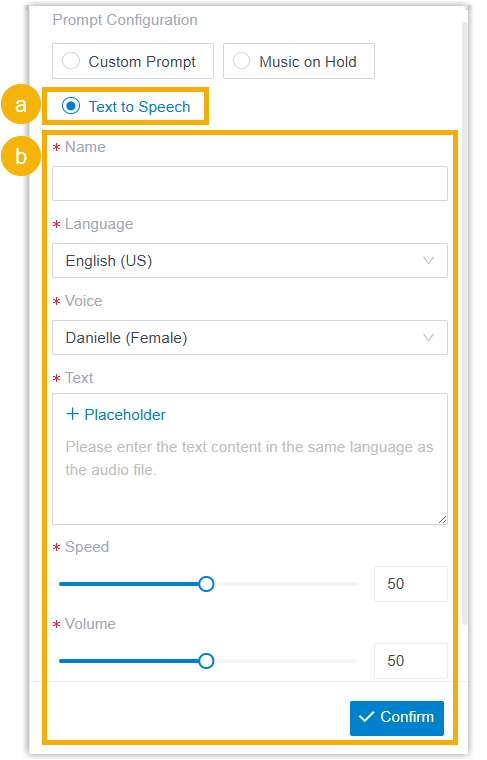
1. Select **Text to Speech**.
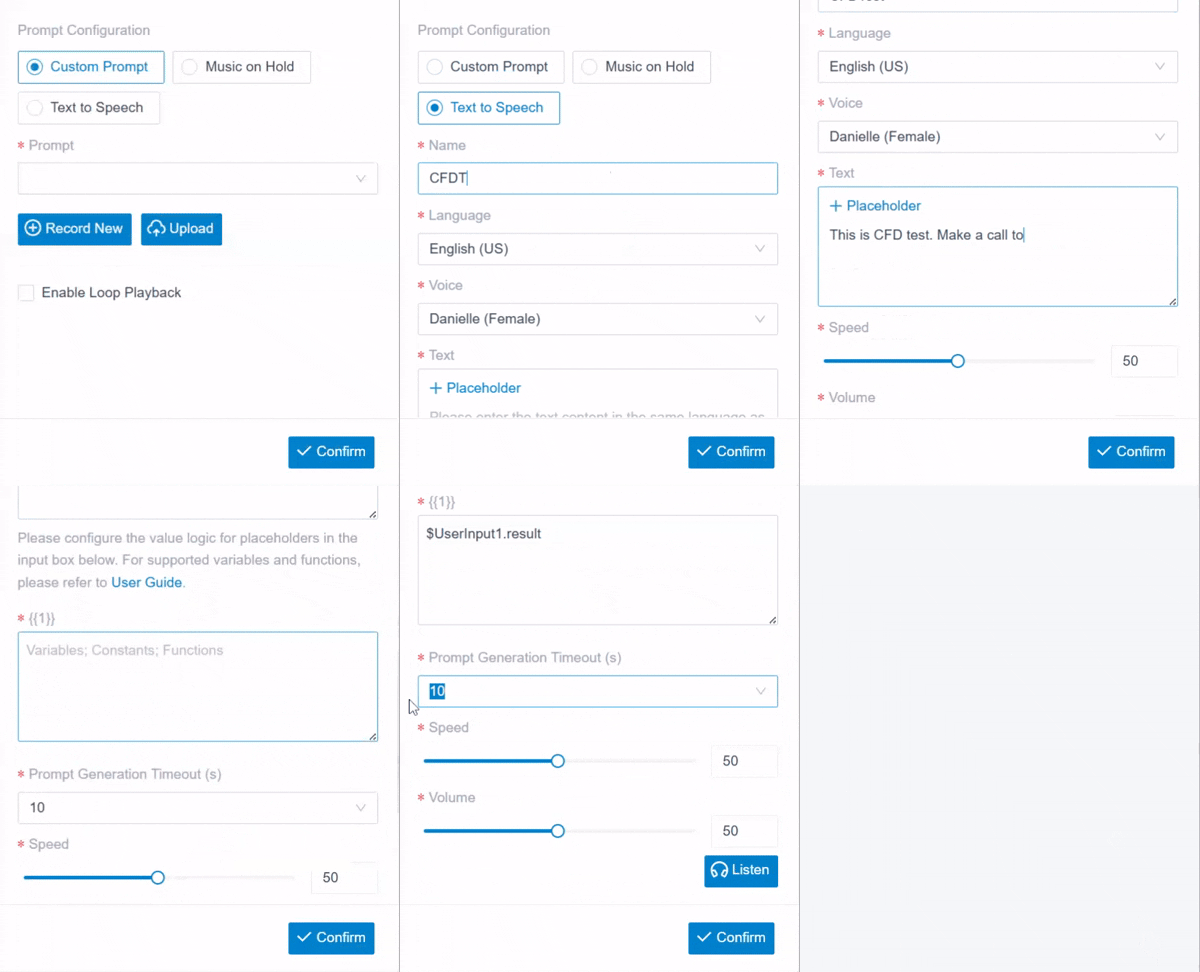
2. Fill in the remaining fields to turn your text into speech. Both fixed and dynamic text are supported:
- **Static text**: type it straight into the **Text** field.
- **Dynamic text**: type text and drop in placeholders backed by [variables](/pbx/call-flow-designer-guide/constants-and-variables-in-cloud-voice-cfd-expression/) so the message assembles itself at runtime. You can also set a generation timeout; if the speech isn't ready in time, the caller moves on to the next component without hearing anything.
:::note
Generated speech is saved to the system and synced to **PBX Settings > Voice Prompt > Custom Prompt**.
:::
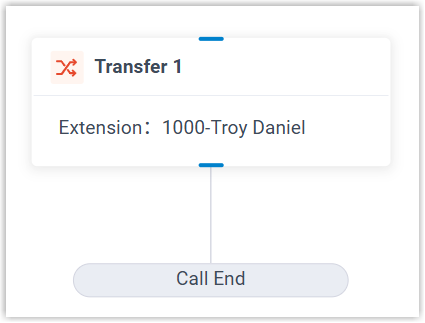
4. Click **Confirm** in the bottom-right corner. The destination you picked now shows on the component.
## Variables
When a Transfer component uses TTS, the system records the outcome in a variable. You can read that value from any expression-aware component, **Condition**, for instance, and branch the call on it.
:::note
Because a flow can hold several Transfer components, each one is numbered in the order you add it (Transfer 1, Transfer 2, and so on). Include the matching index in the variable name so you read from the right component.
:::
| Variable | Type | Description | Example |
|----------|------|-------------|---------|
| `$Transfer{index}.ttsResult` | String | The result of the component's Text-to-Speech conversion.
`TransferTTSResult.Success`, the text was converted and played to the caller.
`TransferTTSResult.Timeout`, the text wasn't converted before the timeout, so the caller was sent to the next component without a prompt. | `$Transfer1.ttsResult(STRING)=TransferTTSResult.Success` |
## What it can connect to
Transfer has a single built-in **Call End** branch, which you can connect to **one** of the components below.
:::note
Every component you can attach here does background work (reading data, sending an email, or calling an external service). None of them route the caller somewhere new, so they run after the caller has already been handed off. That is why Transfer still counts as an end component even though the branch can connect onward.
:::
| Component | Purpose |
|-----------|---------|
| Internal Data Ops | Read from and write to the Cloud Voice system's own database. See [Get Extension Presence Status](/pbx/call-flow-designer-guide/get-extension-presence-status/), [Set Extension Presence Status](/pbx/call-flow-designer-guide/set-extension-presence-status/), [Get Queue Agent](/pbx/call-flow-designer-guide/get-queue-agent/), [Get Queue Info](/pbx/call-flow-designer-guide/get-queue-info/), [Get Agent Status](/pbx/call-flow-designer-guide/get-agent-status/), [Set Agent Status](/pbx/call-flow-designer-guide/set-agent-status/), [Get System Info](/pbx/call-flow-designer-guide/get-system-info/), [Get System Capacity](/pbx/call-flow-designer-guide/get-system-capacity/), [Get Extension Info](/pbx/call-flow-designer-guide/get-extension-info/), and [Get Company Contact Info](/pbx/call-flow-designer-guide/get-company-contact-info/). |
| [Email Sender](/pbx/call-flow-designer-guide/email-sender/) | Send an email for real-time notifications, alerts, or user-specific details. |
| [Database Access](/pbx/call-flow-designer-guide/database-access/) | Run a SQL (Structured Query Language) operation against a database mid-flow to read or update data. |
| [HTTP Request](/pbx/call-flow-designer-guide/http-request/) | Send an HTTP (HyperText Transfer Protocol) request to an external server to exchange data with a third-party service. |