# Manage CRM Integration Templates
A CRM (Customer Relationship Management) integration template defines how Cloud Voice exchanges data with a particular CRM. From the Template Management page you can refresh the built-in defaults, save your own editable copies, adjust their settings, and move templates between systems. This page walks through each of those tasks.
## Open Template Management
All of the procedures below start from the same place:
1. Sign in to the PBX (Private Branch Exchange, your phone system) web portal and go to **Integrations > CRM**.
2. In the top-right corner of the page, click **Template Management**.
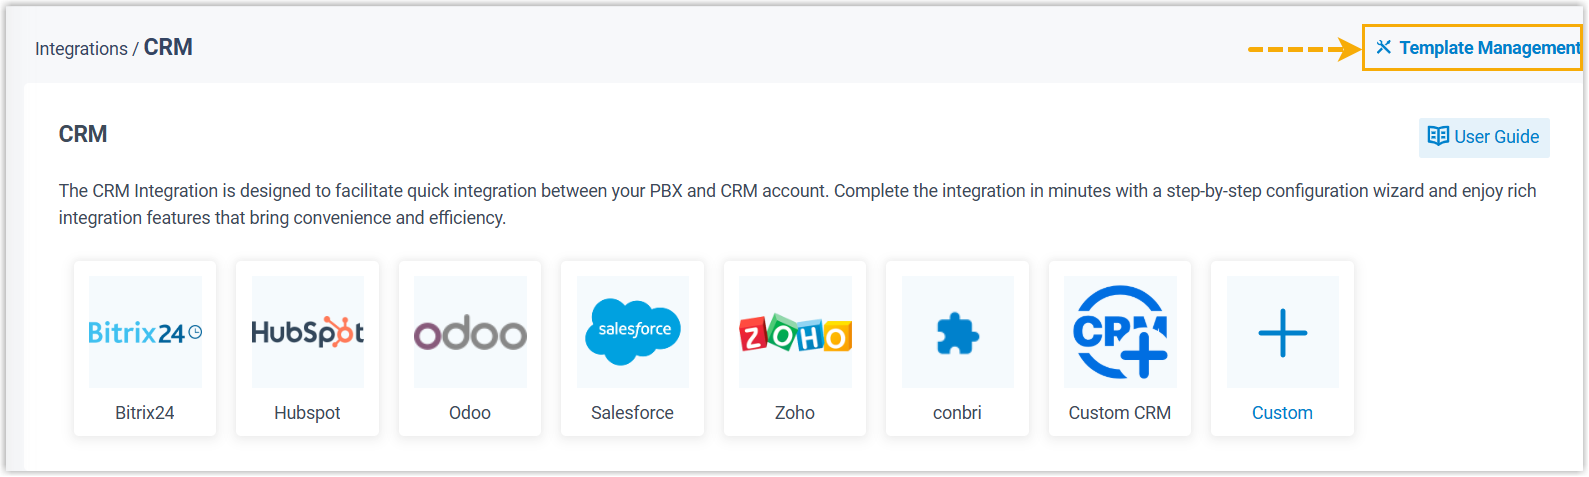
The page opens with two tabs: **Default Templates** (the built-in templates that ship with your system) and **Custom Templates** (the copies you create).
## Update a default template
Cloud Voice periodically publishes new versions of the built-in templates. You can check for an update and choose whether to apply it.
:::note
Your PBX must be able to reach the internet, otherwise new templates cannot be detected.
:::
1. On the **Default Templates** tab, click **Check for New Template** at the top of the list.
2. If an update is available, click the download icon () next to the template you want, then click **OK** to confirm.
:::caution
The new template takes effect right away. If a CRM integration is already using this template, the update is pushed to that live integration automatically, with no separate apply step. Expect the integration's behavior to change the moment you confirm.
:::
3. To review what changed, click the view icon () beside the template.
## Save a default template as a custom template
Copying a default template gives you an editable version you can tailor to your needs while leaving the original untouched.
:::tip
Always make your changes on a custom copy rather than editing anything shipped as a default. Default templates get overwritten when you apply an update, so keeping your edits in a custom template protects them from being wiped out.
:::
1. On the **Default Templates** tab, click the save-as icon () beside the template you want to copy.
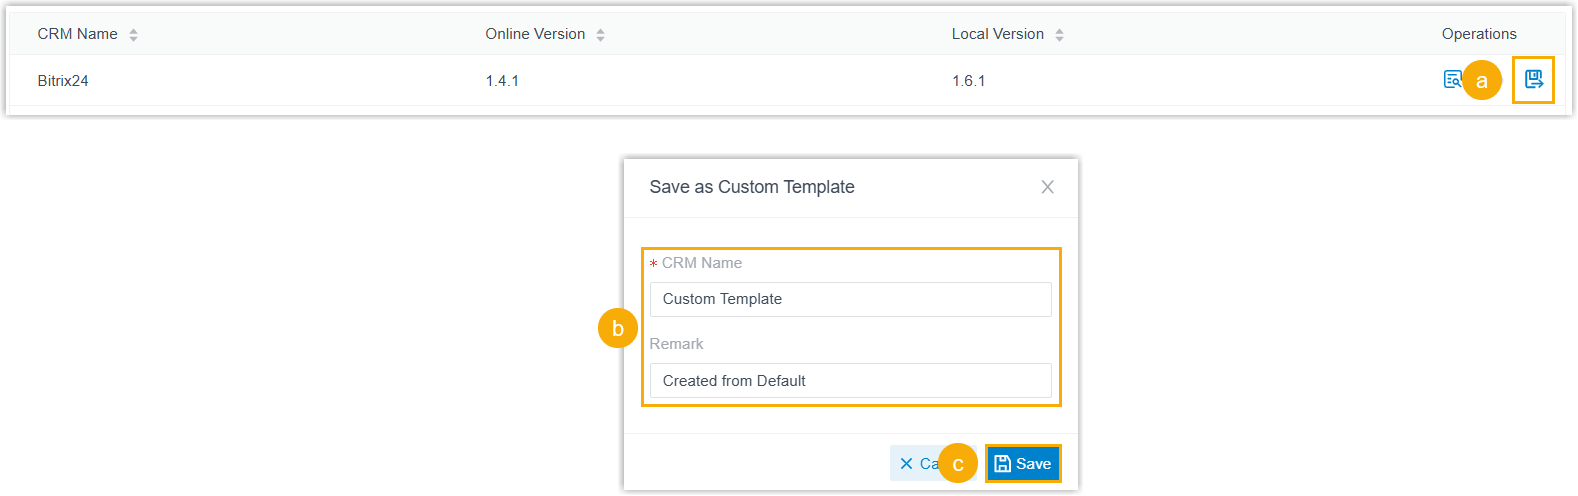
2. In the dialog, fill in the template details:
- **CRM Name**: Give the template a name.
- **Remark**: (Optional) Add a note describing the template.
3. Click **Save**.
The copy appears on the **Custom Templates** tab, ready to edit.
## Edit a custom template
You can adjust a custom template in one of two ways: through its [configuration page](#manage-crm-integration-templates__form) or by editing its [XML](#manage-crm-integration-templates__xml) directly. XML (Extensible Markup Language) is the raw text format the template is stored in.
:::note
Editing only changes the settings that are exposed on the web page. Any customizations made inside the template itself are left as they are.
:::
### Edit through the configuration page
1. On the **Custom Templates** tab, click the edit icon () beside the template.
2. Adjust the template settings in the dialog as needed.
3. Click **Save**.
4. If the template is already integrated with your PBX, push the changes to the live integration:
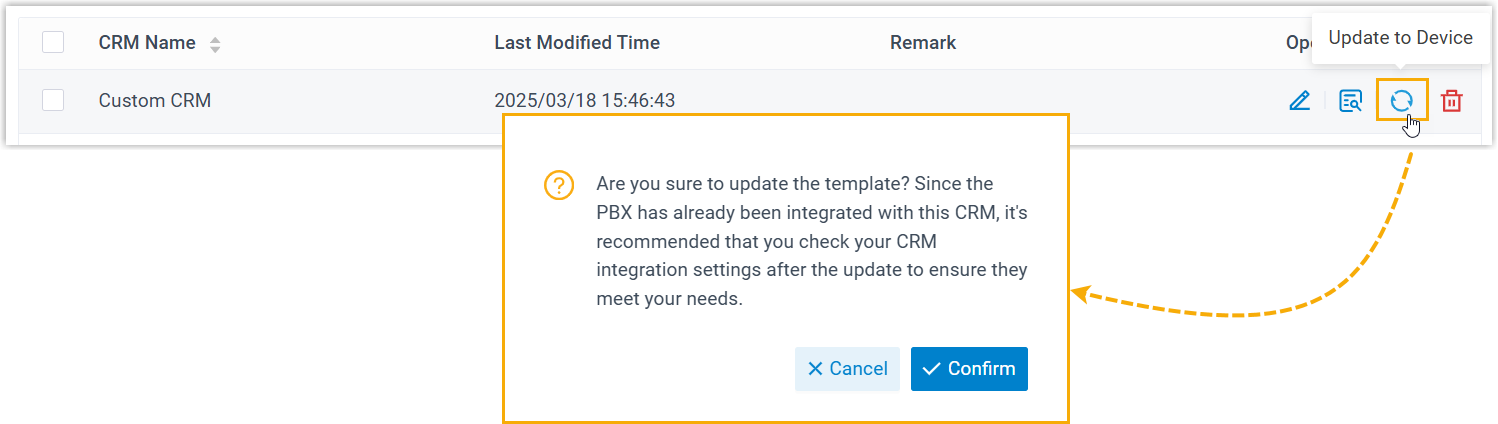
1. Click the refresh icon () beside the template.
2. In the dialog, click **Confirm**.
### Edit the XML directly
1. On the **Custom Templates** tab, click the view icon () beside the template.
2. At the bottom of the view window, click **Edit**.
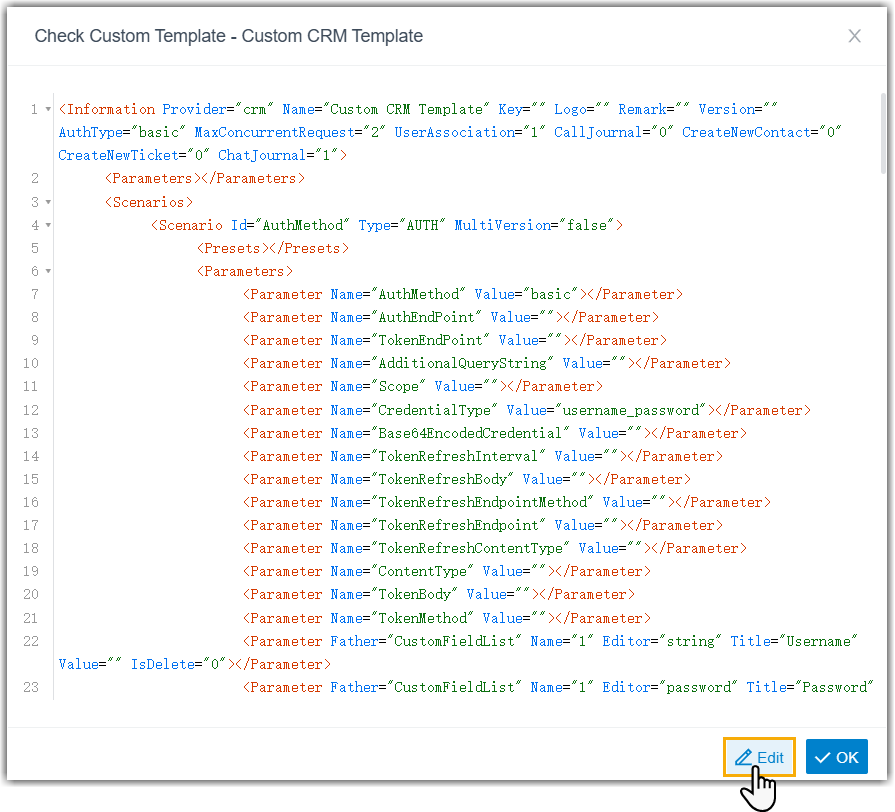
3. Make your changes to the XML, then click **Save**.
:::caution
Editing the XML directly bypasses the guided configuration fields, so a small typo can break the template. The changes also take effect immediately: if the template is already integrated with your PBX, they are pushed to the live integration as soon as you save.
:::
## Download custom templates
Downloading a template lets you keep a backup, load it onto another PBX, or edit its parameters by hand.
1. Open the **Custom Templates** tab.
2. Select the template or templates you want, then click **Download** at the top of the list.
The template files are saved to your computer.
## Upload a custom template
Uploading a template file is a quick way to add an integration you built elsewhere.
:::note
- You can store up to **10** custom CRM integration templates.
- Each file must be smaller than 1 MB.
:::
1. Open the **Custom Templates** tab.
2. At the top of the list, click **Upload**.
3. In the dialog, click **Browse** and select the template file.
4. Click **Save**.
The template is added to your system and appears in the list.
## Delete custom templates
:::caution
Deleting a custom template is permanent and cannot be undone. If there is any chance you will need it again, download a copy first (see [Download custom templates](#download-custom-templates)).
:::
1. Open the **Custom Templates** tab.
2. To remove one template, click the delete icon () beside it, then click **OK** in the dialog.
3. To remove several at once, select the templates you want, click **Delete** at the top of the list, then click **OK** in the dialog.