# Manage Helpdesk Integration Templates
A helpdesk integration template holds the settings Cloud Voice uses to connect to a specific helpdesk platform and match calls to its records. The Template Management page is where you keep those templates current: you can pull down updated defaults, branch your own editable copies, change their configuration, and carry templates from one system to another. The sections below cover each task.
## Where to start
Every procedure on this page begins in the same location:
1. Sign in to the PBX web portal and go to **Integrations > Helpdesk**.
2. Click **Template Management** in the top-right corner of the page.
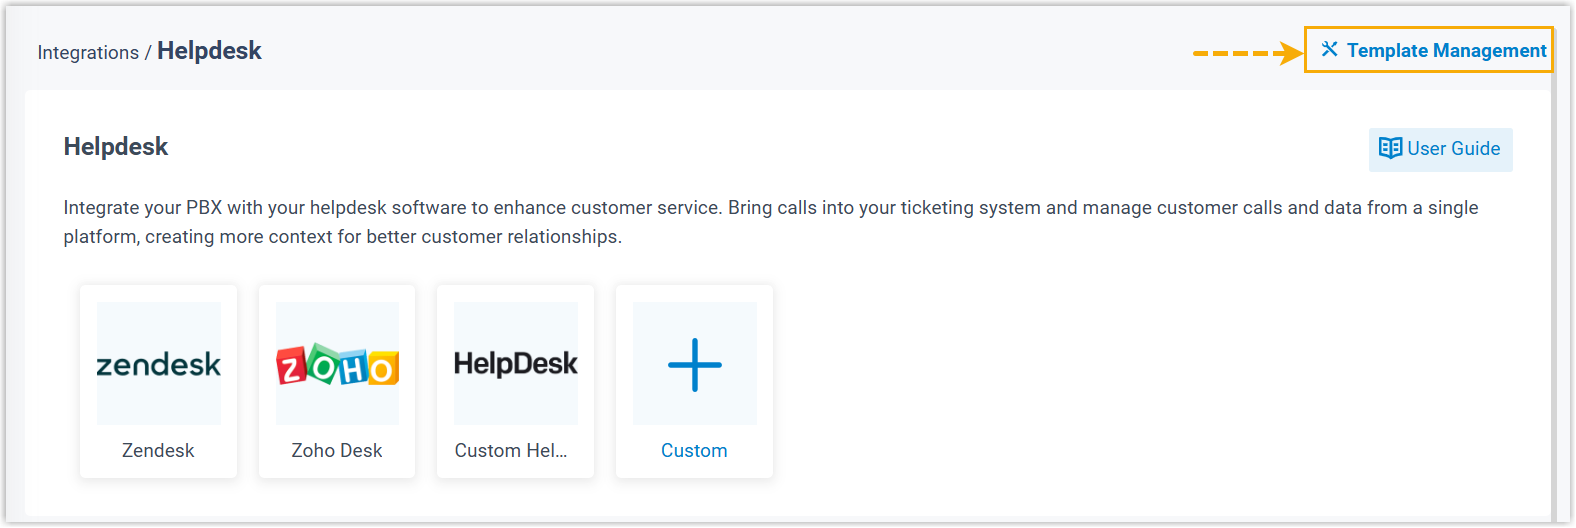
Template Management has two tabs. **Default Templates** lists the templates that ship with your system, and **Custom Templates** lists the copies you make and maintain yourself.
## Update a default template
New versions of the built-in templates are released from time to time. You can look for a newer version and decide whether to apply it.
:::note
Detecting new templates requires internet access. If your PBX cannot reach the internet, no updates will be found.
:::
1. On the **Default Templates** tab, click **Check for New Template** above the list.
2. When an update is found, click the download icon () next to the template, then confirm with **OK** in the dialog.
The updated content applies immediately. If a helpdesk integration is already using this template, that integration is updated at the same time.
:::caution
Applying a new default template takes effect right away and overwrites the settings of any live integration built on that template. Confirm the change is expected before you click **OK**, since there is no separate step to review it first.
:::
3. Click the view icon () beside the template to see the revised configuration.
## Save a default template as a custom copy
Branching a default template gives you a version you can freely modify for your own requirements while the original stays intact.
1. On the **Default Templates** tab, click the save-as icon () next to the template you want to copy.
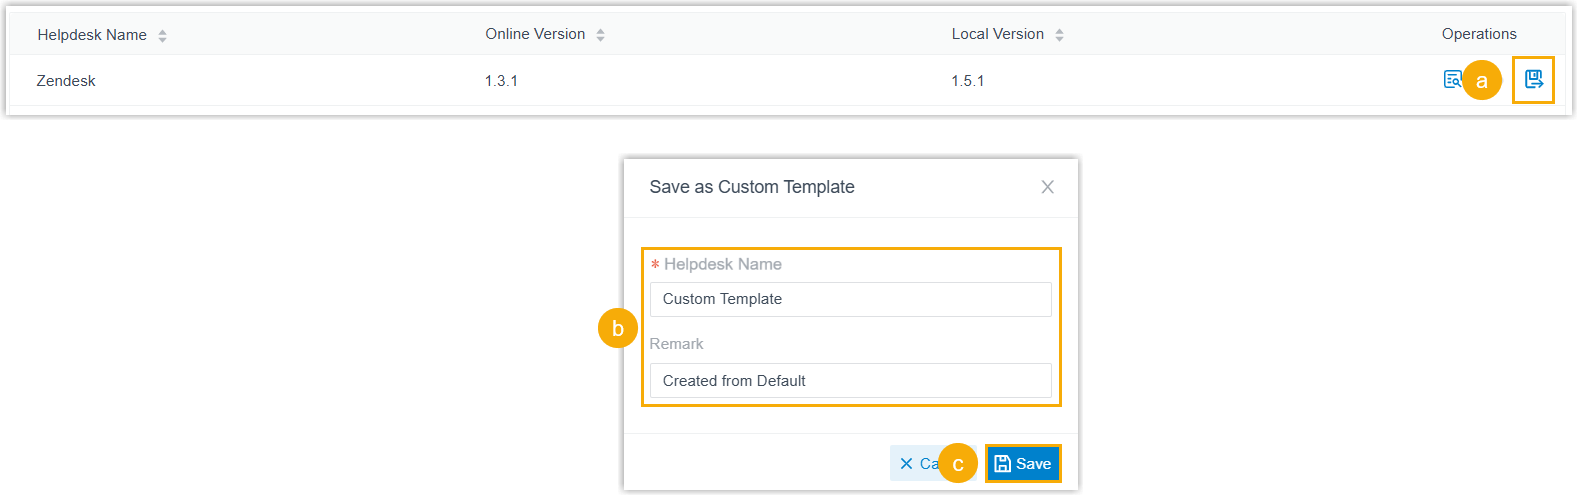
2. Complete the template details in the dialog:
- **Helpdesk Name**: Name the template.
- **Remark**: (Optional) Add a short note about the template.
3. Click **Save**.
Your copy is added to the **Custom Templates** tab, where it is ready to edit.
## Edit a custom template
There are two ways to change a custom template: through its [configuration page](#manage-crm-integration-templates__form) or by working with its [XML](#manage-crm-integration-templates__xml) directly.
:::note
This changes only the settings surfaced on the web page. Any custom configuration held inside the template itself is left untouched.
:::
### Edit through the configuration page
1. On the **Custom Templates** tab, click the edit icon () beside the template.
2. Update the settings in the dialog as needed.
3. Click **Save**.
4. If this template is already integrated with your PBX, apply the update to the live integration:
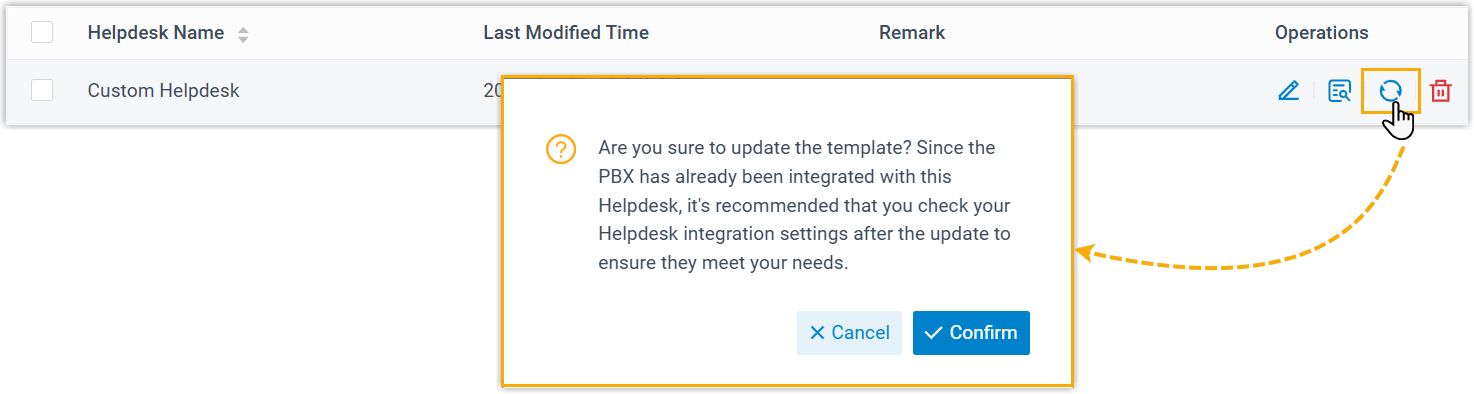
1. Click the refresh icon () beside the template.
2. Click **Confirm** in the dialog.
### Edit the XML directly
1. On the **Custom Templates** tab, click the view icon () beside the template.
2. Click **Edit** at the bottom of the view window.
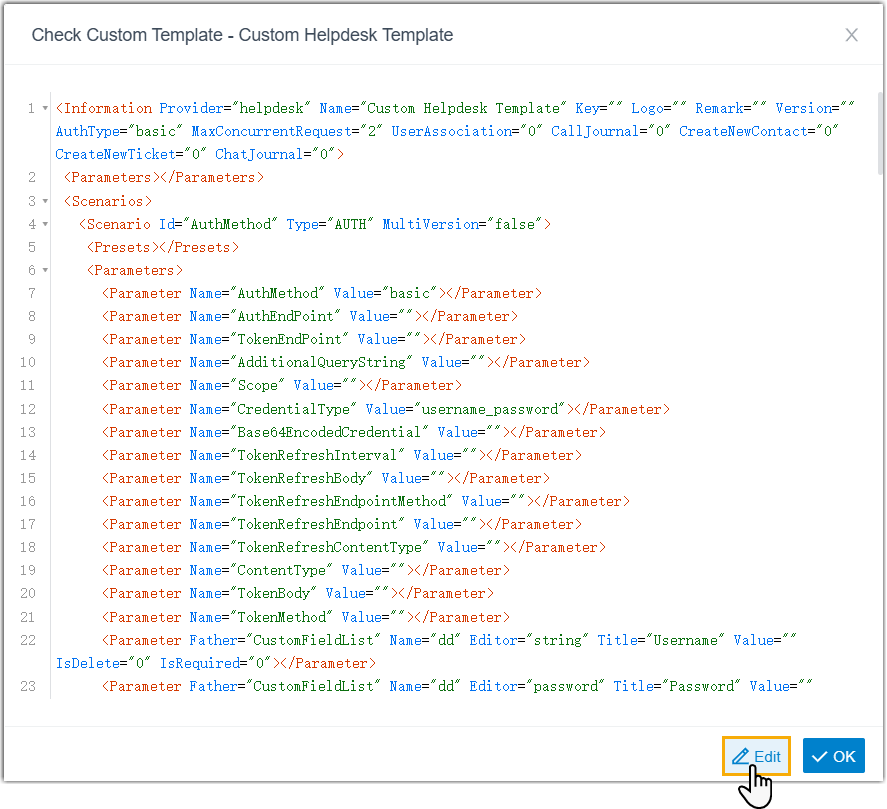
3. Adjust the XML content, then click **Save**.
The changes apply immediately. If the template is already integrated with your PBX, they reach the existing integration in real time.
## Download custom templates
Download a template when you want a backup, need to load it onto another PBX, or plan to edit its parameters by hand.
1. Open the **Custom Templates** tab.
2. Select one or more templates, then click **Download**.
The template files are saved to your computer.
## Upload a custom template
Uploading a template file is a fast way to add an integration you prepared elsewhere.
:::note
- You can keep up to **10** custom helpdesk integration templates.
- Each file must be under 1 MB.
:::
1. Open the **Custom Templates** tab.
2. Click **Upload** above the template list.
3. In the dialog, click **Browse** and choose the template file.
4. Click **Save**.
The file is added to your system and appears in the template list.
## Delete custom templates
:::caution
Deleting a custom template is permanent and cannot be undone. If you might need the template again, download a copy first (see [Download custom templates](#download-custom-templates)).
:::
1. Open the **Custom Templates** tab.
2. To remove a single template, click the delete icon () beside it, then click **OK** in the dialog.
3. To remove several templates together, select them, click **Delete** above the list, then click **OK** in the dialog.