# Integrate Cloud Voice with Salesforce CRM
Linking Cloud Voice to Salesforce lets your team place and answer calls straight from the CRM (Customer Relationship Management) system, with each Salesforce user tied to their own extension. Setting up the connection is a round trip: you first collect a redirect address from Cloud Voice, register an app in Salesforce to obtain OAuth credentials, hand those credentials back to Cloud Voice to authorize the link, and finally map Salesforce users to extensions.
:::note
OAuth is an authorization standard. It lets Cloud Voice connect to Salesforce on a user's behalf without ever storing anyone's Salesforce password. The credentials you create below (a Consumer Key and Consumer Secret) are what the two systems use to trust each other.
:::
## Before you begin
You must sign in to Salesforce as a system administrator. Only an administrator on the Salesforce account can turn on this integration.
## Step 1. Copy the redirect address from Cloud Voice
1. Sign in to the Cloud Voice web portal and open **Integrations > CRM**.
2. Choose **Salesforce**.
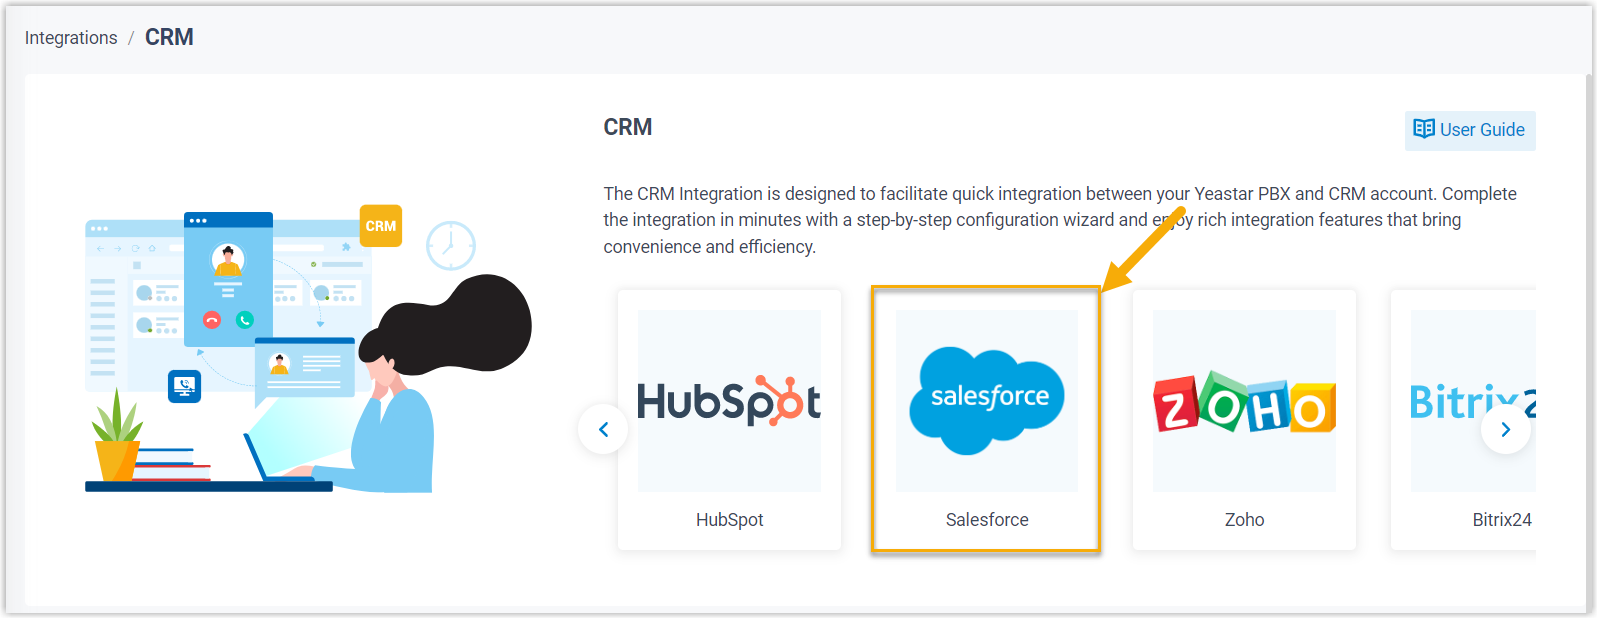
3. Under **Network**, pick the **Homepage URL** you want to use, then record the **Authorized Redirect URI** (the web address Salesforce returns the user to after they approve the connection). You'll paste this value into Salesforce in the next step.

:::note
URI stands for Uniform Resource Identifier. For this integration it is just a web address that must be copied exactly. Keep this browser tab open, or paste the value somewhere safe, so you can reuse it in Step 2.
:::
## Step 2. Register and configure an app in Salesforce
1. Sign in to [Salesforce](https://login.salesforce.com/).
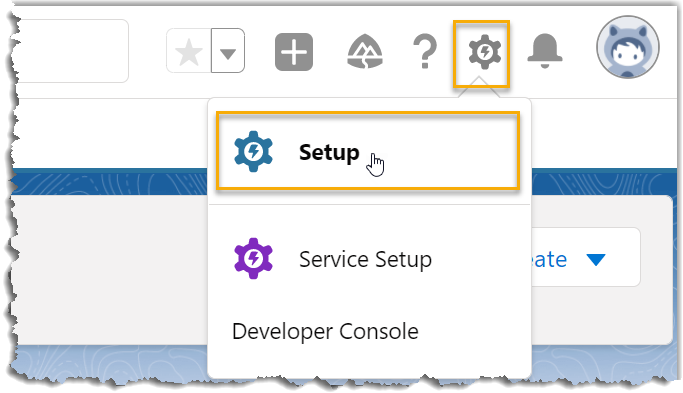
2. In the top-right corner, click the gear icon and choose **Setup** to open the **Setup Home** page.
3. In the left navigation, go to **PLATFORM TOOLS > Apps > App Manager**.
4. At the top-right of the **App Manager** page, click **New External Client App**.

a. In the **Basic Information** section, fill in the required fields and add any others you need:
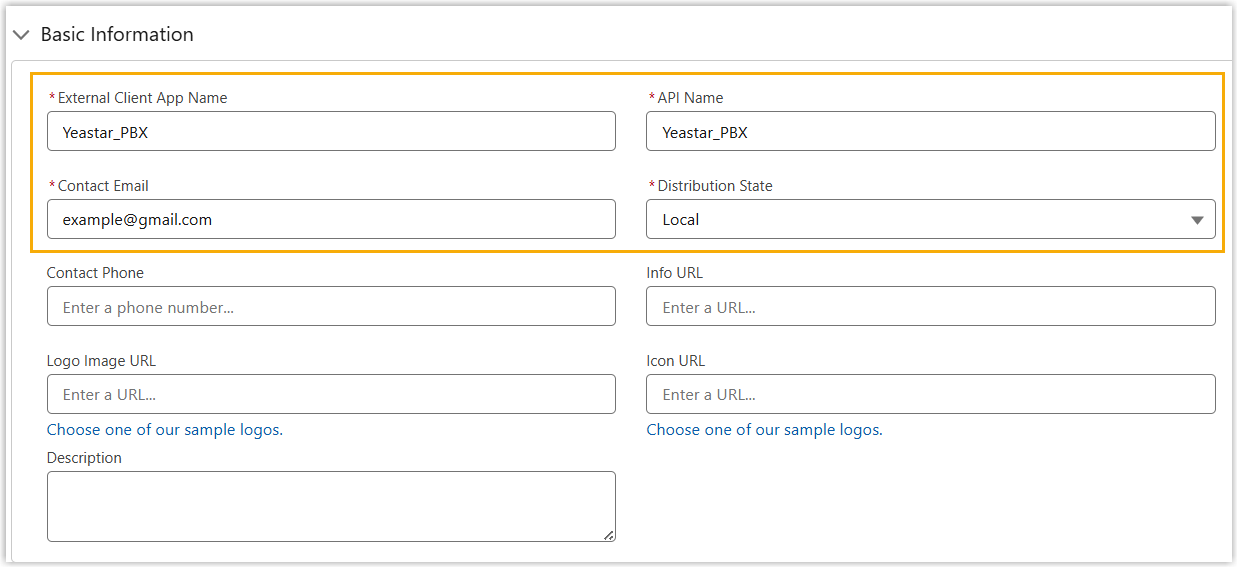
- **External Client App Name**: A name that helps you recognize the app later.
:::note
Salesforce fills in the **API Name** automatically to match the app name.
:::
- **Contact Email**: A contact email address.
- **Distribution State**: Leave the default value.
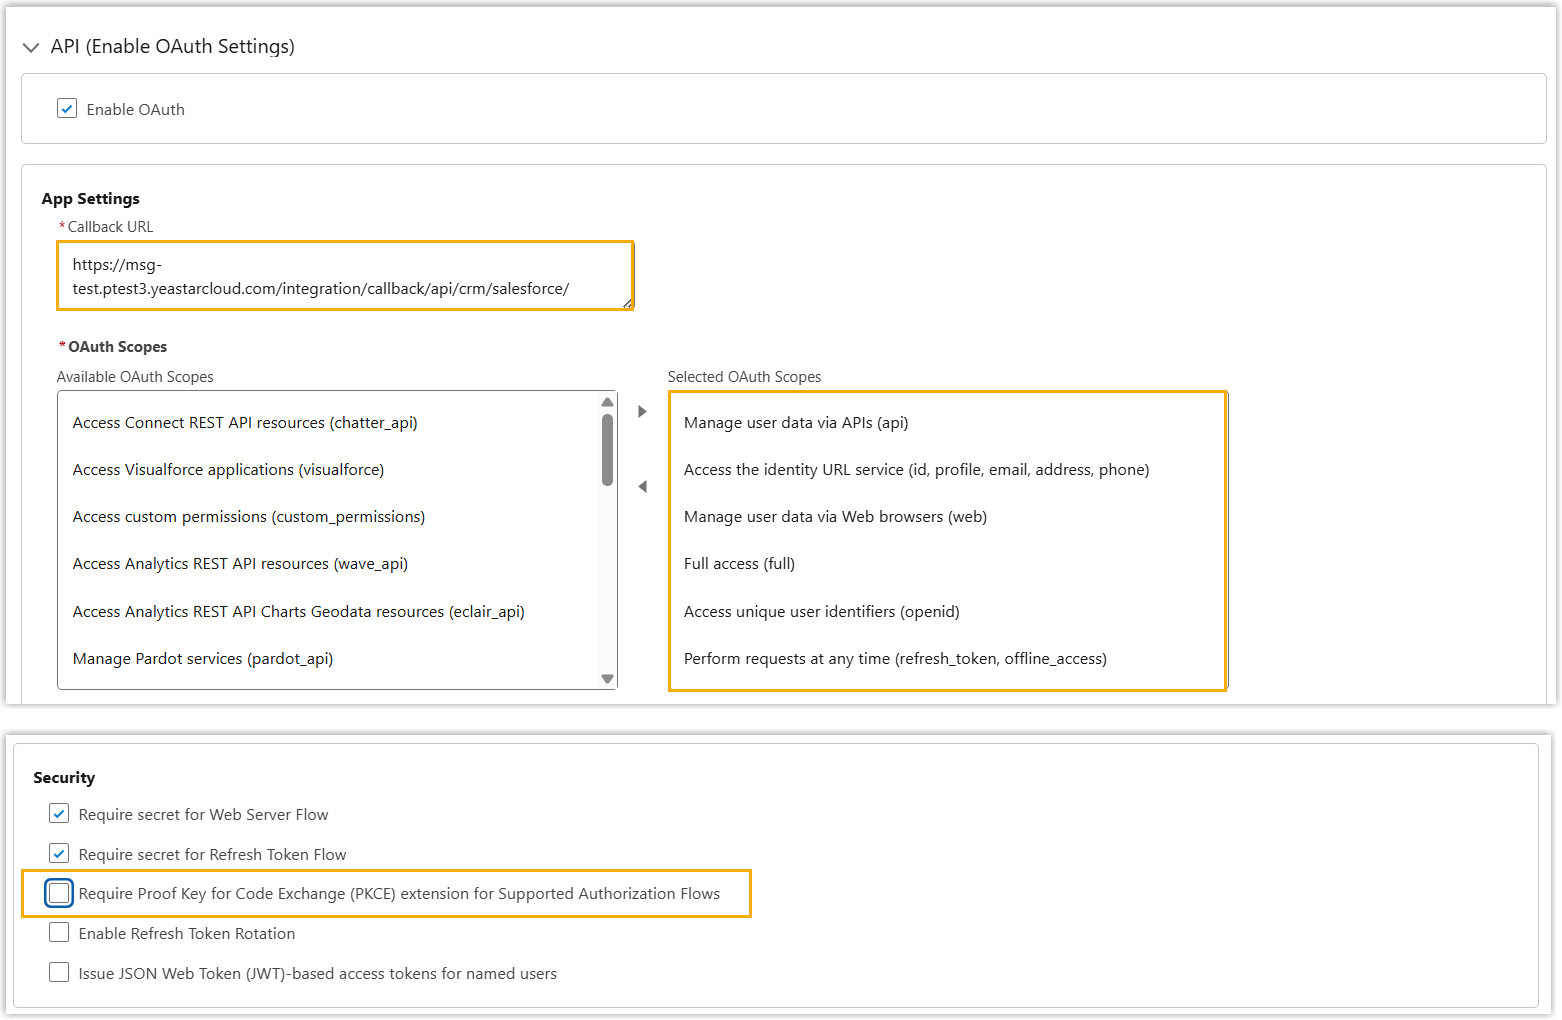
b. In the **API (Application Programming Interface) (Enable OAuth Settings)** section, select **Enable OAuth**, then complete the configuration described below.
| Setting | What to enter |
|---------|---------------|
| **App Settings** section | |
| Callback URL | Paste the Authorized Redirect URI you copied from the Cloud Voice portal in Step 1. |
| OAuth Scopes | Move the following permissions from **Available OAuth Scopes** to **Selected OAuth Scopes**:
• Full access (full)
• Manage user data via APIs (api)
• Manage user data via Web browsers (web)
• Access unique user identifiers (openid)
• Access the identity URL service (id, profile, email, address, phone)
• Perform requests at any time (refresh_token, offline_access) |
| **Security** section | |
| Require Proof Key for Code Exchange (PKCE) extension for Supported Authorization Flows | Clear this checkbox. |
:::caution
Two settings in this table are easy to get wrong and both will break the authorization in Step 3:
- The **Callback URL** must match the Authorized Redirect URI from Cloud Voice exactly, character for character. If you later change the Homepage URL in Cloud Voice, update this value to match.
- Leave the **PKCE** checkbox cleared. If it stays selected, Salesforce will reject the authorization request.
:::
c. Click **Save** at the bottom of the page. Salesforce confirms the app was created.
5. Check the app's authorization policy. New apps are usually set to **All users can self-authorize**, which grants access to every associated Salesforce user in the organization. If the app list shows a different setting, correct it:

a. Go to **Apps > External Client App > External Client App Manager**, click the dropdown arrow next to your new app, and choose **Edit Policies**.
b. Scroll to **OAuth Policies** and set **Permitted Users** to **All users may self-authorize**.
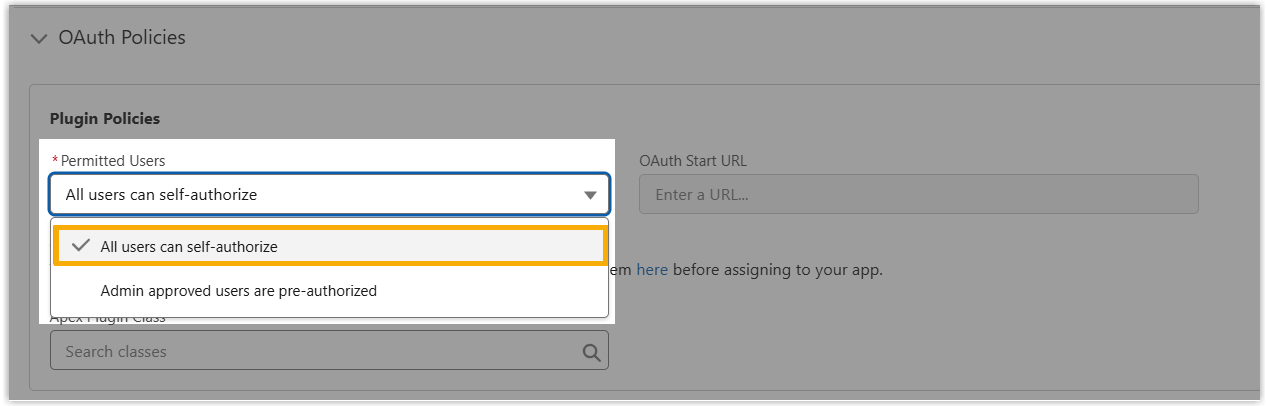
c. Click **Save**.
6. Retrieve the app's authorization credentials, which you'll enter into Cloud Voice later.

a. Go to **Apps > External Client App > External Client App Manager**, click the dropdown arrow next to your new app, and choose **Edit Settings**.
b. In the **OAuth Settings** section, get the API credentials:
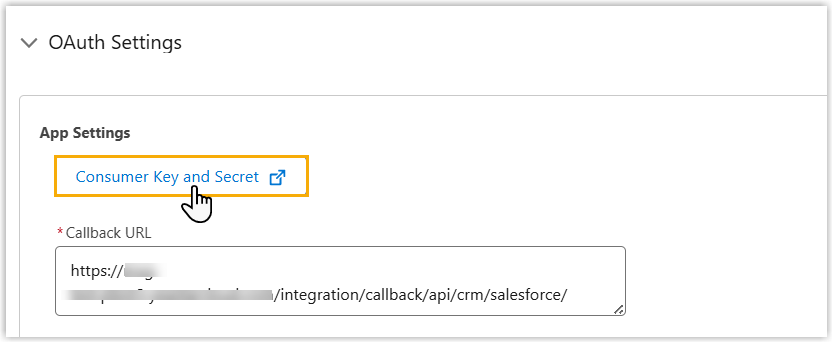
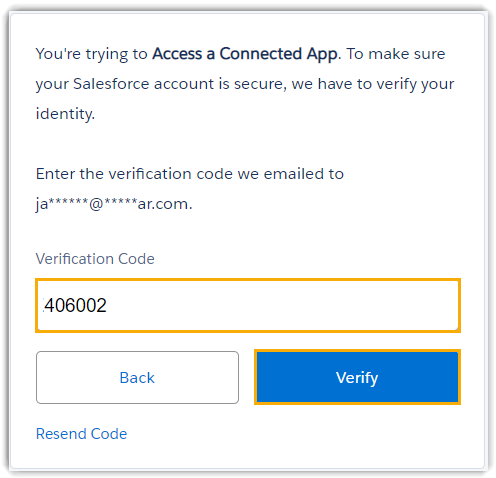
i. Click **Consumer Key and Secret**. Salesforce emails a verification code to your inbox.
ii. Enter the code and click **Verify**.
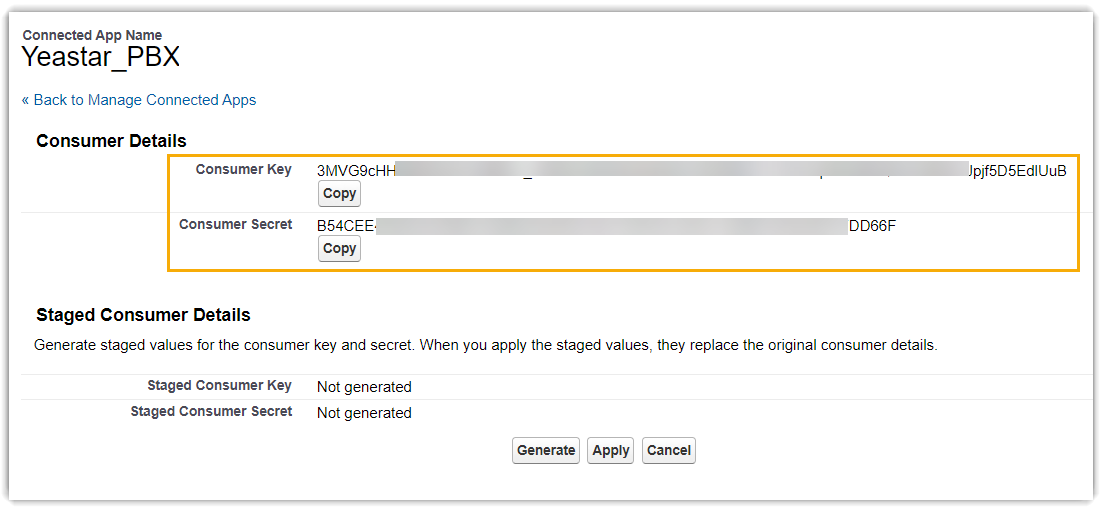
iii. In the **Consumer Details** section, record the **Consumer Key** and **Consumer Secret**.
:::caution
Treat the Consumer Key and especially the Consumer Secret like a password. Anyone who has them can reach the data in your Salesforce account. Do not paste them into chat, tickets, or shared documents, and only enter them on the trusted Cloud Voice portal in Step 3.
:::
## Step 3. Authorize Cloud Voice against Salesforce
1. Sign in to the Cloud Voice web portal and open **Integrations > CRM**.
2. Choose **Salesforce**.
3. In the **Authorization** section, enter the credentials from Salesforce:

- **Consumer Key**: Paste the Salesforce Consumer Key.
- **Consumer Secret**: Paste the Salesforce Consumer Secret.
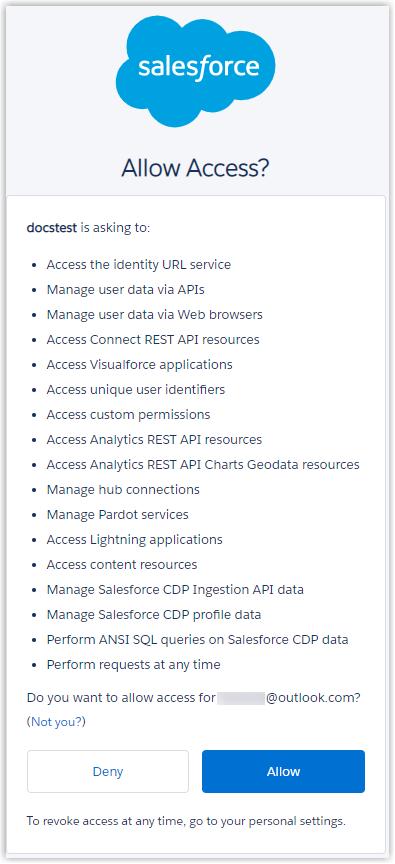
4. Click **Save**. A new browser tab opens asking you to grant access to your Salesforce data.
:::note
If nothing opens after you click **Save**, a pop-up blocker is most likely stopping the new tab. Allow pop-ups for the Cloud Voice portal and try again.
:::
5. Click **Allow** to let Cloud Voice access your CRM data. You're returned to the Cloud Voice configuration page, where a pop-up shows the result of the authorization.
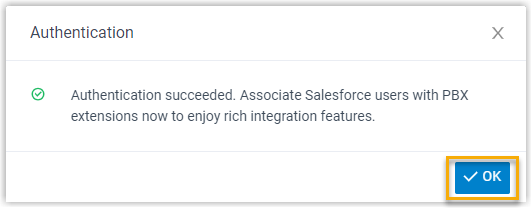
6. Click **OK**. When the **Status** field reads **Connected**, the Salesforce integration is active.
## Step 4. Map Salesforce users to extensions
1. On the CRM integration page, click the refresh icon next to **Salesforce User** to pull in the current list of Salesforce users.
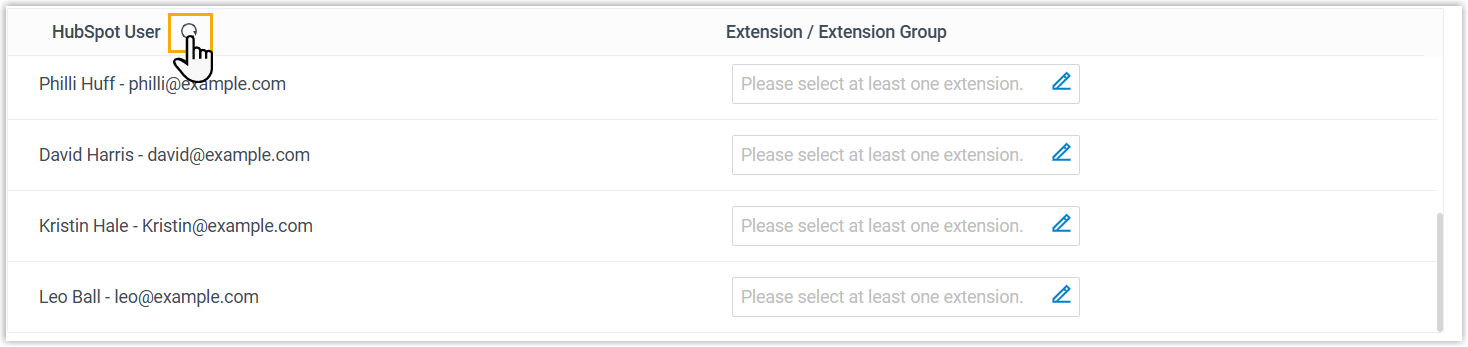
2. Link each Salesforce user to an extension. Choose the method that fits how email addresses are set up in your organization.
:::tip
Automatic matching is faster and avoids mistakes. If your users already share the same email address on both their Salesforce account and their Cloud Voice extension, use it. Fall back to manual matching only for users whose two email addresses differ.
:::
**Automatic matching**
If users have the same email address on both their Salesforce account and their extension, Cloud Voice can pair them for you:
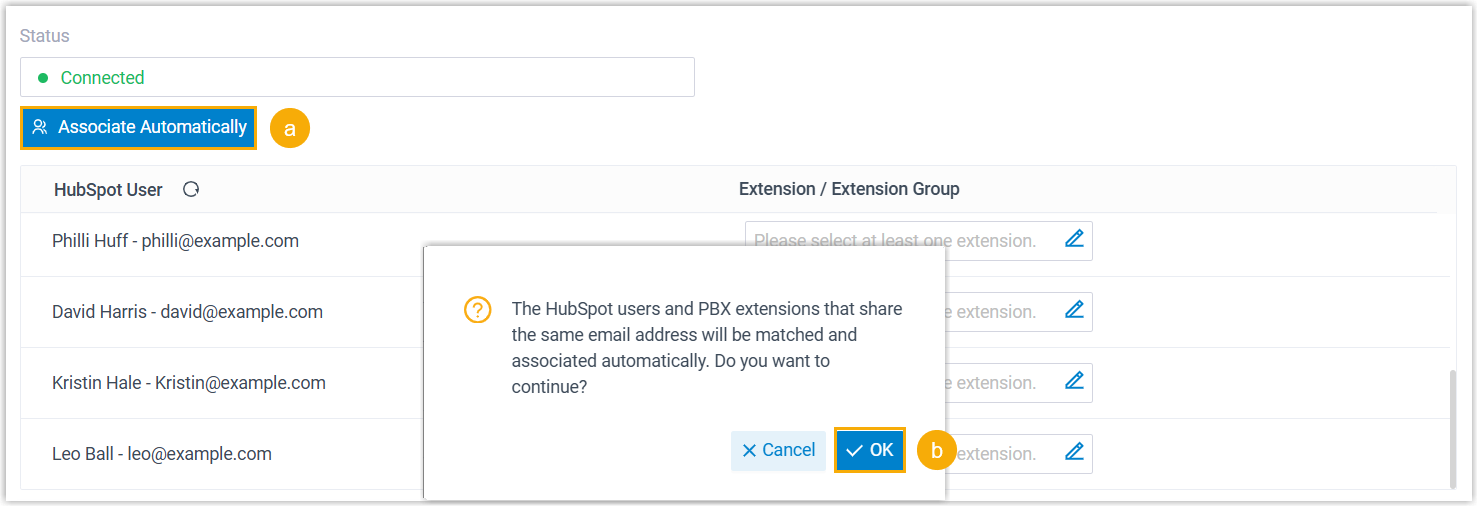
a. Click **Associate Automatically**.
b. In the pop-up, click **OK**.
**Manual matching**
If a user's Salesforce email differs from their extension email, pair them by hand:
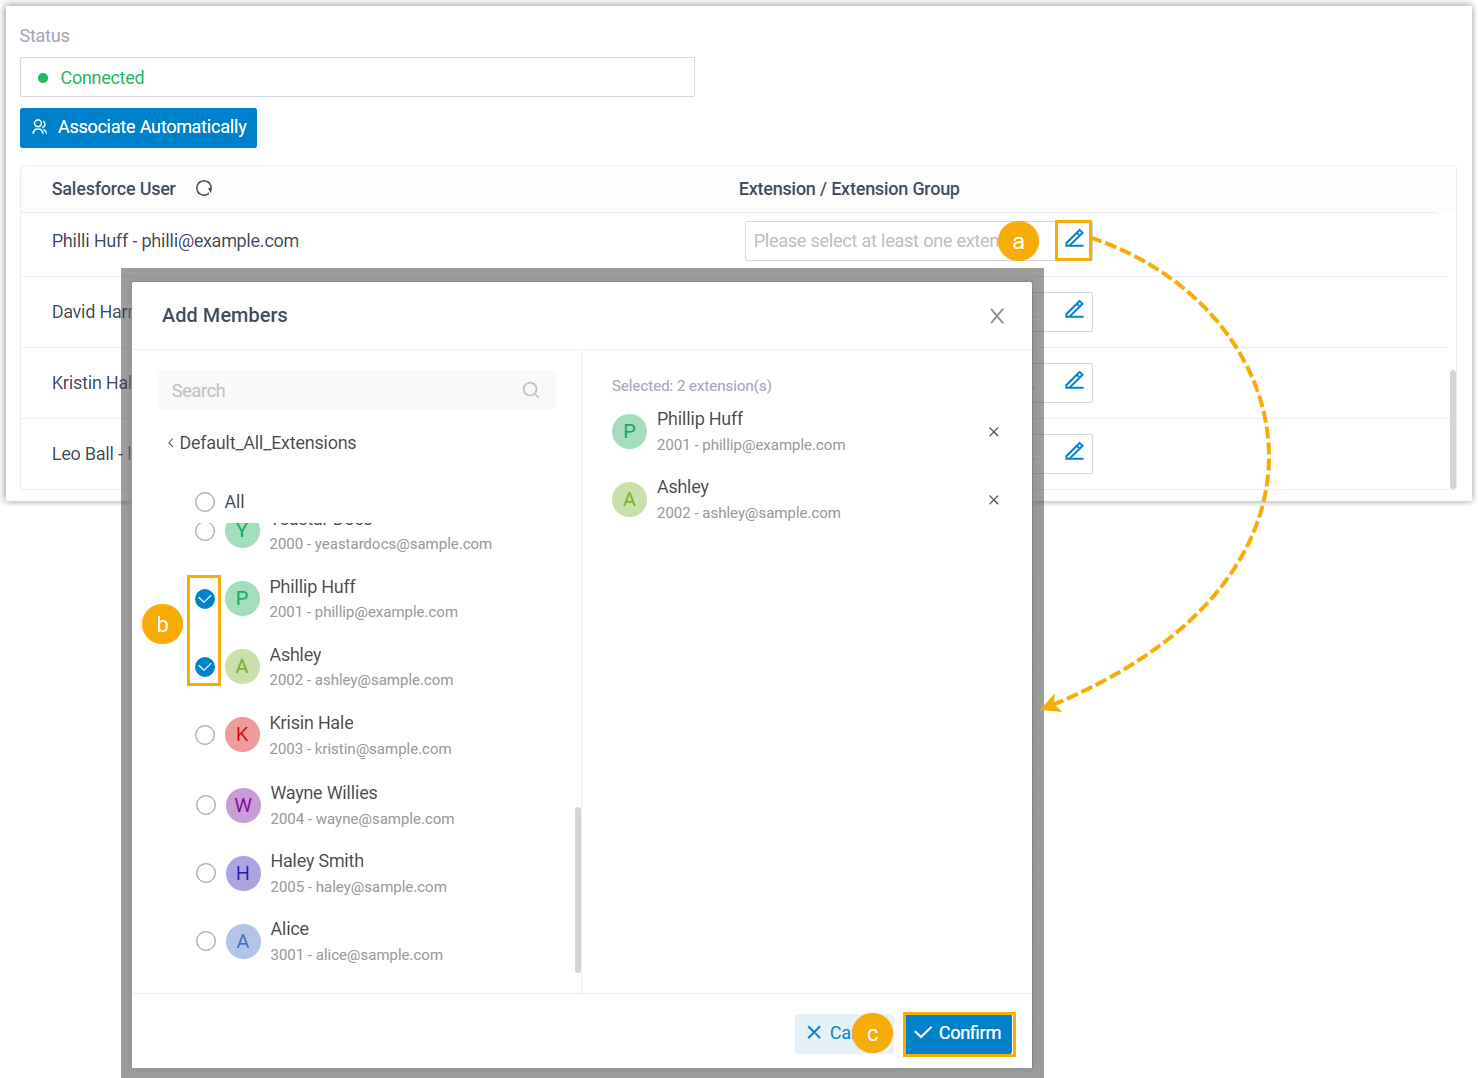
a. In the **Extension / Extension Group** field next to the Salesforce user, click the edit icon.
b. In the pop-up, select the extension(s) for that user.
c. Click **Confirm**.
3. Click **Save**.
## Result
- Cloud Voice and Salesforce CRM are now connected.
- Salesforce users can place and receive calls through their extensions.
## What to do next
- [Set up contact synchronization from Salesforce](/pbx/integrations/salesforce/set-up-contact-synchronization-with-salesforce-crm/)
- [Set up lead or contact creation for Salesforce](/pbx/integrations/salesforce/set-up-automatic-lead-or-contact-creation-for-salesforce-crm/)
- [Set up call popups for inbound calls](/pbx/integrations/salesforce/set-up-call-popup-for-inbound-calls/)
- [Use the Salesforce integration](/pbx/integrations/salesforce/use-salesforce-crm-integration/)