
Contingency Plan
Hardening your phone system reduces risk, but no defense is perfect. A contingency plan keeps you ready to act fast if an attacker breaks through or the system goes down. Two policies do the heavy lifting: Event Notification and Logging keeps you informed of critical events as they happen, and Backup and Archive protects your data and configuration so you can recover from an outage or data loss.
Event notification and logging
Section titled “Event notification and logging”Cloud Voice can watch for system events, record them, and alert the right people the moment something noteworthy occurs. You decide which events to track, who gets contacted, how they are reached (email, a call to an extension, or a call to a mobile number), and what the message says.
-
Go to System > Event Notification.
-
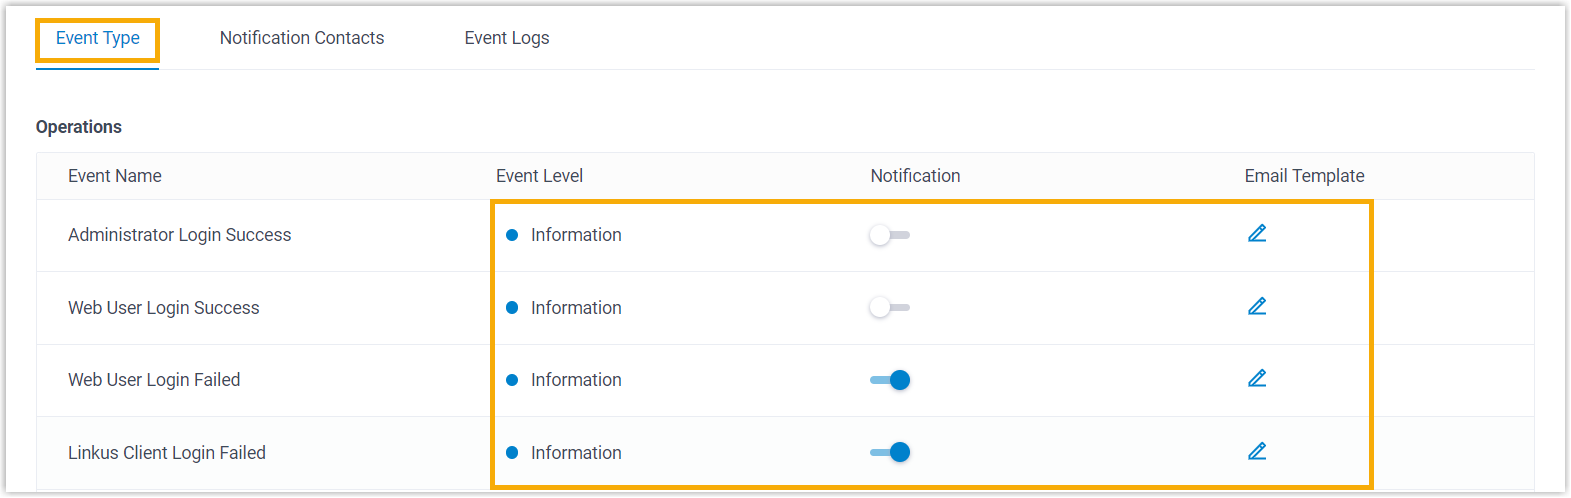
On the Event Type tab, enable notifications for the events you care about. For each event you can set how serious it is (its level) and tailor the email template that gets sent.
-
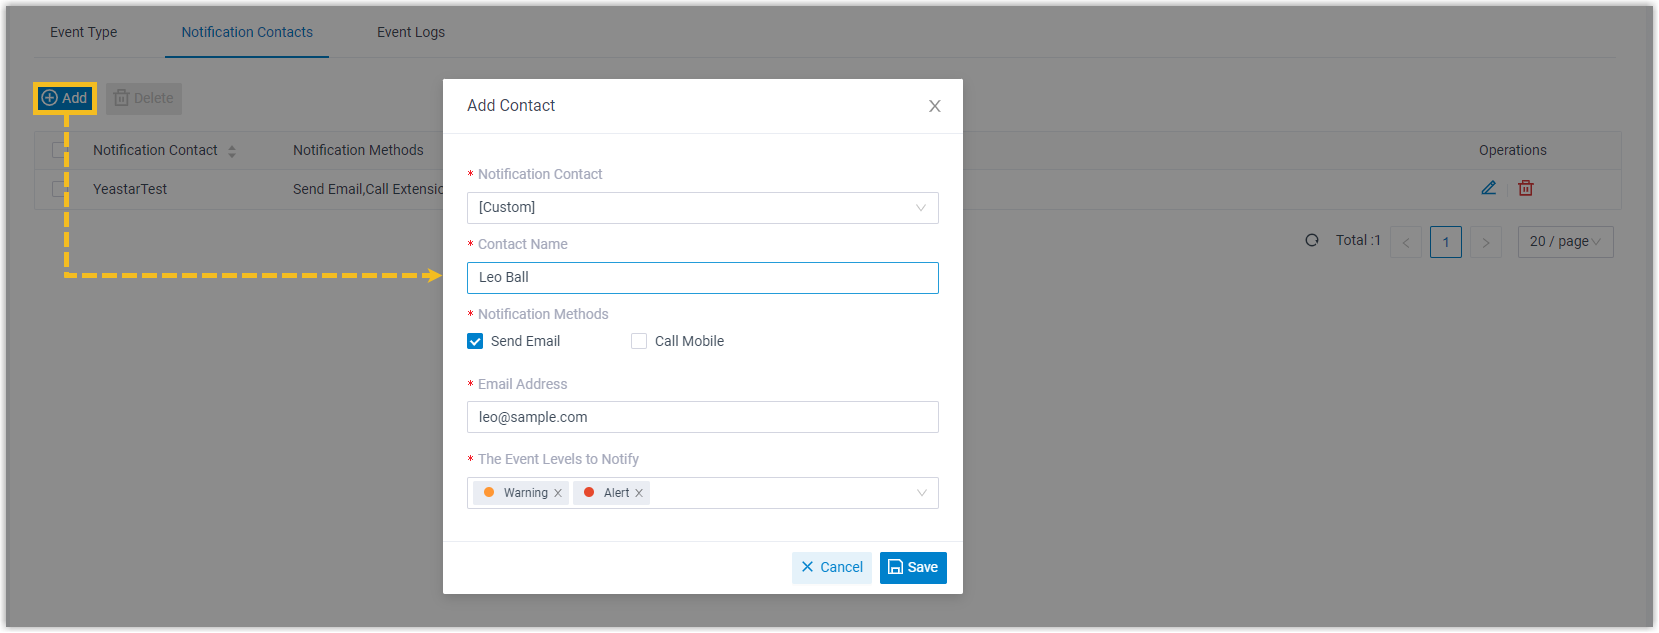
On the Notification Contacts tab, add the people who should receive event alerts.
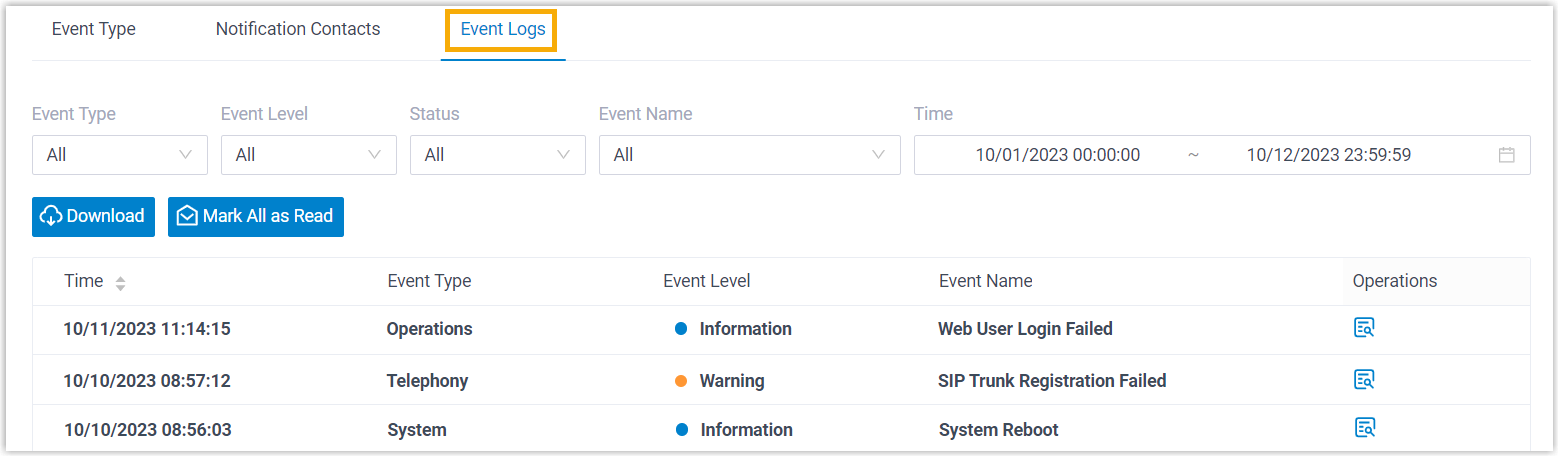
Once an alert reaches you, open the web portal to review the full record at System > Event Notification > Event Logs.
Backup and archive
Section titled “Backup and archive”Cloud Voice lets you back up the system’s data and configuration, and go a step further by archiving those backup files to external storage. Together these reduce downtime and guard against data loss, helping your business stay running after a failure.
Back up data and configuration
Section titled “Back up data and configuration”Run backups automatically on a schedule, or create one manually whenever you need it.
-
Go to Maintenance > Backup and Restore.
-
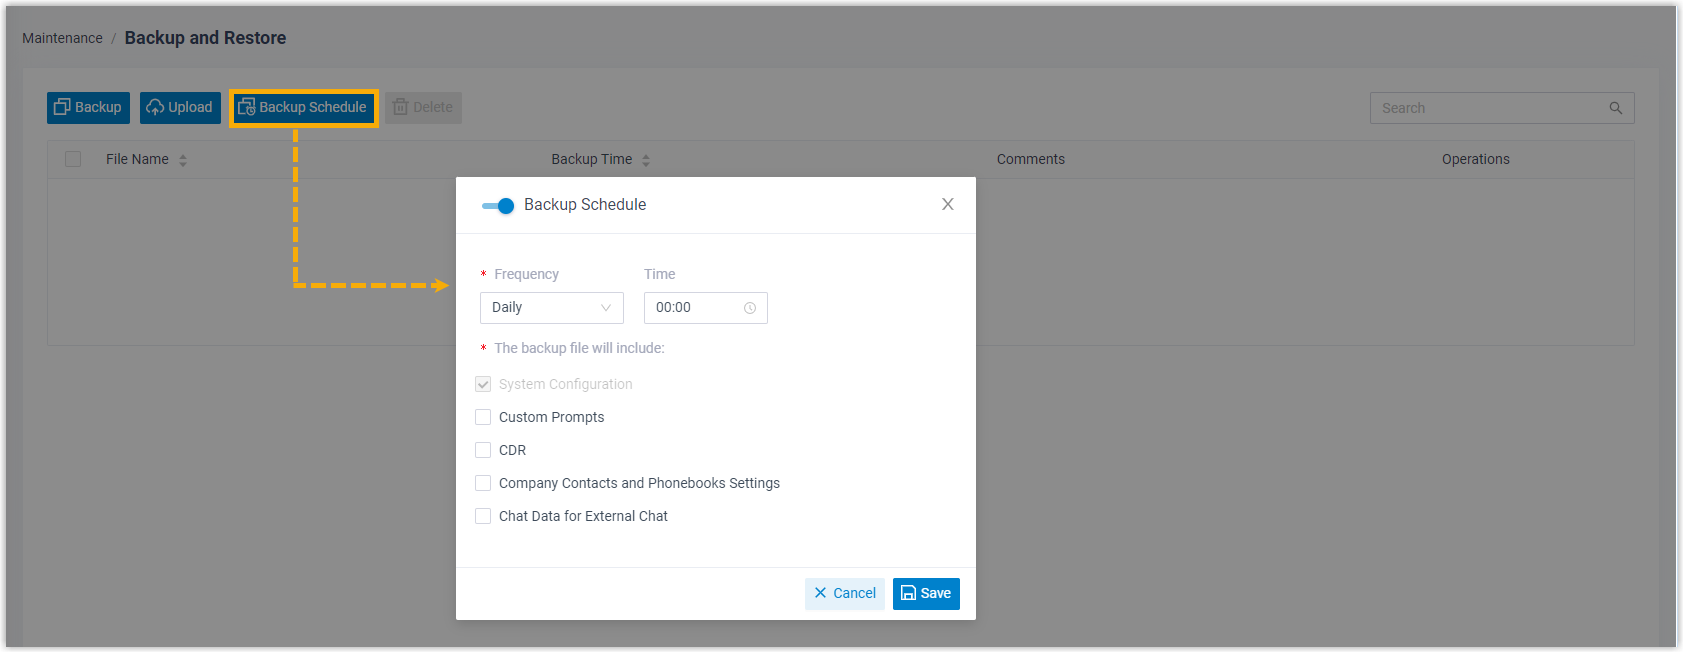
For automatic backups, click Backup Schedule, configure the task, and save it.
-
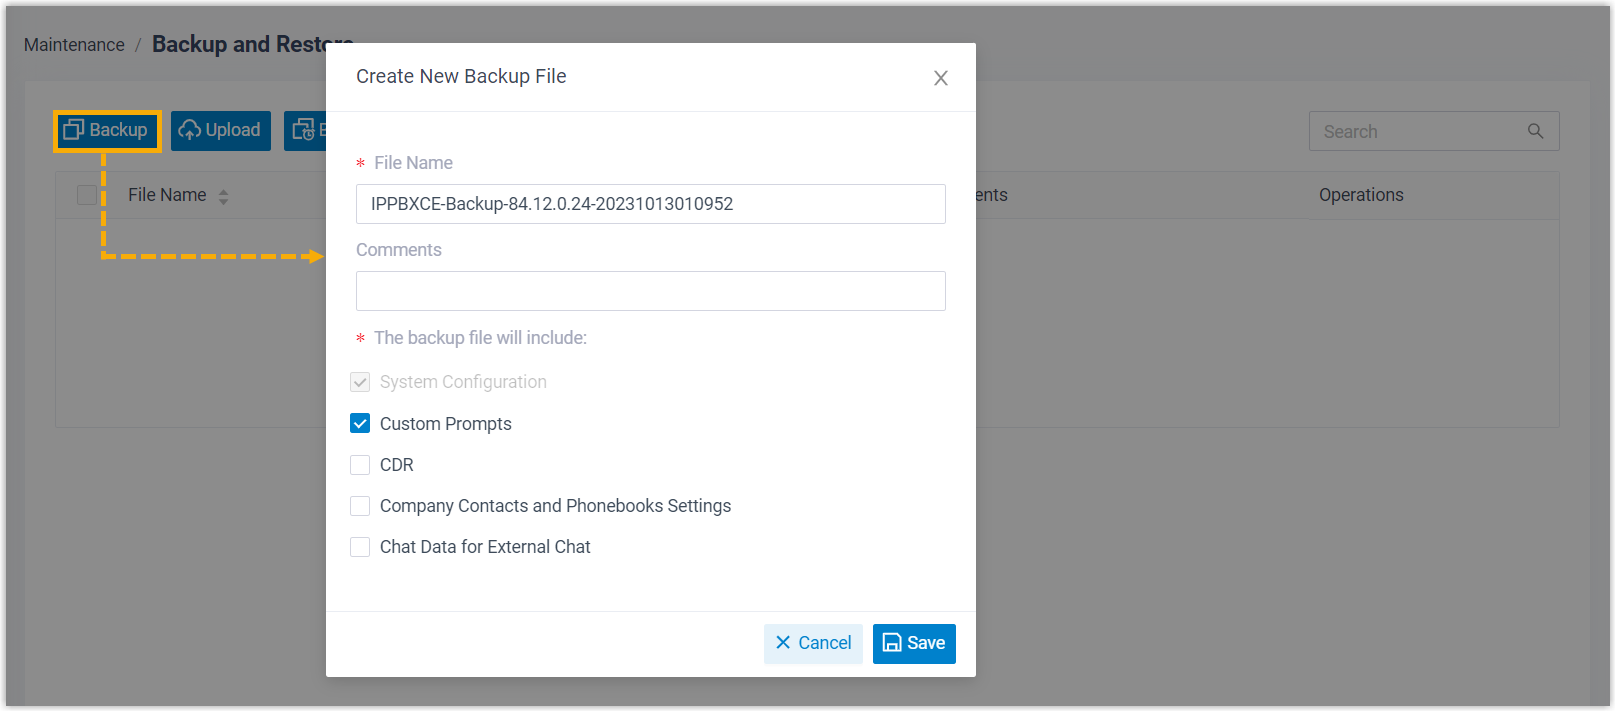
For a one-time backup, click Backup, select the data and configuration items to include, and save the task.
Archive backup files to an external server
Section titled “Archive backup files to an external server”For an added layer of protection, send your backups to third-party storage. Cloud Voice supports the following destinations:
- FTP server (File Transfer Protocol)
- SFTP server (SSH File Transfer Protocol, an encrypted version of FTP)
- S3-compatible object storage (works with Amazon S3, short for Simple Storage Service, and services that use the same API)
- Google Cloud Storage bucket
- Microsoft SharePoint
-
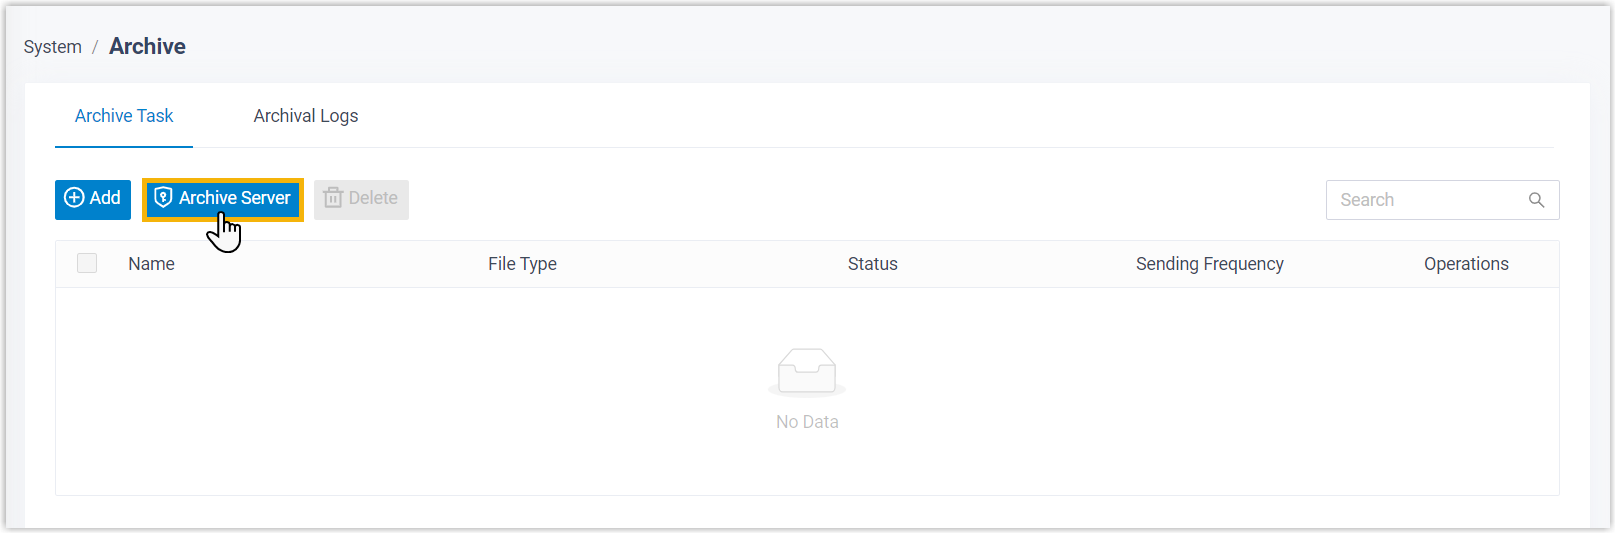
Go to System > Archive.
-
Click Archive Server to register a storage destination.
-
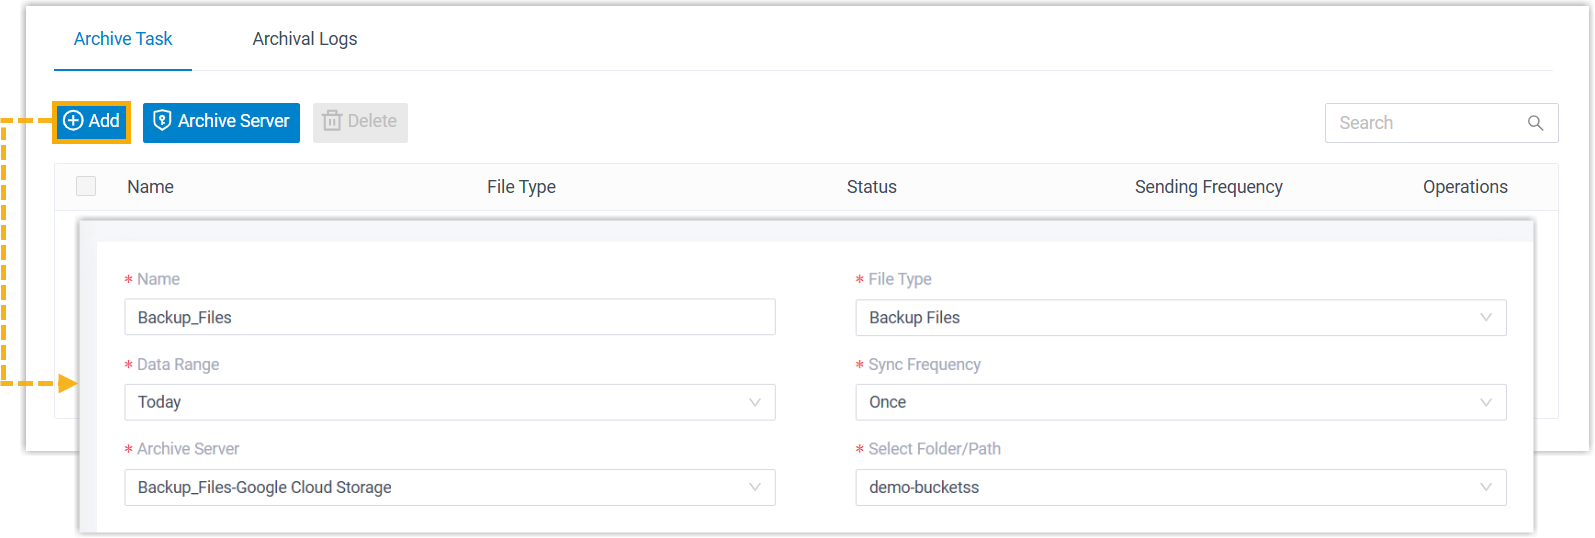
Click Add to create and configure an archive task.
Question about this page?
Ask the AI assistant. It starts from this page, then searches the rest of the docs.
Ask Cloud Voice AI
Answers are AI-generated from the docs and may contain mistakes. Verify with the linked pages.