
Network Security
Network security forms the second layer in a defense-in-depth approach to protecting your phone system, your PBX (Private Branch Exchange, the platform that runs your calls and extensions). It watches every connection attempt reaching Cloud Voice and decides whether to permit or reject it against rules you define. Two policies let you tighten this layer: restricting access by country or region, and explicitly allowlisting trusted IP (Internet Protocol) addresses.
Use these when you want to shrink the number of places on the internet that are even allowed to talk to your system. The fewer sources that can reach it, the fewer ways an attacker has in. The two policies live in different parts of the Security menu: country and region filtering sits under Security Settings, while the trusted-IP allowlist sits under Security Rules.
Restrict access by country or region
Section titled “Restrict access by country or region”Geographic filtering limits who can reach your Cloud Voice system based on where their traffic originates. When you enable it, only the countries and regions you approve are allowed through; connections from everywhere else are blocked.
To turn on geographic restrictions:
-
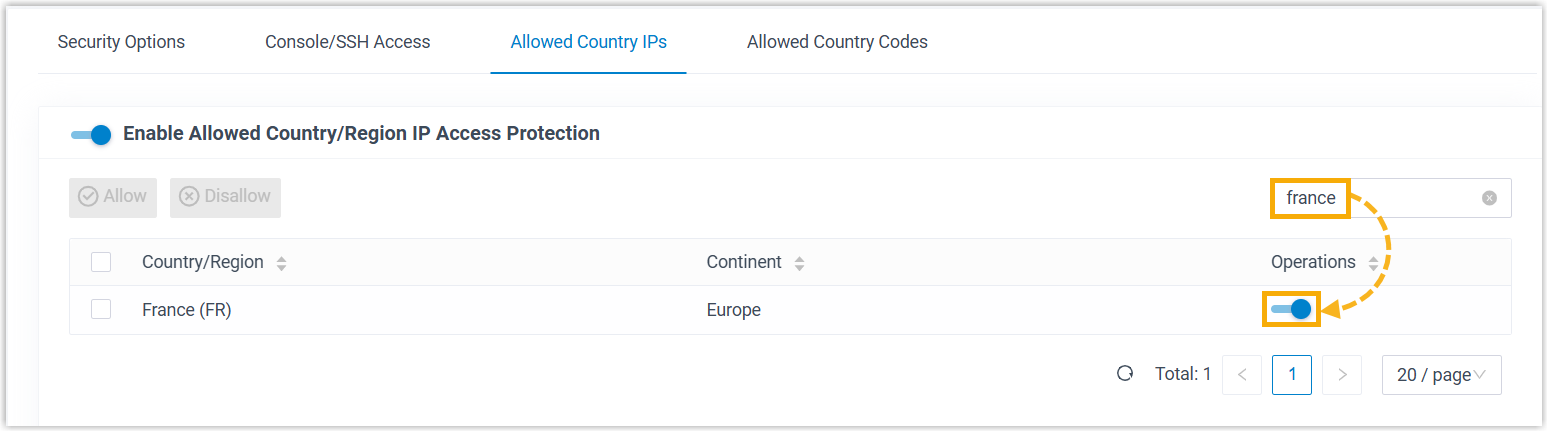
Navigate to Security > Security Settings > Allowed Country IPs.
-
Enable the Enable Allowed Country/Region IP Access Protection switch.
-
Use the search bar in the top-right corner to find each country or region you want to permit, then switch it on in the Operations column.
-
Click Apply.
Allow trusted access by IP address
Section titled “Allow trusted access by IP address”Cloud Voice ships with built-in protection that guards legitimate connections, such as those from auto-provisioned devices (phones the system configures automatically) and platform services, while blocking unknown threats. It does this by inspecting the volume of packets sent to particular ports over a set window of time.
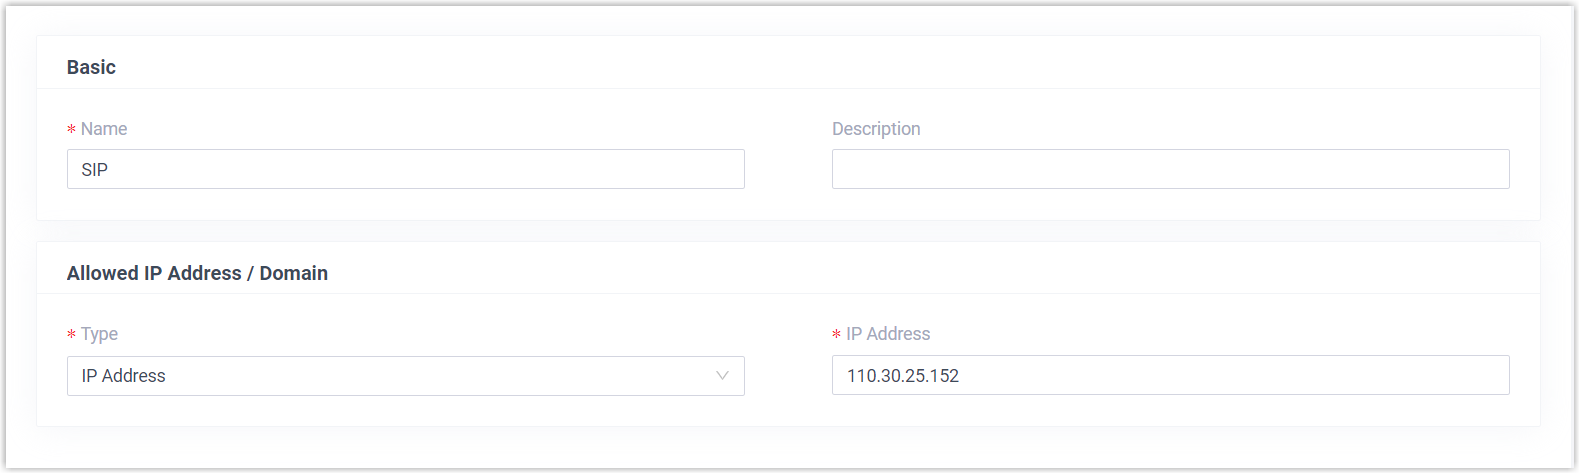
To keep a trusted device from being blocked this way, add its IP address to the allowlist so Cloud Voice always accepts its connections.
-
Sign in to the PBX web portal and go to Security > Security Rules.
-
On the Allowed IPs tab, click Add to create a rule.
-
Click Save, then Apply.
Question about this page?
Ask the AI assistant. It starts from this page, then searches the rest of the docs.
Ask Cloud Voice AI
Answers are AI-generated from the docs and may contain mistakes. Verify with the linked pages.