
Extension Login Security
Endpoint security is the third line of defense in a multi-layered security strategy: it guards individual extension accounts against fraudsters who try to register or sign in without permission. Cloud Voice ships with lockout rules that watch login attempts on SIP (Session Initiation Protocol) extensions out of the box, and you can strengthen protection further with single sign-on (SSO), two-factor authentication (2FA), login QR codes and links, password policies, and user roles. The sections below walk through each option.
Lock out accounts after failed login attempts
Section titled “Lock out accounts after failed login attempts”Cloud Voice enforces an account lockout policy on both the PBX (Private Branch Exchange) web portal and the Cloud Voice App:
- When an IP address hits the configured number of failed attempts inside a set time window, the system temporarily refuses further attempts from that address.
- When an IP address reaches the maximum number of failed attempts, it is banned permanently. Cloud Voice blocks the address, lists it under Blocked IPs, and sends a Web User Blocked Out or Cloud Voice App User Blocked Out notification to the contacts you designate.
So that someone is alerted whenever an address is blocked, turn on the relevant event notifications and add recipients.
-
Go to System > Event Notification.
-
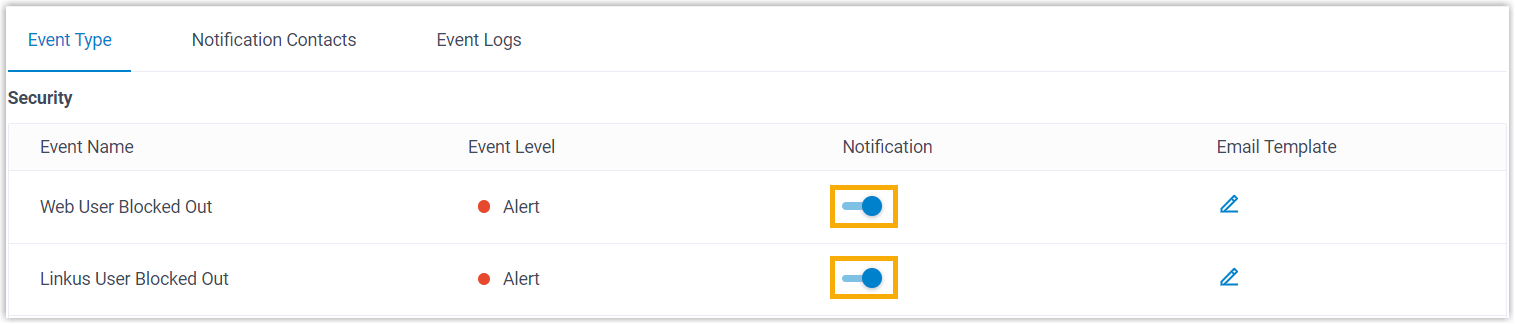
On the Event Type tab, enable the Web User Blocked Out and Cloud Voice App User Blocked Out notifications.
-
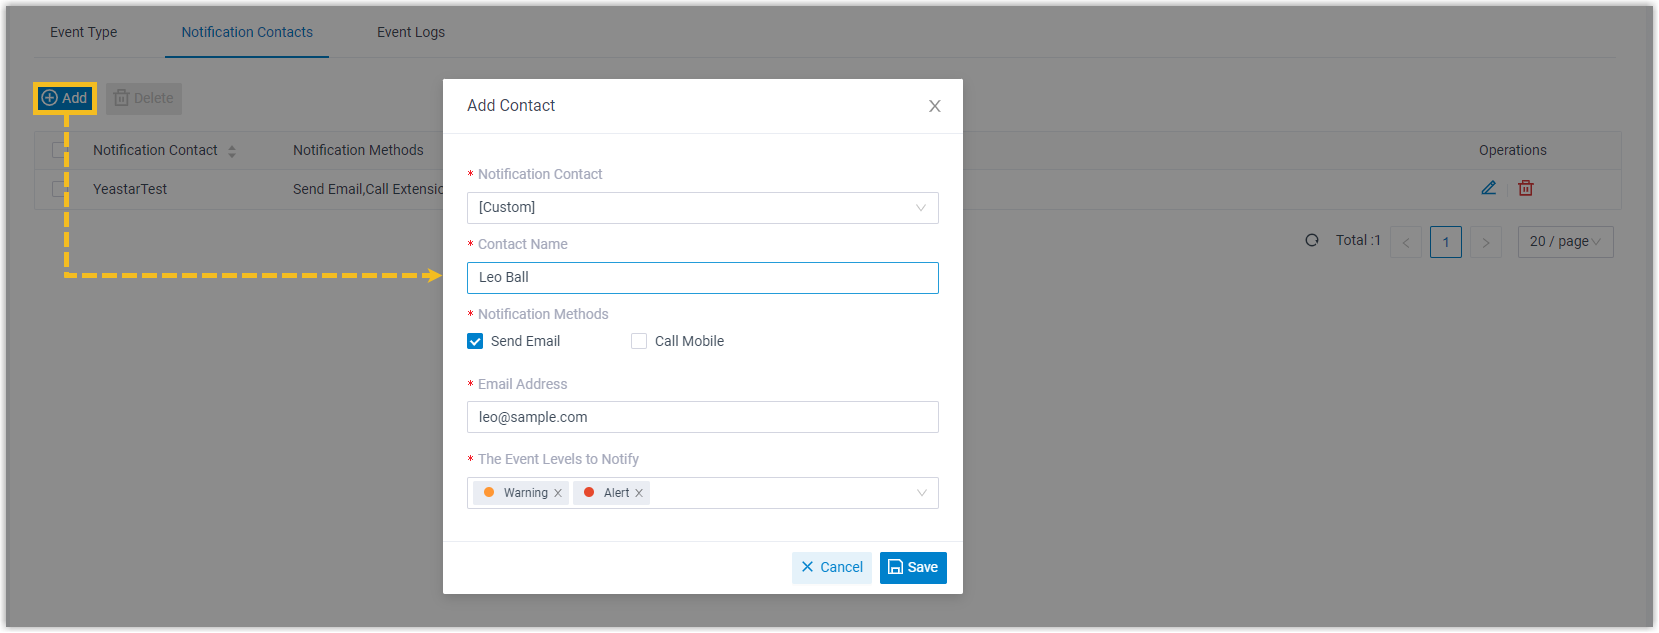
On the Notification Contacts tab, add the people who should receive these alerts.
Once an alert arrives, review the specifics in the web portal under Security > Security Rules > Blocked IPs.

Use single sign-on for third-party authentication
Section titled “Use single sign-on for third-party authentication”Connecting Cloud Voice to Microsoft 365, Google Workspace, or Red Hat SSO lets users sign in to the Cloud Voice App with their existing Microsoft, Google, or Red Hat credentials. This removes the burden of managing yet another password and inherits the security controls already enforced on those third-party accounts.
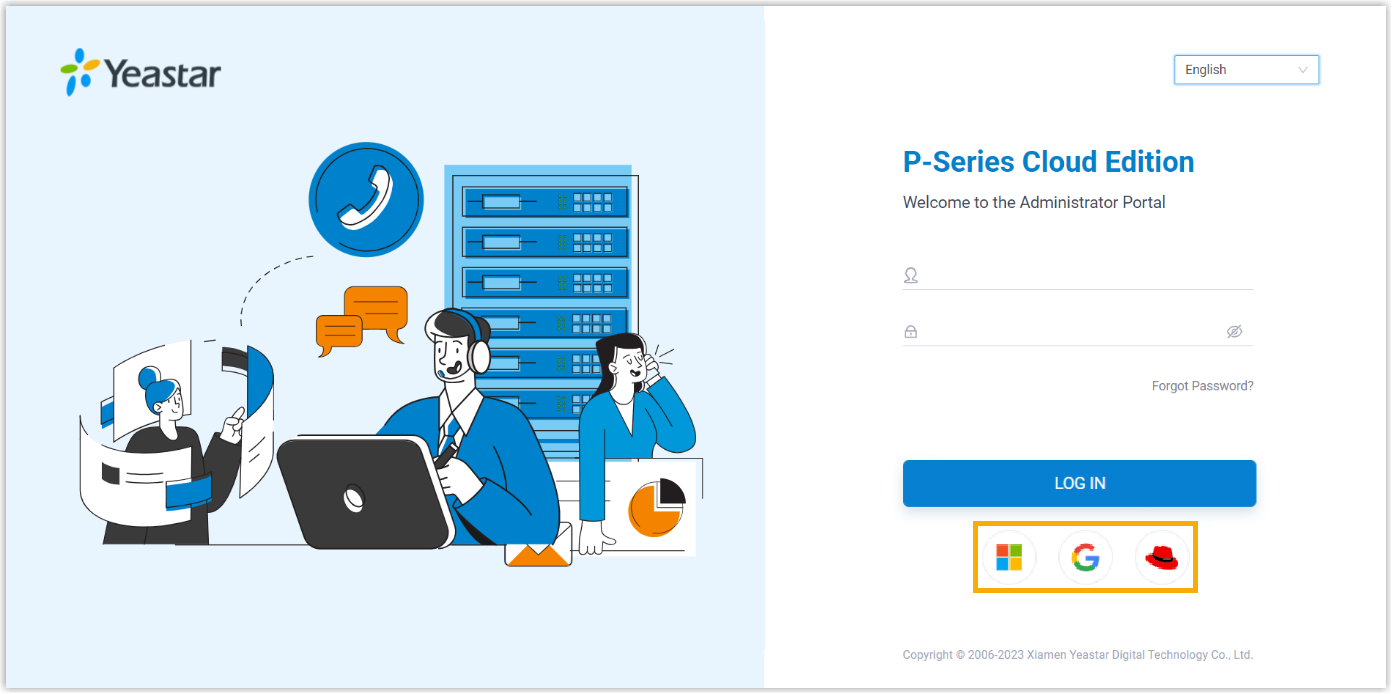
- Microsoft 365: Integrate Cloud Voice with Microsoft Entra ID (Azure Active Directory) or Active Directory, then enable SSO. Refer to the Microsoft Entra ID and Active Directory integration guides for the setup steps.
- Google Workspace: Integrate Cloud Voice with Google Workspace, then enable SSO. Refer to the Google Workspace integration guide for the setup steps.
- Red Hat: Integrate Cloud Voice with Red Hat SSO, then enable SSO. Refer to the Red Hat SSO integration guide for the setup steps.
Require two-factor authentication
Section titled “Require two-factor authentication”Two-factor authentication (2FA) adds a second checkpoint to every login. Besides the account password (the first factor), the user must supply a one-time code delivered to a designated device (the second factor).
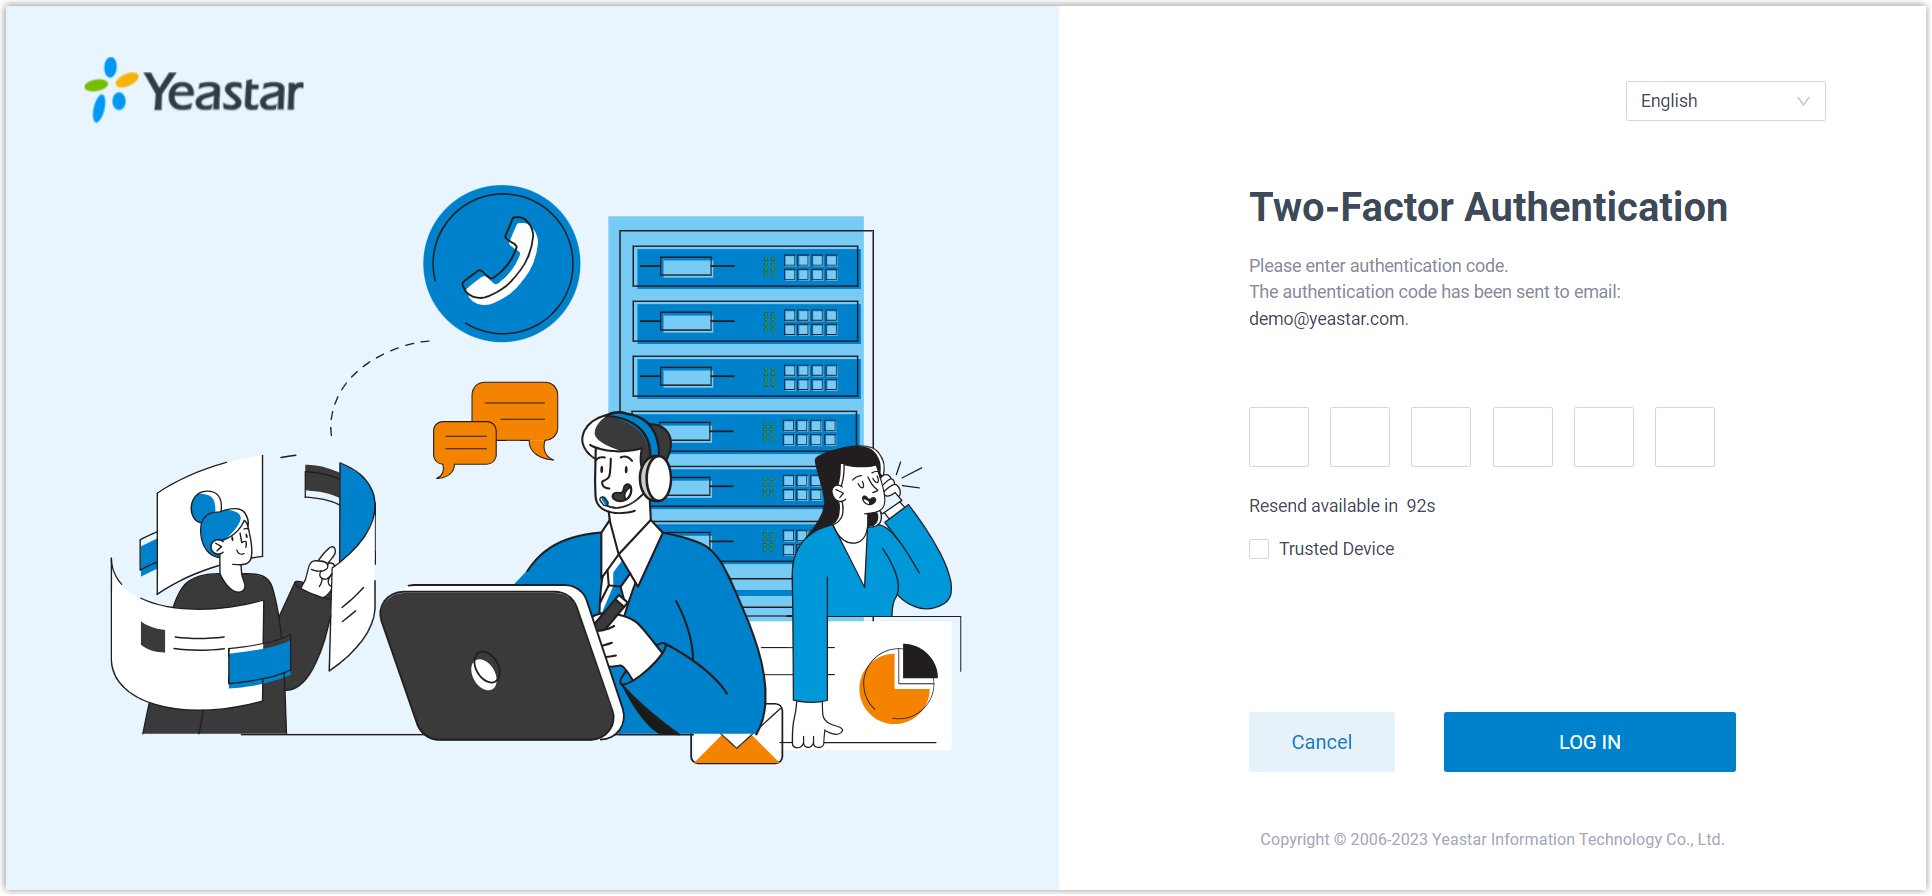
To force every extension user through 2FA:
-
Go to Security > Security Settings > Security Options.
-
In the Two-Factor Authentication section, select Make Two-Factor Authentication Mandatory for All Extensions.

-
Click Save, then Apply.
Offer passwordless login with a QR code or link
Section titled “Offer passwordless login with a QR code or link”Login QR codes and links are a safer alternative to typing a password into the Cloud Voice App: each credential is encrypted and can be used only once. There are two ways to hand them out.
Send a code or link to one user
Section titled “Send a code or link to one user”-
Go to Extension and Trunk > Extension and edit the extension you want.
-
On the Cloud Voice App tab, click Login QR Code or Login Link to copy the credential, then send it to the user.

Send codes or links to several users at once
Section titled “Send codes or links to several users at once”-
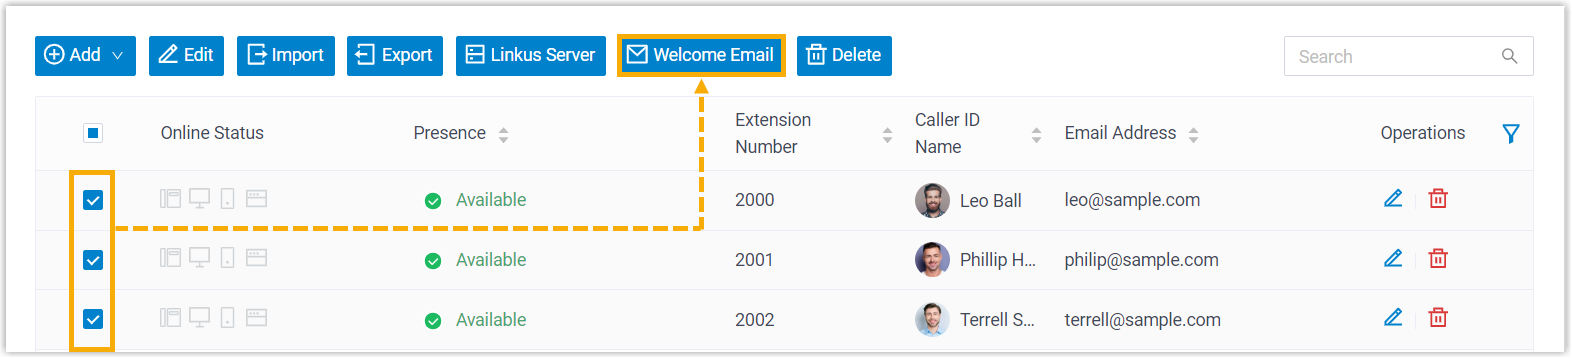
Go to Extension and Trunk > Extension.
-
Select the extensions you want, then click Welcome Email.
Enforce strong passwords for manual login
Section titled “Enforce strong passwords for manual login”Weak passwords are an easy target for attackers. Close that gap by setting system-wide password requirements and giving each extension a strong password.
Set password policies
Section titled “Set password policies”-
Go to Security > Security Settings > Security Options.
-
In the Extension Password Rules section, set the minimum password length and the number of previous passwords that cannot be reused.

-
Click Save, then Apply.
Give an extension a strong password
Section titled “Give an extension a strong password”-
Go to Extension and Trunk > Extension and edit the extension you want.
-
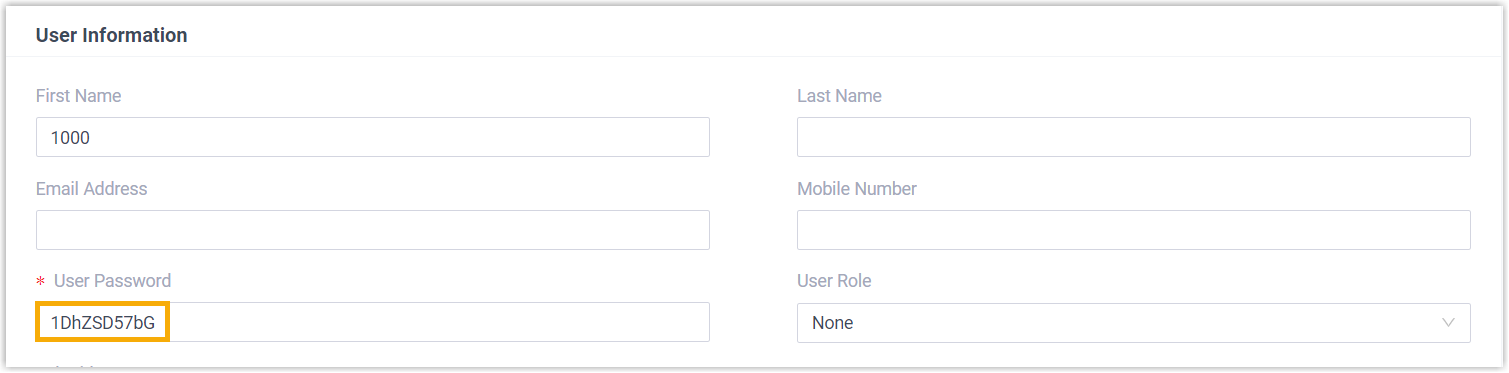
In the User Information section, enter a strong user password.
-
Click Save, then Apply.
Control access with user roles
Section titled “Control access with user roles”Role-based access control grants or restricts administrative permissions according to a person’s job. Each user gets exactly the privileges their work requires, which limits the chance of an unauthorized user reaching sensitive data or performing actions they should not.
Cloud Voice includes these built-in roles: Super Administrator, Administrator, Supervisor, Operator, Employee, Human Resource, Accounting, and Hotel Manager. Assign a built-in role as is, or build a custom role with precisely the permissions you want.
Create a custom role
Section titled “Create a custom role”-
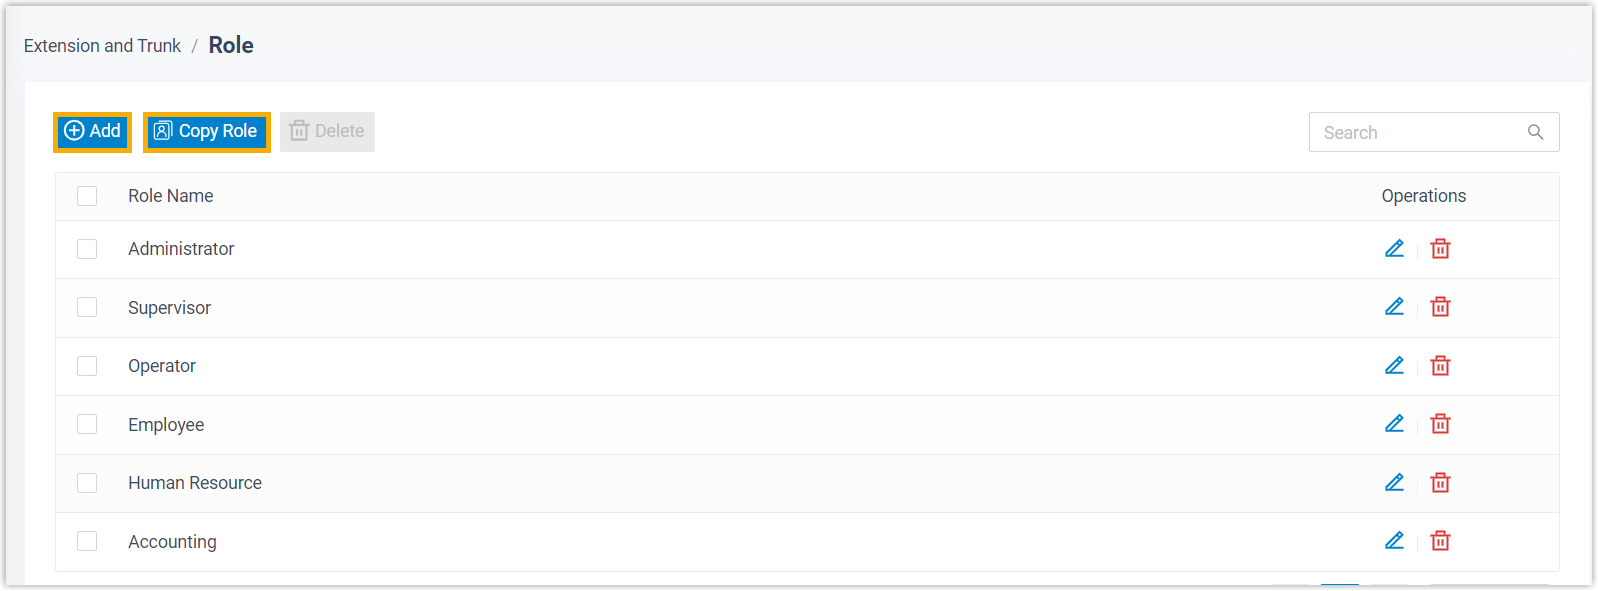
Go to Extension and Trunk > Role.
-
Click Add to define a role from scratch, or Copy Role to start from an existing role and adjust it.
Assign a role to a user
Section titled “Assign a role to a user”-
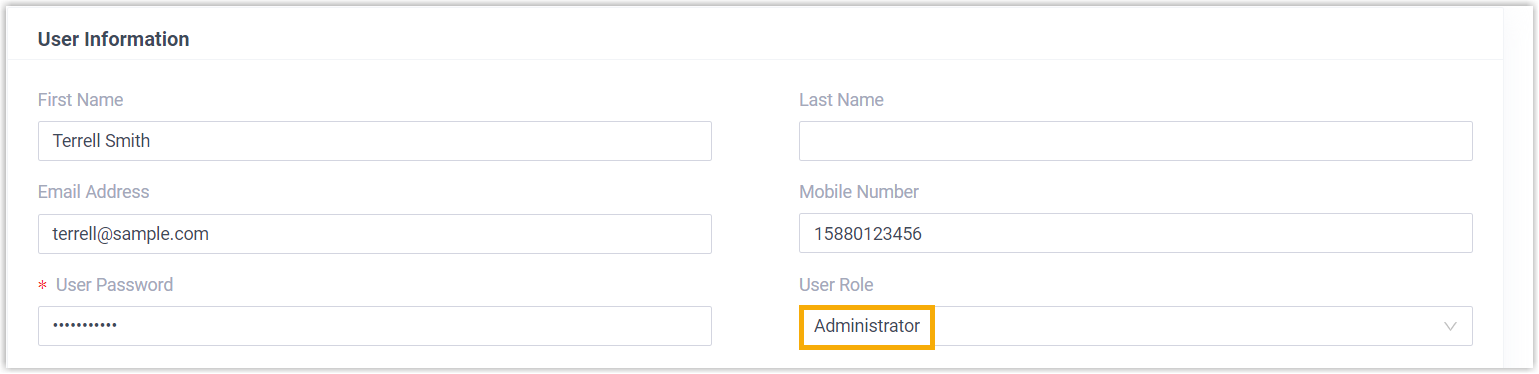
Go to Extension and Trunk > Extension and edit the extension you want.
-
In the User Information section, pick a role from the User Role drop-down list.
-
Click Save, then Apply.
Question about this page?
Ask the AI assistant. It starts from this page, then searches the rest of the docs.
Ask Cloud Voice AI
Answers are AI-generated from the docs and may contain mistakes. Verify with the linked pages.