
Integrate Cloud Voice with Microsoft Entra ID (Legacy)
Use the legacy method to link Cloud Voice with Microsoft Entra ID (formerly Azure Active Directory) by manually registering an application in your Microsoft Entra tenant and pairing it with your phone system.
Requirements
Section titled “Requirements”| Item | Requirement |
|---|---|
| Microsoft Entra ID | Free, Office 365 apps, Premium P1, or Premium P2 plan |
| Cloud Voice | Firmware version 84.21.0.66 or later |
Prerequisites
Section titled “Prerequisites”Have the following in place before you start:
- Your organization already runs a Microsoft Entra tenant.
- You can sign in with a Microsoft account that holds the Global Administrator role, which is required to complete the setup.
Overview
Section titled “Overview”The integration spans both your phone system and the Azure portal. You will:
- Collect the redirect URIs that Cloud Voice generates.
- Register a new application in your Microsoft Entra tenant.
- (Optional) Add the SSO redirect URI so users can sign in with their Microsoft accounts.
- Grant the application the Microsoft Graph permission it needs.
- Create a client secret for the application.
- Enter the application details back in Cloud Voice to complete the connection.
Step 1. Get the redirect URIs from Cloud Voice
Section titled “Step 1. Get the redirect URIs from Cloud Voice”You supply these redirect URIs (URI stands for Uniform Resource Identifier, a web address) when you register the Entra application, so gather them first.
-
Sign in to the Cloud Voice web portal and go to Integrations > Collaboration.
-
Next to Microsoft 365, click Integrate.
-
Under App Registration, locate and copy the two redirect URIs.
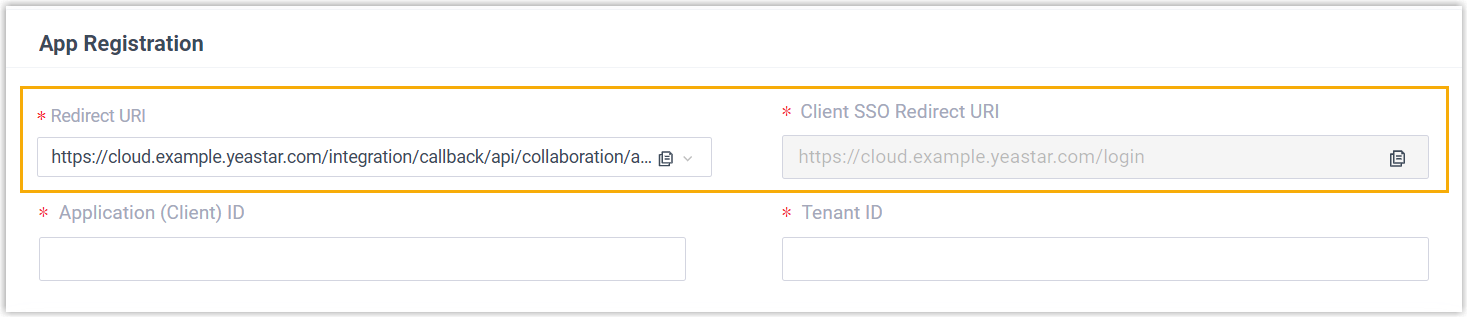
- Redirect URI: The address you are returned to once the integration finishes authenticating.
- Client SSO Redirect URI: The address used to enable Single Sign-on (SSO) for the Cloud Voice App.
Step 2. Register an application in your Microsoft Entra tenant
Section titled “Step 2. Register an application in your Microsoft Entra tenant”Create the application that ties Cloud Voice to Microsoft Entra ID.
-
Sign in to the Microsoft Azure Portal with your Global Administrator account.
-
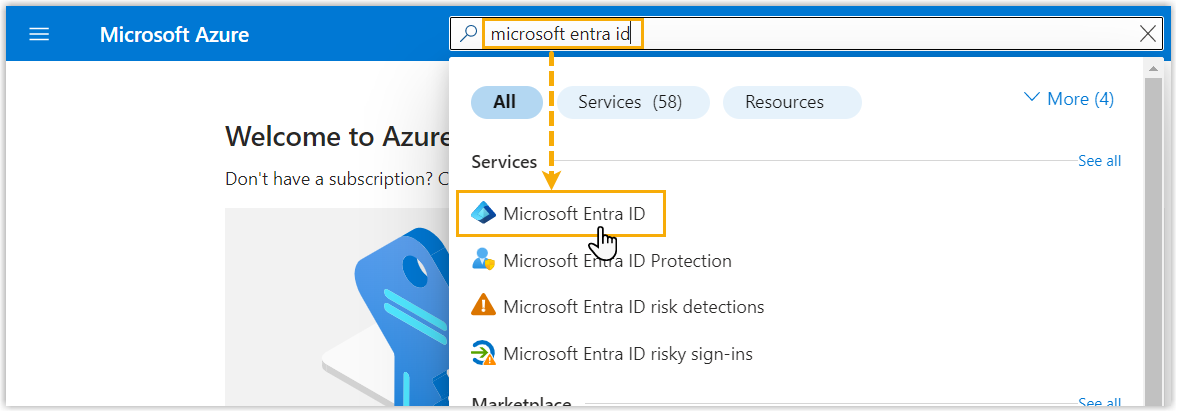
Search for and open the Microsoft Entra ID service to enter your organization’s directory.
-
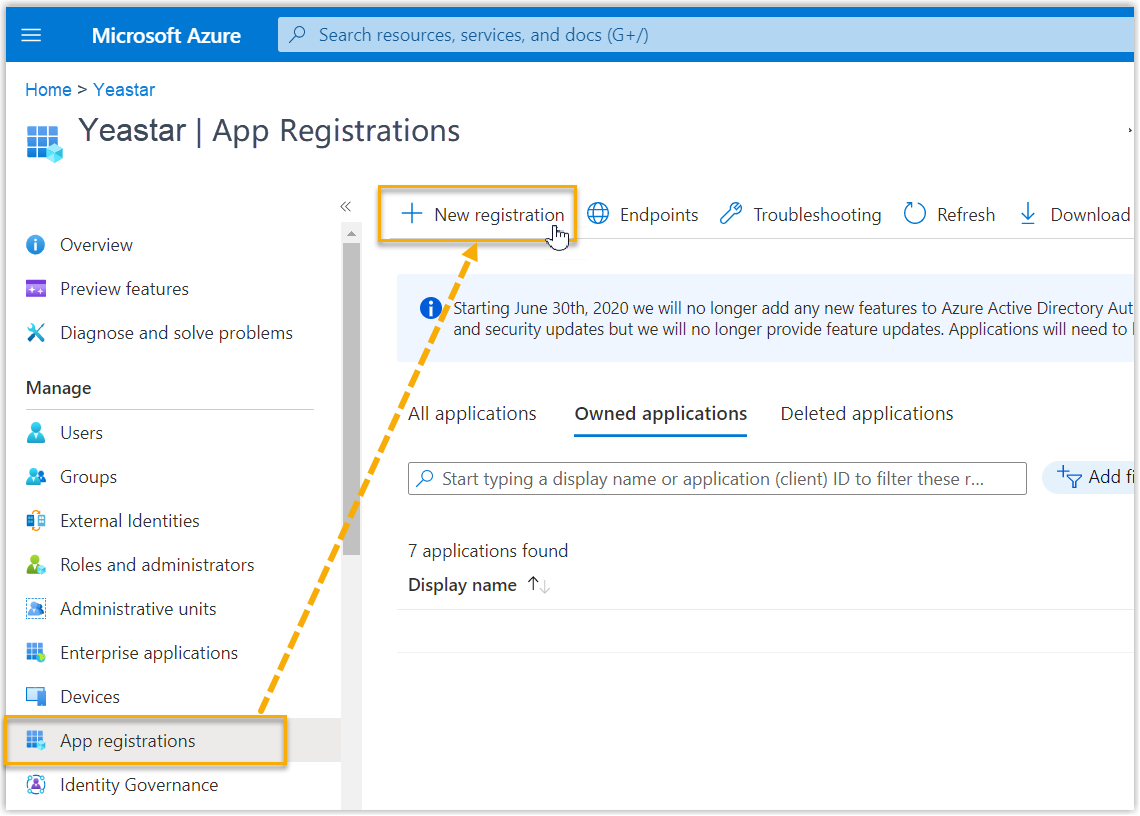
In the directory’s left navigation, select App registrations, then click New registration.
-
On the Register an application page, complete the form:
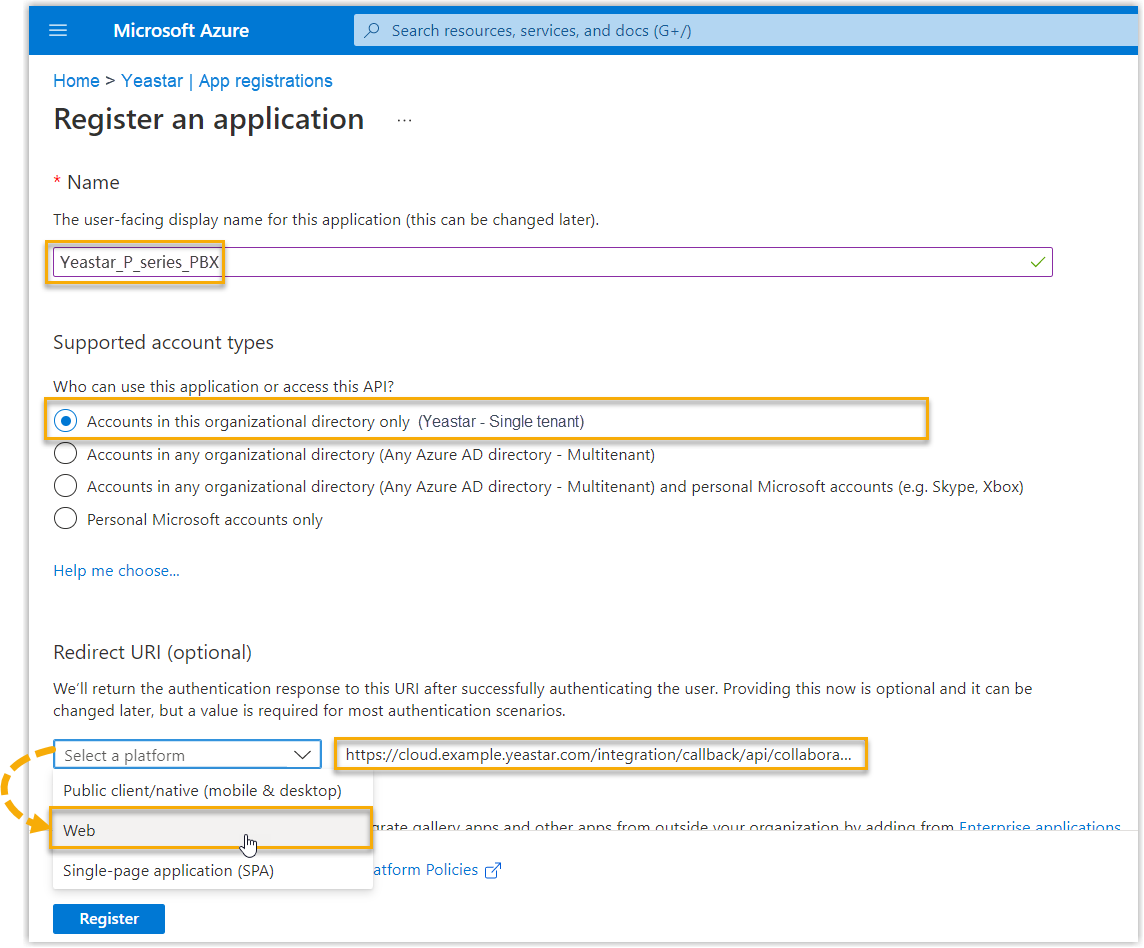
a. Enter the registration details:
- Name: A label that helps you recognize the application later.
- Supported account types: Choose Accounts in this organizational directory only.
- Redirect URI: In the platform drop-down, select Web, then paste the Redirect URI you copied from Cloud Voice.
b. Click Register.
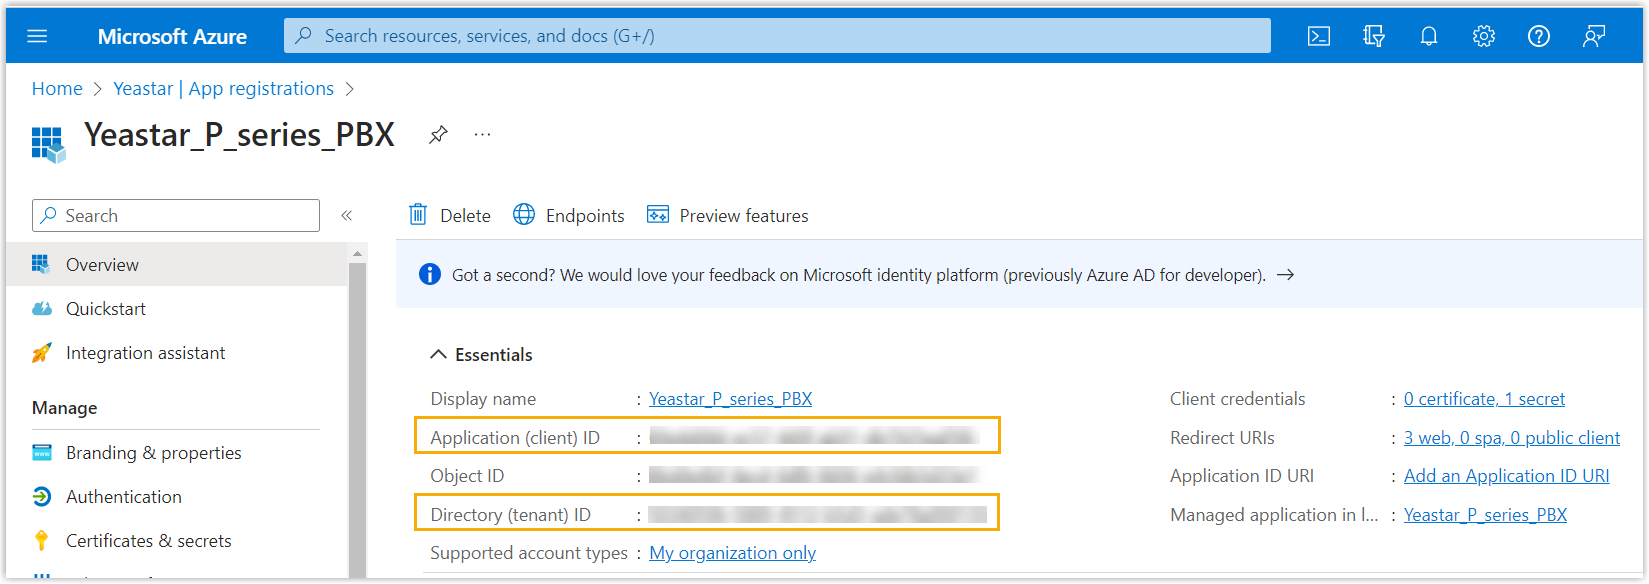
The application’s Application (client) ID and Directory (tenant) ID appear on the Overview page. Record both values, you enter them in Cloud Voice later.
Step 3. (Optional) Add the SSO redirect URI to the application
Section titled “Step 3. (Optional) Add the SSO redirect URI to the application”Complete this step only if you want users synced from Microsoft Entra ID to sign in to the Cloud Voice App with their Microsoft accounts. To enable SSO, add the Client SSO Redirect URI to the application.
-
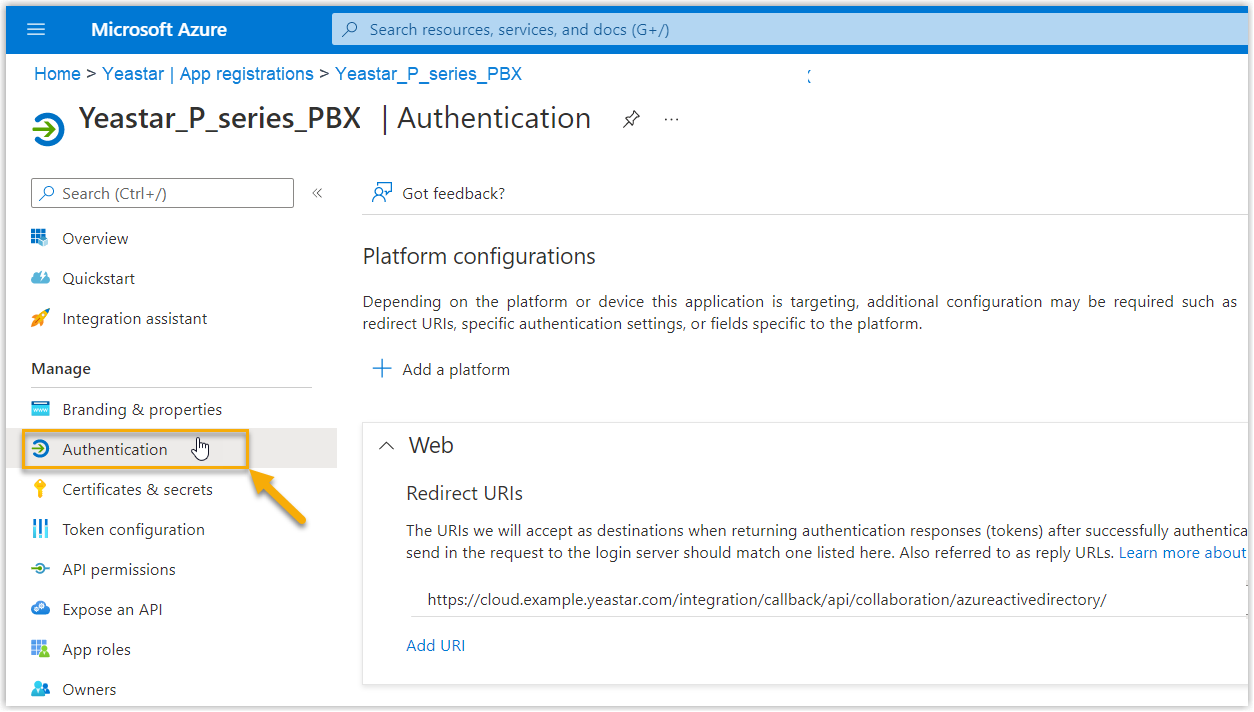
In the application’s left navigation, open Authentication.
-
Add the Cloud Voice App SSO redirect URI:
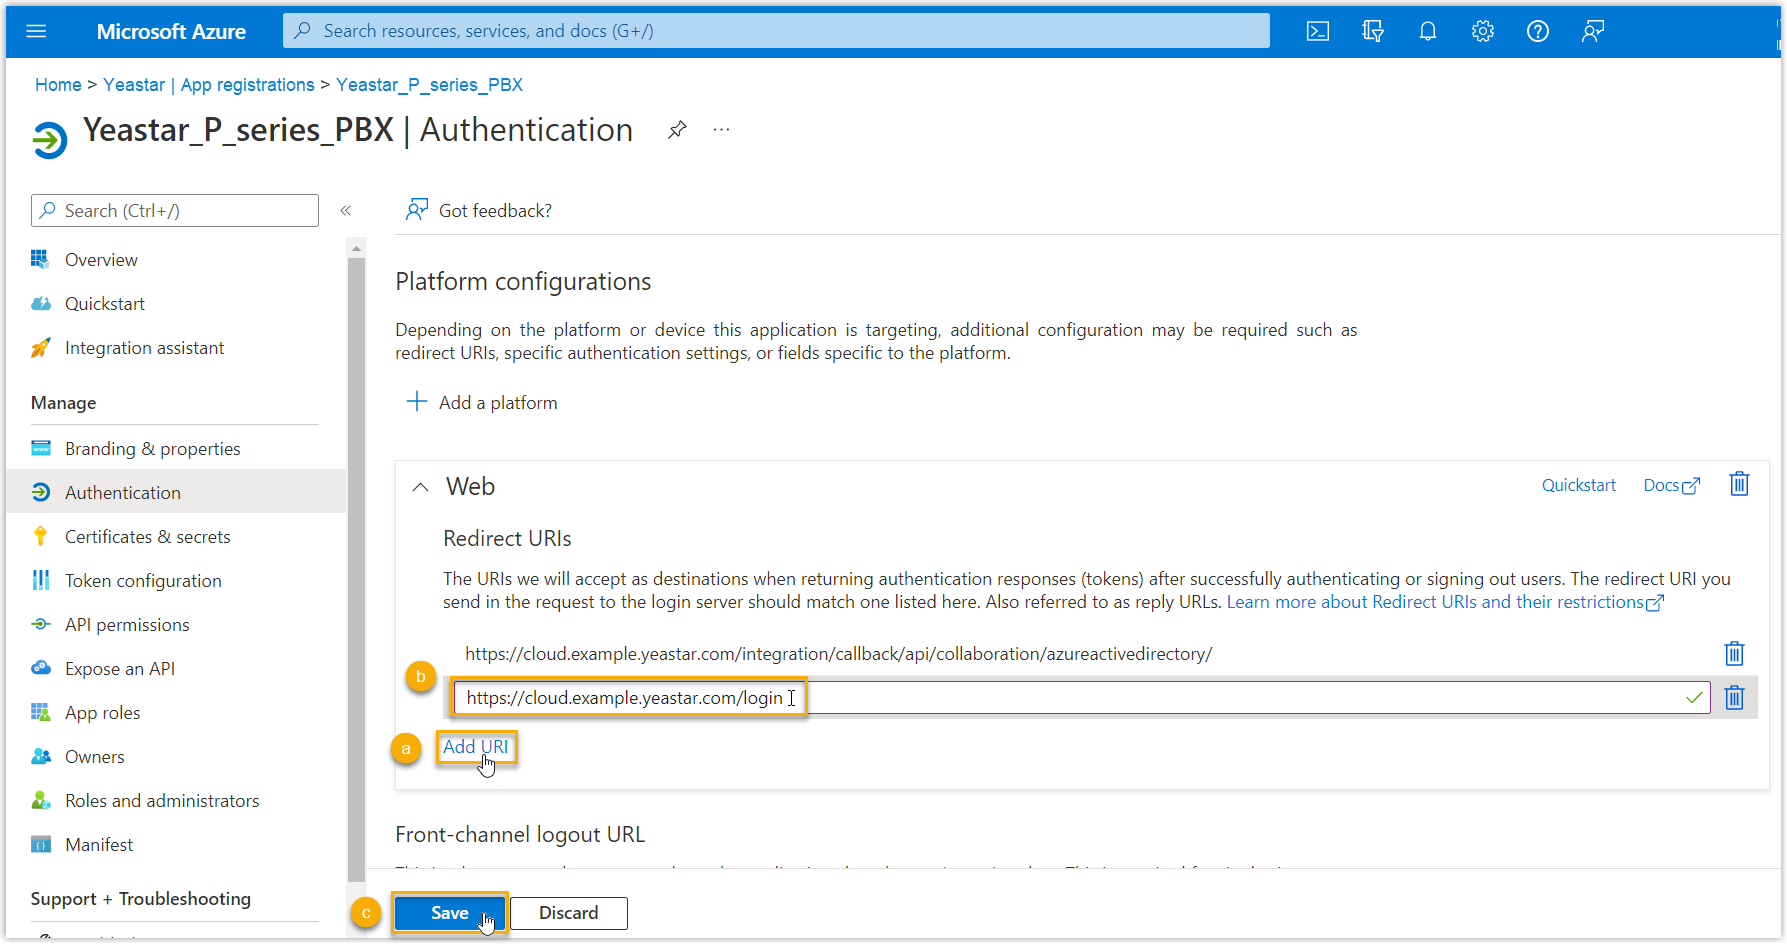
a. On the Authentication page, click Add URI in the Web section. b. Paste the Client SSO Redirect URI you copied from Cloud Voice. c. Click Save.
Step 4. Grant permissions to the application
Section titled “Step 4. Grant permissions to the application”Give the application the Microsoft Graph permission it needs to read and write user presence in Microsoft Entra ID.
-
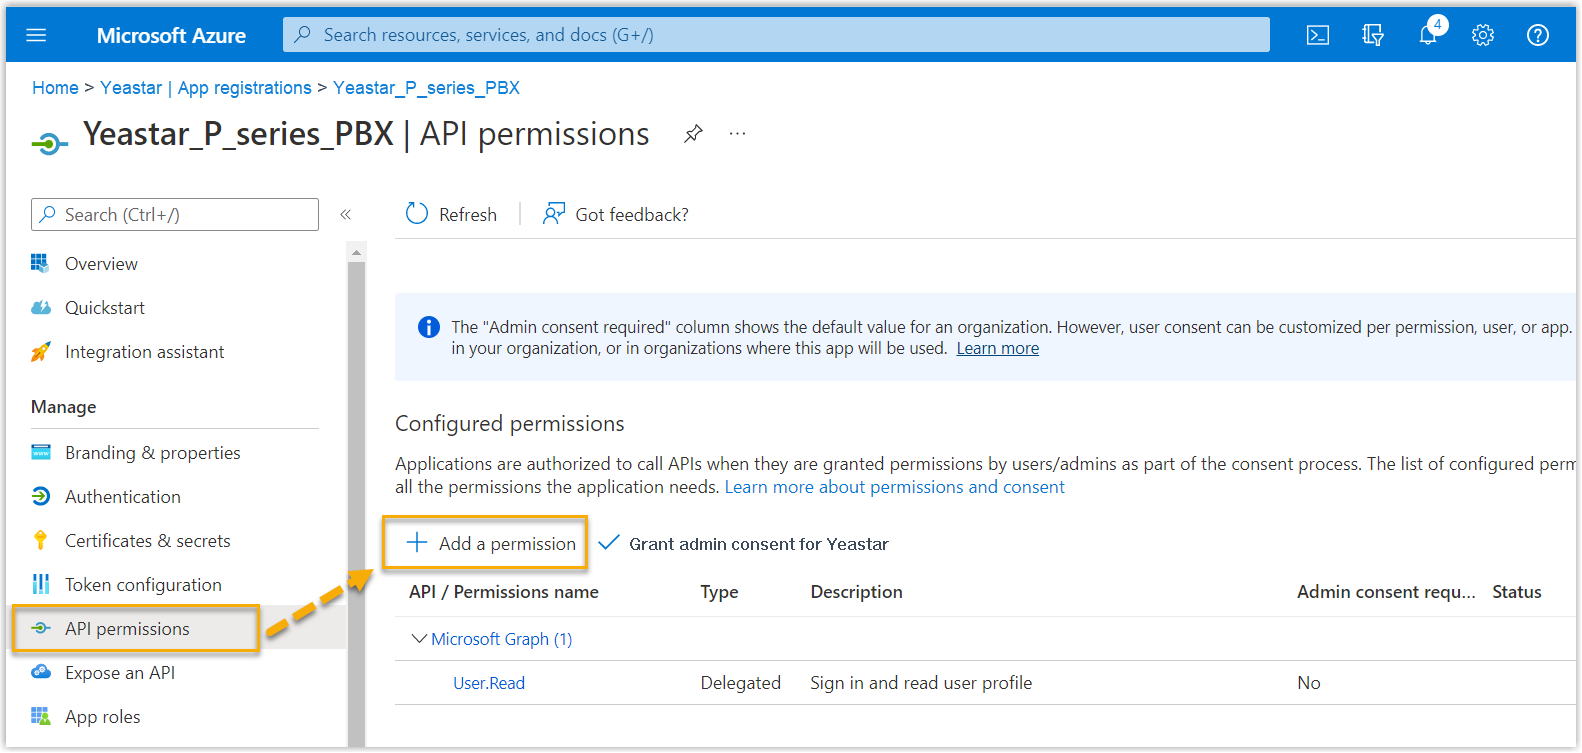
In the application’s left navigation, open API permissions, then click Add a permission.
-
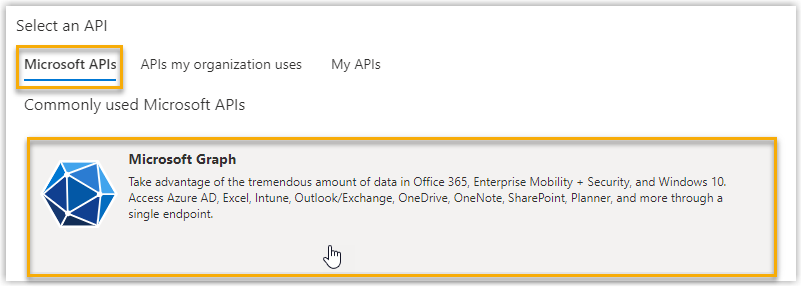
On the Select an API page, choose Microsoft APIs > Microsoft Graph.
-
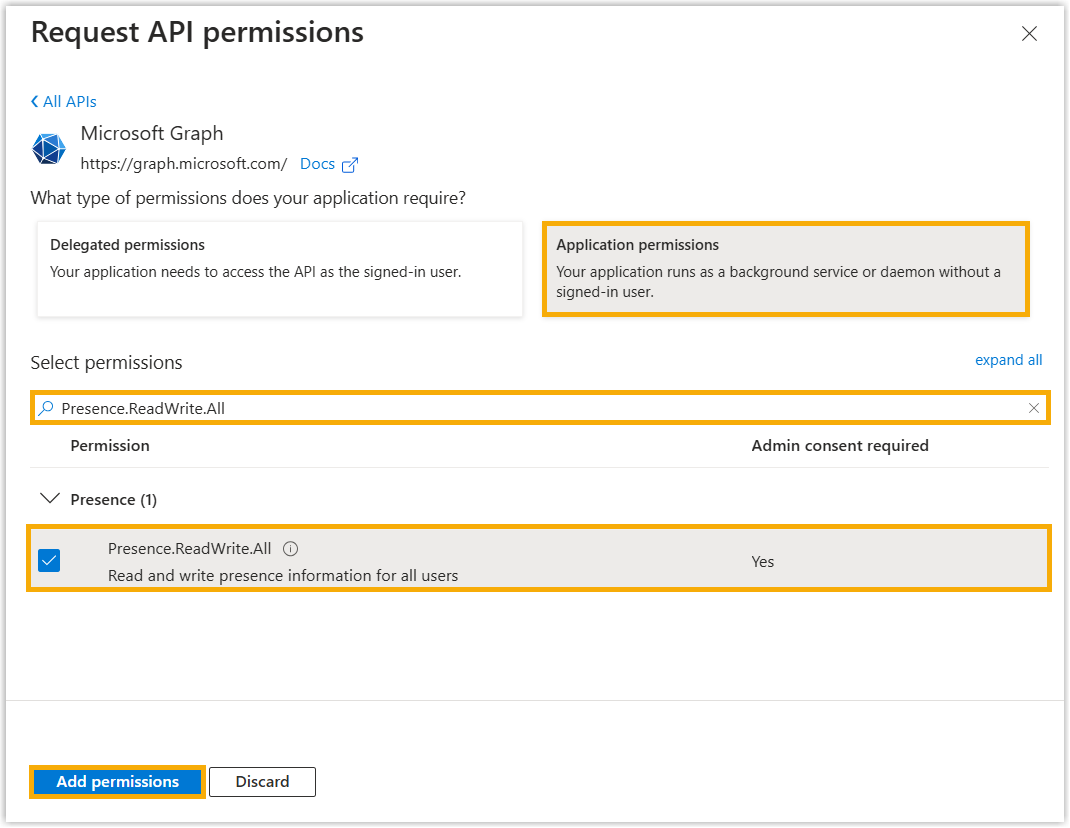
Add the presence permission:
a. Click Application permissions, search for and select Presence.ReadWrite.All, then click Add permissions.
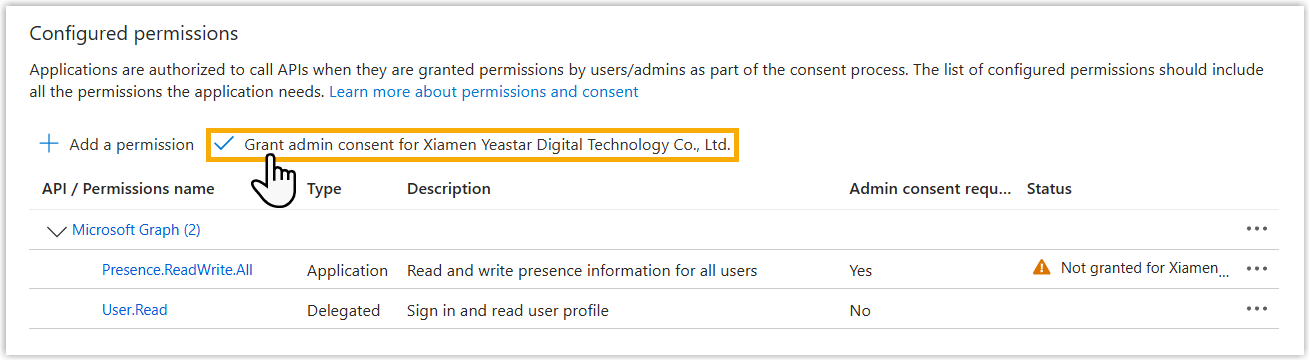
b. Click Grant admin consent for… to apply the permission.
c. In the confirmation dialog, click Yes.
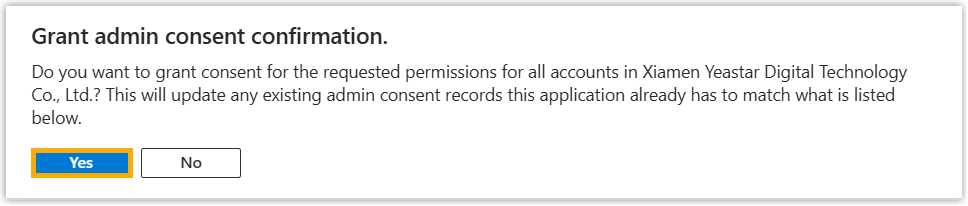
The permission’s Status switches to a green Granted indicator, confirming the application now holds the permission.
Step 5. Create a client secret for the application
Section titled “Step 5. Create a client secret for the application”The client secret authenticates the application during the integration.
-
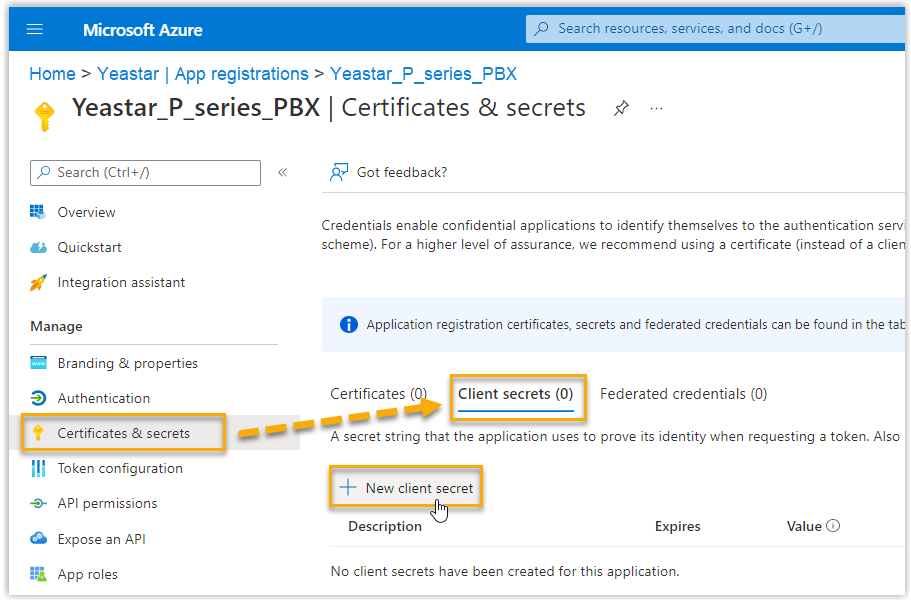
In the application’s left navigation, go to Certificates & secrets > Client secrets, then click New client secret.
-
On the Add a client secret page:
a. Enter a description and choose an expiration period.
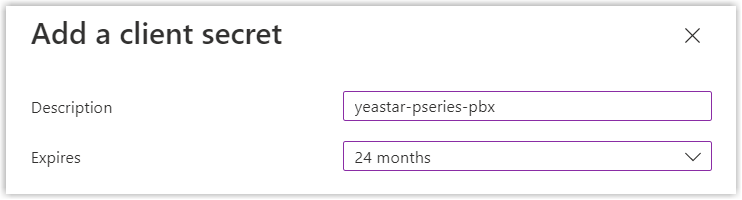
b. At the bottom of the page, click Add. The new secret appears in the Client secrets list.
-
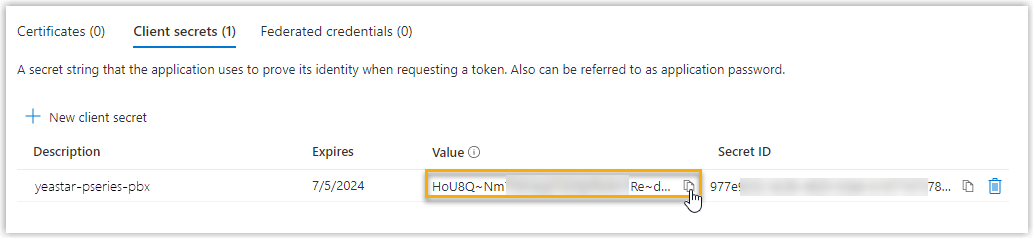
Copy the secret’s Value: you enter it in Cloud Voice later.
Step 6. Connect Cloud Voice to Microsoft Entra ID
Section titled “Step 6. Connect Cloud Voice to Microsoft Entra ID”Enter the application’s IDs and secret in Cloud Voice to finish the connection.
-
Sign in to the Cloud Voice web portal and go to Integrations > Collaboration.
-
Next to Microsoft 365, click Integrate.
-
Under App Registration, fill in:
- Application (Client) ID: Paste the application (client) ID.
- Tenant ID: Paste the directory (tenant) ID.
-
Under Certificates & Secrets, paste the secret into the Client Secret field.
-
Click Save. Cloud Voice redirects you to the Microsoft sign-in page.
-
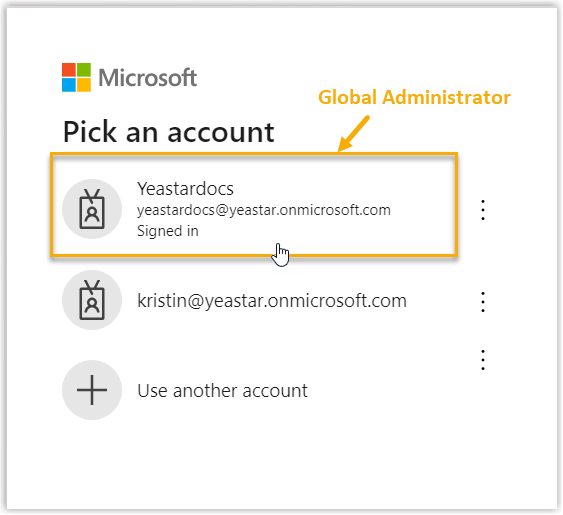
Sign in with the Microsoft account that has the Global Administrator role.
-
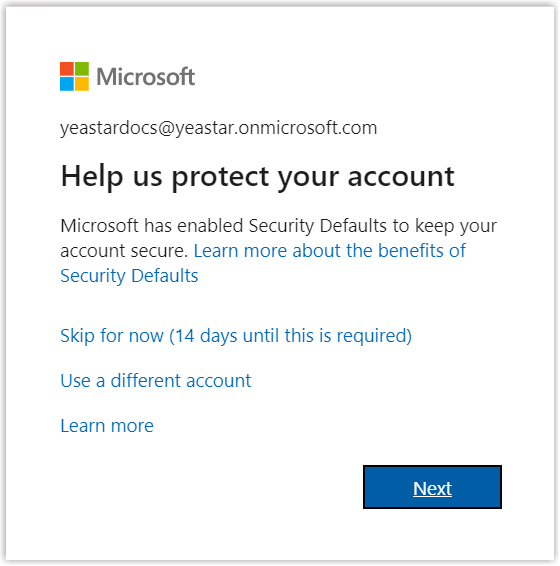
If Microsoft prompts for an extra security check, click Next to complete it, or skip it for now.
-
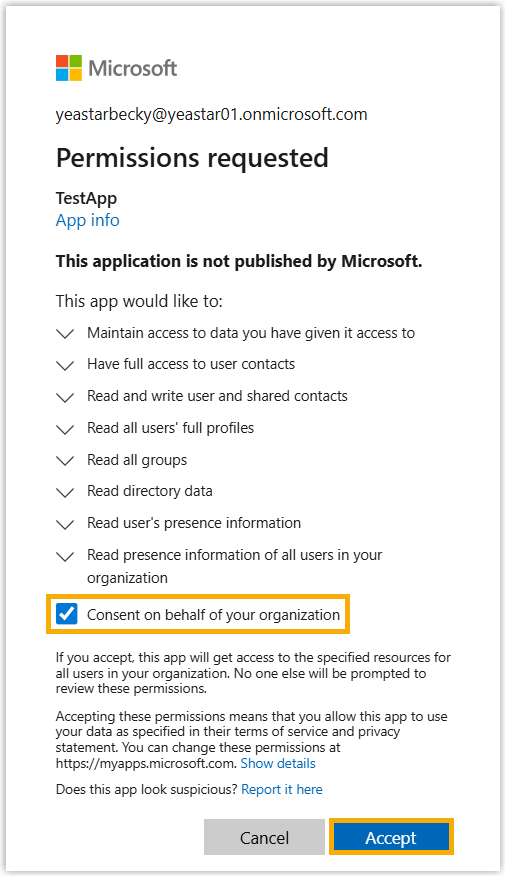
Review the requested permissions and click Accept.
-
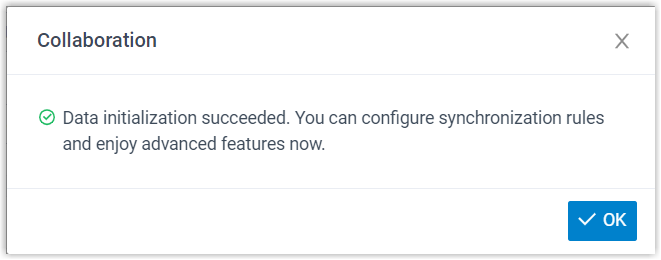
Back on the Cloud Voice configuration page, click OK to close the dialog.
Result
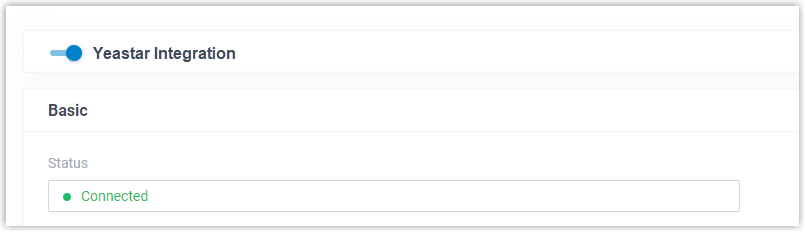
Section titled “Result”The integration status shows Connected, confirming that Cloud Voice is linked to your organization’s Microsoft Entra ID.
What to do next
Section titled “What to do next”Define synchronization rules to bring the users and groups you want from Microsoft Entra ID into Cloud Voice:
Question about this page?
Ask the AI assistant. It starts from this page, then searches the rest of the docs.
Ask Cloud Voice AI
Answers are AI-generated from the docs and may contain mistakes. Verify with the linked pages.