
Connect Cloud Voice to a TA1600/2400/3200 FXS Gateway
A TA1600/2400/3200 FXS gateway lets you bring traditional analog phones into your Cloud Voice phone system. FXS (Foreign Exchange Station) ports are the sockets on the gateway that supply dial tone to an ordinary analog phone. Each analog phone plugs into an FXS port, and that port registers to Cloud Voice (your PBX, or Private Branch Exchange) as a standard extension. Once the link is in place, the analog phone behaves like any other extension on the system.
The setup has four parts:
- Create the extension on Cloud Voice.
- Point the gateway at your PBX as a VoIP (Voice over Internet Protocol) server.
- Choose the dial pattern the port should use.
- Register the FXS port to the extension.
Step 1. Create the extension on Cloud Voice
Section titled “Step 1. Create the extension on Cloud Voice”Start by adding the extension that the analog phone will use.
-
Sign in to the PBX web portal and go to Extension and Trunk > Extension.
-
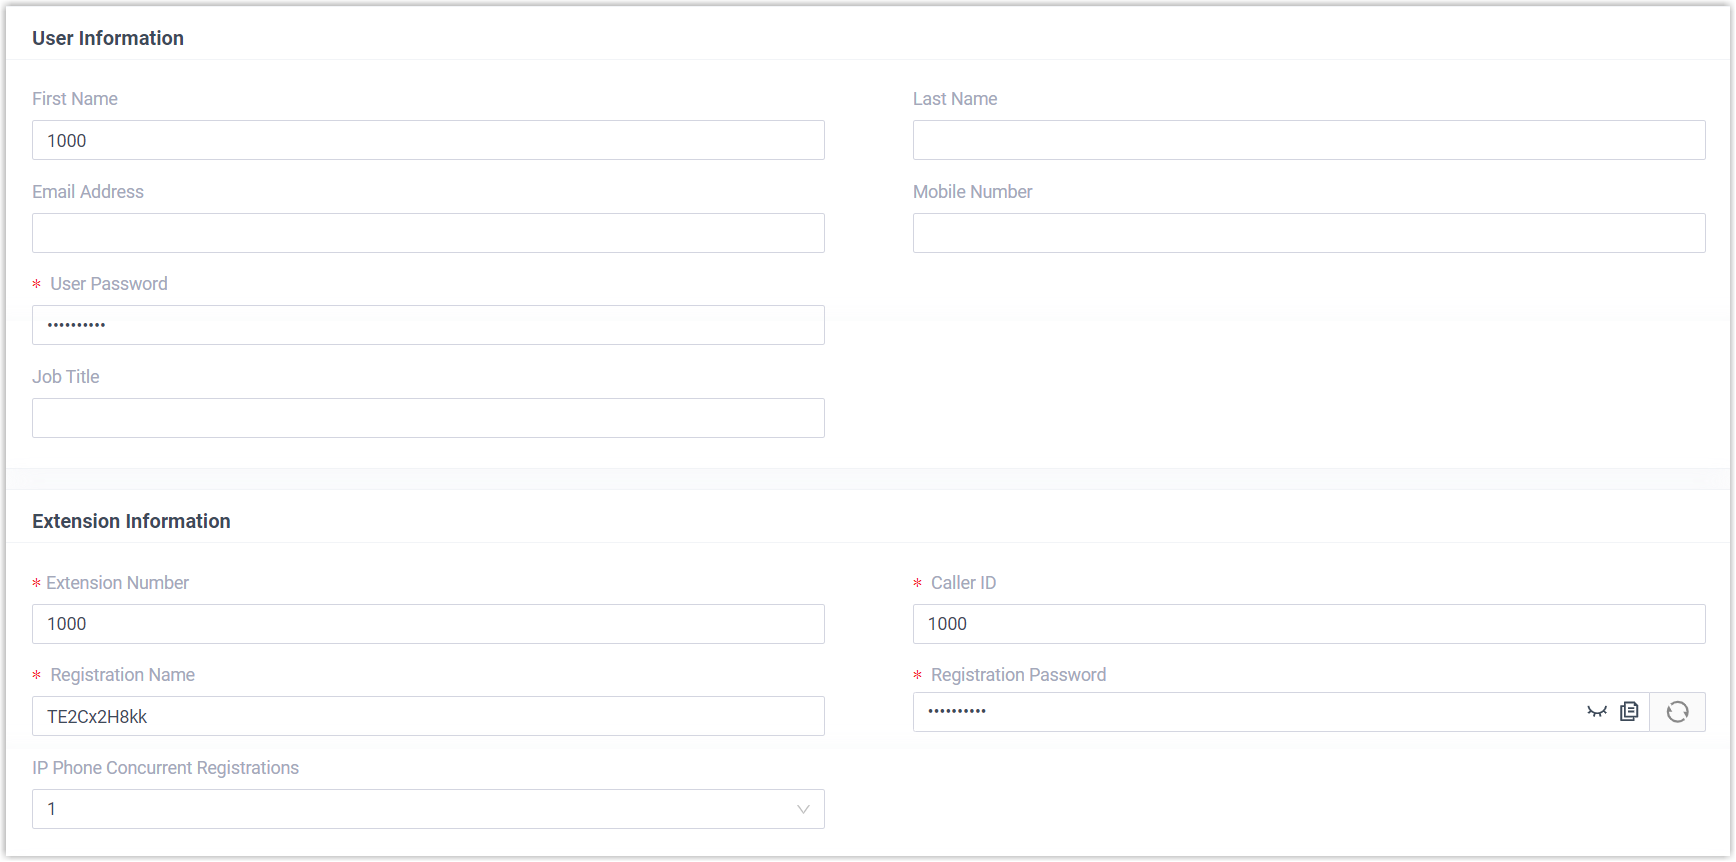
Click Add and configure the new extension. The examples in this guide use extension 1000.
-
Click Save, then Apply.
Step 2. Add Cloud Voice as a VoIP server on the gateway
Section titled “Step 2. Add Cloud Voice as a VoIP server on the gateway”Tell the gateway how to reach your PBX by defining it as a VoIP server.
-
Sign in to the gateway’s web interface and go to Gateway > VoIP Settings > VoIP Server Settings, then open a VoIP server for editing.
-
In the dialog, set the following:
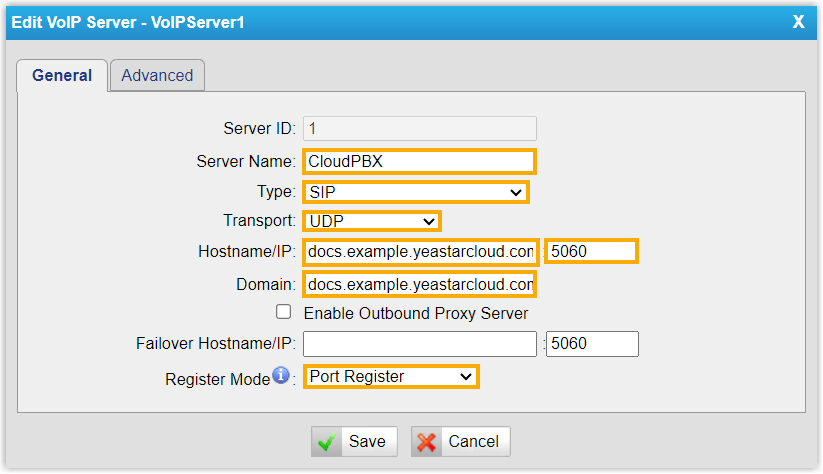
- Server Name: A label that helps you recognize this VoIP server.
- Type: Select SIP (Session Initiation Protocol, the signaling used to set up calls).
- Transport: Select UDP (User Datagram Protocol).
- Hostname/IP: Enter your PBX domain name followed by its SIP registration port.
- Domain: Enter your PBX domain name.
- Register Mode: Select Port Register.
-
Click Save, then Apply Changes.
Step 3. (Optional) Adjust a dial pattern template
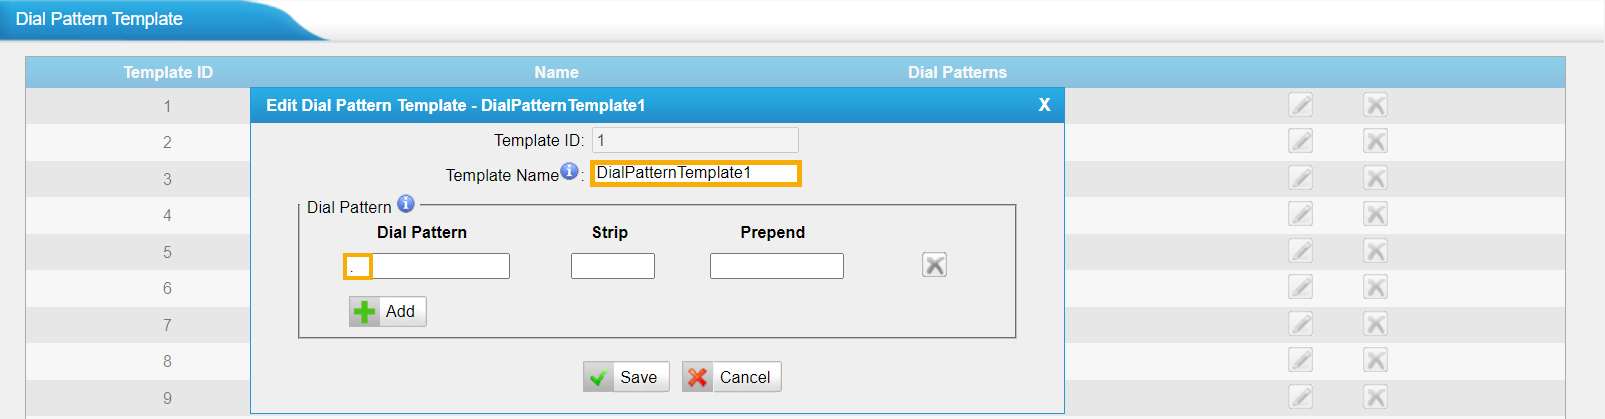
Section titled “Step 3. (Optional) Adjust a dial pattern template”The gateway ships with dial pattern templates whose pattern is set to ., which permits dialing any number. If the default suits you, skip this step.
To use a custom pattern, go to Gateway > VoIP Settings > Dial Pattern Template and edit the template you want. This guide keeps the defaults on DialPatternTemplate1.
Step 4. Register the FXS port to the extension
Section titled “Step 4. Register the FXS port to the extension”Now bind an FXS port to the extension you created in Step 1.
-
In the gateway’s web interface, go to Gateway > Port List > Port List and open an FXS port for editing.
-
In the dialog, set the following:
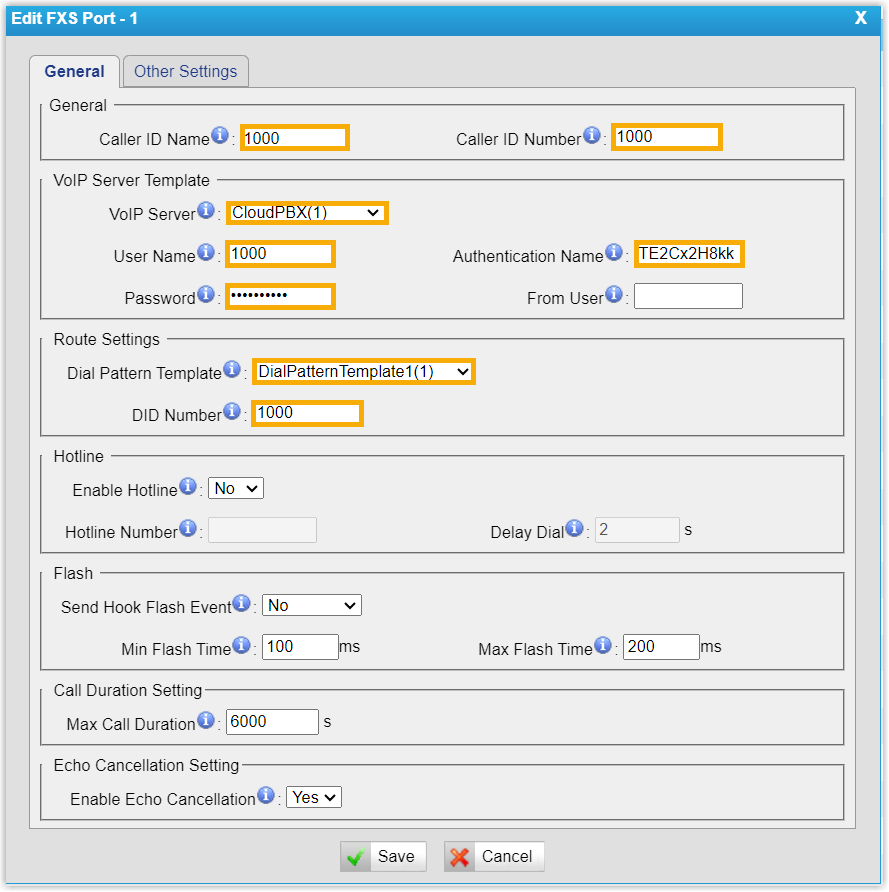
- Caller ID Name: A label that helps you identify this FXS port.
- Caller ID Number: The extension number.
- VoIP Server: Select the VoIP server you defined in Step 2.
- User Name: The extension number.
- Authentication Name: The extension’s registration name.
- Password: The extension’s registration password.
- Dial Pattern Template: The template to apply to this FXS port.
- DID Number: (DID stands for Direct Inward Dialing.) Enter the extension number.
-
Click Save, then Apply Changes.
Confirm the registration
Section titled “Confirm the registration”Check that the port has come up on both sides:
-
In the PBX web portal, go to Extension and Trunk > Extension. A successful registration shows the registered indicator
 next to the extension.
-
On the gateway, go to Status > System Status > FXS Port Status. A registered port reads OK.

With the port registered, the analog phone can now place and answer internal calls across the phone system.
What to do next
Section titled “What to do next”- To let the analog phone reach external numbers over a PBX trunk, see Make Outbound Calls from an Analog Phone Connected to a TA1600/2400/3200 FXS Gateway.
- To let the analog phone receive calls from outside, see Receive Inbound Calls on an Analog Phone Connected to a TA1600/2400/3200 FXS Gateway.
Question about this page?
Ask the AI assistant. It starts from this page, then searches the rest of the docs.
Ask Cloud Voice AI
Answers are AI-generated from the docs and may contain mistakes. Verify with the linked pages.