
Integrate Cloud Voice with Odoo CRM
Linking Cloud Voice to Odoo CRM (Customer Relationship Management) lets your Odoo users handle calls through their assigned extensions and brings your telephony and customer records together. This guide walks you through generating an Odoo API key, establishing the connection from the Cloud Voice portal, and mapping Odoo users to extensions.
Before you begin
Section titled “Before you begin”Make sure the following requirements are met on both sides of the integration.
Odoo
- Hosting type: Odoo Online
- Edition: Odoo Enterprise
- Version: Odoo 14.0 or later
- Use the Administrator account of the Odoo database to set up the integration.
- Have these details from your Odoo database on hand:
- The name of the database where Odoo CRM is installed.
- The domain name of that same database.
Cloud Voice phone system
- Firmware version 84.21.0.66 or later.
Step 1. Create an API key in Odoo
Section titled “Step 1. Create an API key in Odoo”Cloud Voice authenticates to Odoo with an API (Application Programming Interface) key, a secret token that lets one system access another on your behalf. Generate one first.
-
Sign in to the Odoo Database Manager using an administrator account.
-
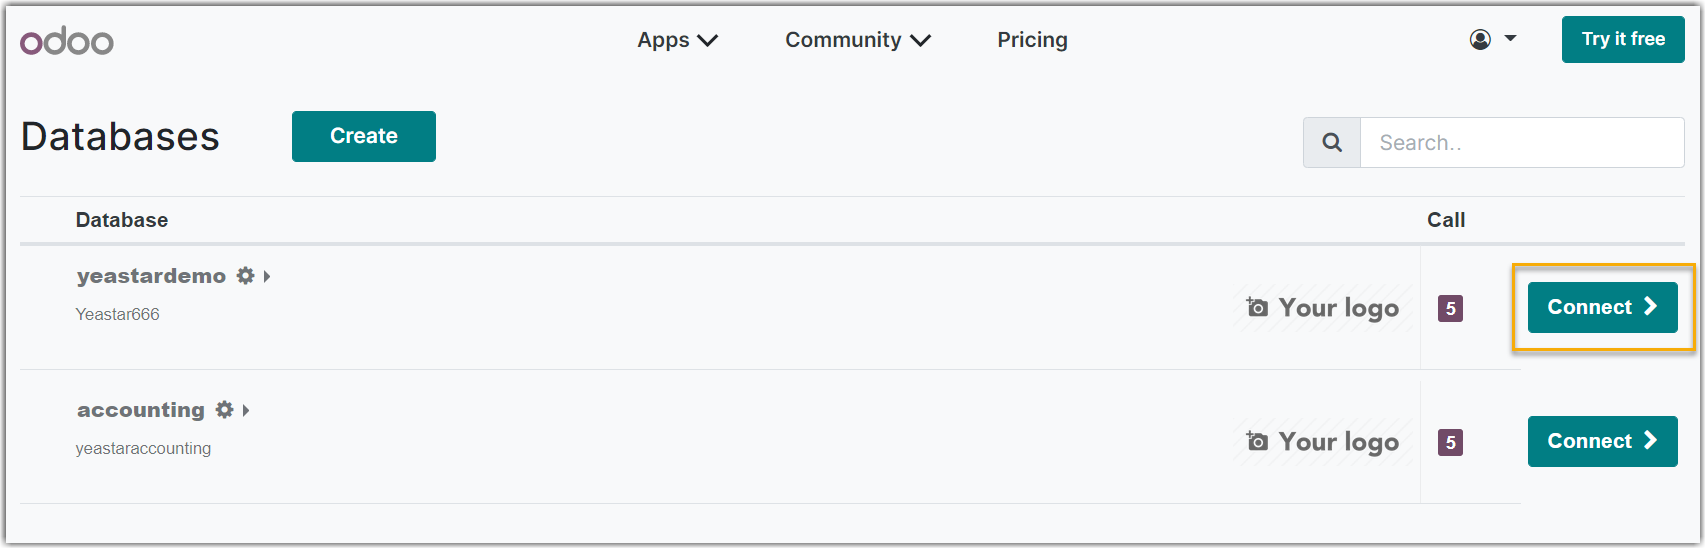
Locate the database that hosts Odoo CRM and click Connect next to it.
-
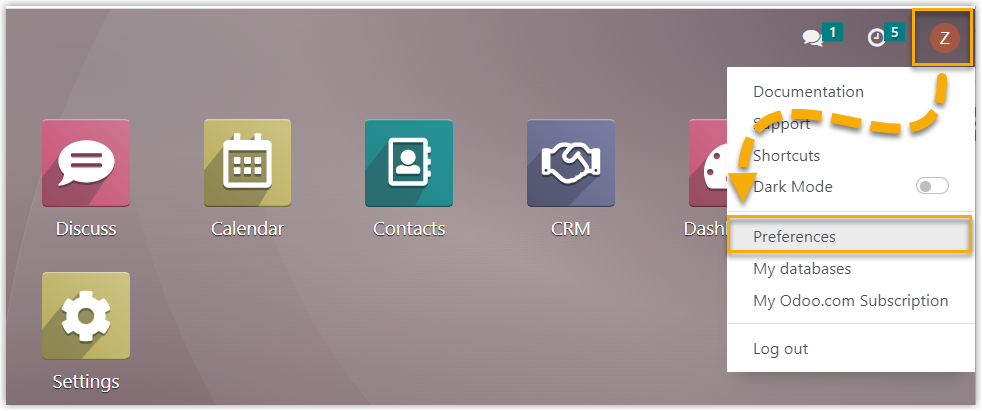
On the Odoo dashboard, open the account menu in the top-right corner and choose Preferences.
-
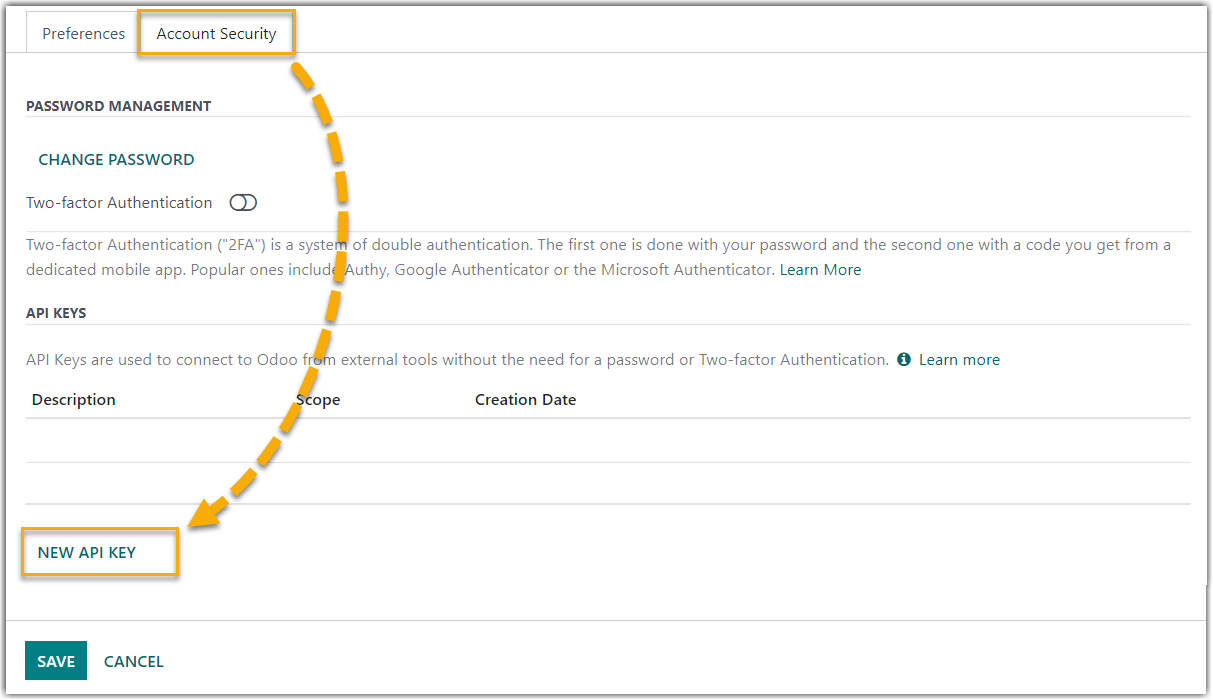
Switch to the Account Security tab in the dialog, then click NEW API KEY.
-
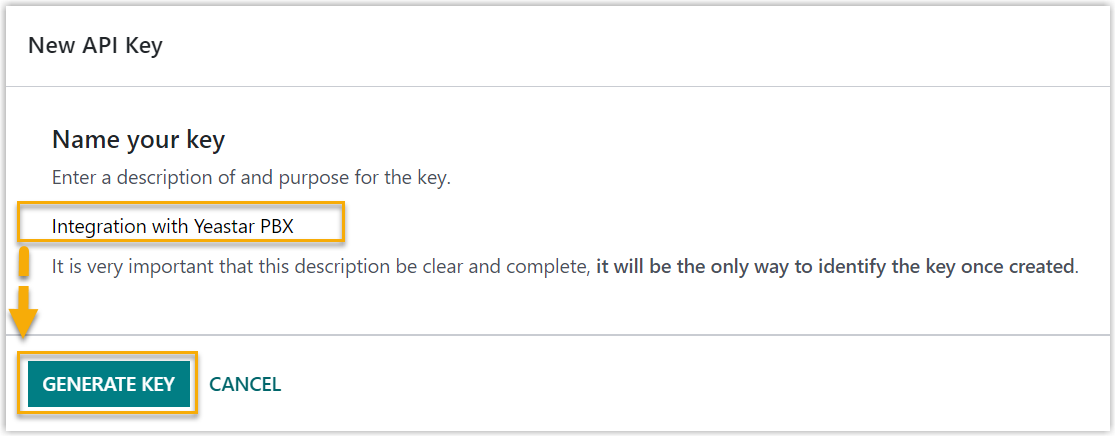
Type a description that identifies the key, then click GENERATE KEY.
-
Copy the generated key and store it somewhere safe, then click DONE. You will paste this key into Cloud Voice in the next step to authorize access to your Odoo user and CRM data.
Step 2. Connect Odoo CRM to Cloud Voice
Section titled “Step 2. Connect Odoo CRM to Cloud Voice”-
Sign in to the Cloud Voice management portal and go to Integrations > CRM > Odoo.
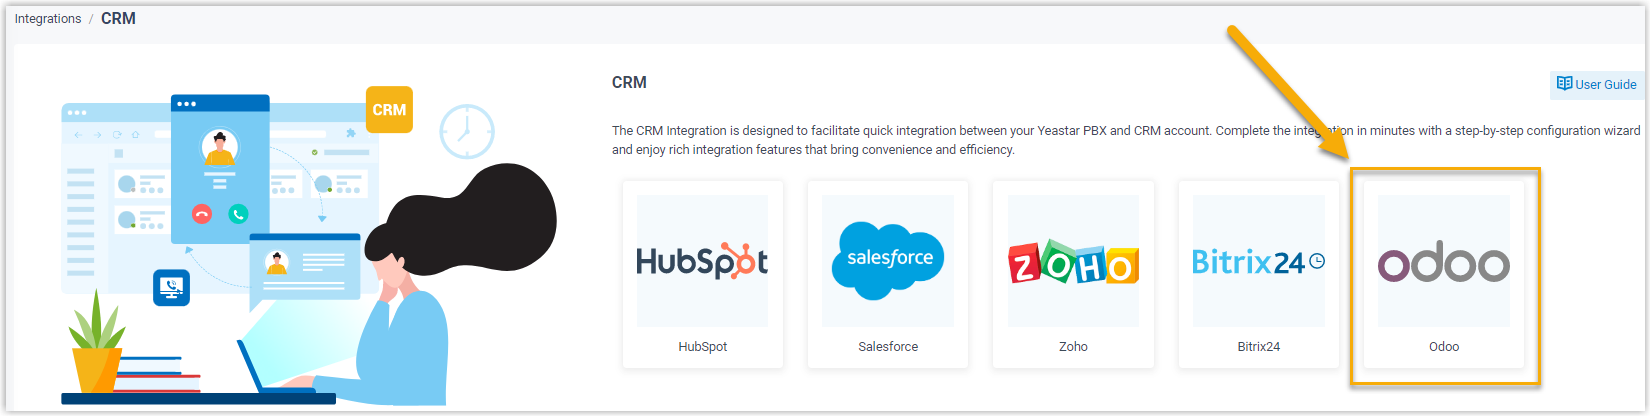
-
Enter the authentication details you gathered from Odoo.
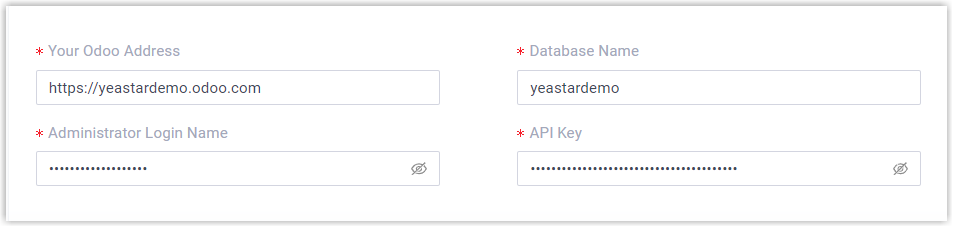
- Your Odoo Address: The domain name of the database where Odoo CRM is installed.
- Database Name: The name of that database.
- Administrator Login Name: The email address used to sign in to the Odoo administrator account.
- API Key: The key you created in Step 1.
-
Click Save. A dialog reports the outcome of the authentication attempt.
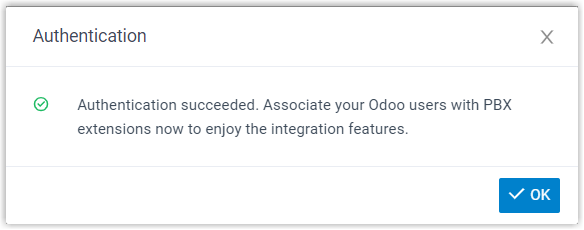
-
Click OK. When the Status field reads Connected, Cloud Voice is linked to Odoo CRM.

Step 3. Map Odoo users to extensions
Section titled “Step 3. Map Odoo users to extensions”With the connection in place, pair each relevant Odoo user with a Cloud Voice extension.
-
On the CRM integration page, click the refresh icon next to Odoo User to pull in the current list of Odoo CRM users.
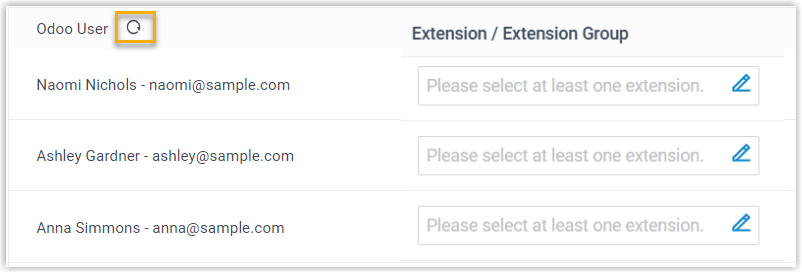
-
Associate Odoo users with extensions using either method below.
Associate automatically
Use this when a user’s Odoo account and their extension share the same email address. Cloud Voice can then match them for you.
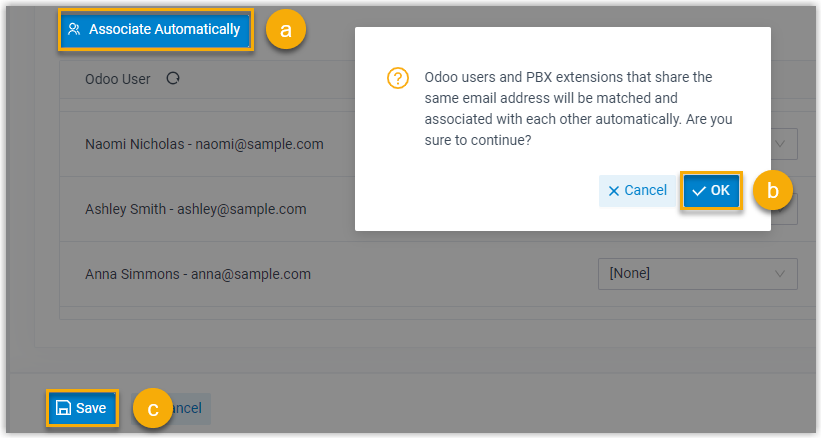
- Click Associate Automatically.
- Click OK in the confirmation dialog.
- Click Save.
Associate manually
Use this when a user’s Odoo account and extension use different email addresses, so you need to pair them by hand.
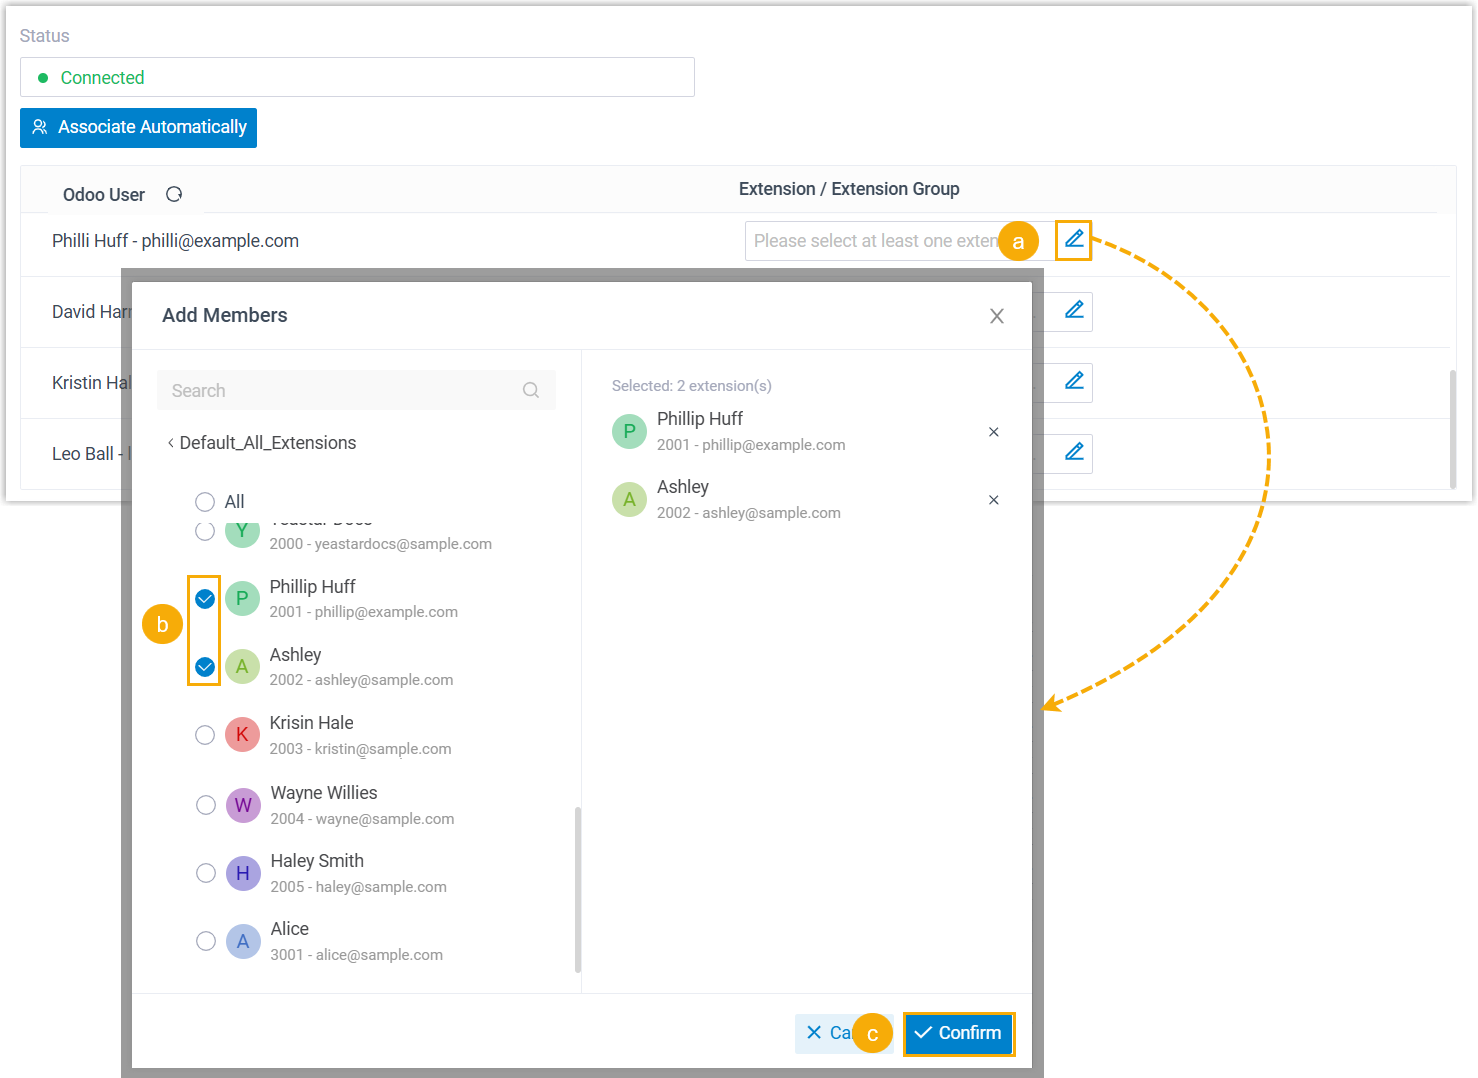
- In the Extension / Extension Group field next to the Odoo user, click the edit icon.
- Select the extension or extensions for that user in the dialog.
- Click Confirm.
- Click Save.
Result
Section titled “Result”The integration between Cloud Voice and Odoo CRM is now active. Mapped Odoo users can place and receive calls on their extensions.
What to do next
Section titled “What to do next”Question about this page?
Ask the AI assistant. It starts from this page, then searches the rest of the docs.
Ask Cloud Voice AI
Answers are AI-generated from the docs and may contain mistakes. Verify with the linked pages.