
Synchronize Active Directory Users to Cloud Voice
Once Cloud Voice is connected to Active Directory (AD), you can define a rule that decides which AD users become extensions on the phone system. Cloud Voice creates an extension for every user the rule covers and, on each synchronization afterward, applies any changes made in the directory so the two stay aligned.
There are two ways to build the rule:
- Sync a range of AD users automatically, pick a scope (all users, an organizational unit, a group, or a search filter) and let Cloud Voice create and number the extensions for you.
- Sync specific AD users manually, search the directory, choose individual users, and pair each one with the extension you want.
Before you begin
Section titled “Before you begin”You must have already integrated Cloud Voice with Active Directory.
Sync a range of AD users automatically
Section titled “Sync a range of AD users automatically”Define the set of AD users to bring in and an auto-assignment rule for extension numbers. Cloud Voice then matches users to extensions on its own during each synchronization.
-
Sign in to the Cloud Voice management portal and go to Integrations > Collaboration.
-
In the User Synchronization section, turn the switch on.

-
Open the User Range for Extension Auto Creation drop-down list and choose which AD users to synchronize and create extensions for.
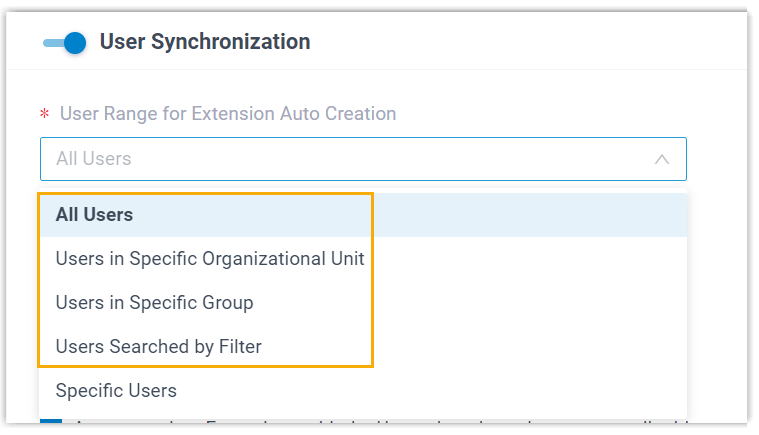
Option What it does All Users Brings in every AD user in the connected directory and creates an extension for each. Users in Specific Organizational Unit Brings in the users in one or more organizational units. Choose them in the Organizational Units drop-down list. Users in Specific Group Brings in the users in one or more groups. Choose them in the Group drop-down list. Users Searched by Filter Brings in the users that match an LDAP search filter you enter in the Search Filter for User field. If you pick Users in Specific Organizational Unit, select the units to include:

If you pick Users in Specific Group, select the groups to include:

If you pick Users Searched by Filter, enter your LDAP filter. For example,
(&(objectCategory=person)(objectClass=user)(cn=sales*))returns users whose name begins with “sales”.
-
In the User’s Extension Number drop-down list, set the rule for numbering the extensions.

Option What it does Assign Automatically Numbers extensions sequentially from a starting value you set in the Start Extension Number from field. Read Specific Property Value Reads each user’s extension number from an AD property, so users who already have a number keep it instead of getting a new one. Name the property (for example, ipPhone) in the Property Name field. -
In the Delete the Extension when its associated user account is drop-down list, choose the AD account states that make Cloud Voice stop syncing a user and remove their extension.
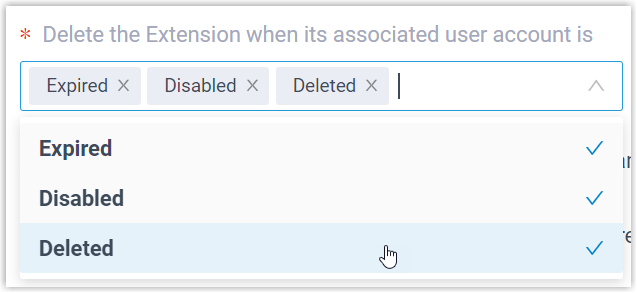
Option What it does Expired Stops syncing and deletes the extension when the AD account expires. Disabled Stops syncing and deletes the extension when the AD account is disabled. Deleted Stops syncing and deletes the extension when the AD account is deleted. -
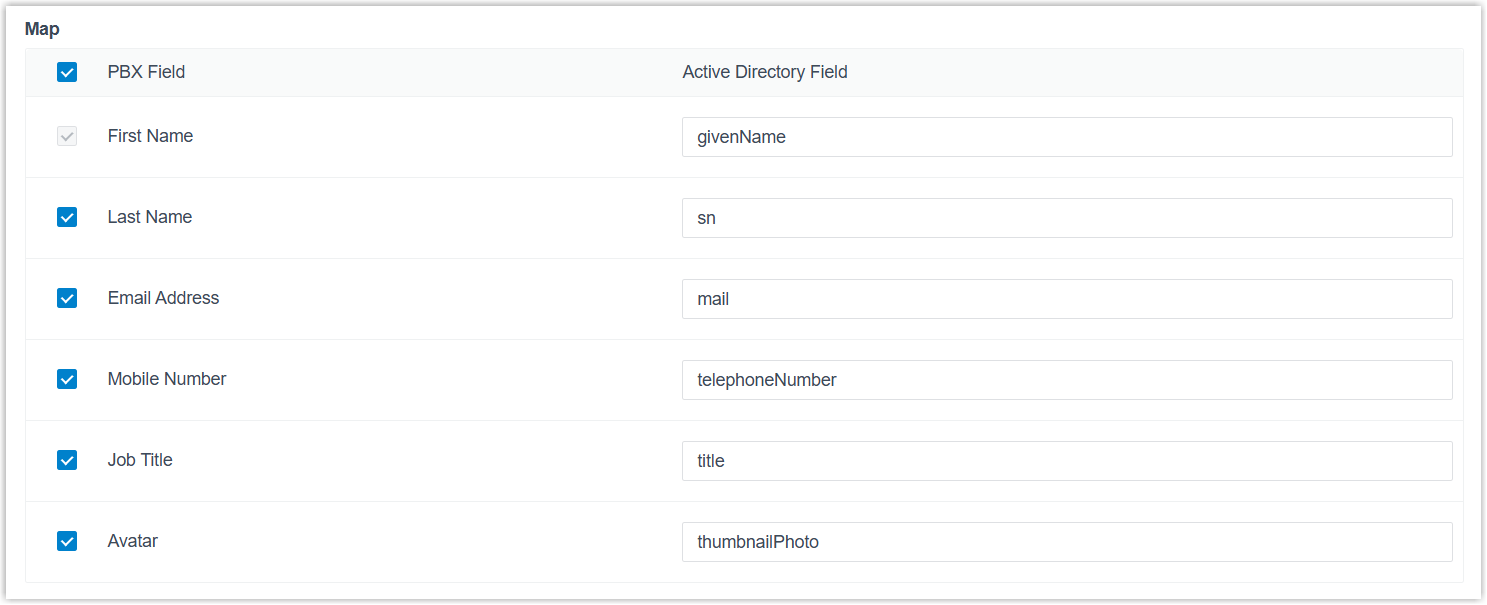
Decide how to handle the Auto associate Extensions with the Users that share the same email address option, which governs AD users whose email matches an existing Cloud Voice extension. The email is read from the AD field you set for the Email Address mapping in the Map section.
- Selected: the matching AD user is synced and linked to that extension, and the extension’s user details are overwritten with the values from AD.
- Cleared: the matching AD user is not synced, because Cloud Voice does not allow duplicate email addresses on extensions.
-
To email a welcome message to each synced user, select Send Welcome Email automatically after an extension is created.
-
In the Map section, choose and pair the fields for the user details you want to carry over from AD.
-
Click Save.
Sync specific AD users manually
Section titled “Sync specific AD users manually”Set the search scope, pick the exact AD users you want, and assign each one an extension by hand.
-
Sign in to the Cloud Voice management portal and go to Integrations > Collaboration.
-
In the User Synchronization section, turn the switch on.
-
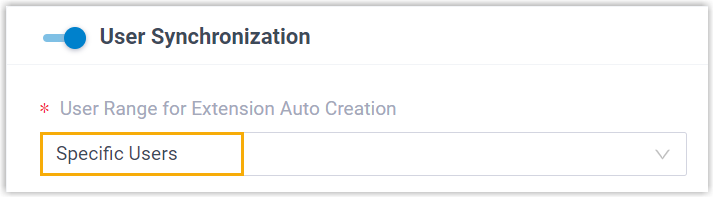
In the User Range for Extension Auto Creation drop-down list, choose Specific Users.
-
In the Search Criteria drop-down list, set where Cloud Voice looks for AD users.
Option What it does Search Users by Organizational Unit Searches within the organizational units you select in the Organizational Unit drop-down list. Search Users by Group Searches within the groups you select in the Group drop-down list. If you search by organizational unit, choose the units:
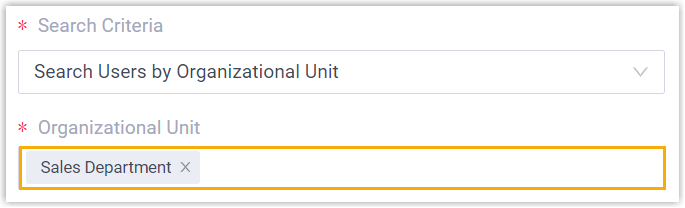
If you search by group, choose the groups:
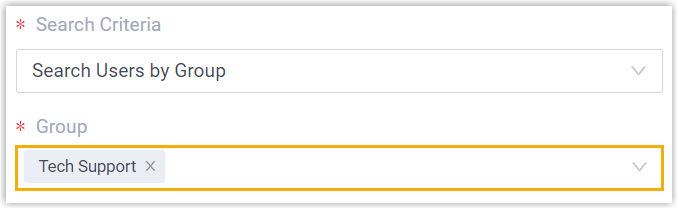
-
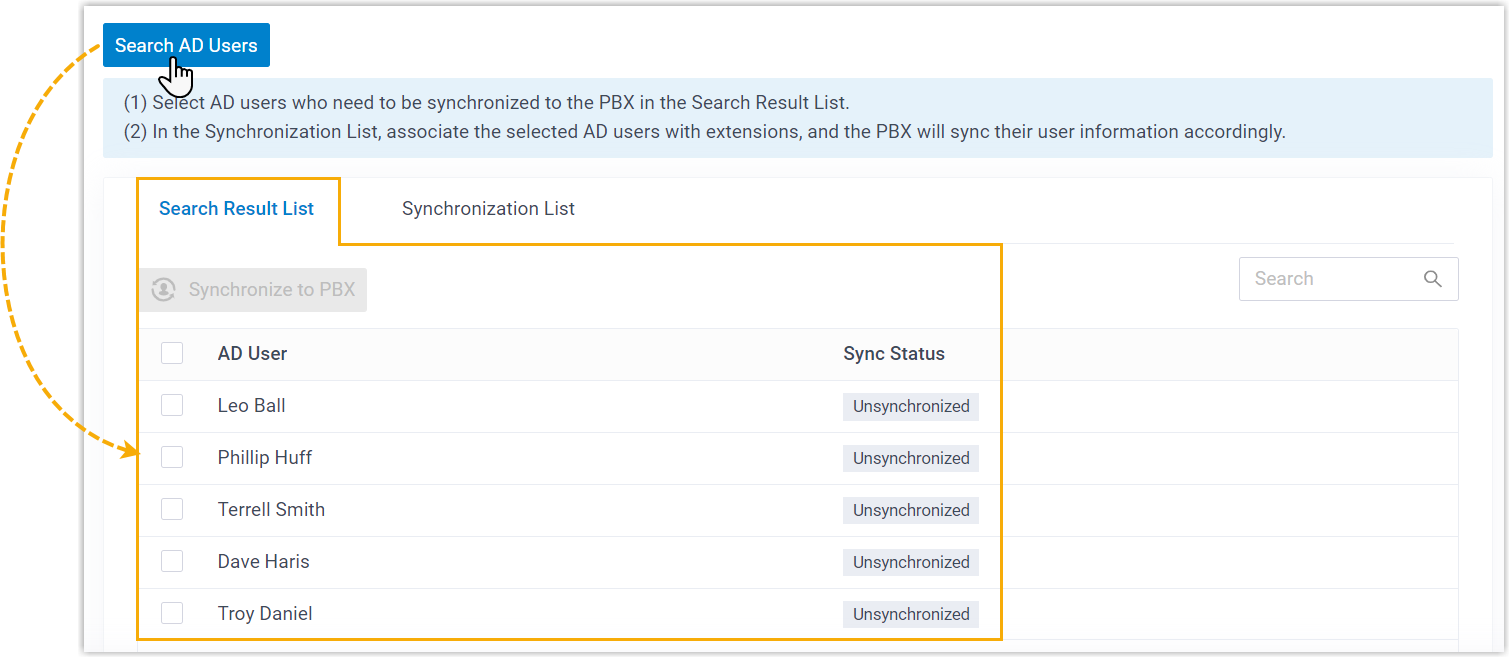
Click Search AD Users. Cloud Voice searches the scope you set and lists the matches in the Search Result List.
-
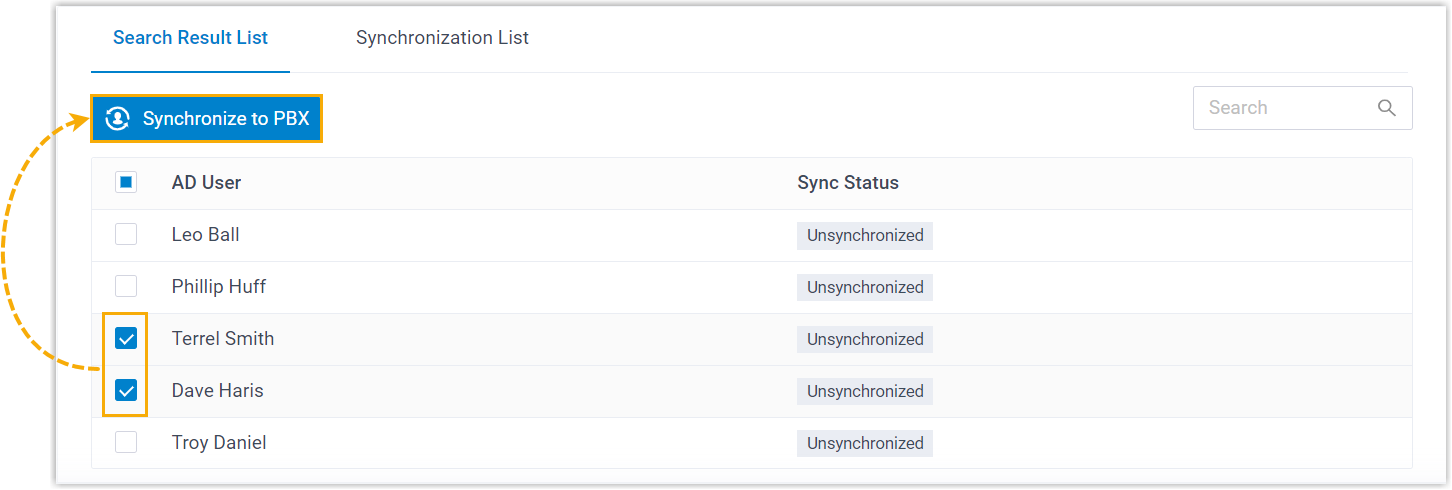
Select the users you want and click Synchronize to PBX. They move into the Synchronization List.
-
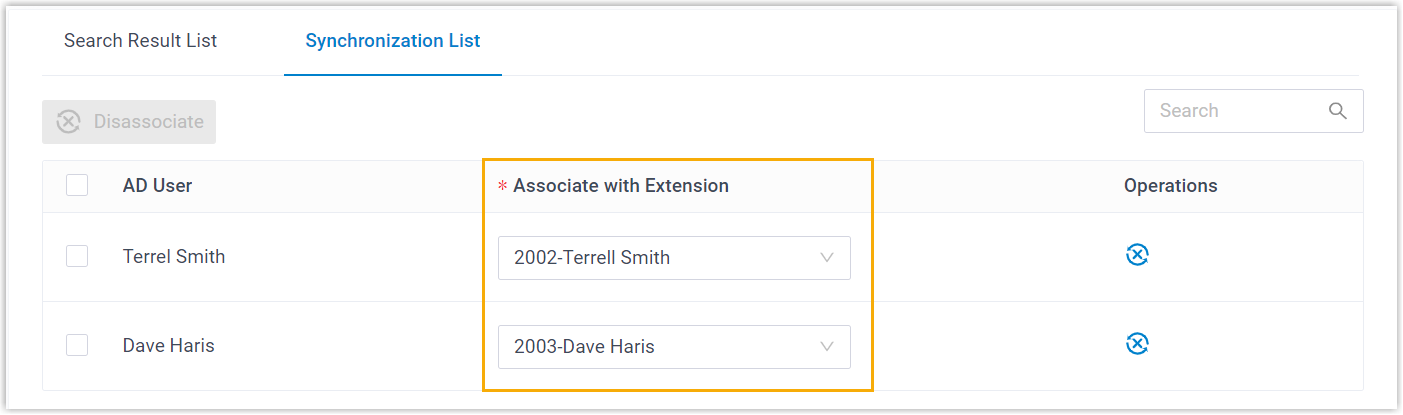
For each user, open the Associate with Extension drop-down list next to their name and pick the extension to assign.
-
In the Delete the Extension when its associated user account is drop-down list, choose the AD account states that make Cloud Voice stop syncing a user and remove their extension.
Option What it does Expired Stops syncing and deletes the extension when the AD account expires. Disabled Stops syncing and deletes the extension when the AD account is disabled. Deleted Stops syncing and deletes the extension when the AD account is deleted. -
To email a welcome message to each synced user, select Send Welcome Email automatically after an extension is created.
-
In the Map section, choose and pair the fields for the user details you want to carry over from AD.
-
Click Save.
Result
Section titled “Result”Your custom synchronization rule is now in place. On each run, Cloud Voice queries Active Directory over LDAP using your rule and pulls in the matching users along with their latest details. After a synchronization:
-
You can review the outcome in the User Synchronization section.

-
Extensions tied to AD users carry a marker
 and cannot be deleted by hand in Cloud Voice.
 -
When field mapping is enabled, the following details on those extensions can no longer be edited directly in Cloud Voice, change them in Active Directory instead, and they update on the next synchronization:
- Last name
- First name
- Email Address
- Mobile Number
- Job Title
- Avatar
What to do next
Section titled “What to do next”To let synced users sign in to the Cloud Voice App with their AD domain accounts, see Allow Users to Sign In to the Cloud Voice App with AD Domain Accounts.
Question about this page?
Ask the AI assistant. It starts from this page, then searches the rest of the docs.
Ask Cloud Voice AI
Answers are AI-generated from the docs and may contain mistakes. Verify with the linked pages.