
Manage CRM Integration Templates
A CRM (Customer Relationship Management) integration template defines how Cloud Voice exchanges data with a particular CRM. From the Template Management page you can refresh the built-in defaults, save your own editable copies, adjust their settings, and move templates between systems. This page walks through each of those tasks.
Open Template Management
Section titled “Open Template Management”All of the procedures below start from the same place:
-
Sign in to the PBX (Private Branch Exchange, your phone system) web portal and go to Integrations > CRM.
-
In the top-right corner of the page, click Template Management.
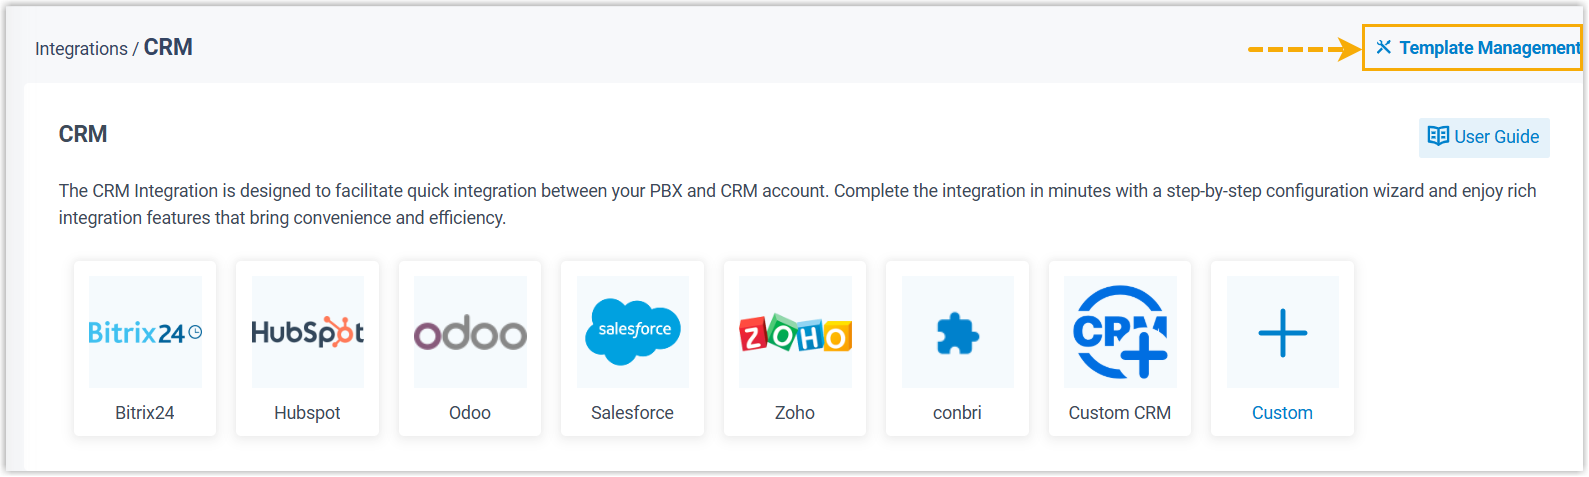
The page opens with two tabs: Default Templates (the built-in templates that ship with your system) and Custom Templates (the copies you create).
Update a default template
Section titled “Update a default template”Cloud Voice periodically publishes new versions of the built-in templates. You can check for an update and choose whether to apply it.
-
On the Default Templates tab, click Check for New Template at the top of the list.
-
If an update is available, click the download icon (
 ) next to the template you want, then click OK to confirm.
 -
To review what changed, click the view icon (
 ) beside the template.
Save a default template as a custom template
Section titled “Save a default template as a custom template”Copying a default template gives you an editable version you can tailor to your needs while leaving the original untouched.
-
On the Default Templates tab, click the save-as icon (
 ) beside the template you want to copy.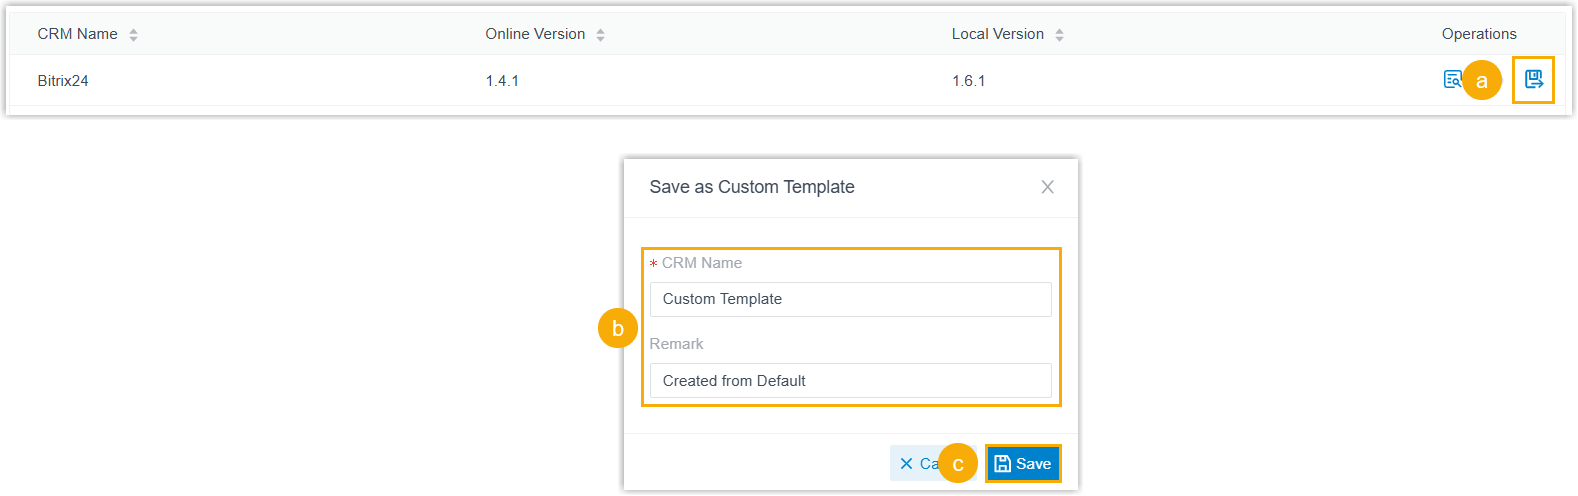
-
In the dialog, fill in the template details:
- CRM Name: Give the template a name.
- Remark: (Optional) Add a note describing the template.
-
Click Save.
The copy appears on the Custom Templates tab, ready to edit.
Edit a custom template
Section titled “Edit a custom template”You can adjust a custom template in one of two ways: through its configuration page or by editing its XML directly. XML (Extensible Markup Language) is the raw text format the template is stored in.
Edit through the configuration page
Section titled “Edit through the configuration page”-
On the Custom Templates tab, click the edit icon (
 ) beside the template.
 -
Adjust the template settings in the dialog as needed.
-
Click Save.
-
If the template is already integrated with your PBX, push the changes to the live integration:
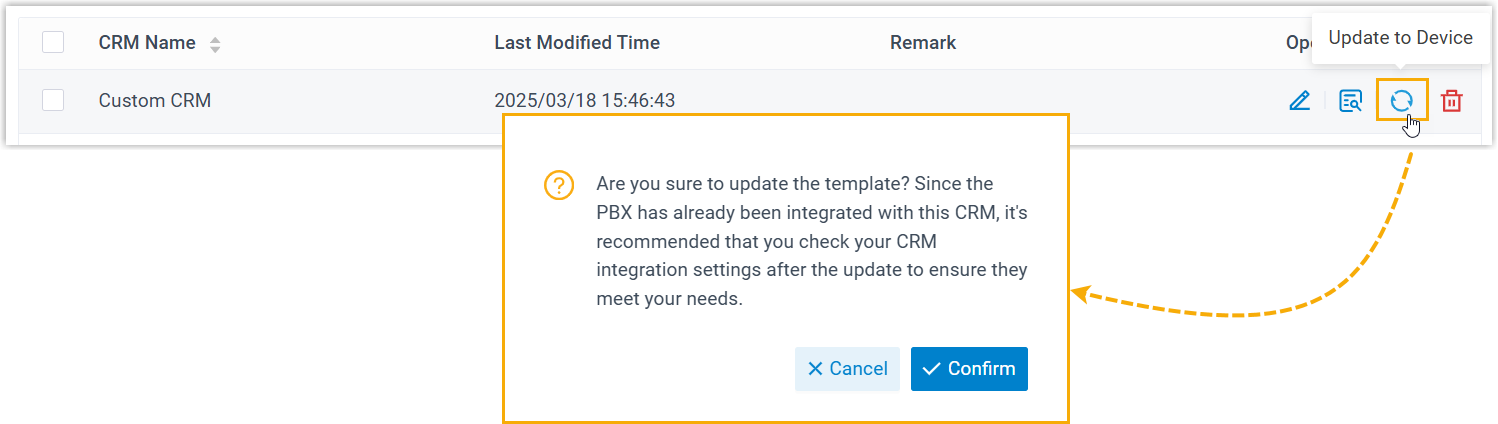
- Click the refresh icon (
 ) beside the template.
 - In the dialog, click Confirm.
- Click the refresh icon (
Edit the XML directly
Section titled “Edit the XML directly”-
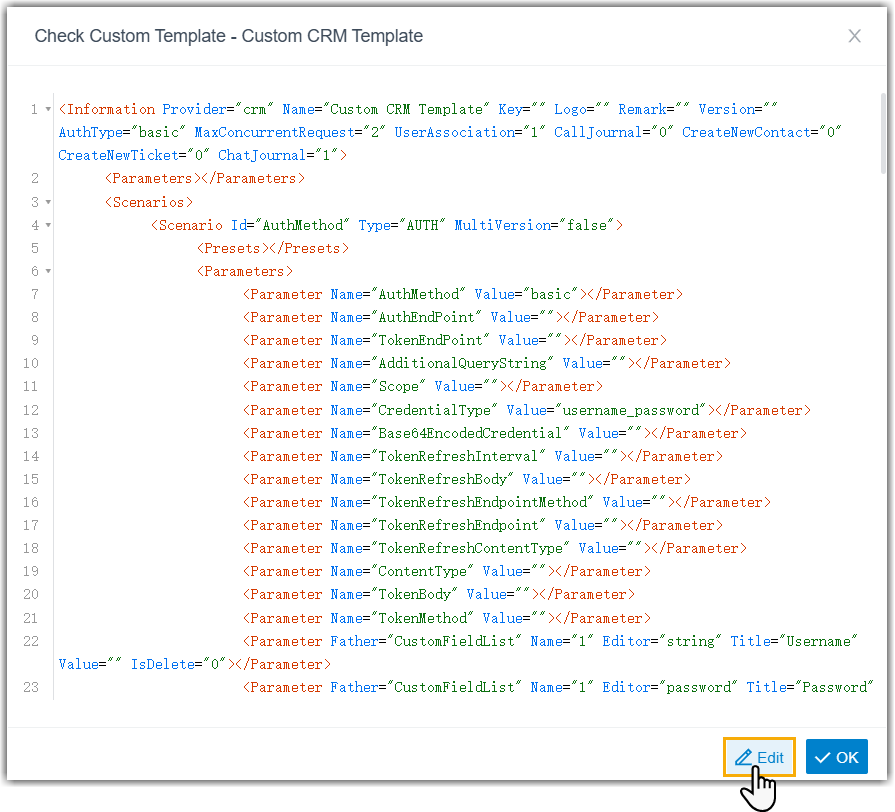
On the Custom Templates tab, click the view icon (
) beside the template. -
At the bottom of the view window, click Edit.
-
Make your changes to the XML, then click Save.
Download custom templates
Section titled “Download custom templates”Downloading a template lets you keep a backup, load it onto another PBX, or edit its parameters by hand.
- Open the Custom Templates tab.
- Select the template or templates you want, then click Download at the top of the list.
The template files are saved to your computer.
Upload a custom template
Section titled “Upload a custom template”Uploading a template file is a quick way to add an integration you built elsewhere.
- Open the Custom Templates tab.
- At the top of the list, click Upload.
- In the dialog, click Browse and select the template file.
- Click Save.
The template is added to your system and appears in the list.
Delete custom templates
Section titled “Delete custom templates”- Open the Custom Templates tab.
- To remove one template, click the delete icon (
 ) beside it, then click OK in the dialog.
 - To remove several at once, select the templates you want, click Delete at the top of the list, then click OK in the dialog.
Question about this page?
Ask the AI assistant. It starts from this page, then searches the rest of the docs.
Ask Cloud Voice AI
Answers are AI-generated from the docs and may contain mistakes. Verify with the linked pages.