
Synchronize Users from Google Workspace to Cloud Voice
Once Cloud Voice is connected to Google Workspace, the next step is to bring your Google users into the phone system and give each of them an extension. Cloud Voice lets you decide exactly which users to synchronize and how their extension numbers are assigned, so you can onboard your whole directory or just a subset of it.
Before you start
Section titled “Before you start”A few things to know before you configure synchronization:
- How many users you can sync. The number of Google users you can bring in is capped by how many extensions your Cloud Voice system is able to create. If you run out of extension capacity, not every user will sync.
- Which users you can sync. Cloud Voice supports four synchronization scopes. Pick the one that matches how you want to onboard your directory.
| Scope | What it covers | How extensions are handled |
|---|---|---|
| All users | Every user in the organization, regardless of account status. | Extensions are created and linked automatically using your assignment rule. |
| Users in a specific organizational unit | Users in one or more organizational units, excluding deleted users. | Extensions are created and linked automatically using your assignment rule. |
| Users in a specific group | Users in one or more groups, excluding deleted users. | Extensions are created and linked automatically using your assignment rule. |
| Specific users | Users you select by hand, excluding archived and deleted users. | You assign an existing extension to each user yourself. |
Open the User Synchronization settings
Section titled “Open the User Synchronization settings”Every procedure below starts from the same place.
- Sign in to the Cloud Voice web portal and go to Integrations > Collaboration.
- Scroll down to the User Synchronization section.
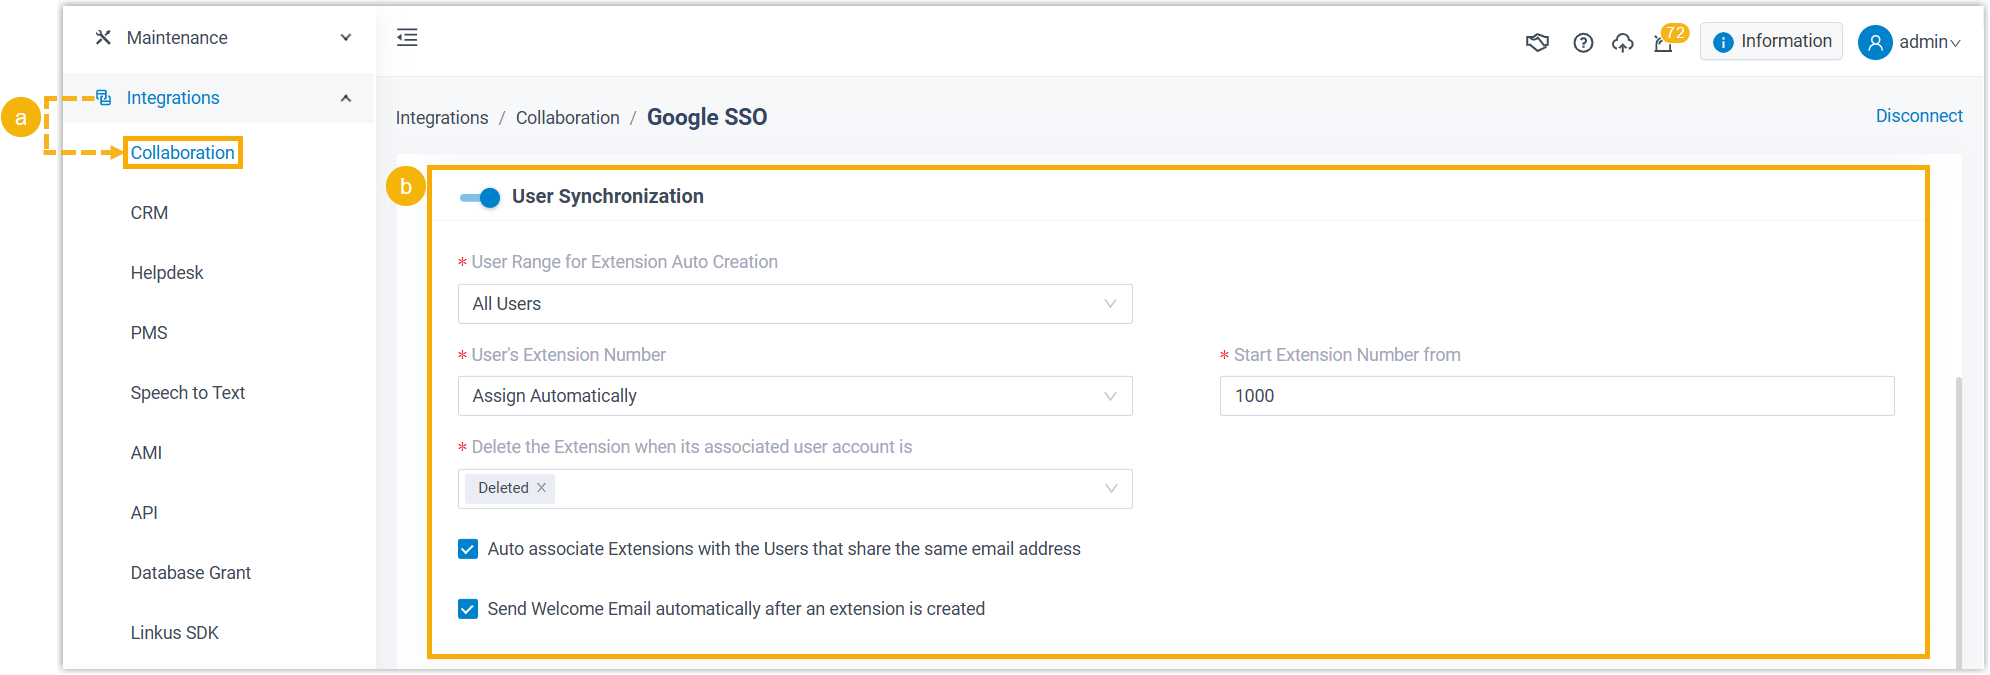
The fields shown in this section change based on what you choose in the User Range for Extension Auto Creation drop-down list. The procedures that follow walk through each range.
Settings you’ll reuse
Section titled “Settings you’ll reuse”The scopes share most of the same options. Here’s what each one does; the individual procedures tell you which apply.
User’s Extension Number: controls how Cloud Voice picks an extension number when it creates extensions automatically.
| Rule | What it does |
|---|---|
| Assign Automatically | Numbers extensions in sequence from a value you choose. Enter that value in Start Extension Number from. |
| Read Specific Property Value | Takes the extension number from a Google user account property. Enter the property in Property Name: for example, externalIds.#(type=="organization").value. |
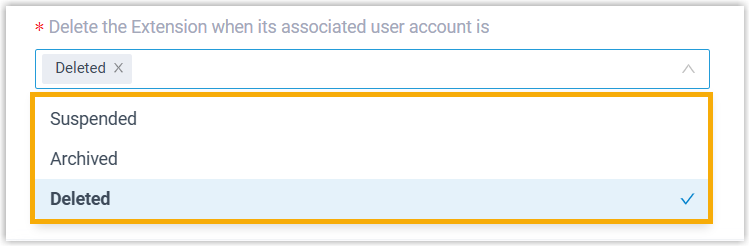
Delete the Extension when its associated user account is: select one or more Google account statuses. When a synced user reaches any of them, Cloud Voice stops syncing that user and removes their extension.
Auto associate Extensions with the Users that share the same email address: decides what happens when a Google user’s Primary email matches the Email Address of an extension that already exists in Cloud Voice.
- Selected: the user is synced and tied to the existing extension, and that extension’s user details are overwritten with the values from Google.
- Cleared: the user is not synced, because Cloud Voice does not allow two extensions to share an email address.
Auto delete the Extensions no longer in sync: when selected, extensions belonging to users that fall outside the current scope are removed automatically. This keeps unused extensions from piling up when you narrow the synchronization scope.
Send Welcome Email automatically after an extension is created: select this to email each newly synced user their Cloud Voice App welcome message.
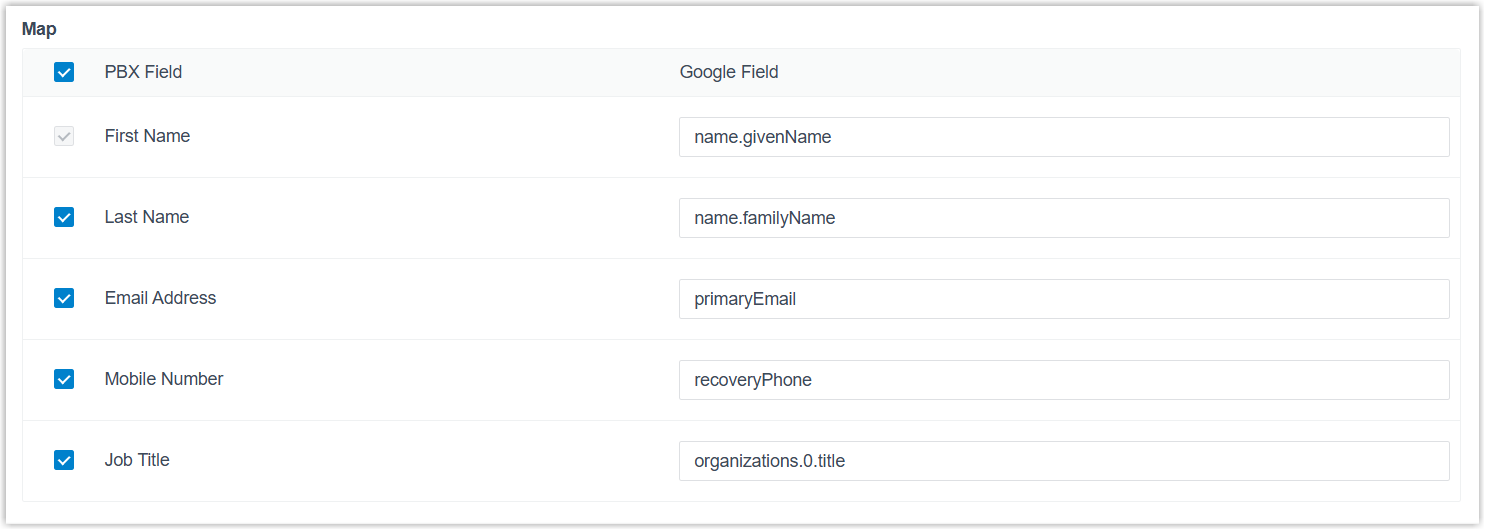
Map: choose which Google user fields to carry into Cloud Voice and pair each one with its matching extension field. See Google’s Google Workspace user property reference for the field names to enter.
Synchronize all users
Section titled “Synchronize all users”-
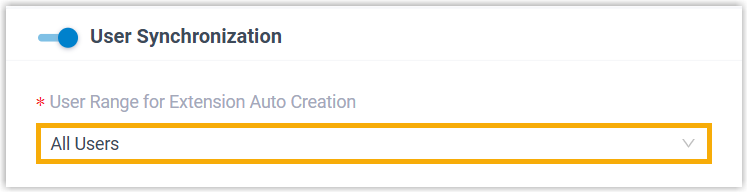
In the User Range for Extension Auto Creation drop-down list, select All Users.
-
Set the extension assignment options that decide how synced users are matched to extensions.

-
Choose a rule in the User’s Extension Number drop-down list.
-
In the Delete the Extension when its associated user account is drop-down list, select the account statuses that should trigger removal.
-
Set Auto associate Extensions with the Users that share the same email address to match how you want to handle users whose email already exists on an extension.
-
-
To email new users their Cloud Voice App details, select Send Welcome Email automatically after an extension is created.
-
Optional: In the Map section, pick and pair the user fields you want to synchronize.
-
Click Save.
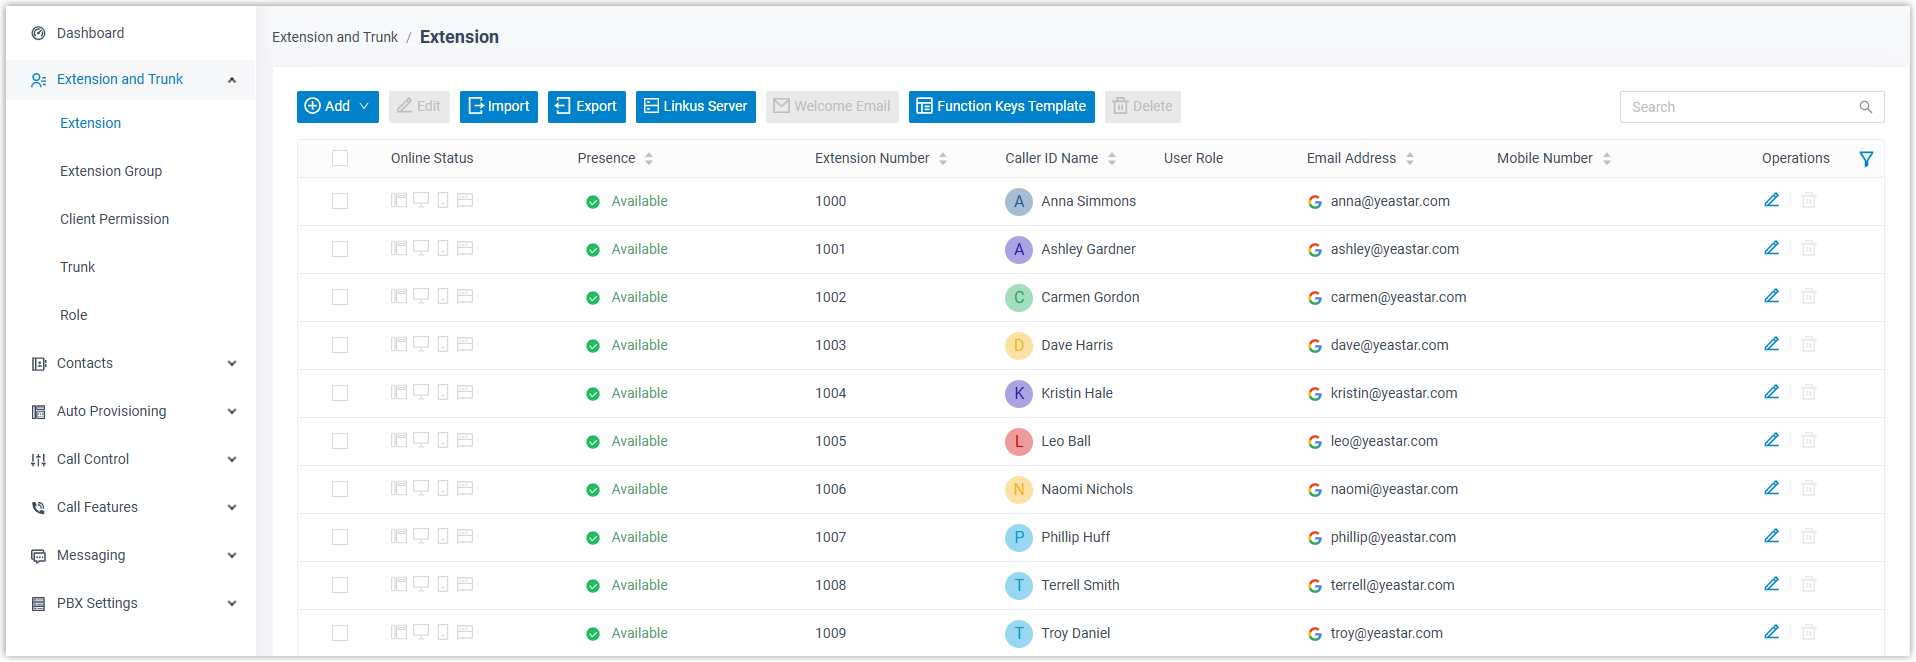
Cloud Voice runs the first synchronization right away. A banner reports the result, and every user is synced and given an extension under Extension and Trunk > Extension.

Synced extensions are flagged with a Google marker  and cannot be deleted from Cloud Voice.
Synchronize users in a specific organizational unit
Section titled “Synchronize users in a specific organizational unit”-
Point Cloud Voice at the organizational units you want to sync.

- In the User Range for Extension Auto Creation drop-down list, select Users in Specific Organizational Unit.
- In the Organizational Units drop-down list, choose one or more units.
-
Set the extension assignment options.
-
To have Cloud Voice remove extensions for users that later fall out of scope, select Auto delete the Extensions no longer in sync.
-
Choose a rule in the User’s Extension Number drop-down list.
-
In the Delete the Extension when its associated user account is drop-down list, select the account statuses that should trigger removal.
-
Set Auto associate Extensions with the Users that share the same email address as needed.
-
-
To email new users their Cloud Voice App details, select Send Welcome Email automatically after an extension is created.
-
Optional: In the Map section, pick and pair the user fields you want to synchronize.
-
Click Save.
Cloud Voice runs the first synchronization right away and shows a result banner.

Users from the selected units are synced and given extensions under Extension and Trunk > Extension, each flagged with a Google marker and locked against deletion in Cloud Voice.
Synchronize users in a specific group
Section titled “Synchronize users in a specific group”-
Point Cloud Voice at the groups you want to sync.

- In the User Range for Extension Auto Creation drop-down list, select Users in Specific Group.
- In the Group drop-down list, choose one or more groups.
-
Set the extension assignment options.
- To have Cloud Voice remove extensions for users that later fall out of scope, select Auto delete the Extensions no longer in sync.
- Choose a rule in the User’s Extension Number drop-down list.
- In the Delete the Extension when its associated user account is drop-down list, select the account statuses that should trigger removal.
- Set Auto associate Extensions with the Users that share the same email address as needed.
-
To email new users their Cloud Voice App details, select Send Welcome Email automatically after an extension is created.
-
Optional: In the Map section, pick and pair the user fields you want to synchronize.
-
Click Save.
Cloud Voice runs the first synchronization right away and shows a result banner. Users from the selected groups are synced and given extensions under Extension and Trunk > Extension, each flagged with a Google marker and locked against deletion in Cloud Voice.
Synchronize specific users
Section titled “Synchronize specific users”Use this scope when you want to hand-pick users and tie each one to an extension you’ve already created.
-
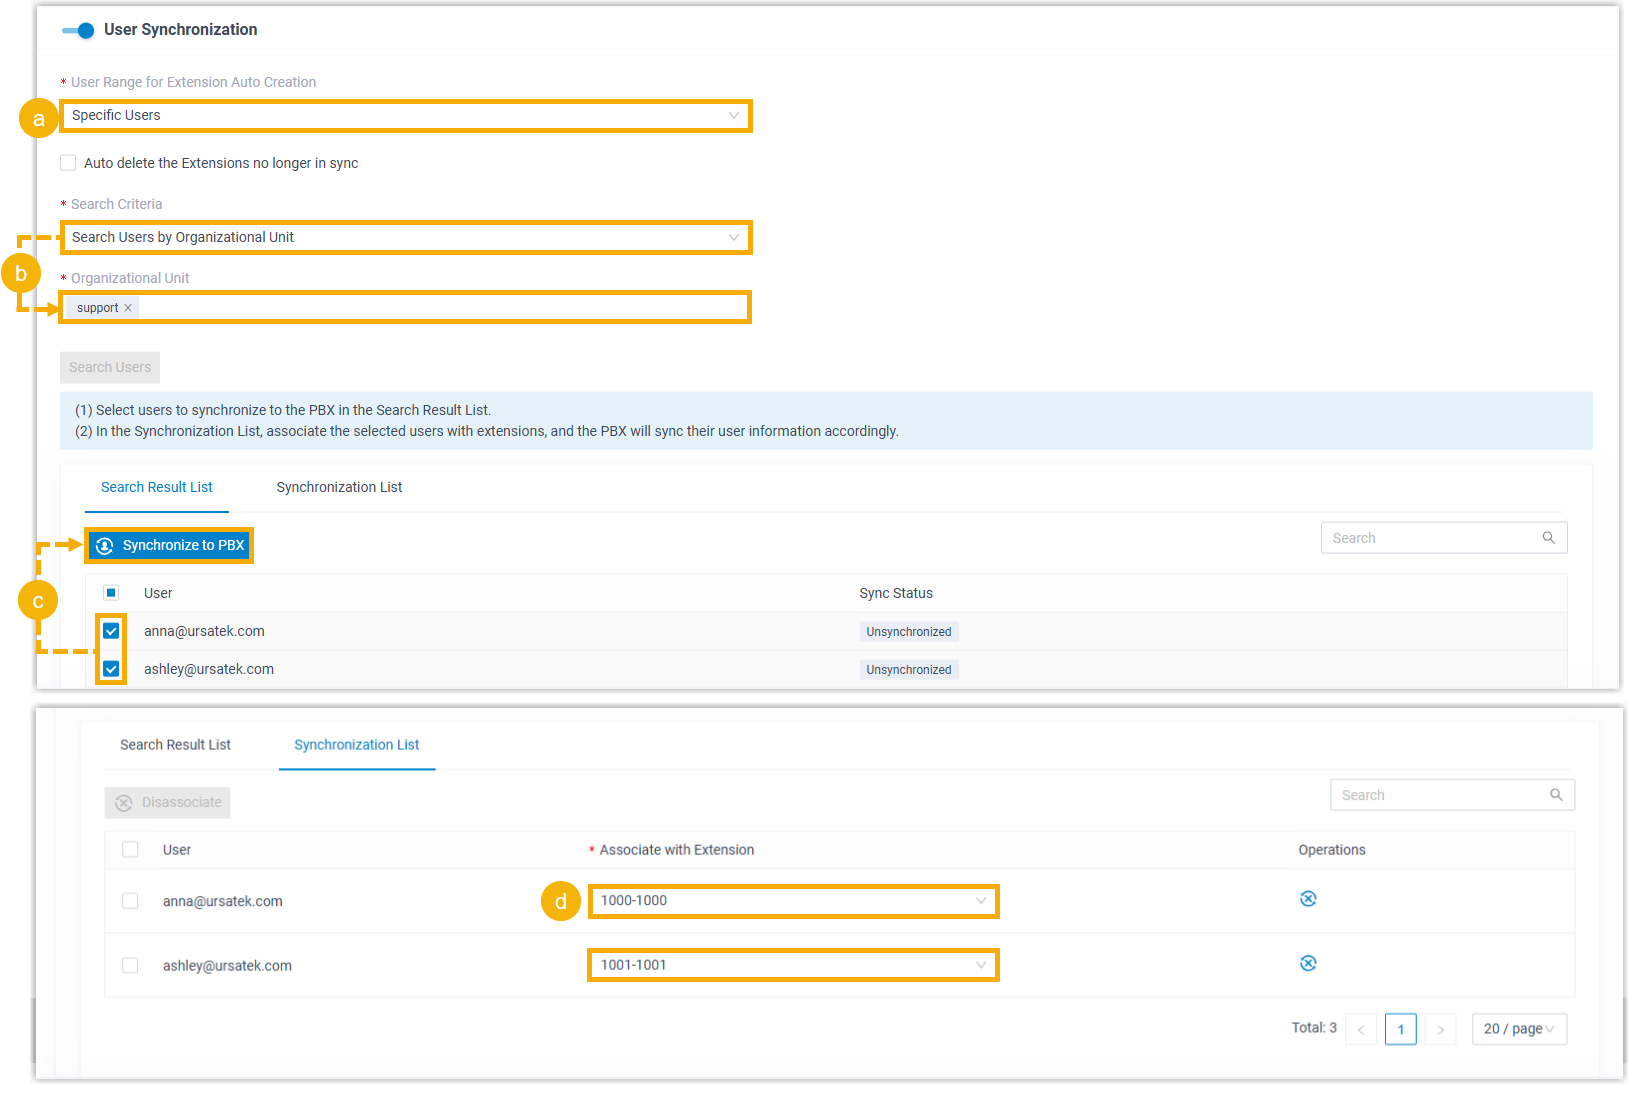
In the User Range for Extension Auto Creation drop-down list, select Specific Users.
-
In the Search Criteria drop-down list, choose whether to search by organizational unit or by group, specify the unit or group, then click Search Users. Matching users appear in the results.
-
In the Search Result List, select the users you want and click Synchronize to Cloud Voice.
-
In the Synchronization List, choose an extension from the drop-down list for each user to link them together.
-
Set the extension management options that decide how these extensions are handled when the scope or a user’s account status changes.
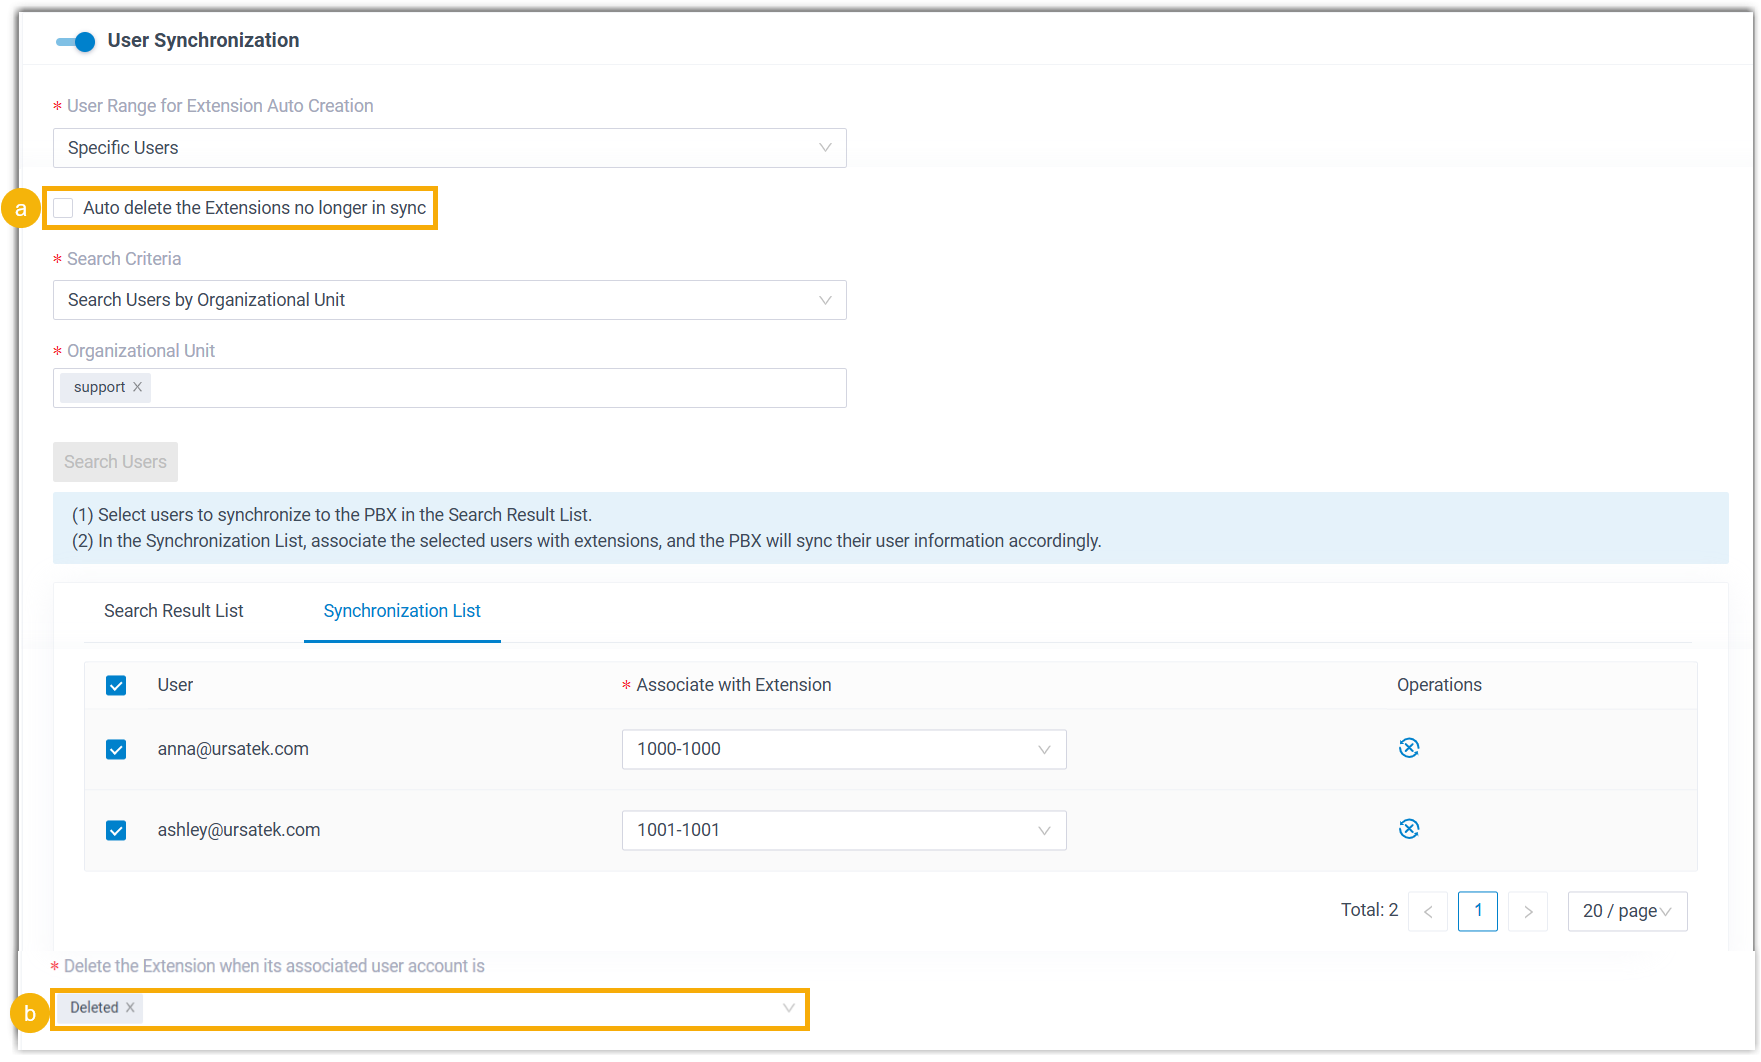
- To have Cloud Voice remove extensions for users that later fall out of scope, select Auto delete the Extensions no longer in sync.
- In the Delete the Extension when its associated user account is drop-down list, select the account statuses that should trigger removal.
-
To email new users their Cloud Voice App details, select Send Welcome Email automatically after an extension is created.
-
Optional: In the Map section, pick and pair the user fields you want to synchronize.
-
Click Save.
Cloud Voice runs the first synchronization right away and shows a result banner. The selected users are synced and given their assigned extensions under Extension and Trunk > Extension, each flagged with a Google marker and locked against deletion in Cloud Voice.
What to do next
Section titled “What to do next”To let synced users open the Cloud Voice App with their Google credentials, turn on Single Sign-on. See Allow Users to Log in to the Cloud Voice App with Google SSO.
Question about this page?
Ask the AI assistant. It starts from this page, then searches the rest of the docs.
Ask Cloud Voice AI
Answers are AI-generated from the docs and may contain mistakes. Verify with the linked pages.