
Integrate Cloud Voice with Google Workspace
Linking Cloud Voice to Google Workspace lets your organization use Google Single Sign-On (Google SSO) and pull user accounts directly from your Google directory. Completing the connection is a three-part process: you collect a pair of redirect URIs (Uniform Resource Identifiers, the web addresses Google returns a user to after sign-in) from Cloud Voice, build the matching project and credentials in Google Workspace, and then paste those credentials back into Cloud Voice to finish the handshake.
Requirements
Section titled “Requirements”Before you begin, confirm both platforms meet the following:
| Platform | Requirement |
|---|---|
| Google Workspace | Business or Enterprise edition. |
| Cloud Voice | Firmware 84.19.0.22 or later, on the Enterprise Plan or Ultimate Plan. |
Step 1. Collect the redirect URIs from Cloud Voice
Section titled “Step 1. Collect the redirect URIs from Cloud Voice”Google Workspace needs two redirect URIs from Cloud Voice before you can register the application, so gather them first.
-
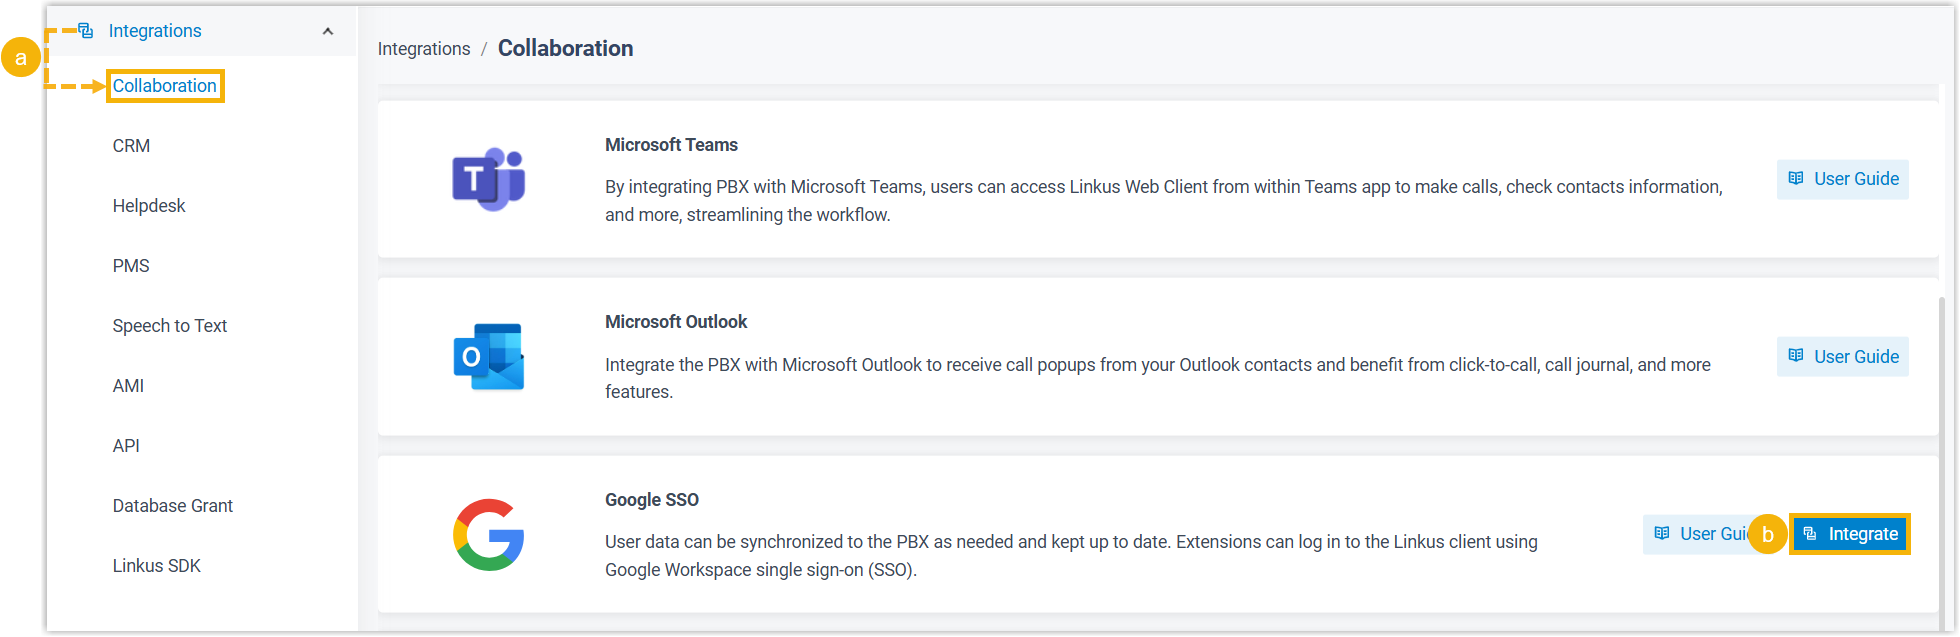
Open the Google Workspace integration page:
- Sign in to the Cloud Voice web portal and go to Integrations > Collaboration.
- Find Google SSO in the list and click Integrate on its row.
-
In the App Registration section, copy and save both redirect URIs.

- Redirect URI: Where the browser lands once integration authentication succeeds.
- Client SSO Redirect URI: The address that lets users sign in to the Cloud Voice App with their Google credentials.
Step 2. Build the project and credentials in Google Workspace
Section titled “Step 2. Build the project and credentials in Google Workspace”Sign in with a Google Workspace super admin account to create a dedicated Cloud project and enable the APIs (Application Programming Interfaces) the integration depends on.
-
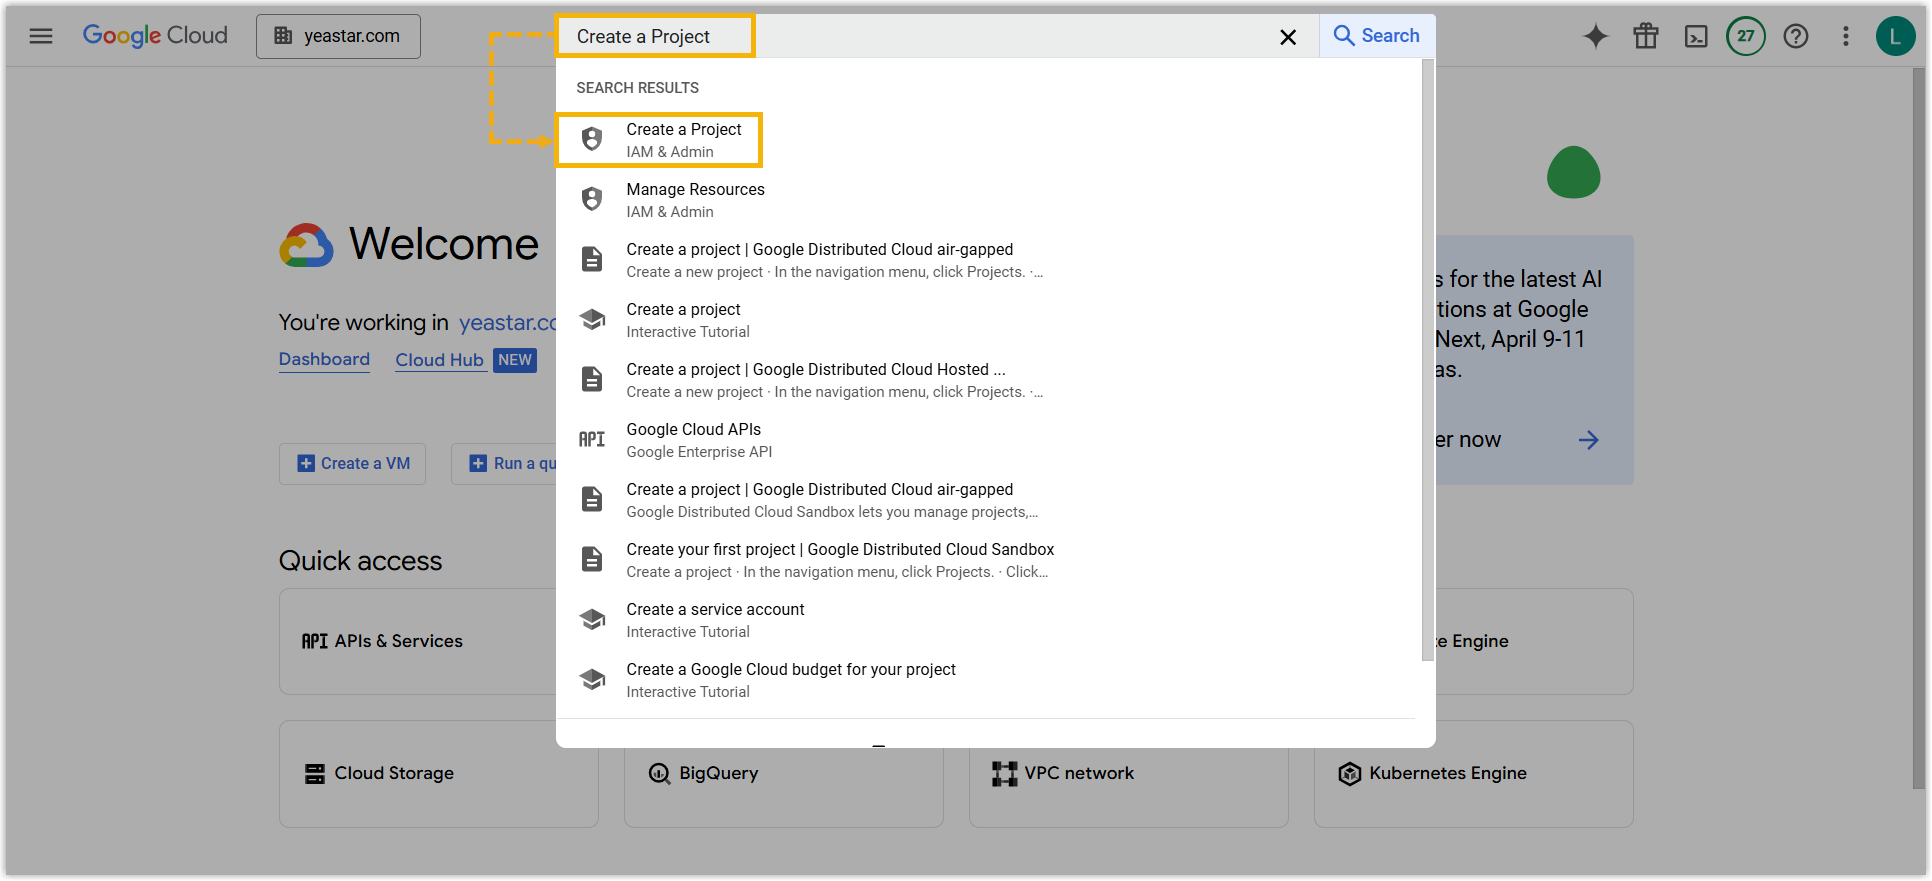
Create a Cloud project for your organization:
-
Sign in to the Google Cloud console, search for Create a Project, and open the matching result.
-
Fill in the project details and click Create.
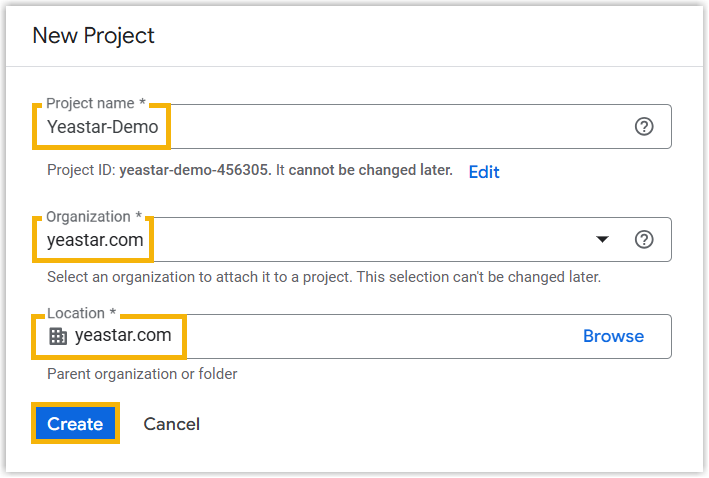
- Project name: A label that helps you recognize the project later.
- Organization: The organization the project belongs to.
- Location: The place within your organization’s resource hierarchy where the project is created.
-
-
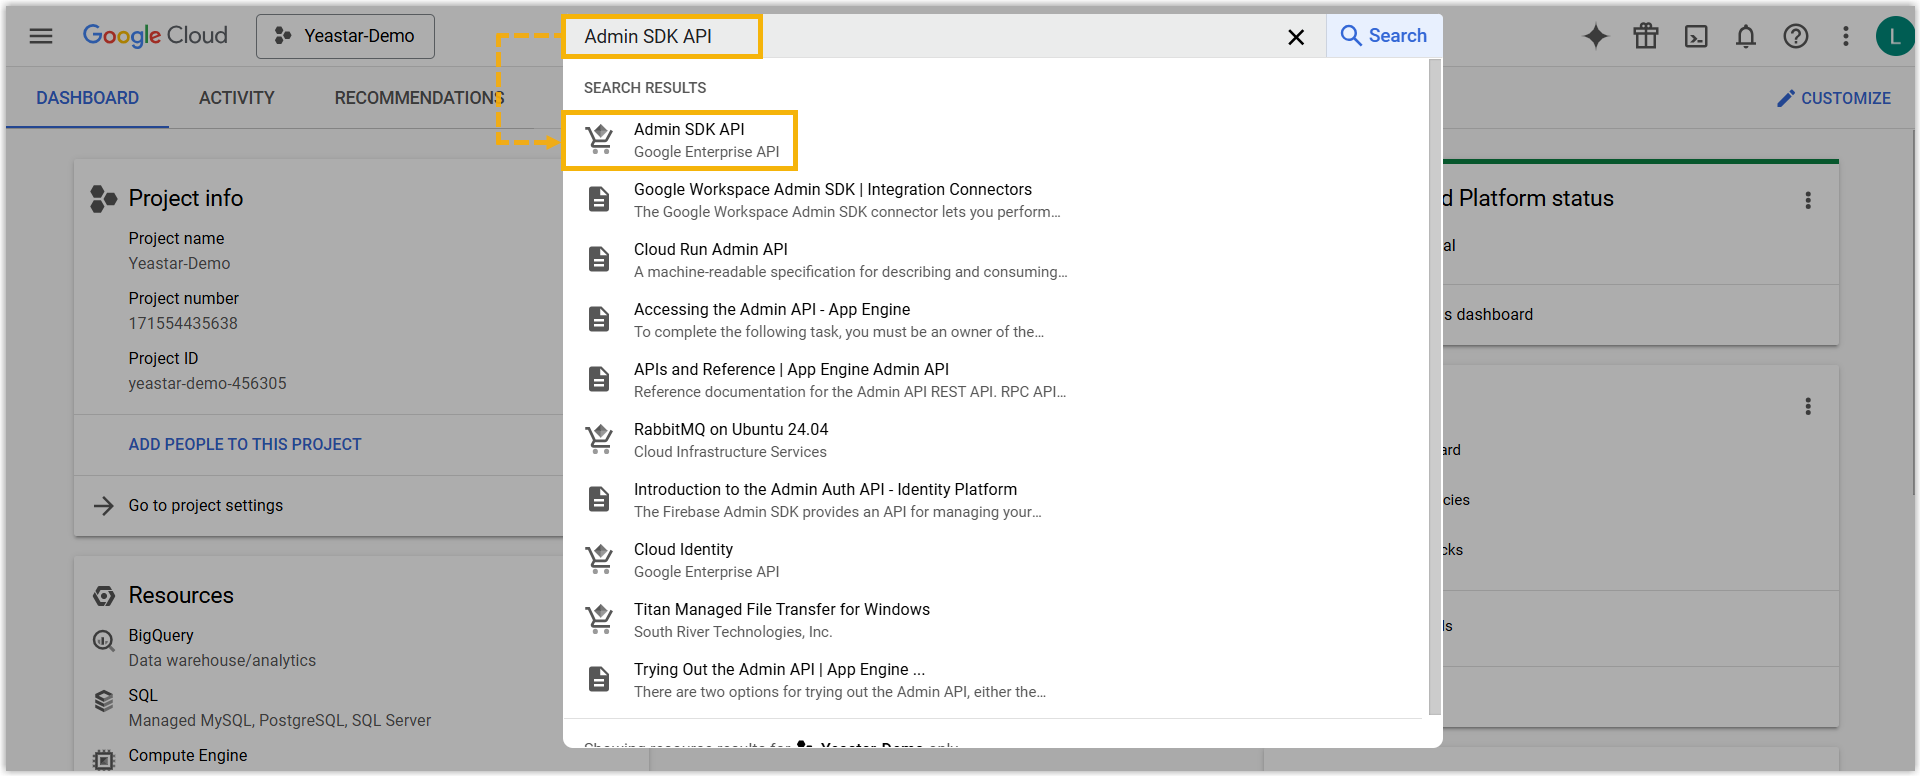
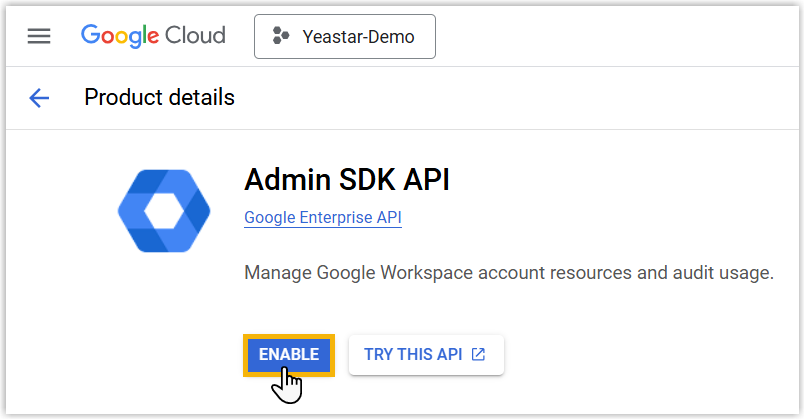
Turn on the Admin SDK API so the integration can reach user data across your organization:
-
Search for Admin SDK API and open it from the results.
-
Click ENABLE.
-
-
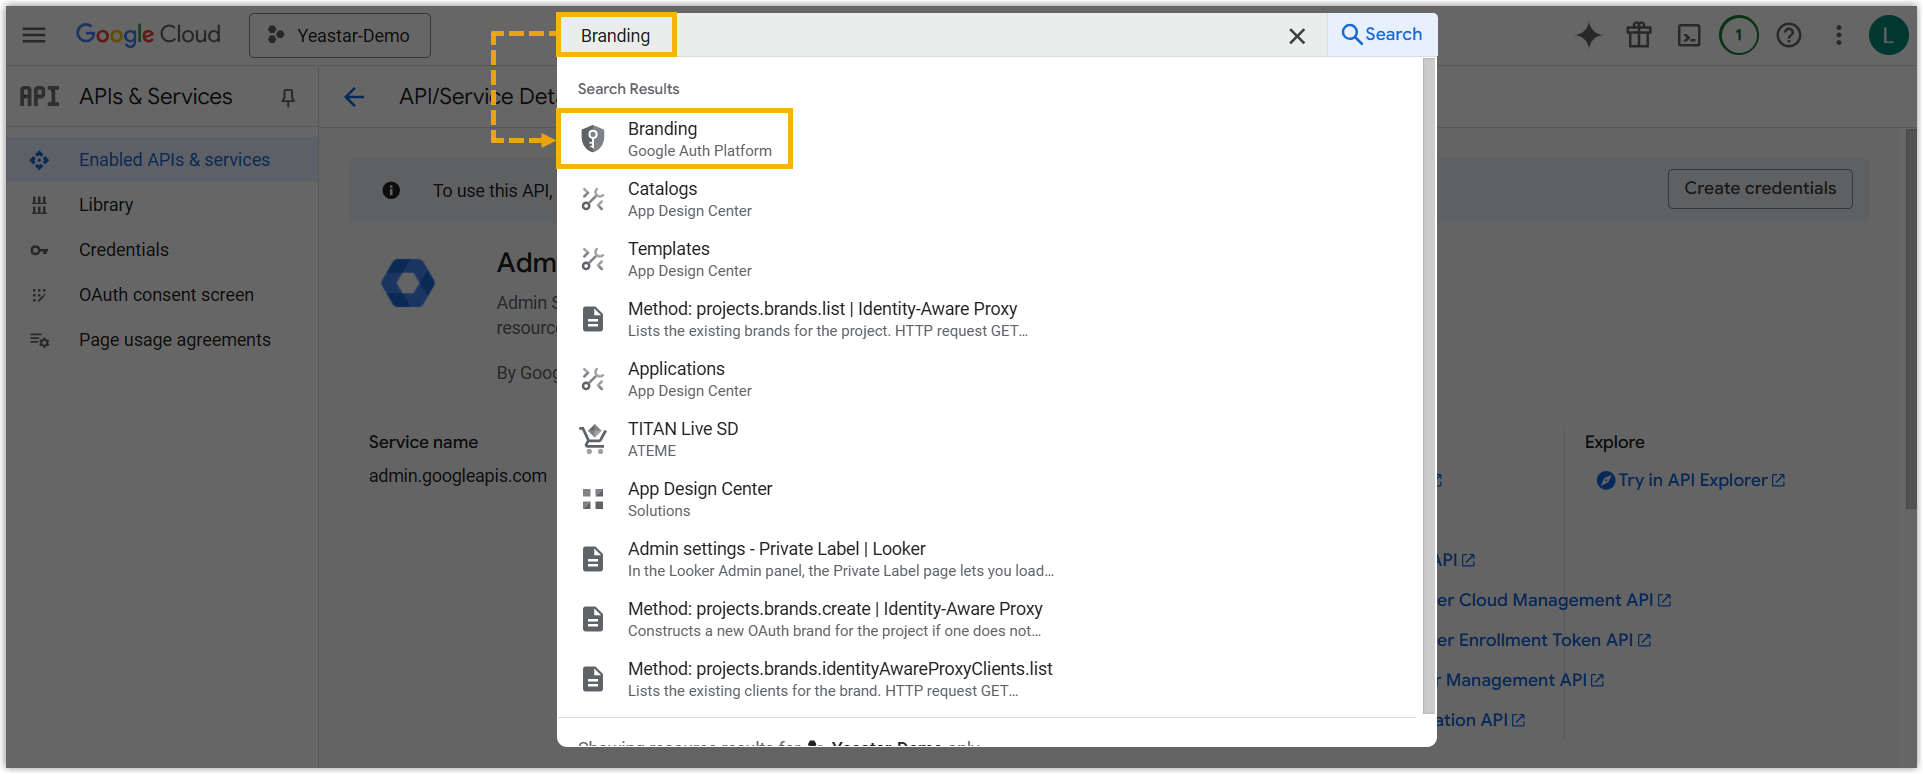
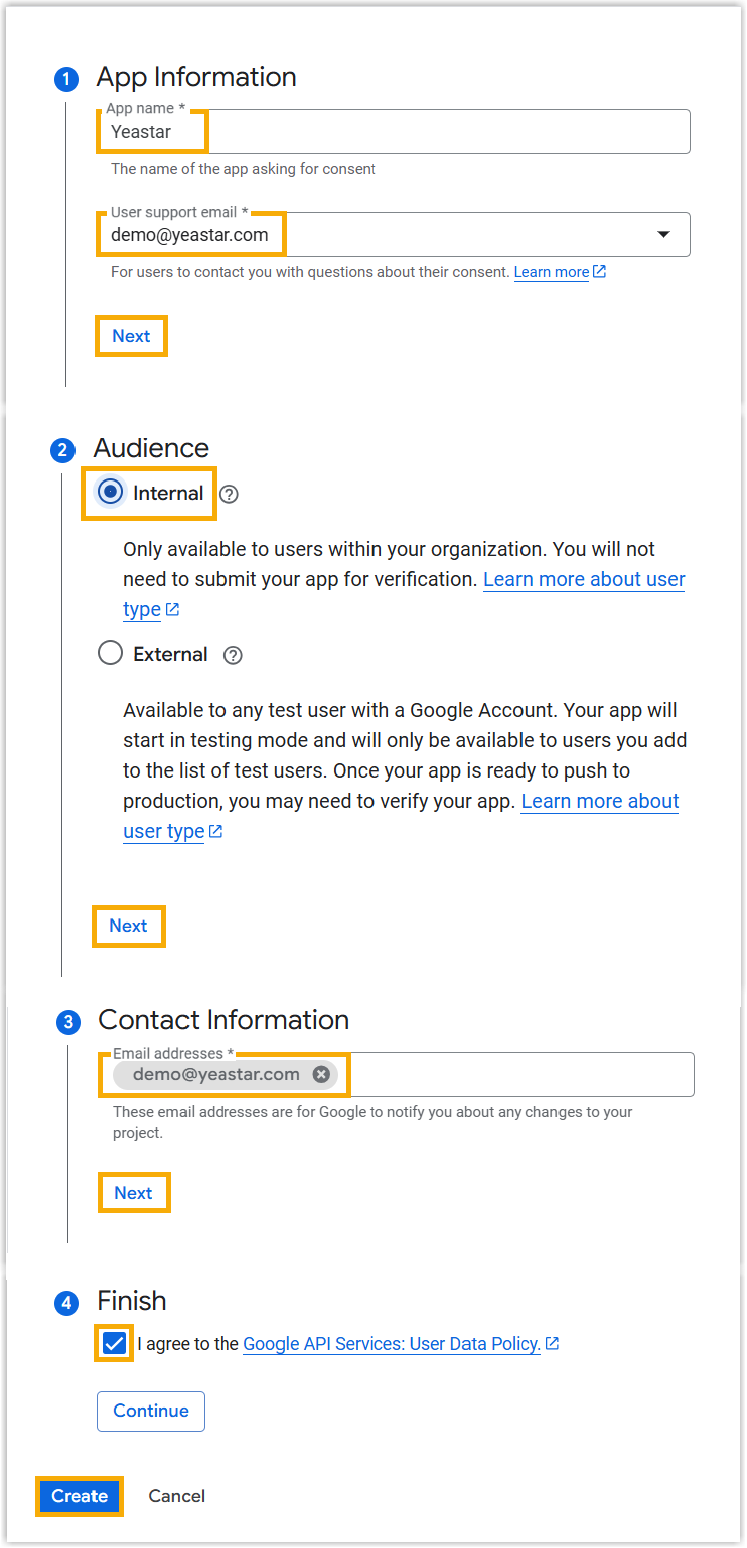
Set up the OAuth (Open Authorization) consent screen. Its branding details appear whenever someone authorizes the application you create in the next step:
-
Search for Branding and open it from the results.
-
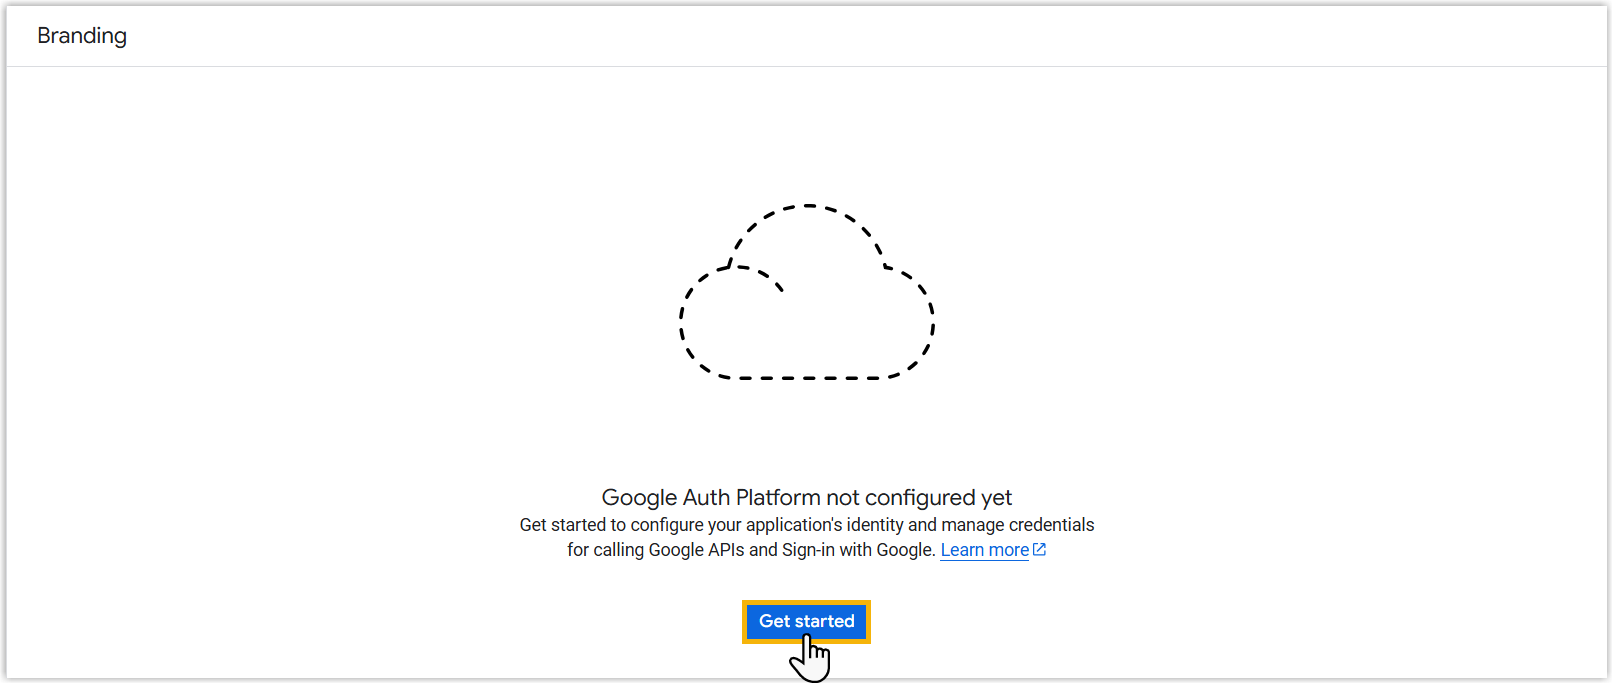
Click Get Started.
-
Work through the wizard to complete the consent screen settings.
-
-
Create a web application to generate the credentials that let Cloud Voice authenticate against your directory:
-
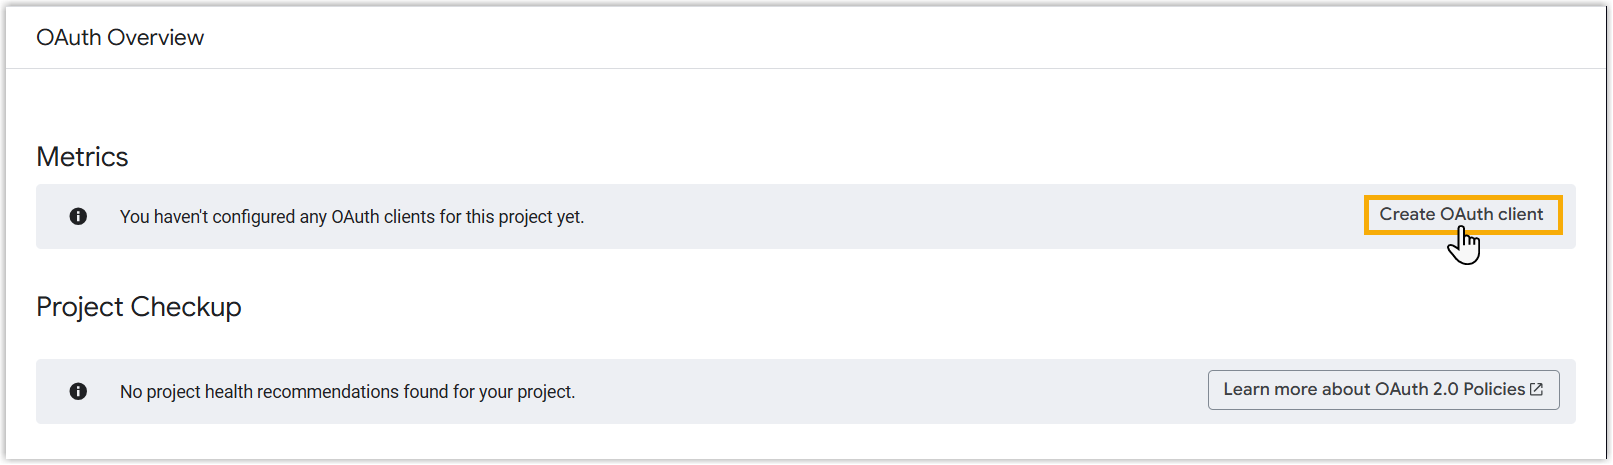
Click Create OAuth client.
-
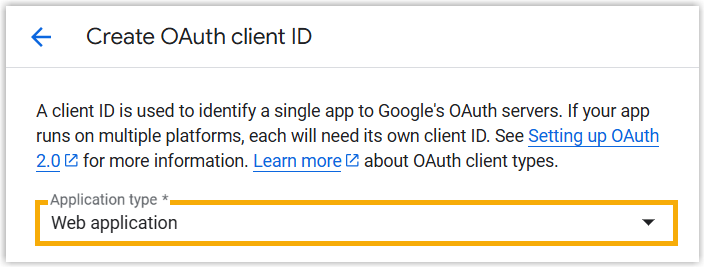
In the Application type drop-down, choose Web application.
-
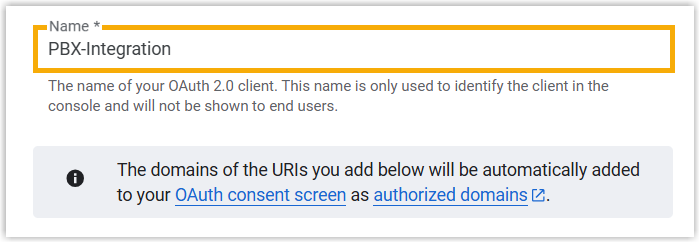
In the Name field, enter a label for the application.
-
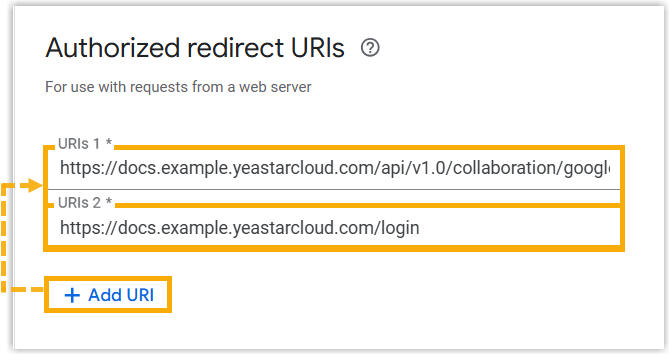
Under Authorized redirect URIs, add both redirect URIs you copied from Cloud Voice in Step 1.
-
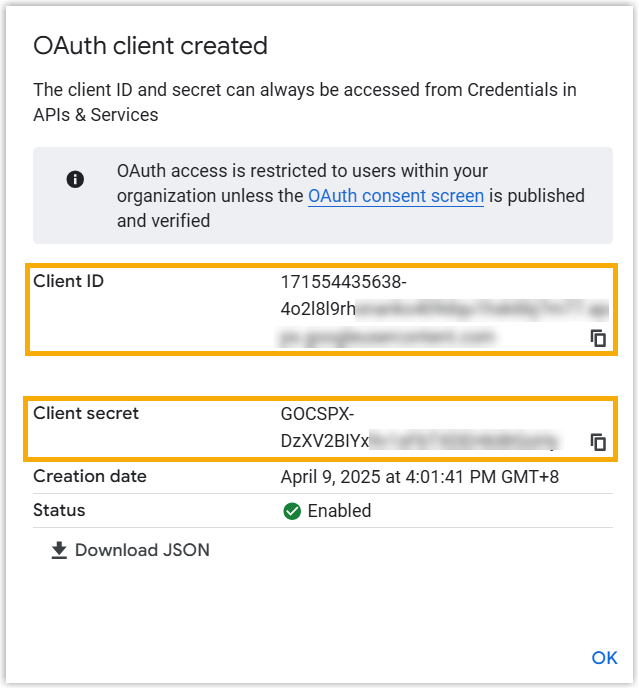
Click Create. Google displays the new credentials in a pop-up window.
-
Copy and save the client ID and client secret: you enter both in Cloud Voice in the next step.
-
Step 3. Finish the connection in Cloud Voice
Section titled “Step 3. Finish the connection in Cloud Voice”Return to Cloud Voice and enter the credentials to complete the integration.
-
Open the Google Workspace integration page again:
- Sign in to the Cloud Voice web portal and go to Integrations > Collaboration.
- Click Integrate on the Google SSO row.
-
In the Certificates & Secrets section, paste the client ID and client secret from Google Workspace.

-
Click Save. Cloud Voice sends you to the Google sign-in page.
-
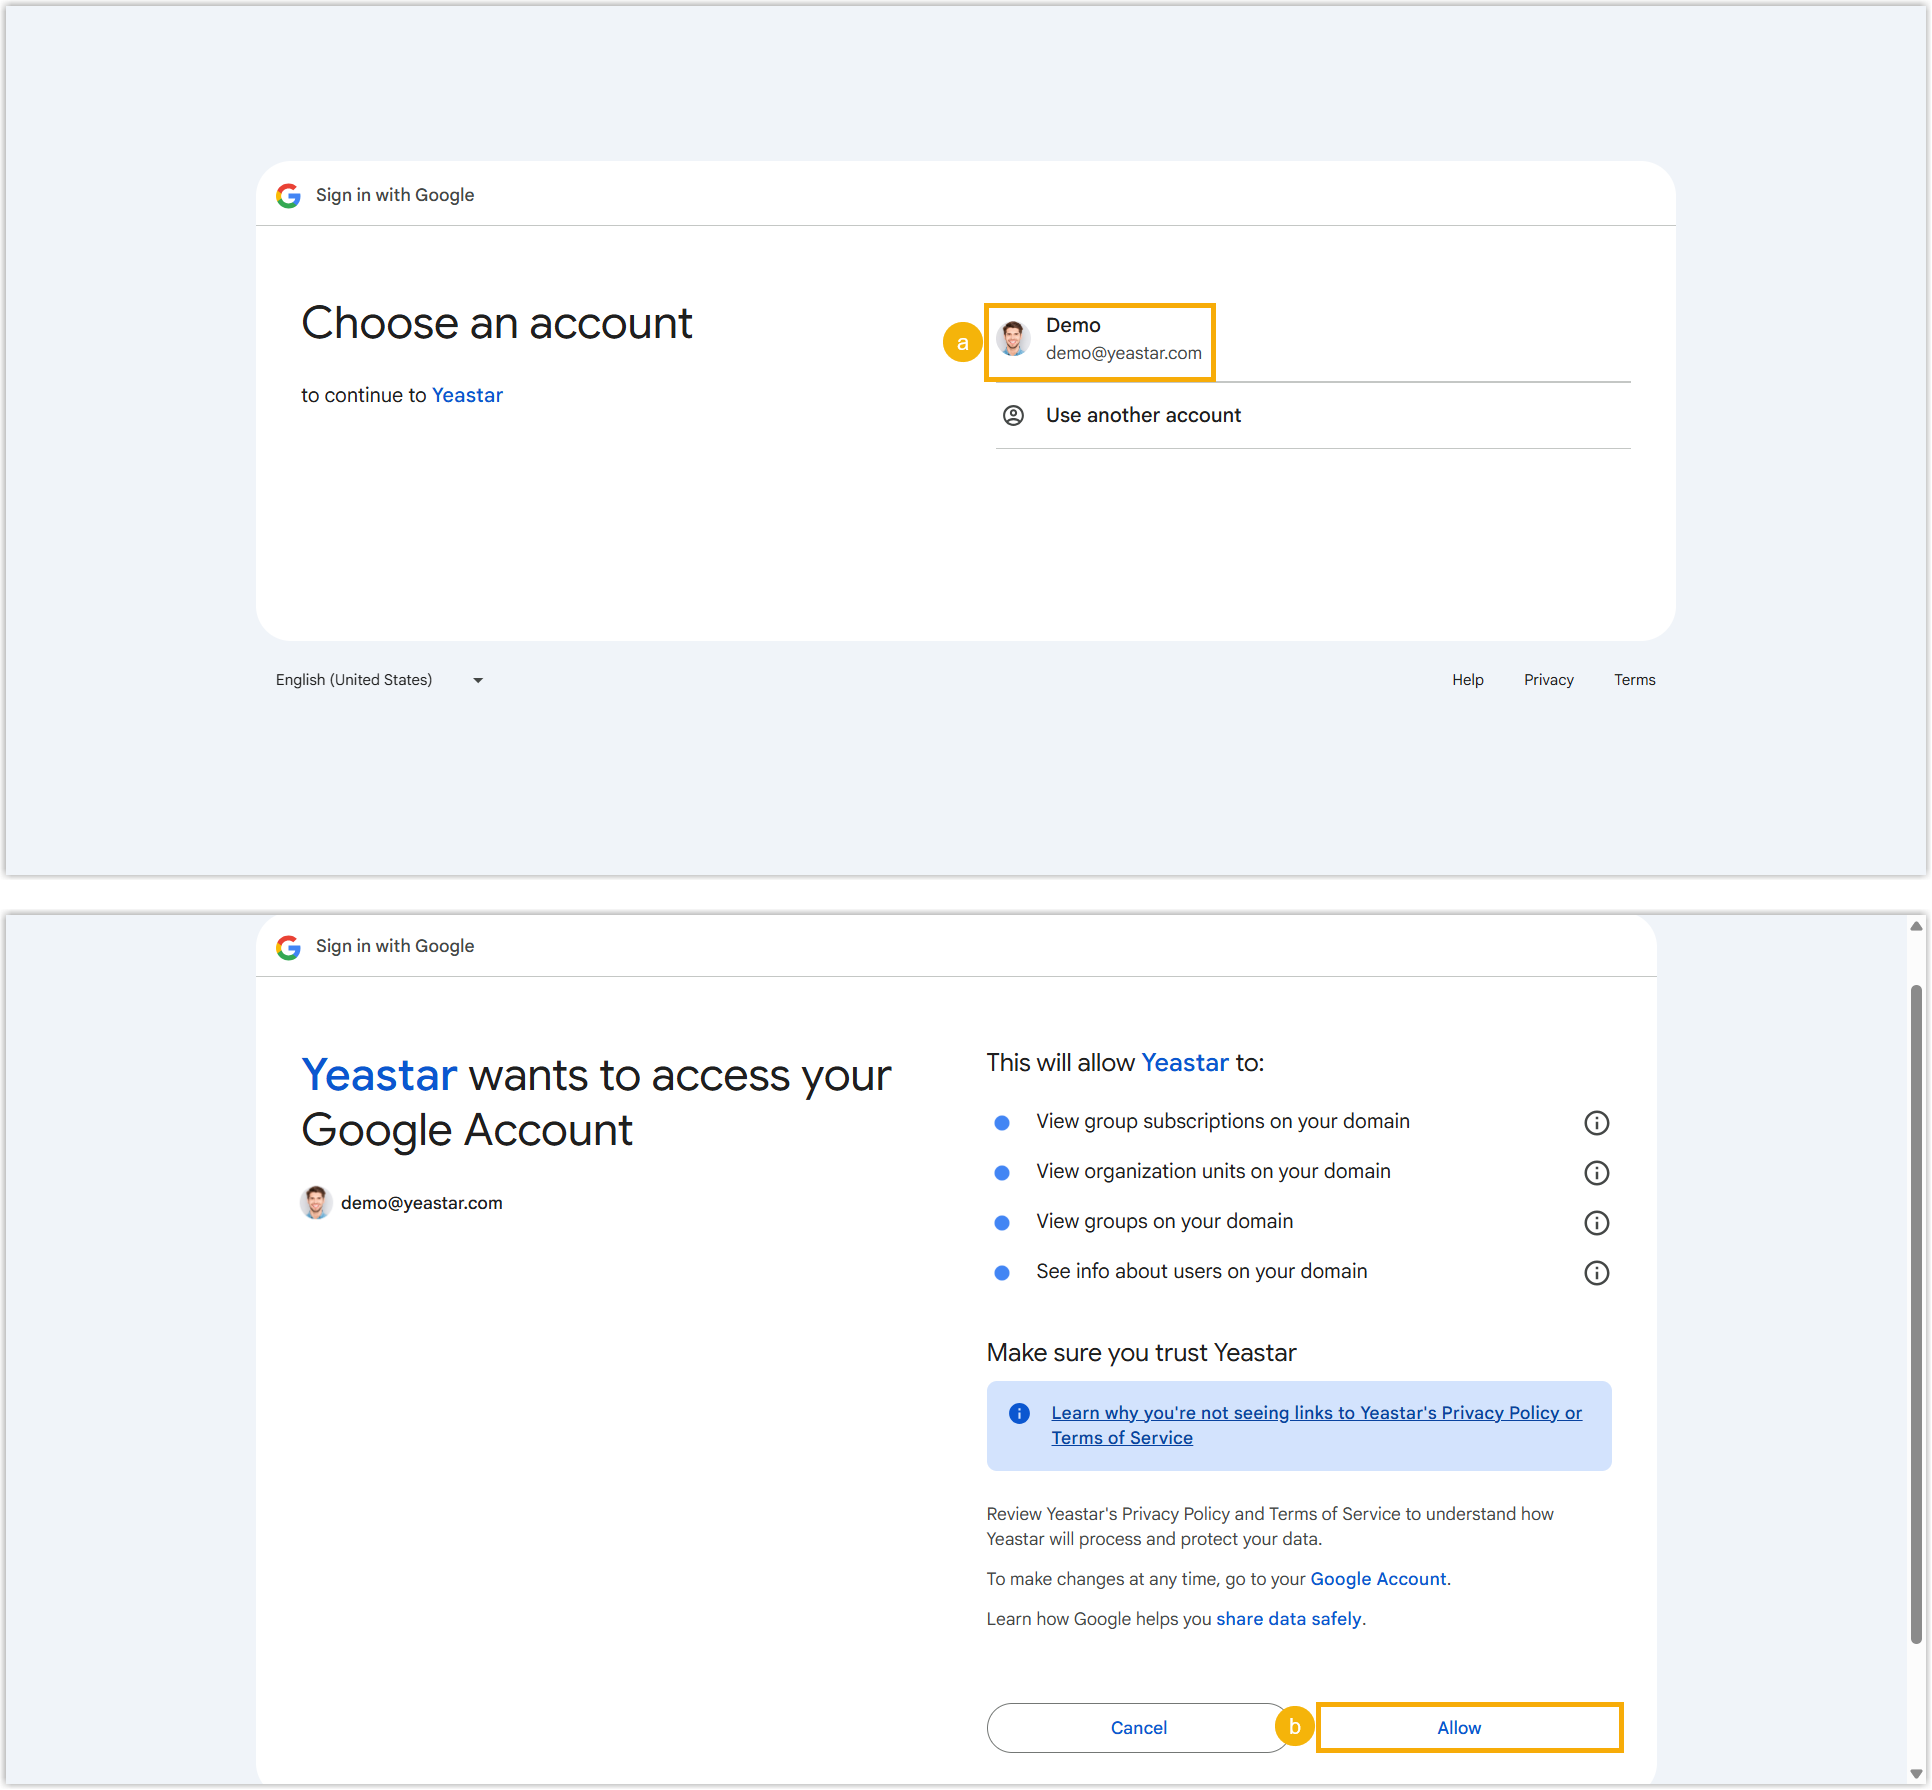
Sign in with your Google Workspace super admin account and authorize the web application to access your organization’s user data.
-
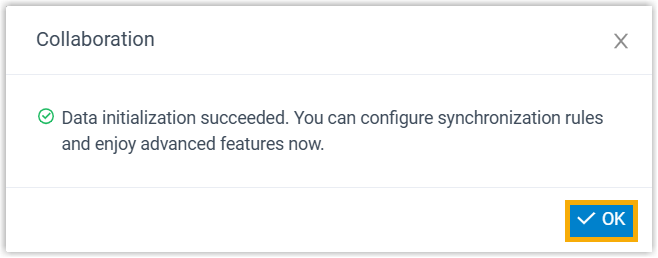
Back in the Cloud Voice portal, click OK to close the dialog.
Result
Section titled “Result”The integration now shows a status of Connected, confirming that Cloud Voice is linked to your Google Workspace.

What to do next
Section titled “What to do next”Synchronize users from Google Workspace to Cloud Voice so their Google accounts map to extensions they can use for calls.
Question about this page?
Ask the AI assistant. It starts from this page, then searches the rest of the docs.
Ask Cloud Voice AI
Answers are AI-generated from the docs and may contain mistakes. Verify with the linked pages.