
Set Up CRM Integration Features
After your phone system is linked to a custom CRM (Customer Relationship Management system, the tool your team uses to track contacts and deals), you decide which integration features to switch on. Each one is configured independently, and together they keep contacts, calls, and chat history flowing between Cloud Voice and your CRM. This page covers how to set up each feature.
Prerequisites
Section titled “Prerequisites”You have already connected Cloud Voice to your custom CRM using an integration template.
Synchronize contacts
Section titled “Synchronize contacts”With contact synchronization on, every inbound and outbound call prompts a lookup in the CRM. When the number matches a CRM record, that contact is copied into a linked Cloud Voice phonebook. Synchronized contacts are read-only within the phone system.
-
Sign in to the phone system portal and go to Integrations > CRM.
-
In the Synchronize Contacts Automatically section, enable the switch.
-
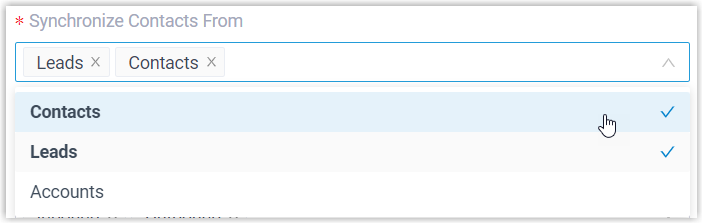
From the Synchronize Contacts From drop-down, choose which contact type or types to pull from the CRM.
-
From the Synchronize to Phonebook drop-down, select an empty phonebook, or create a new one, to hold the contacts brought over from the CRM.

-
Use the Always Query CRM option to decide whether contacts are searched in the CRM in real time.

-
On: the phone system queries the CRM live for contact details, and users of the linked extensions can search CRM contacts as they dial from the Cloud Voice App.
-
Off: the phone system only queries the CRM when no match is found among your company contacts.
-
-
Click Save.
Create contacts in the CRM
Section titled “Create contacts in the CRM”With this feature on, a new record can be added to the CRM, automatically or by the user, depending on your settings, whenever a linked extension calls, or is called by, a number the CRM doesn’t already know.
-
Go to Integrations > CRM.
-
In the Create New Contact section, enable the switch.
-
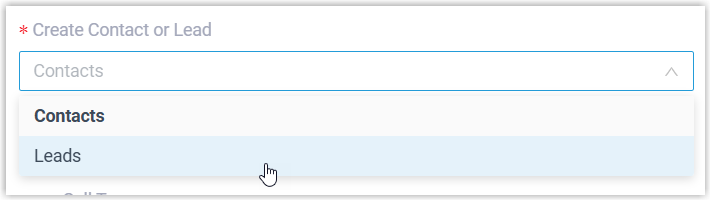
From the Create Contact or Lead drop-down, choose the record type to create.
-
In the Create Method section, choose how records are created:
-
To have the system create records on its own based on the call direction:
-
Select Automatically.
-
From the Call Type drop-down, choose which calls trigger a new record in the CRM.
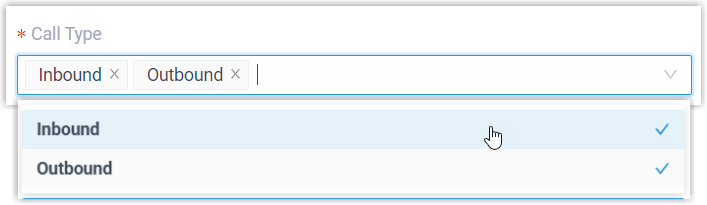
- Inbound: an inbound call from an unknown number that matches no Contact, Lead, or Account in the CRM.
- Outbound: an outbound call to an unknown number that matches no Contact, Lead, or Account in the CRM.
-
-
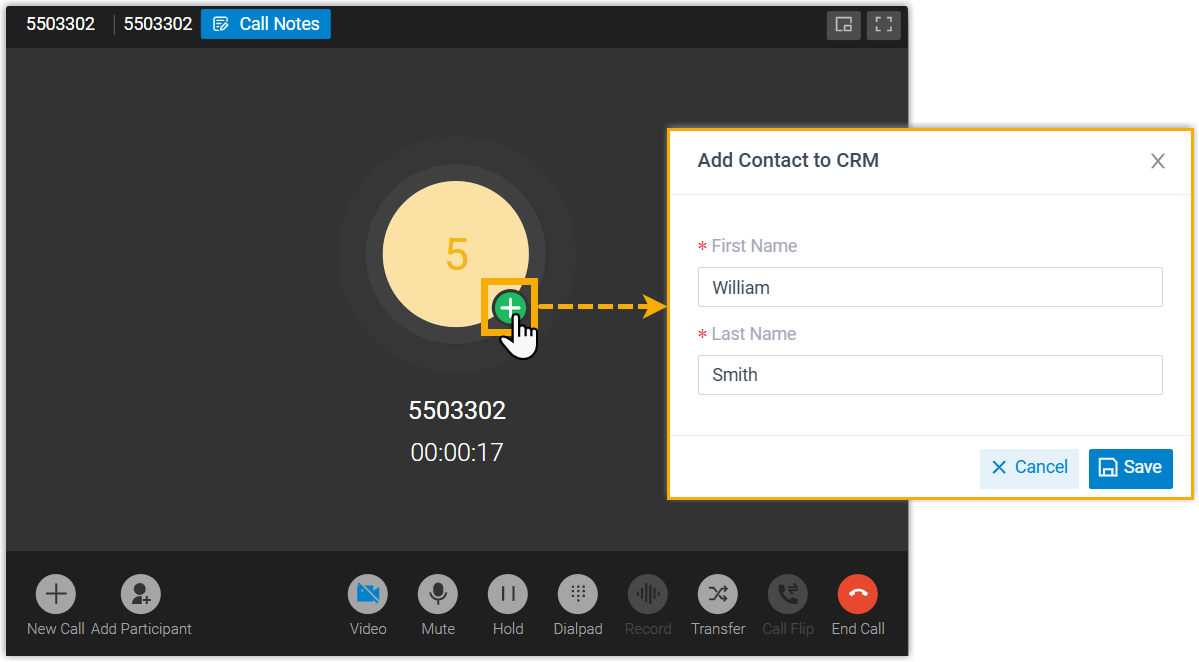
To let extension users add records themselves during a call, select Manually. When a user is on a call with an unknown number, they can add the contact to the CRM straight from the call window.
-
-
Click Save.
Set up call popup
Section titled “Set up call popup”Call popup opens a contact’s CRM profile for an extension user in the Cloud Voice App (Web or Desktop). You can have the profile open automatically on specific call events, or let the user open it manually from the call window during a call with a CRM contact.
-
Go to Extension and Trunk > Extension.
-
Click the edit icon
 for the extension tied to a CRM user.
 -
On the Cloud Voice App tab, scroll to the client you want, then select the Open Contact URL Using System-Integrated CRM checkbox.
-
In the Popup Method section, decide how the popup behaves:
-
To have the CRM contact page open on its own:
-
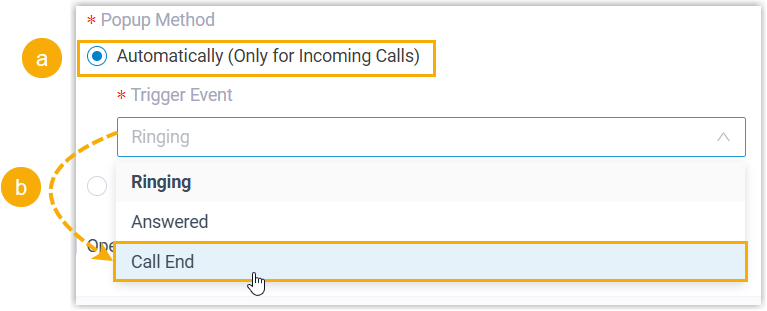
Select Automatically (Only for Incoming Calls).
-
From the Trigger Event drop-down, set when the popup appears:
- Ringing: the popup opens when an inbound call from a CRM contact begins ringing.
- Answered: the popup opens when the user answers an inbound call from a CRM contact.
- Call End: the popup opens when the call with a CRM contact ends.
-
-
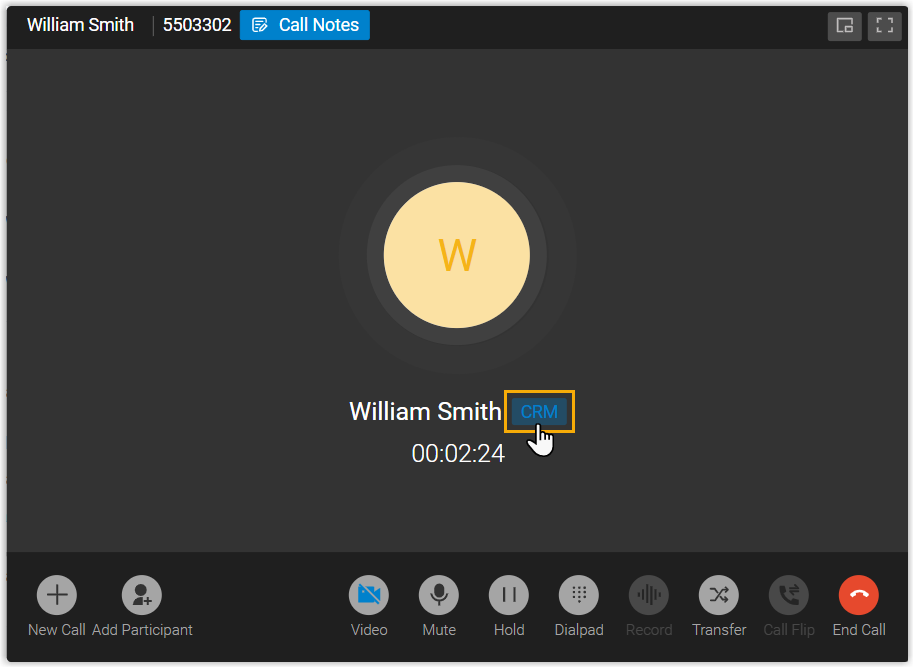
To let the user open the contact URL themselves during a call with a CRM contact, select Manually.
-
-
Click Save.
Log calls to the CRM
Section titled “Log calls to the CRM”With call journaling on, outbound, inbound, and missed-call records are written to the CRM automatically, giving users a record of every conversation.
-
Go to Integrations > CRM.
-
In the Call Journal section, enable the switch.
-
Set the content of the call log to suit your needs.

- Subject: the subject line of the call log.
- Description: the description of the call log.
-
Configure the additional settings:
-
Play Call Recording: when enabled, CRM users tied to phone-system extensions can view and play recordings stored on the phone system directly inside the CRM.
-
Disable Display Missed Call Records in Unanswered Agents: when enabled, for queue and ring group calls only the answering agent’s CRM receives the call log; the matching missed-call log is not written to the CRMs of agents who did not answer.
-
-
Click Save.
Log chats to the CRM
Section titled “Log chats to the CRM”With chat journaling on, when an external chat session between a user (tied to a phone-system extension) and a CRM contact closes, whether the user or the system ends it, every message from that session syncs to the CRM, giving users a complete history of each customer interaction.
-
Go to Integrations > CRM.
-
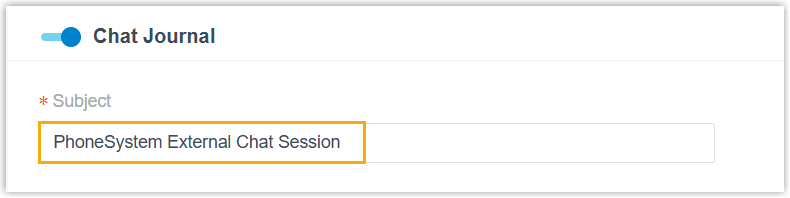
On the CRM integration page, turn on Chat Journal.
-
In the Subject field, set the subject for the synced record.
-
Click Save.
Question about this page?
Ask the AI assistant. It starts from this page, then searches the rest of the docs.
Ask Cloud Voice AI
Answers are AI-generated from the docs and may contain mistakes. Verify with the linked pages.