
Archive Files to S3-Compatible Object Storage
Cloud Voice can offload your call recordings and system backup files to any S3-compatible object storage. S3 (Simple Storage Service) is a widely used cloud storage interface first introduced by Amazon and since adopted by many providers, so any bucket that speaks the S3 protocol works here. You can run the transfer once, on demand, or set it to repeat automatically. This page walks through registering an S3 bucket as an archive server and building the tasks that copy files to it.
Requirements
Section titled “Requirements”On the Cloud Voice phone system:
- Firmware version
84.22.0.17or later. - An Enterprise plan (self-managed phone system) or an Ultimate plan (hosted phone system).
On the storage provider:
- An account with full access to the S3 resources used for archiving.
Limits
Section titled “Limits”- Archive servers: up to 10.
- Archive tasks: up to 200.
Step 1: Prepare the S3 storage
Section titled “Step 1: Prepare the S3 storage”Before Cloud Voice can reach your bucket, set up two things on the storage provider side. Each provider does this differently, so consult their documentation for the exact steps.
- Create an access key pair, an access key ID and a secret access key. Cloud Voice uses this pair to authenticate its archiving requests.
- Create an S3 bucket to hold the archived files.
Step 2: Add the bucket as an archive server
Section titled “Step 2: Add the bucket as an archive server”-
Sign in to the management portal and go to System > Archive.
-
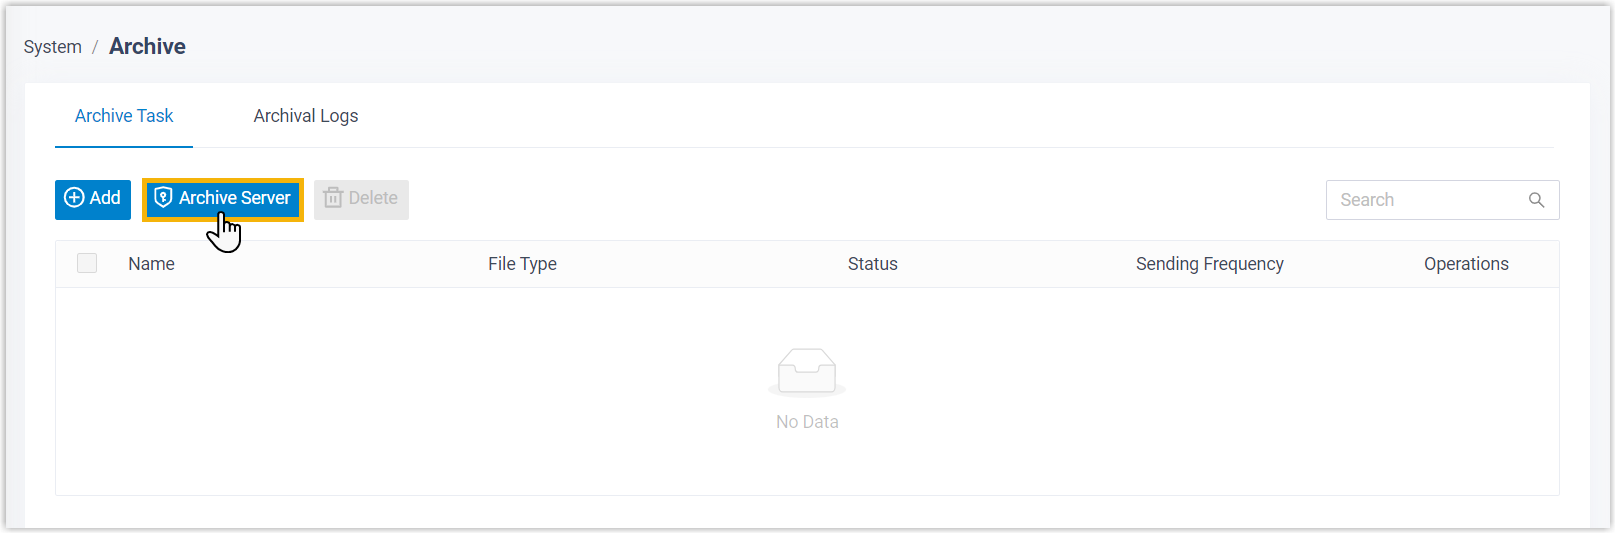
On the Archive Task tab, click Archive Server.
-
Register the bucket:
a. Click Add.
b. Fill in the dialog that opens:
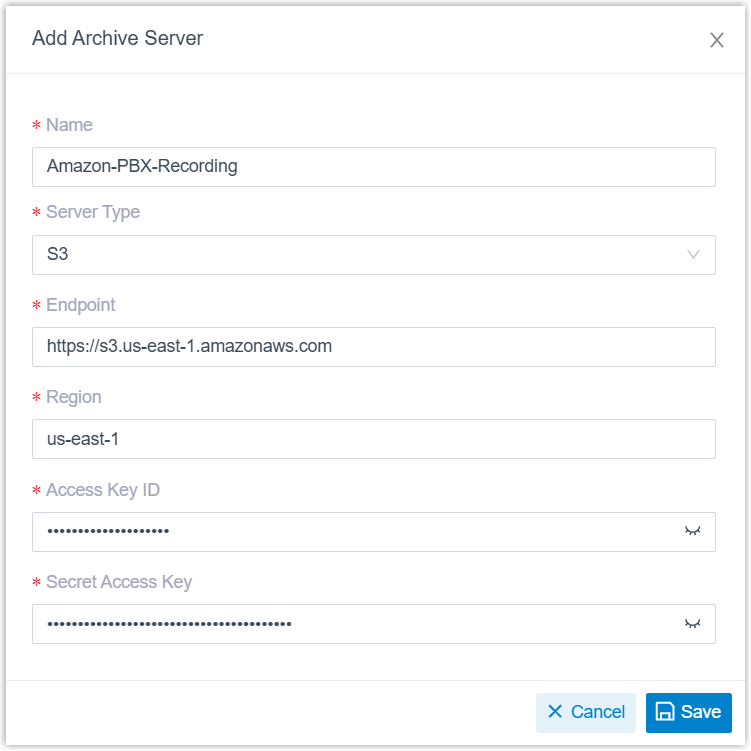
Setting What to enter Name A label that helps you recognize this server. Server Type Select S3. Region & Endpoint The region of your bucket and its matching S3 endpoint, including the protocol (for example, https://). Check the provider’s documentation for the supported regions and their standard endpoints.Access Key ID The access key ID you created in Step 1. Secret Access Key The secret access key you created in Step 1. c. Click Save. The bucket now appears in the archive server list.
-
Close the window.
Step 3: Create an archive task
Section titled “Step 3: Create an archive task”-
On the Archive Task tab, click Add.
-
Under Task Configuration, set the basics for what to archive and when.

Setting Description Name A label that helps you recognize this task. File Type Choose Recording Files or Backup Files. Data Range The time span of files to include. You can cover up to 31 days in a single task. Sync Frequency How often the task runs (see below). Recording File Format The download format for recordings. This appears only for recording-file tasks, and it applies to every recording archived by the task. Sync Frequency options:
- Once: Archives immediately when you save the task.
- Daily: Runs every day at the time you pick from the drop-down list.
- Weekly: Runs on the day of the week and time you choose.
- Monthly: Runs on the day of the month and time you choose.
-
Under Storage Configuration, choose where the files land and how they are organized.
Setting Description Archive Server Select the S3 bucket you added in Step 2. Select Folder/Path The bucket or folder that will hold the archived files. Storage Method How files are grouped on the server (see below). Skip archived files Optional; recording tasks only. When on, files that were archived before are not copied again. When off, they are archived again, the stored location is updated, but the earlier copy is left in place on the server. Delete local files after archiving Optional; recording tasks only. When on, recordings are removed from the phone system after they are archived; they remain playable and downloadable from the management portal and the Cloud Voice App, but are no longer available from the third-party server. When off, the local copies are kept. Organize Files by Date Optional. When on, the task creates date subfolders named YYYYMMDD(for example,20260301) under the storage path. When off, files are written straight to the path.Storage Method depends on whether the task runs once or repeats:
For a one-time task:
- Create Task Folder: Creates a folder named
FileType-TaskNameunder the path and stores the files inside it. - Save Directly to Selected Path: Writes the files to the path with no folder.
For a recurring task:
- Create Folder per Execution: Creates a folder named
FileType-TaskName-ExecutionDateunder the path on every run. - Create Task Folder Once and Reuse It: Creates a folder named
FileType-TaskNameon the first run and reuses it for later runs. - Save Directly to Selected Path: Writes each run’s files to the path with no folder.
- Create Task Folder: Creates a folder named
-
Optional. Set a retention policy so Cloud Voice cleans up old files for you.

Setting Description Retention Type Retention by Quantity keeps a maximum number of files/folders in the path and deletes the oldest once that count is exceeded. Retention by Days keeps files/folders for a maximum period and deletes anything older. Retention Limit The maximum count or the maximum number of days, matching the retention type you chose. Retention Unit Folder counts the task folders created on each run; File counts individual files. -
Click Save.
Result
Section titled “Result”The selected files are copied to the chosen bucket or folder right away or at the scheduled time.
You can confirm the outcome two ways:
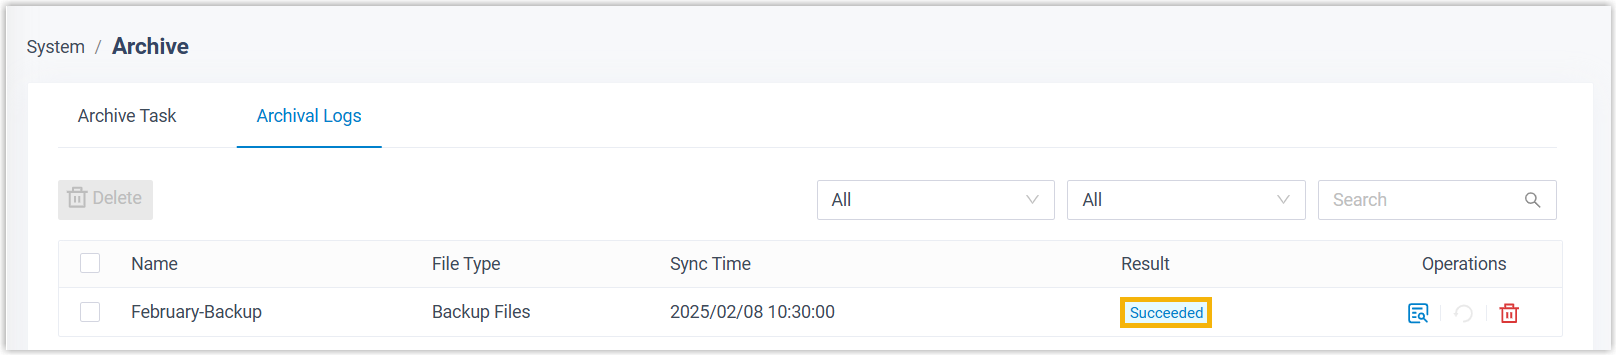
In the management portal: go to System > Archive > Archival Logs. When the Result column shows Succeeded, the files reached the bucket.

On the storage provider: open the bucket in the provider’s portal. If the files are listed there, the archive succeeded.
Question about this page?
Ask the AI assistant. It starts from this page, then searches the rest of the docs.
Ask Cloud Voice AI
Answers are AI-generated from the docs and may contain mistakes. Verify with the linked pages.