
Download CDR from the PBX Web Portal
Cloud Voice lets you export call detail records (CDR) straight from the web portal so you can keep a local copy for billing, reconciliation, or deeper call analysis. Narrow the list to the calls you care about, then download the result to your computer.
Before you begin
Section titled “Before you begin”Downloaded records are saved as a CSV file (comma-separated values, which opens in any spreadsheet program) covering the current results by default. If you want a different file format or a specific data range, adjust the export options first. See Customize CDR download settings.
Step 1. Filter the CDR list
Section titled “Step 1. Filter the CDR list”-
Sign in to the PBX web portal and go to Reports and Recordings > CDR.
-
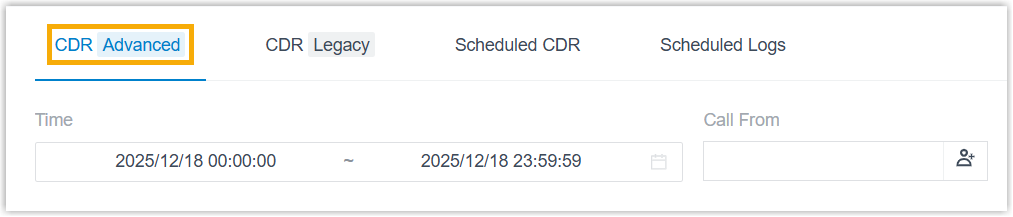
Open the CDR (Advanced) tab.
-
Apply the basic filters to narrow the list by time or by who was on the call.

Filter What it does Time Set a start date and end date. To pin the range down to an exact start and end time, click Select Time. Call From Type the caller’s number or name, or use the add-contact button to pick one or more extensions, extension groups, or organizations. Call To Type the callee’s number or name, or use the add-contact button to pick extensions, extension groups, or organizations. To flip the caller and callee, click the swap button. 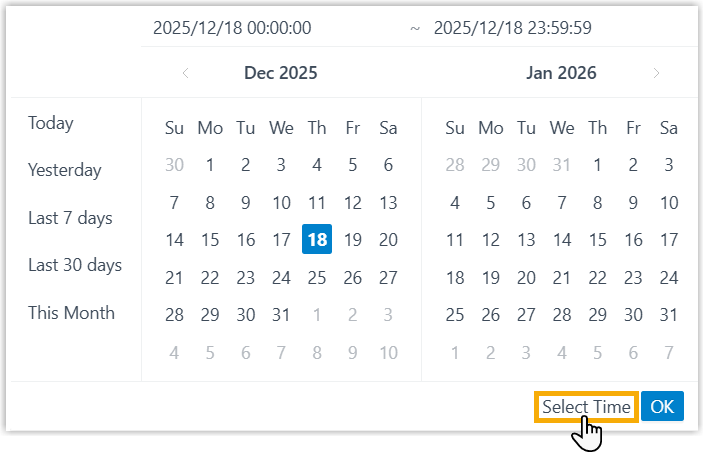
-
Optionally, apply advanced filters to drill into individual call legs.
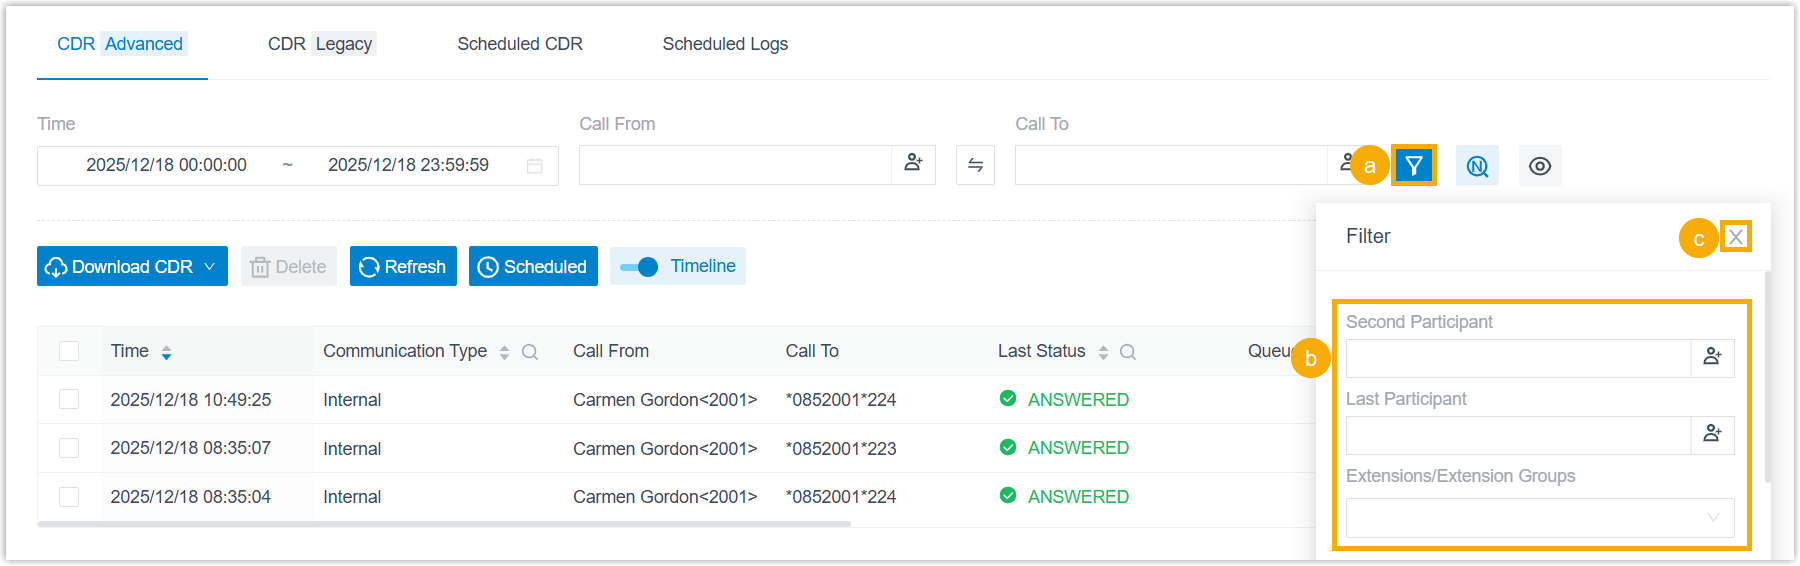
a. On the right pane, click the filter button.
b. Set any of the following criteria:
Filter What it does Second Participant The callee’s number or name on the second call leg. You can also pick extensions, extension groups, or organizations. Last Participant The callee’s number or name on the last call leg. You can also pick extensions, extension groups, or organizations. Extensions/Extension Groups Limit the results to selected extensions or extension groups. Organization Limit the results to selected departments. Queue Limit the results to selected queues. Call Notes Filter by disposition code. Remark Match the remark added on the last call leg. AI Summary Match keywords within the AI summary text. AI Receptionist Processing Result Filter by how the AI receptionist handled the call: Resolved (handled the caller’s request without transferring), Transferred (routed the call to another destination), Unresolved (neither resolved nor transferred), or No Processing Result (the call ended abnormally from an error or timeout, so no outcome was recorded). Trunk Limit the results to a selected trunk. DID/DDI Limit the results to selected DID numbers. DID (Direct Inward Dialing, also called DDI or Direct Dialing In) is the specific phone number a caller dialed to reach the system. Caller IP Address Match the caller’s IP address. SHAKEN Attestation Filter by attestation level or verification result: A, B, or C for calls signed at that level; Invalid for inbound calls carrying an invalid SHAKEN signature; Unknown for inbound calls that are unsigned or whose attestation level can’t be identified. Recording Files Show all calls, only calls with a recording, or only calls without one. c. Click the close button in the top-right corner to apply the filters and close the panel.
-
Optionally, choose which columns appear and refine individual fields.
a. Click the column button to select the columns to display.
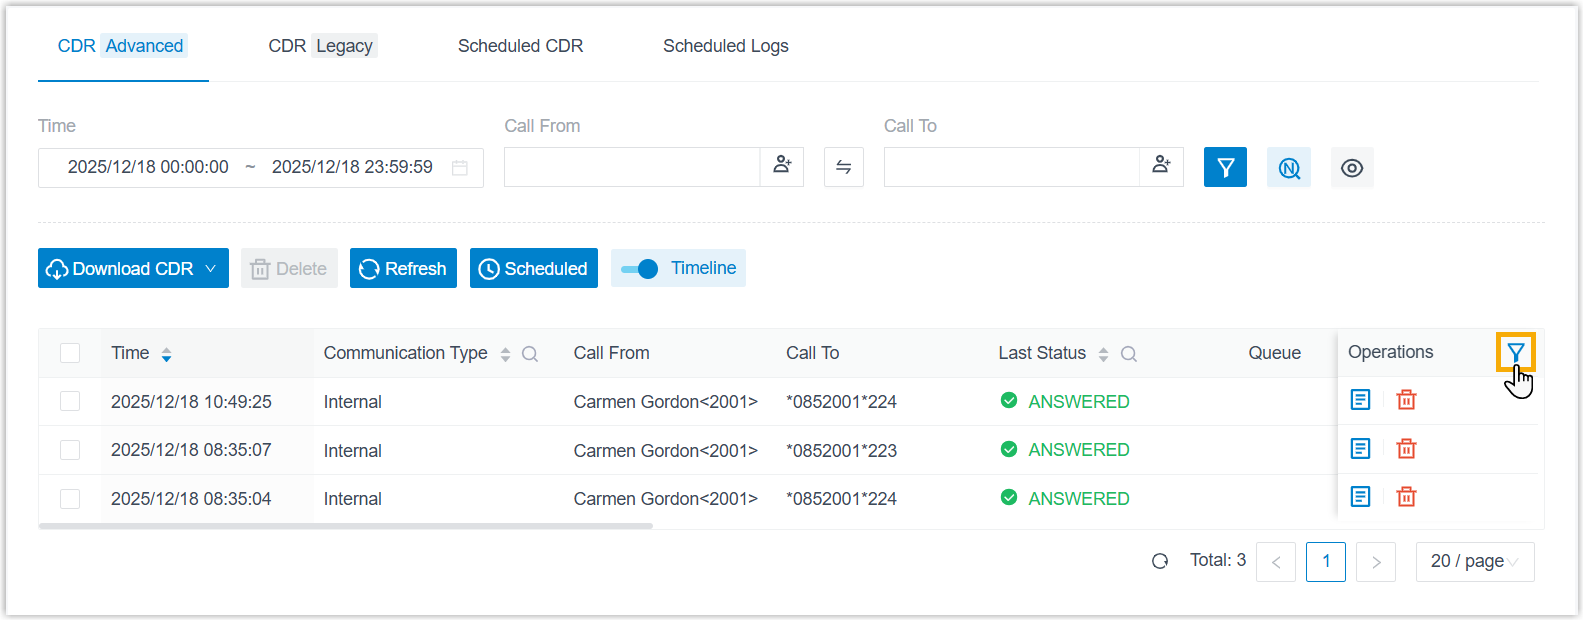
b. For any column that shows a search icon, click it to filter on that field.
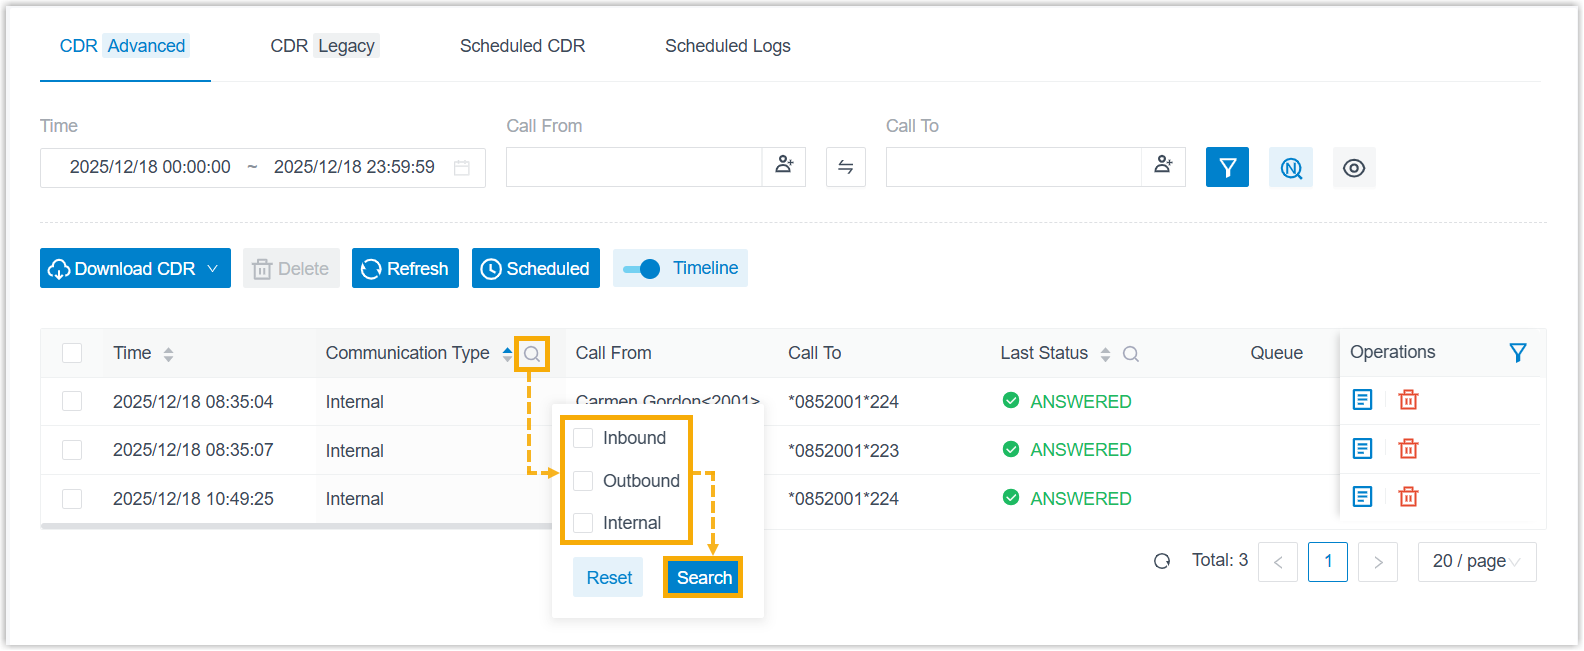
-
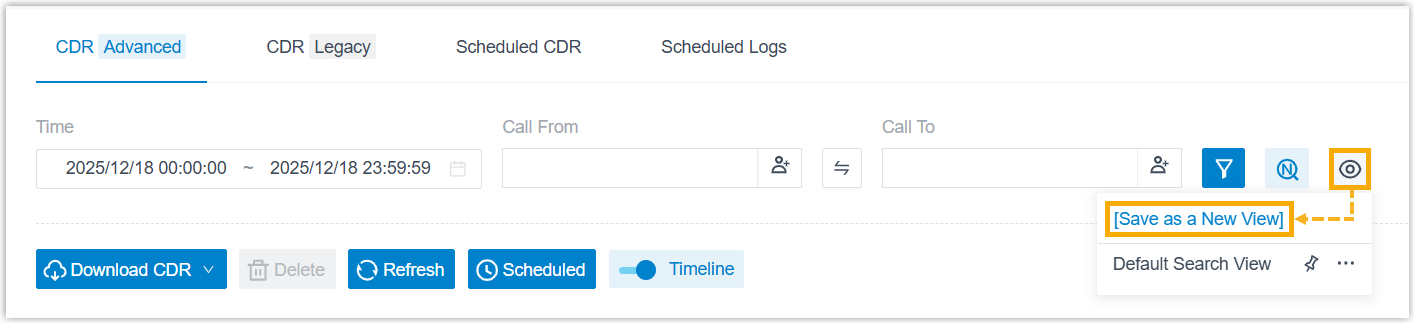
Optionally, save the current filter setup as a view for reuse.
a. On the right pane, click the check button, then choose Save as a New View.
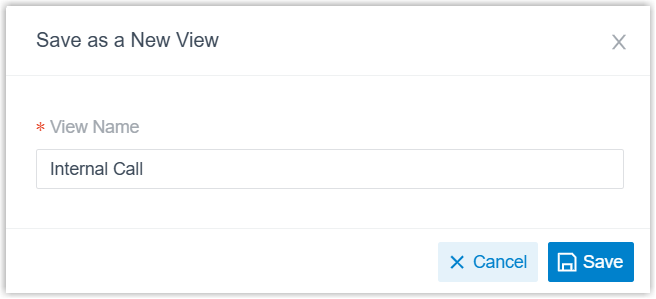
b. Enter a name for the view and click Save.
Step 2. Download the CDR
Section titled “Step 2. Download the CDR”-
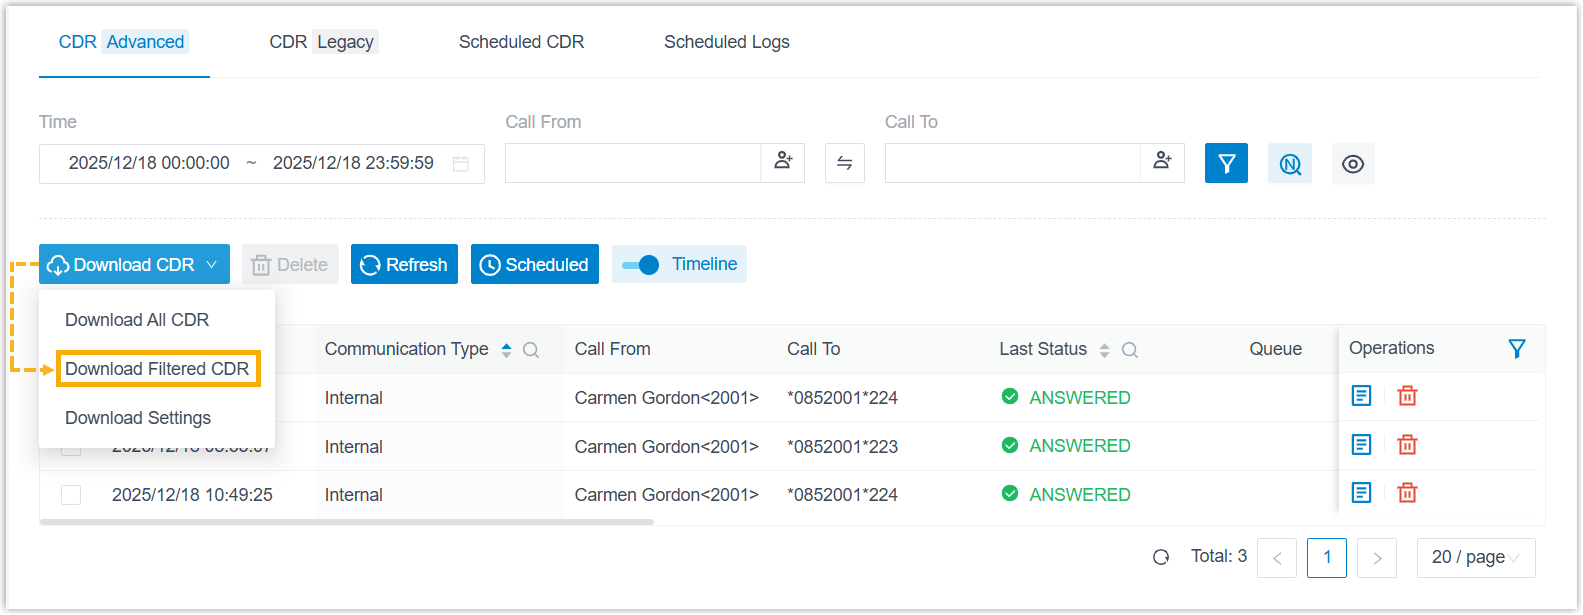
To export every record, click Download CDR and choose Download All CDR.
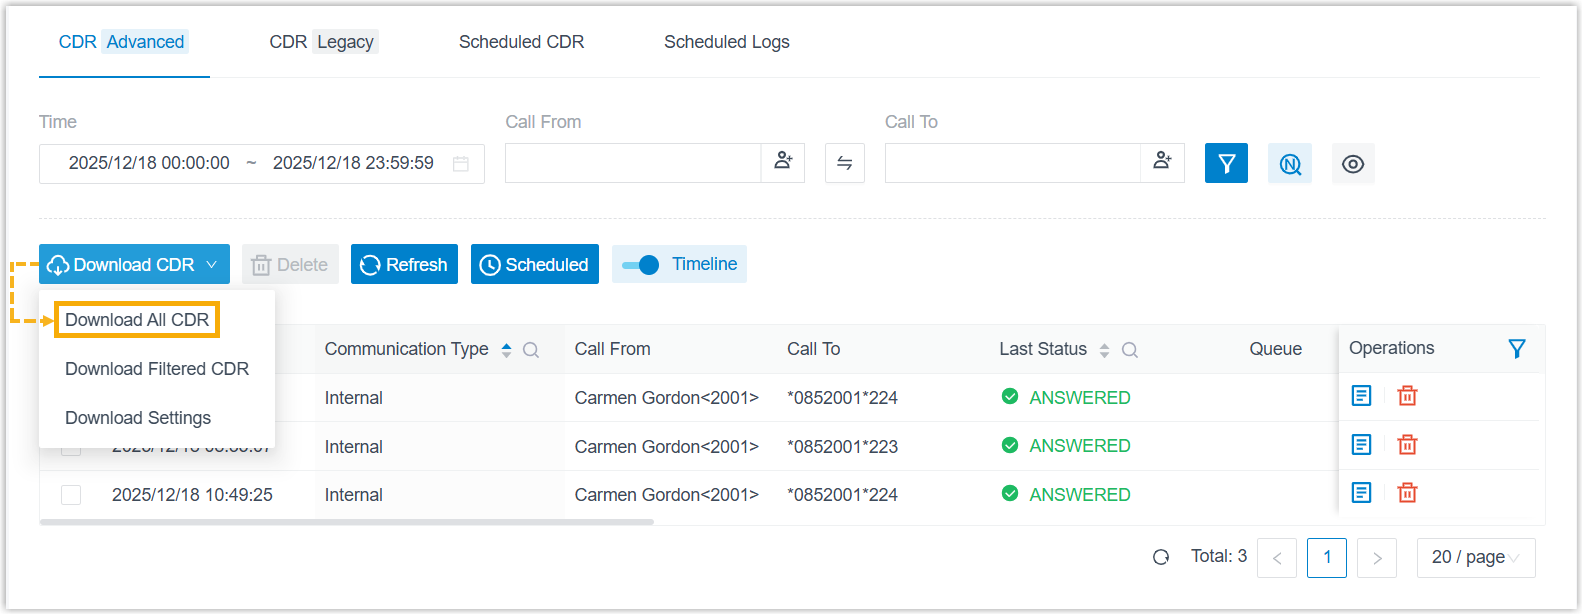
-
To export only the records that match your filters, click Download CDR and choose Download Filtered CDR.
Result
Section titled “Result”The matching records download to your computer in the format you selected.
Question about this page?
Ask the AI assistant. It starts from this page, then searches the rest of the docs.
Ask Cloud Voice AI
Answers are AI-generated from the docs and may contain mistakes. Verify with the linked pages.