
View and Manage Personal Contacts
Personal Contacts is your private address book in the Cloud Voice App. Only you can see the entries you store there, and you can build the list in whatever way suits you: type contacts in by hand, copy them from a shared company phonebook, or capture them straight from a call log, voicemail, or recording. This page walks through each of those tasks, plus how to edit, remove, export, and import entries.
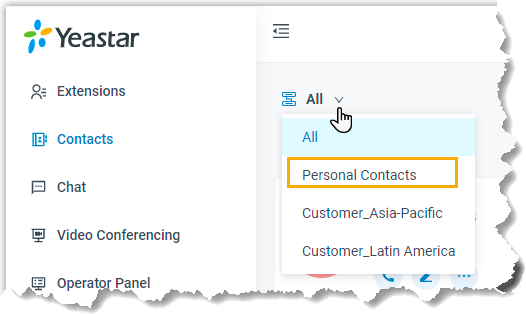
Every procedure below starts the same way: open the Cloud Voice App, click Contacts, then use the phonebook drop-down list in the top-left corner of the workspace to choose Personal Contacts.
View a personal contact
Section titled “View a personal contact”- In the Cloud Voice App, click Contacts.
- Select Personal Contacts from the phonebook drop-down list in the top-left corner.
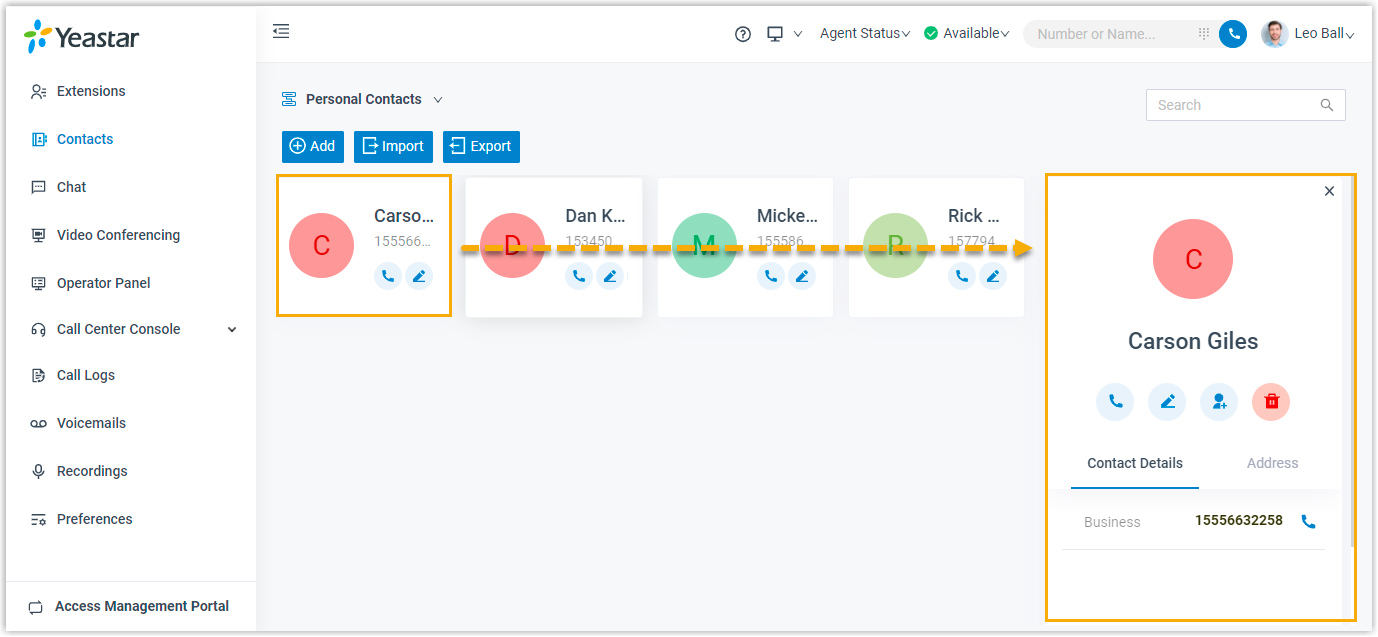
- Click a contact card to open the full details for that person.
Add a personal contact
Section titled “Add a personal contact”You can add a personal contact in several ways. Pick whichever fits what you are doing at the moment.
Add a contact directly
Section titled “Add a contact directly”Use this when you already have the contact’s details on hand.
- In the Cloud Voice App, click Contacts, then select Personal Contacts from the phonebook drop-down list.
- Click Add, fill in the contact information, and click Save.
The new entry appears in your Personal Contacts list right away.
Add a contact from a company phonebook
Section titled “Add a contact from a company phonebook”If you have been given permission to manage one or more company phonebooks, you can copy an entry from a phonebook into your own list.
-
In the Cloud Voice App, click Contacts.
-
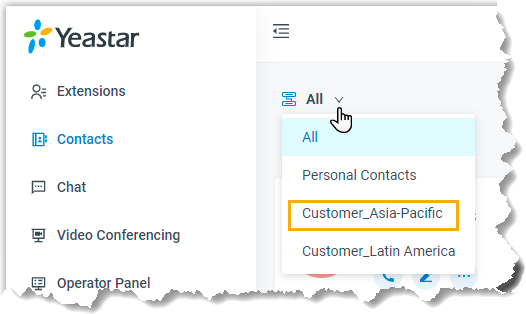
From the phonebook drop-down list, select the phonebook that holds the contact you want.
-
Locate the contact, click the More icon on that entry, and select Add to Personal Contacts.
An “Added successfully” message confirms the contact is now in your Personal Contacts.
Add a contact from Call Logs, Voicemails, or Recordings
Section titled “Add a contact from Call Logs, Voicemails, or Recordings”The Call Logs, Voicemails, and Recordings lists all support the same shortcut for saving a caller. The steps are identical no matter which list you start from.
-
In the Cloud Voice App, open Call Logs, Voicemails, or Recordings.
-
Right-click the record for the number you want to save.
-
Do one of the following:
Create a new contact
- Click Add New Contact.
- In the Add to drop-down list, select Personal Contacts.
- Enter the contact information.
- Click Save.
Add the number to an existing contact
- Click Add to Existing Contact.
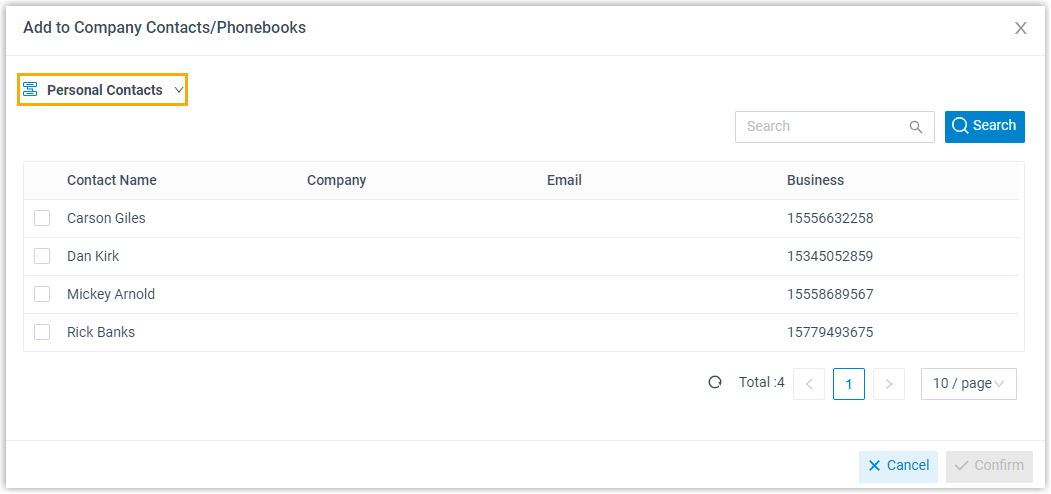
- Select Personal Contacts from the phonebook drop-down list.
- Select the checkbox of the contact you want to update.
- Click Confirm, then Save.
Edit a personal contact
Section titled “Edit a personal contact”- In the Cloud Voice App, click Contacts, then select Personal Contacts from the phonebook drop-down list.
- Find the contact, click the Edit icon, change the details, and click Save.
The updated information is saved to your Personal Contacts.
Delete personal contacts
Section titled “Delete personal contacts”- In the Cloud Voice App, click Contacts, then select Personal Contacts from the phonebook drop-down list.
- Remove contacts using whichever method matches what you need to do.
Delete one contact
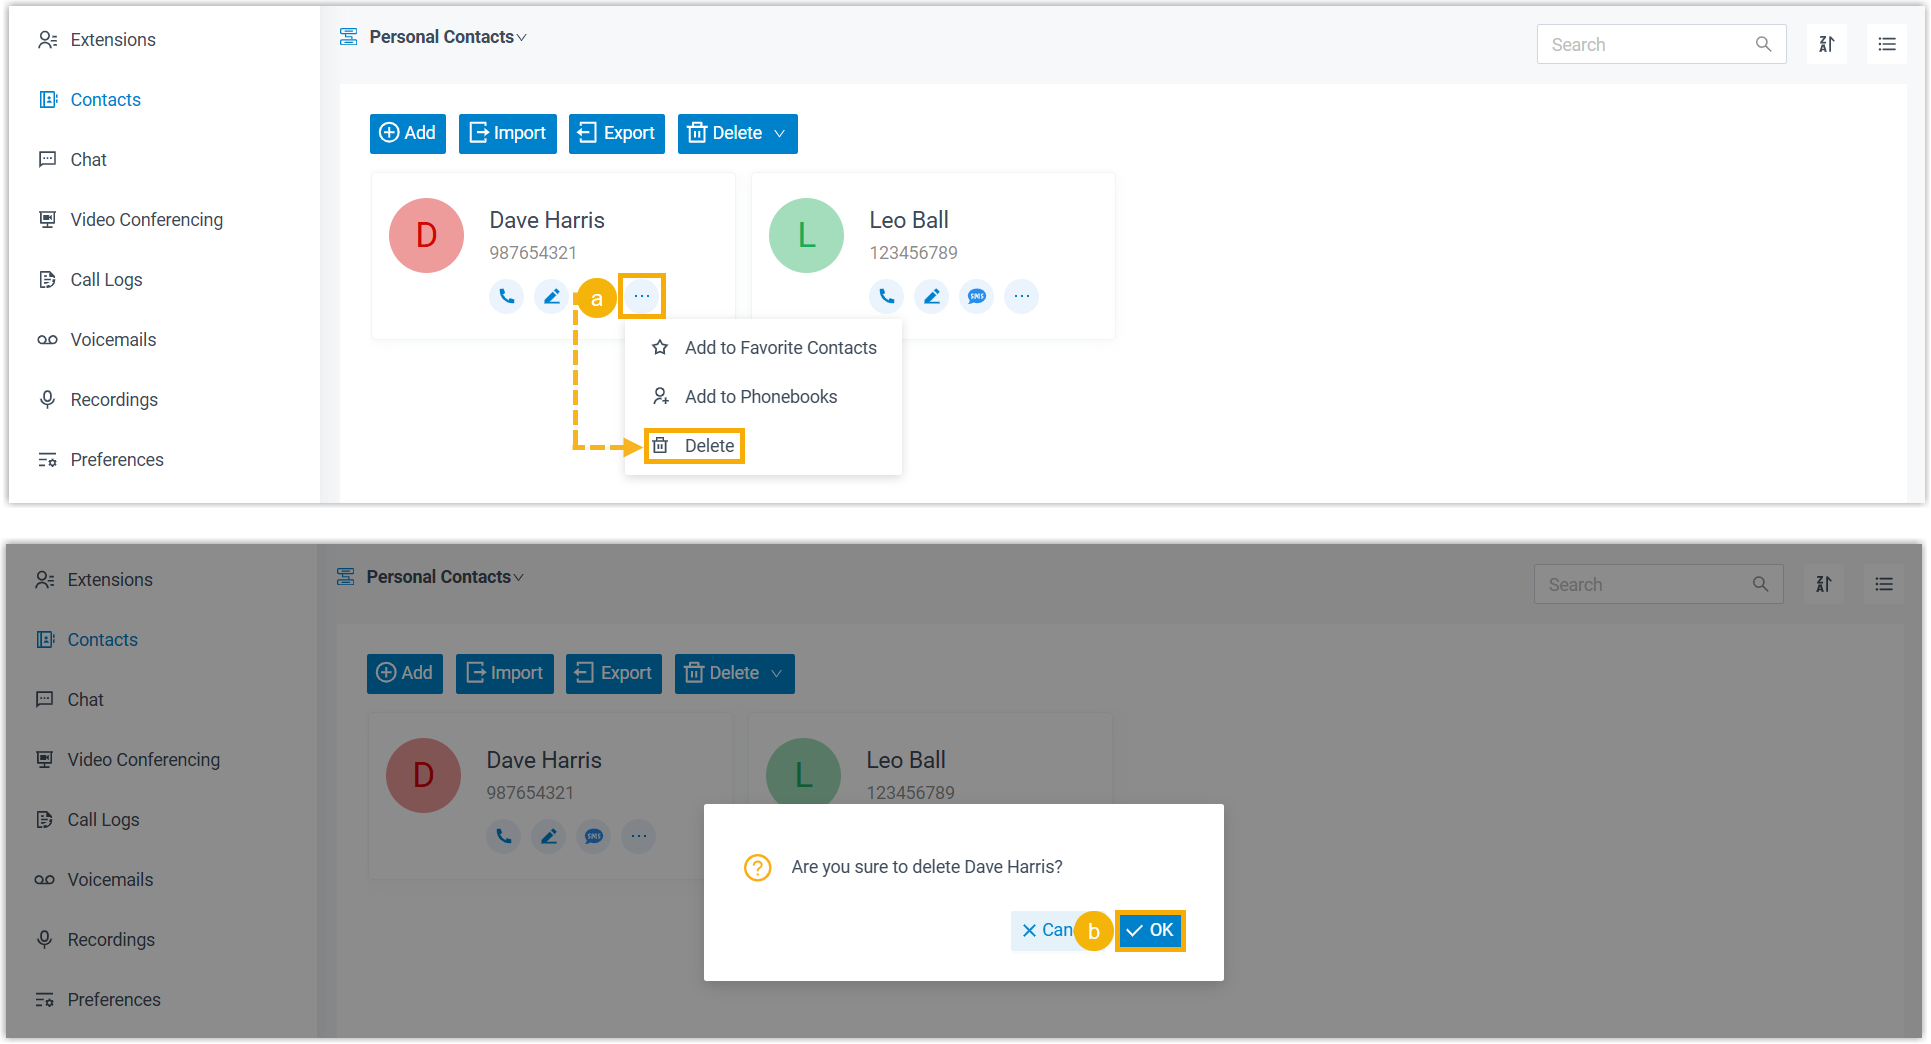
Section titled “Delete one contact”Click the More icon on the contact, select Delete, then click OK in the confirmation window.
Delete several contacts
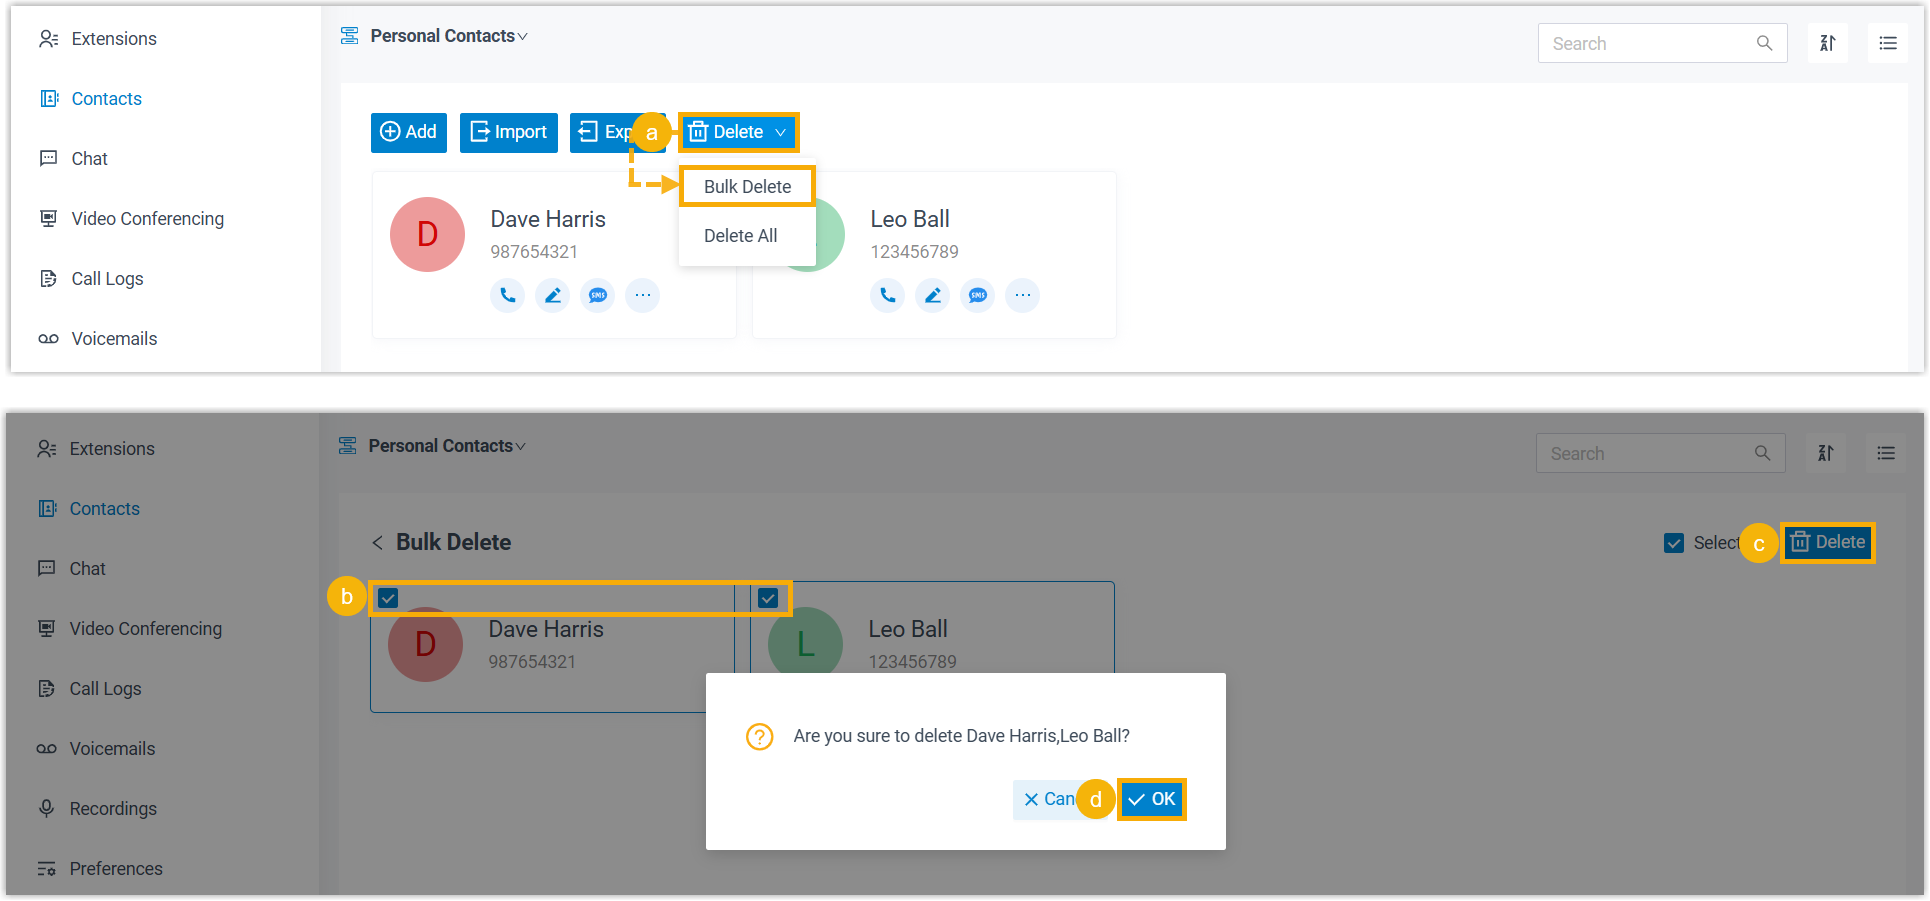
Section titled “Delete several contacts”- At the top of the list, click Delete, then select Bulk Delete.
- Select the checkboxes of the contacts you want to remove.
- Click Delete in the top-right corner.
- Click OK in the confirmation window.
Delete every contact
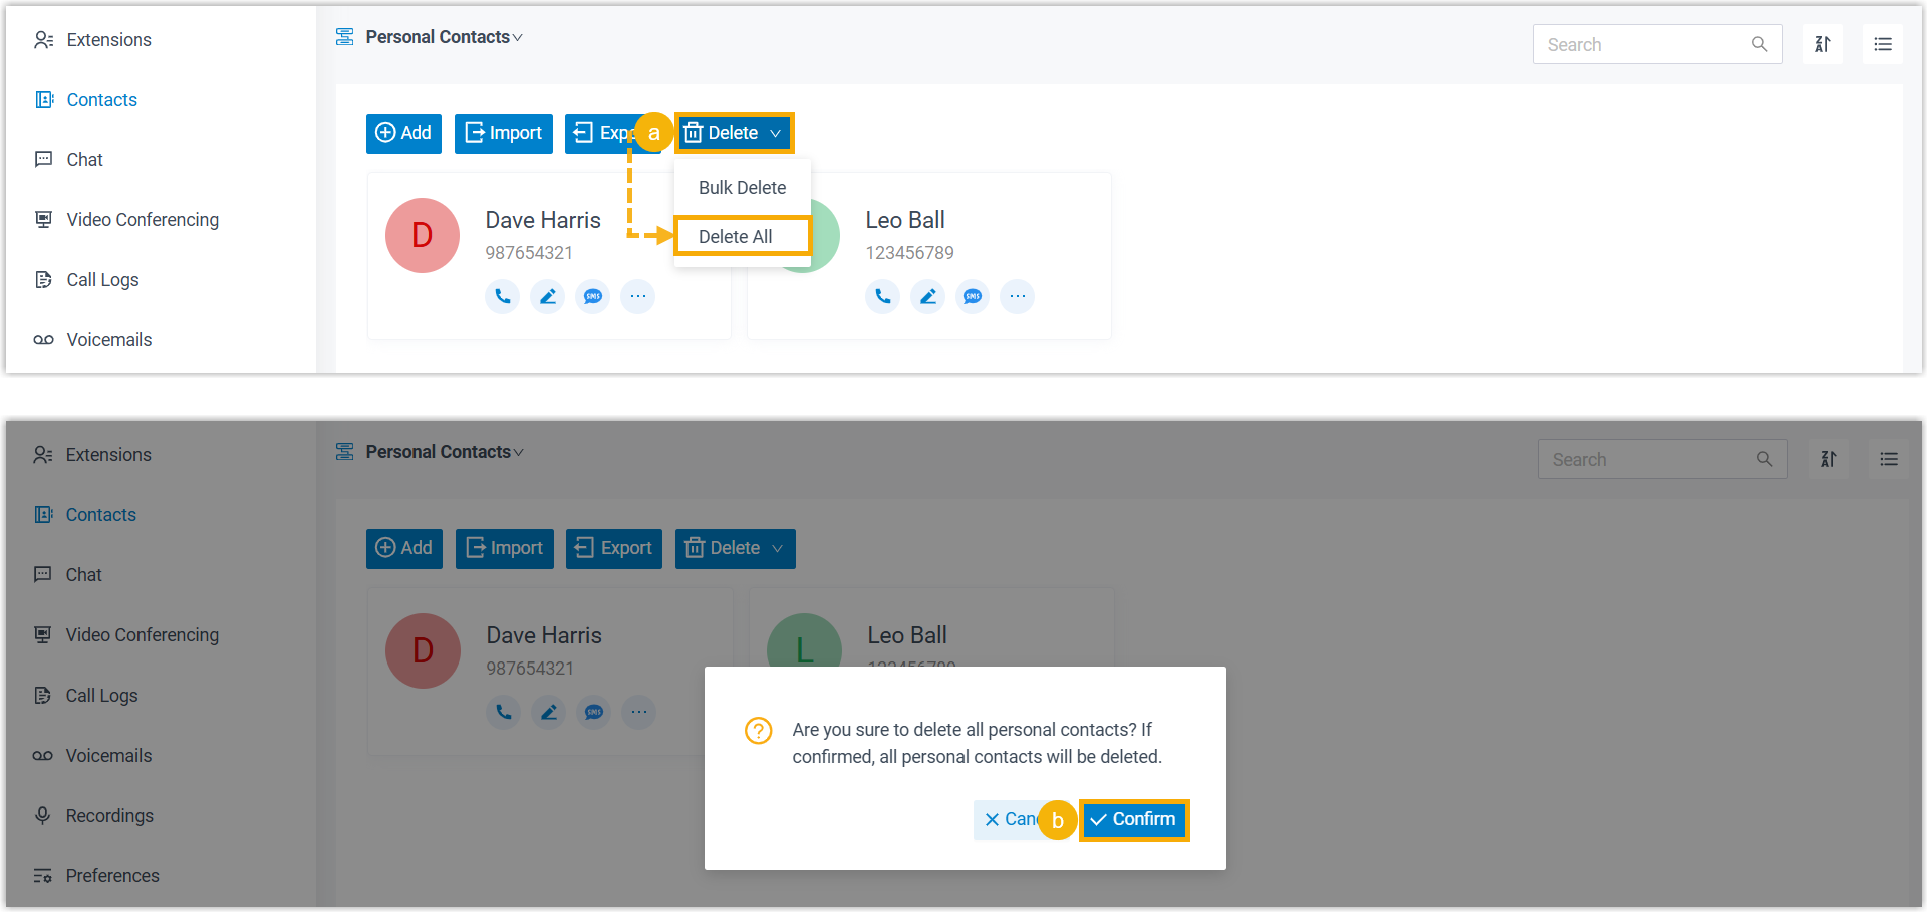
Section titled “Delete every contact”- At the top of the list, click Delete, then select Delete All.
- Click Confirm in the confirmation window.
Export personal contacts
Section titled “Export personal contacts”Export your list to a CSV (Comma-Separated Values) file when you want a backup or plan to make bulk changes offline before importing the file again.
- In the Cloud Voice App, click Contacts, then select Personal Contacts from the phonebook drop-down list.
- Click Export.
A CSV file containing all of your personal contacts downloads to your computer, ready for you to review or edit.
Import personal contacts
Section titled “Import personal contacts”Before you import, make sure the file meets these requirements:
- Format: UTF-8 encoded CSV
- Size: Less than 300 MB
- File name: Fewer than 127 characters
- Contents: Each column value must meet the contact field requirements, so the entries import cleanly.
To import the file:
- In the Cloud Voice App, click Contacts, then select Personal Contacts from the phonebook drop-down list.
- Click Import.
- In the pop-up window, click Browse and choose your CSV file.
- Click Import.
The contacts from the CSV file appear in your Personal Contacts list.
Question about this page?
Ask the AI assistant. It starts from this page, then searches the rest of the docs.
Ask Cloud Voice AI
Answers are AI-generated from the docs and may contain mistakes. Verify with the linked pages.