
Log in to the Cloud Voice App with an Active Directory Account
When your administrator connects the Cloud Voice server to Active Directory (AD), you can open the mobile app and sign in with the same domain credentials you use elsewhere on your organization’s network. No separate extension username or password is required.
Requirements
Section titled “Requirements”Before you can sign in this way, confirm the following:
- Your administrator has integrated the server with Active Directory and turned on Single Sign-on (SSO).
- Your Cloud Voice App is up to date:
- iOS: version 4.9.5 or later
- Android: version 4.9.6 or later
Before you begin
Section titled “Before you begin”Ask your administrator for the network details of the Cloud Voice server. You will enter these on the login screen.
Sign in with a domain name
Section titled “Sign in with a domain name”Follow these steps if your administrator provided a domain name.
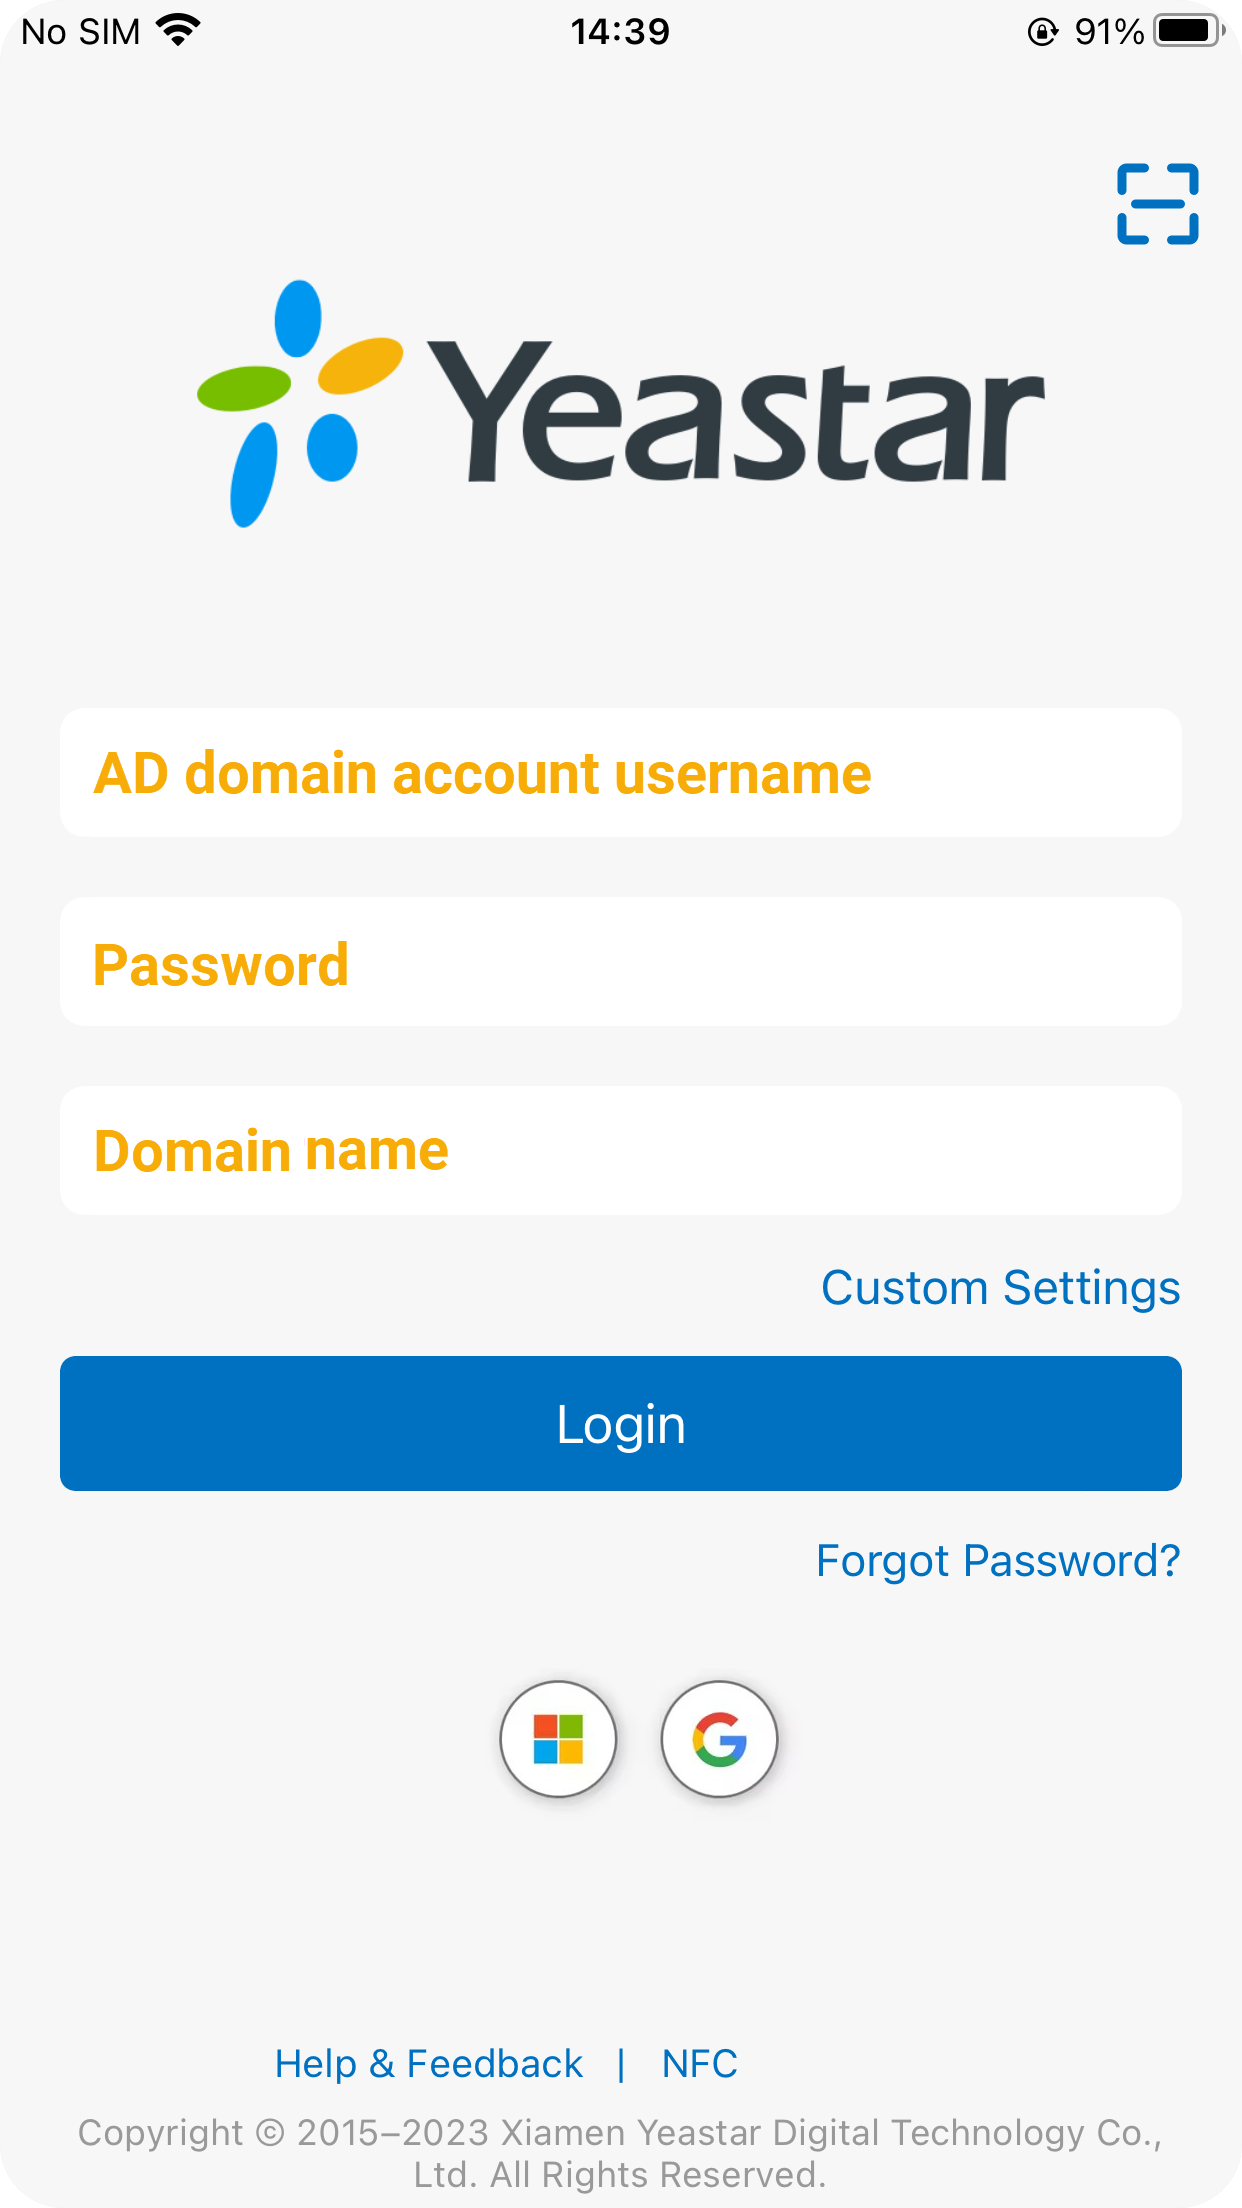
-
Open the Cloud Voice App to reach the login screen.
-
In the Username field, type your AD domain account name using the format
username@domainname. -
In the Password field, type the password for that account.
-
In the SN/Domain field, enter the domain name. (SN is short for serial number; this one field accepts either the server’s serial number or its domain name, and here you use the domain name.)
-
Tap Login.
Sign in with IP addresses and ports
Section titled “Sign in with IP addresses and ports”Follow these steps if your administrator provided IP addresses and ports instead of a domain name.
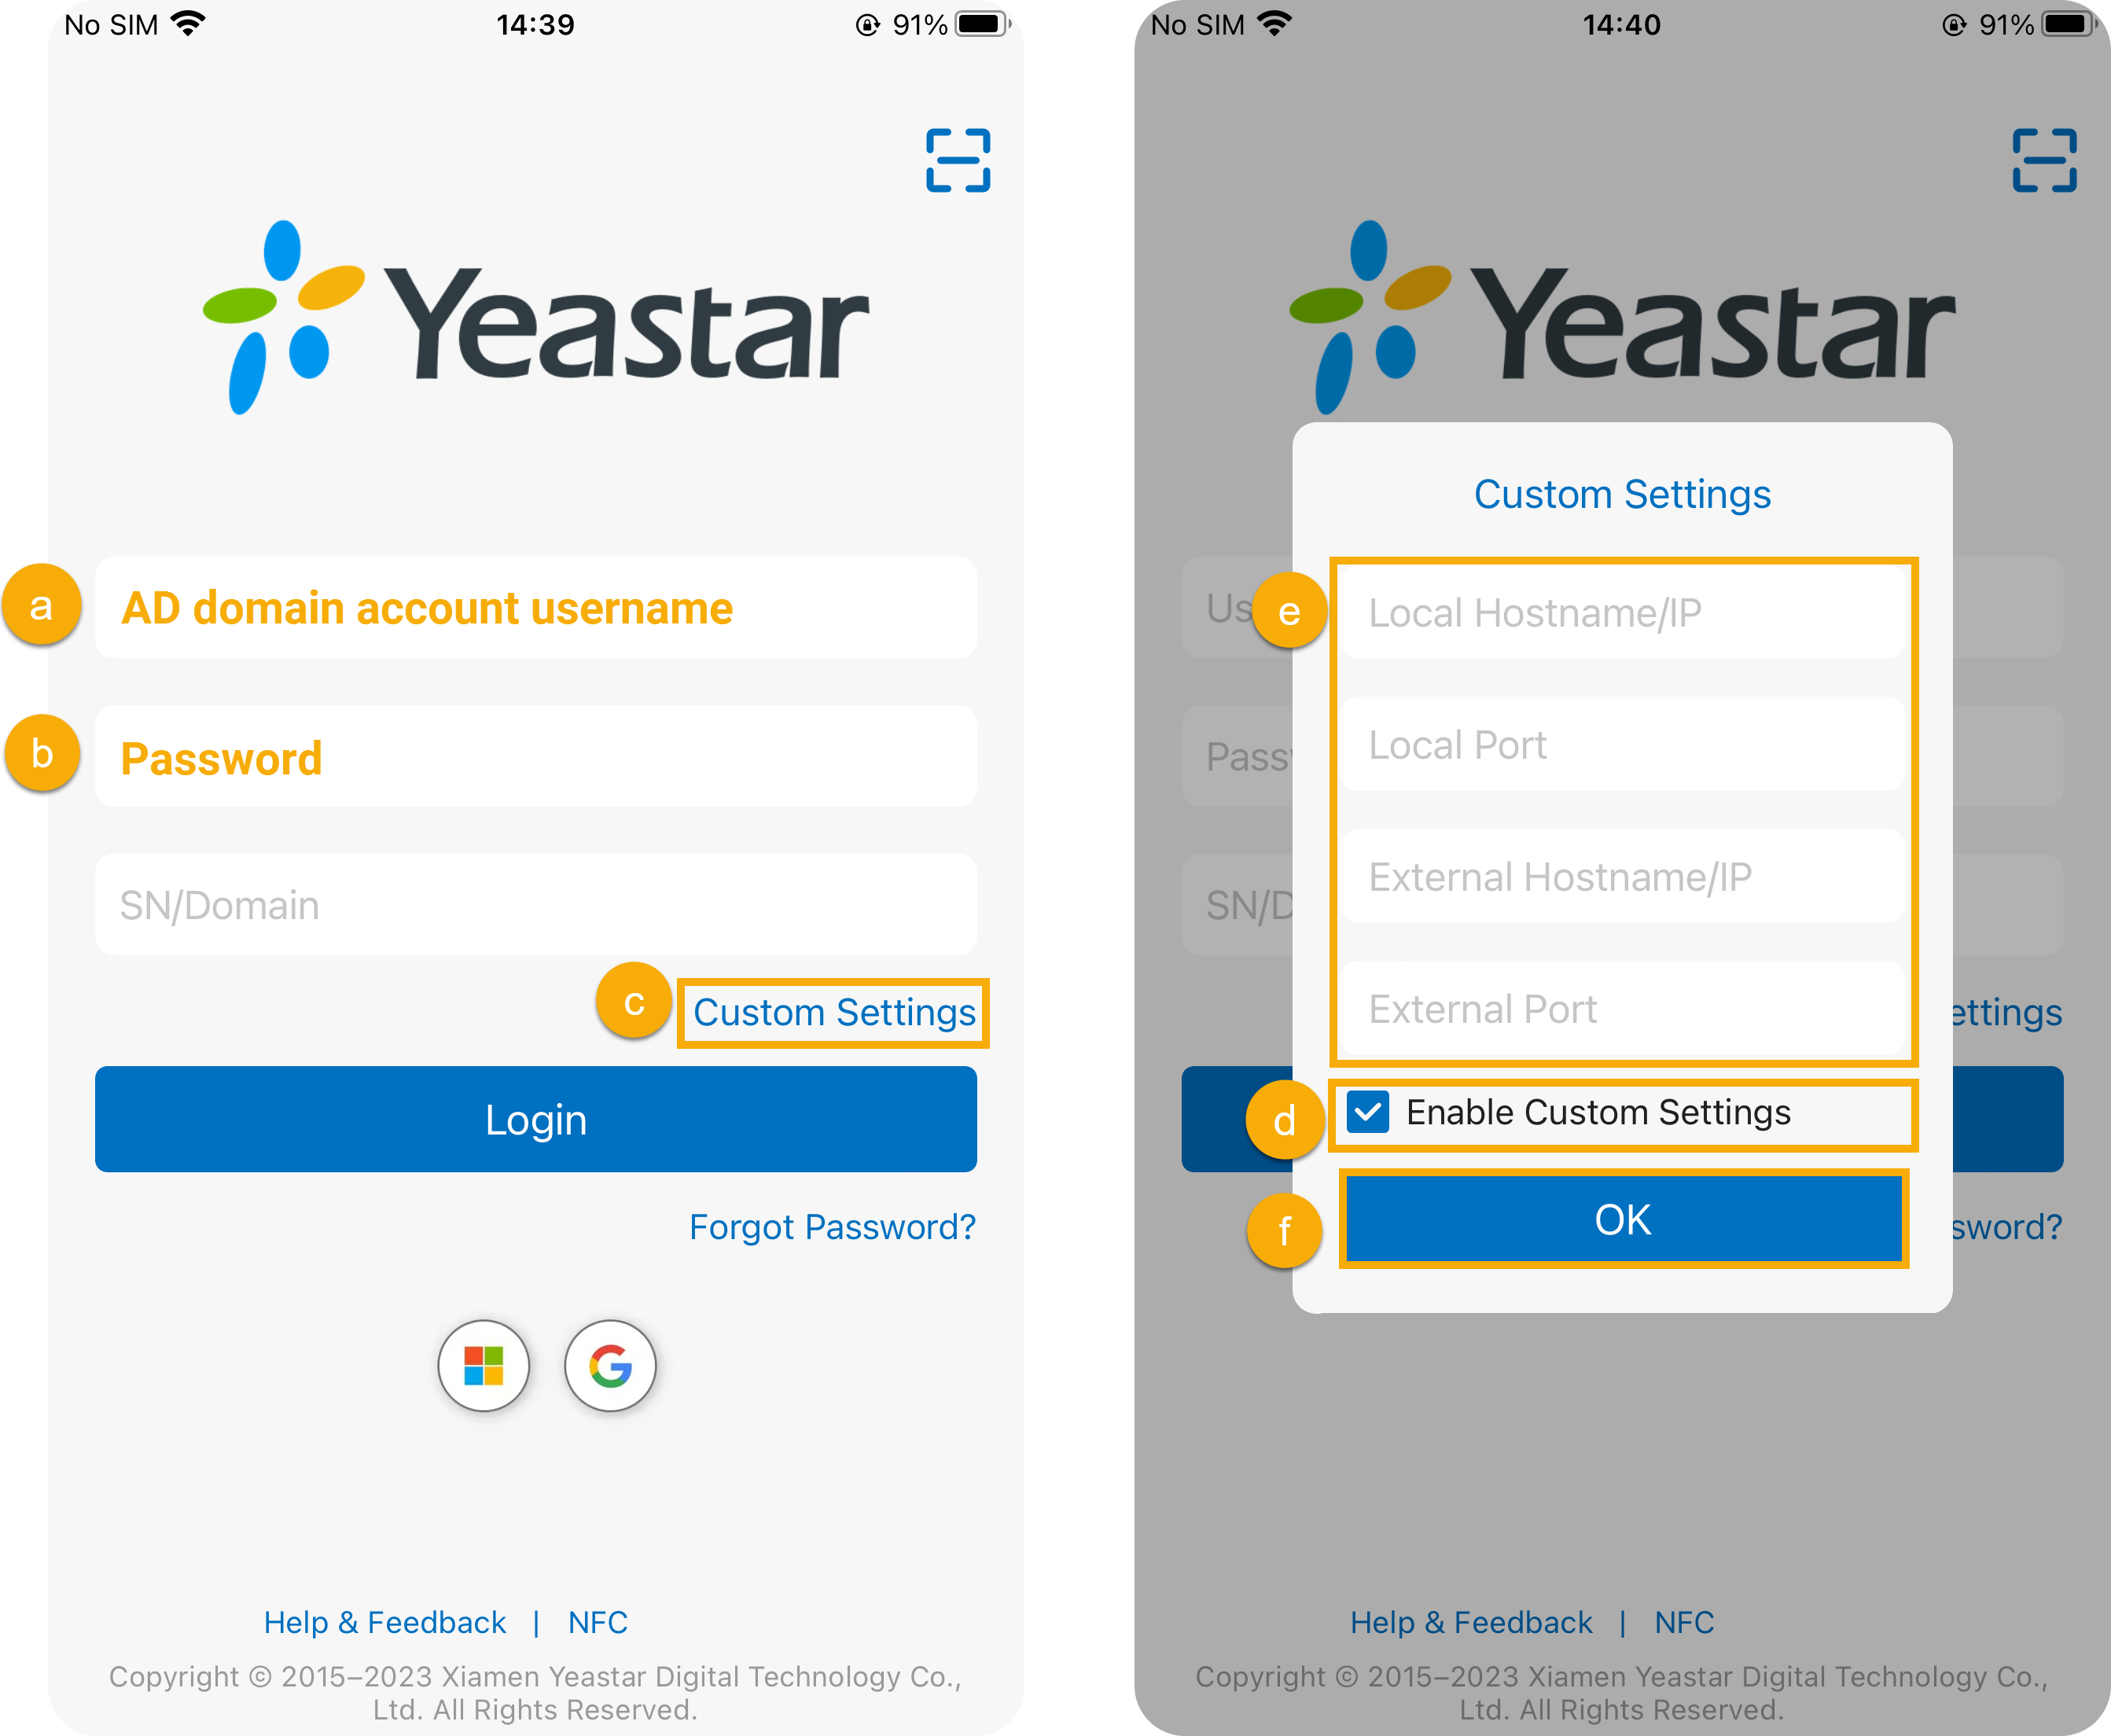
-
Open the Cloud Voice App to reach the login screen.
-
In the Username field, type your AD domain account name using the format
username@domainname. -
In the Password field, type the password for that account.
-
Tap Custom Settings.
-
Select the Enable Custom Settings checkbox.
-
Enter the IP addresses and ports your administrator supplied.
-
Tap OK.
-
Tap Login.
Question about this page?
Ask the AI assistant. It starts from this page, then searches the rest of the docs.
Ask Cloud Voice AI
Answers are AI-generated from the docs and may contain mistakes. Verify with the linked pages.