
Add and Manage Outbound Prefix
An outbound prefix is a saved dialing code, such as a country code, an area code, or an international access code, that you can attach to an external number before placing the call. Instead of typing the same leading digits every time, you store the prefix once and pick it from a list when you dial. This page walks through creating, updating, and removing outbound prefixes in the Cloud Voice App.
Add an outbound prefix
Section titled “Add an outbound prefix”Your administrator may already have assigned you one or more outbound prefixes that you can apply to external numbers. When none of the assigned prefixes fit the call you want to make, you can create your own.
- On the Calls page, tap your account in the top-left corner.
- Open Settings > Advanced > Outbound Prefix.
- Create the prefix:
- Tap the add icon (
 ) in the top-right corner.
 - In the Prefix Name field, type a label that helps you recognize the prefix later.
- In the Prefix Number field, type the digits to prepend.
- Tap Save in the top-right corner.
- Tap the add icon (
To apply a saved prefix when placing a call, press and hold the call button ( ) next to the number, tap Dial through PBX, then choose the prefix you want.
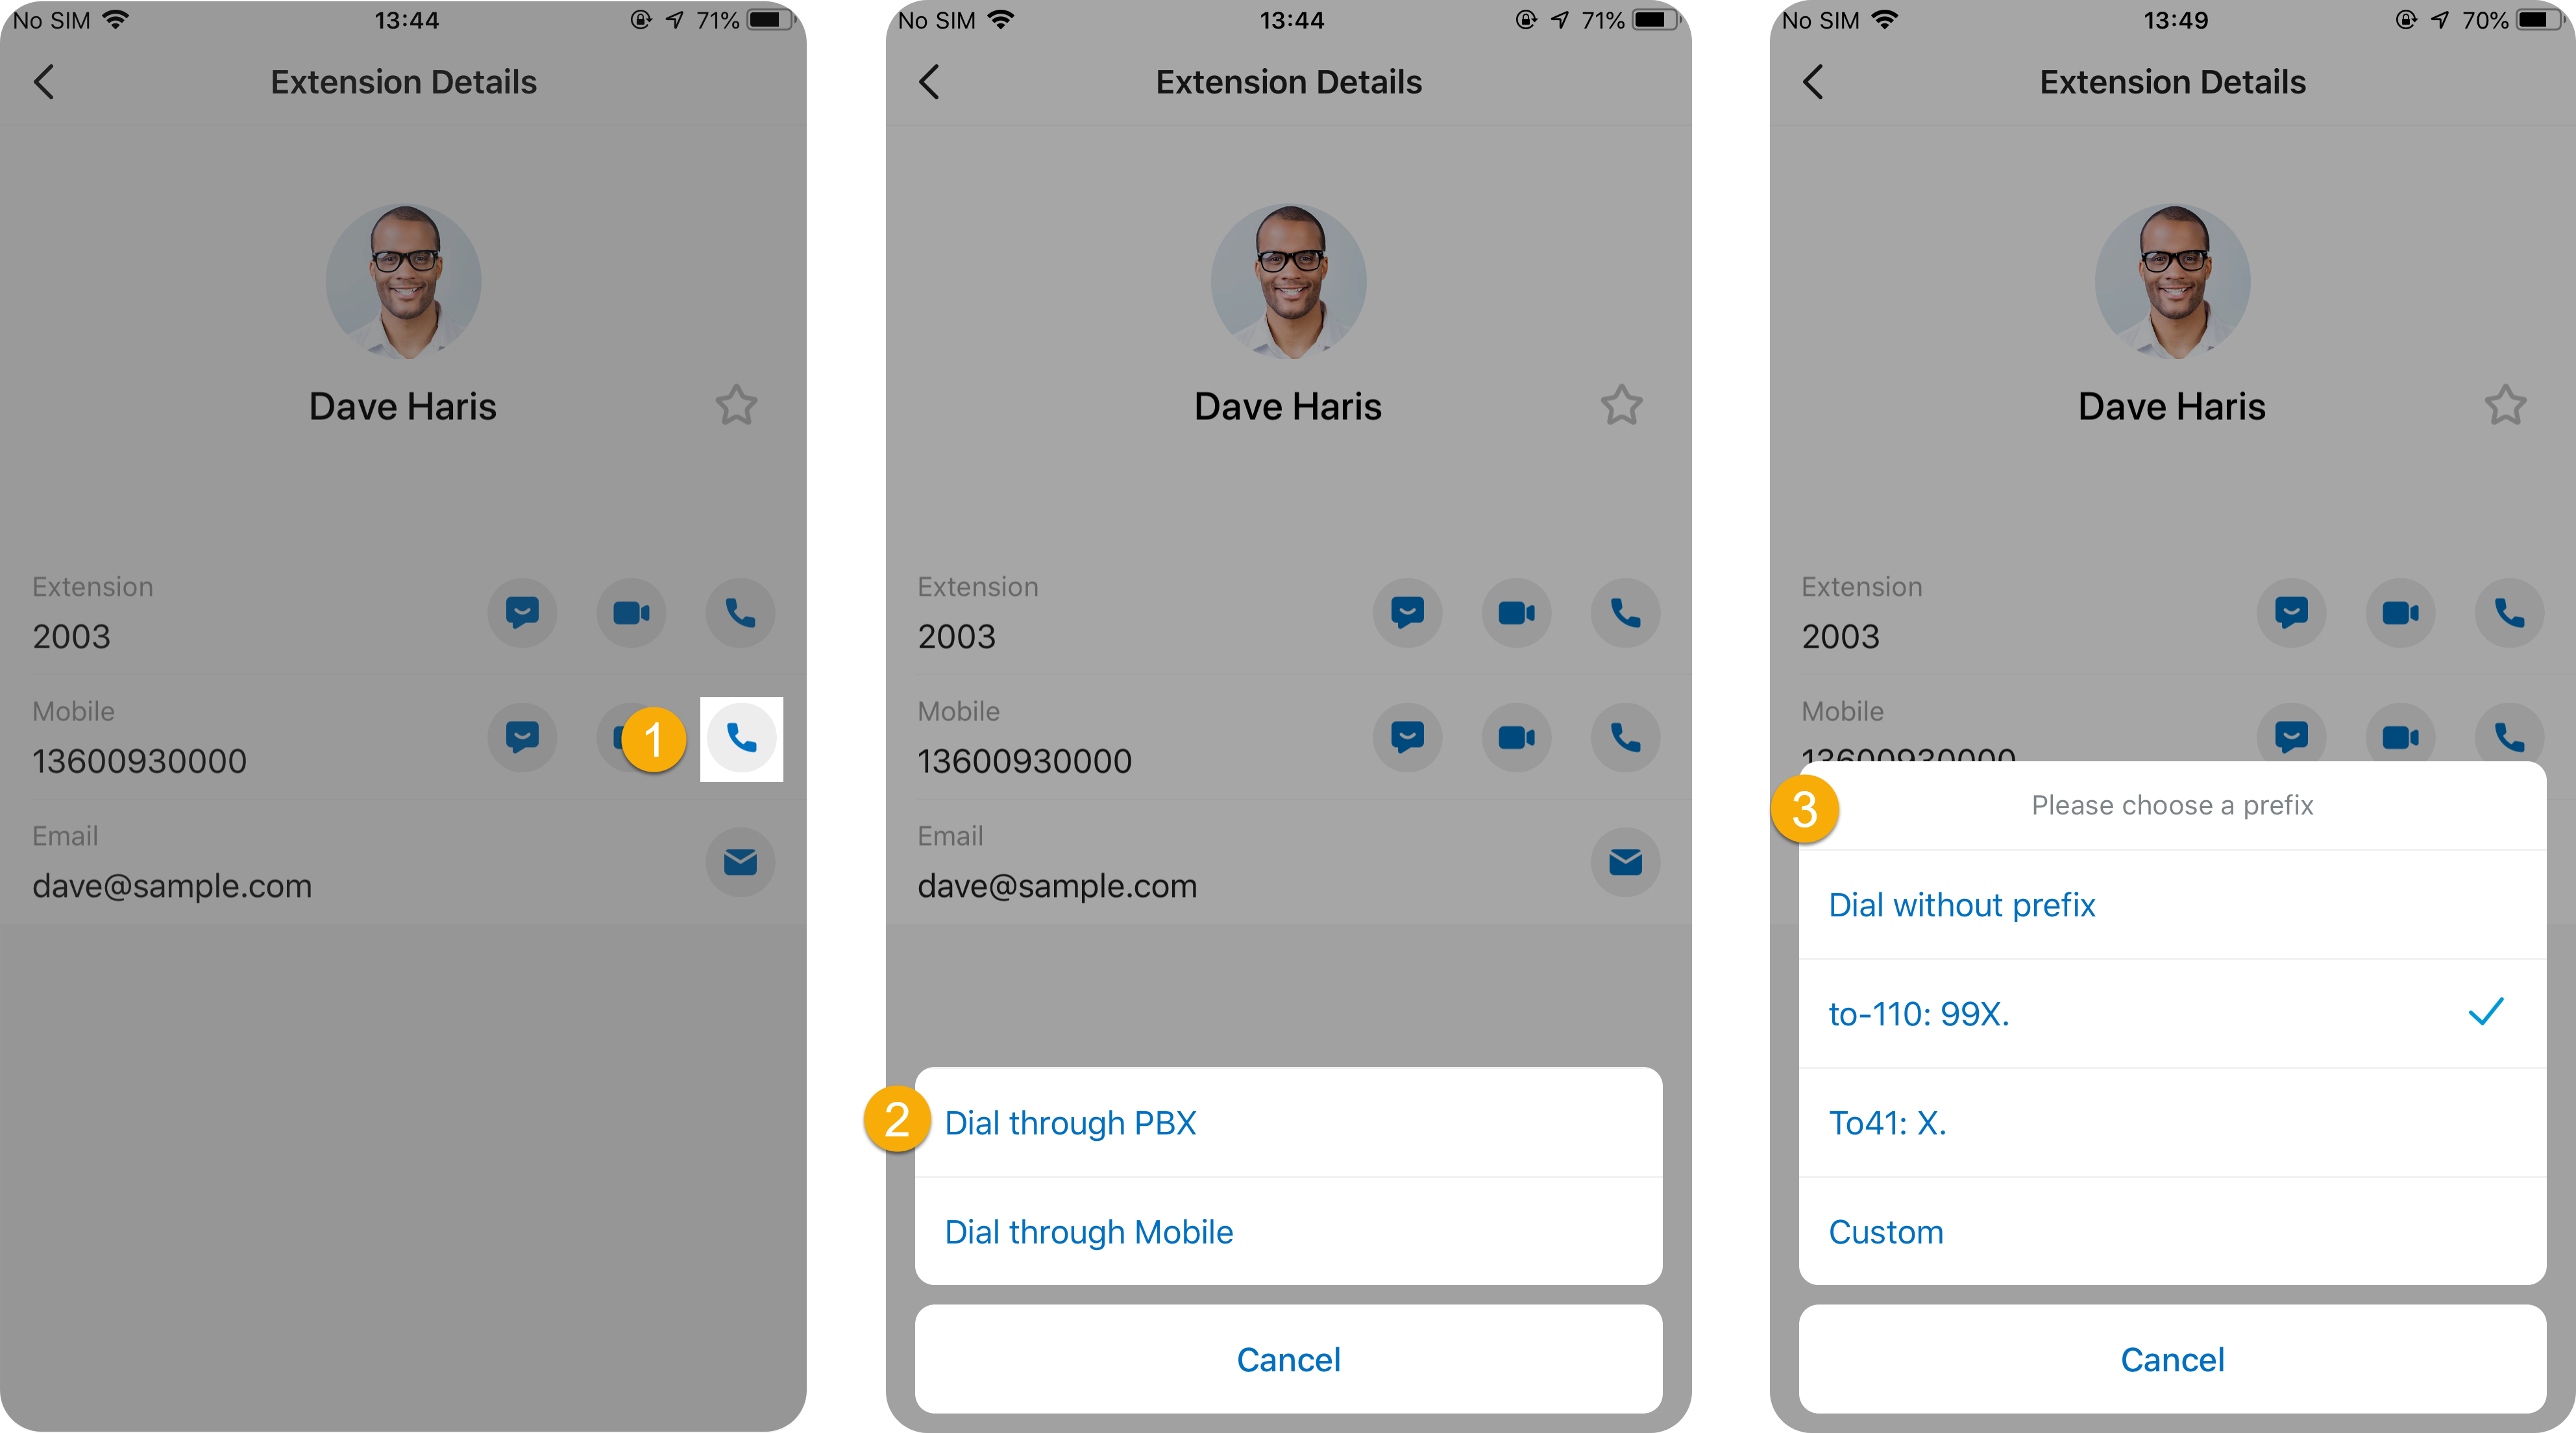
The Cloud Voice App attaches the chosen prefix to the number and dials the combined result.
Edit an outbound prefix
Section titled “Edit an outbound prefix”- On the Calls page, tap your account in the top-left corner.
- Open Settings > Advanced > Outbound Prefix.
- Update the prefix:
- Tap the prefix you want to change.
- Adjust the prefix name, the prefix number, or both.
- Tap Save in the top-right corner.
Delete an outbound prefix
Section titled “Delete an outbound prefix”- On the Calls page, tap your account in the top-left corner.
- Open Settings > Advanced > Outbound Prefix.
- Remove the prefix:
- Press and hold the prefix you no longer need.
- In the pop-up, tap Delete.
Question about this page?
Ask the AI assistant. It starts from this page, then searches the rest of the docs.
Ask Cloud Voice AI
Answers are AI-generated from the docs and may contain mistakes. Verify with the linked pages.