
View and Manage Company Contacts
Company contacts are shared entries stored in phonebooks that your organization maintains. From the Cloud Voice App you can browse the phonebooks you have access to, open a contact’s details, and, if you have the right permission, add, change, or remove entries. What you can do depends on the permissions your system administrator assigns to your extension.
View a company contact
Section titled “View a company contact”-
Sign in to the Cloud Voice App and open Contacts.
-
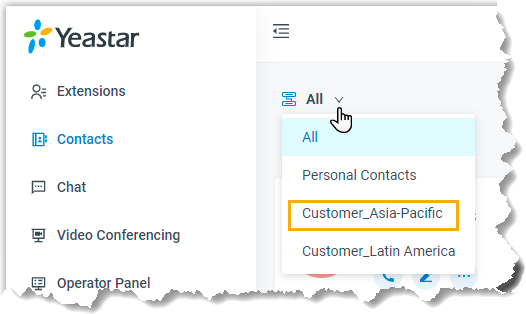
In the top-left corner of the workspace, use the phonebook selector (the group icon) to choose a phonebook from the drop-down list.
-
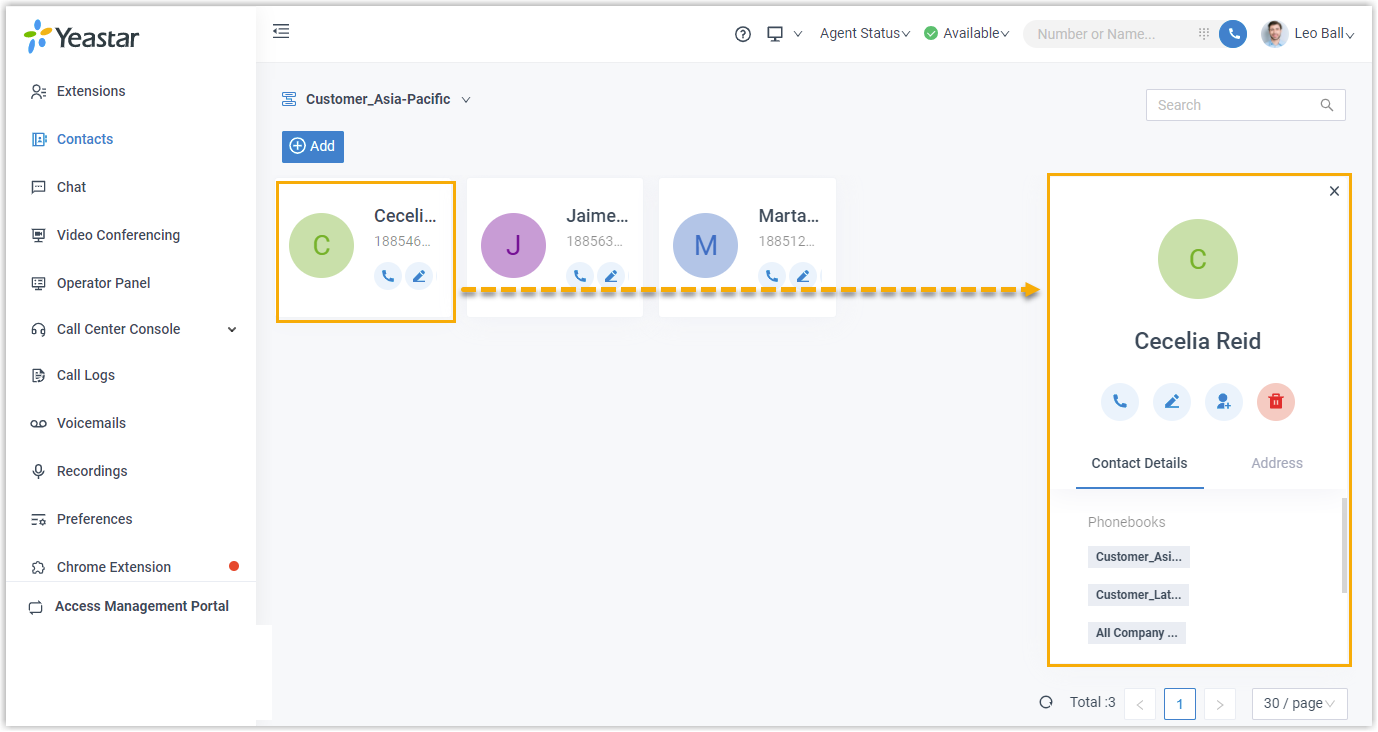
Click any contact card to see that person’s full details.
Add a company contact
Section titled “Add a company contact”You can create a company contact in several ways:
Add a contact directly in a phonebook
Section titled “Add a contact directly in a phonebook”Choose a phonebook you are allowed to manage, then create the entry.
-
Sign in to the Cloud Voice App and open Contacts.
-
In the top-left corner of the workspace, use the phonebook selector to choose the phonebook from the drop-down list.
-
Click Add, fill in the contact’s information, and click Save.
The contact now appears in the relevant phonebooks.
Add a contact from your personal contacts
Section titled “Add a contact from your personal contacts”To share one of your personal contacts with colleagues, copy it into a company phonebook. Anyone who can view or manage that phonebook will then be able to see and call the contact.
-
Sign in to the Cloud Voice App and open Contacts.
-
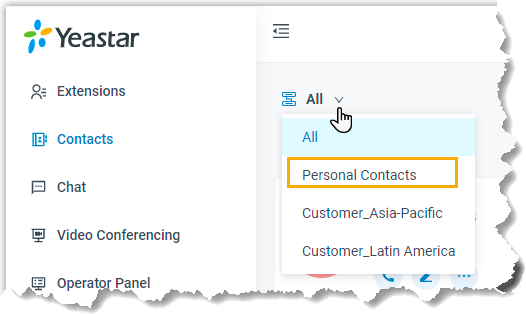
In the top-left corner of the workspace, use the phonebook selector to choose Personal Contacts from the drop-down list.
-
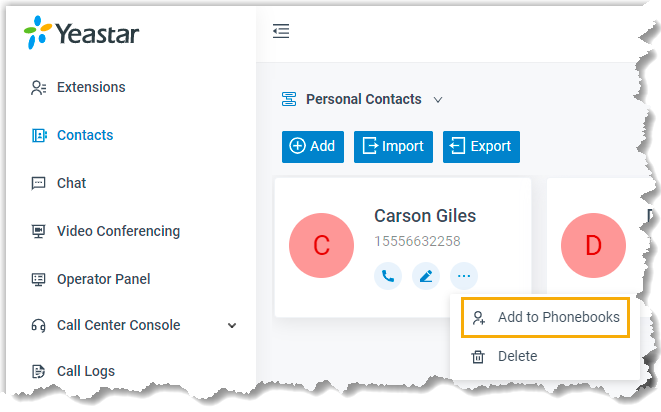
Locate the contact, click the More icon, and select Add to Phonebooks.
-
In the pop-up window, select the checkbox for each target phonebook and click Confirm.
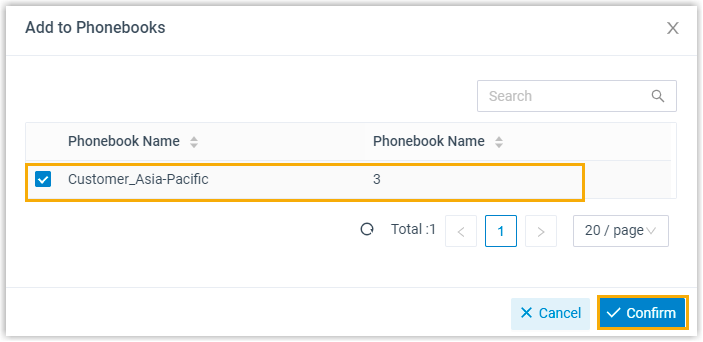
A confirmation message (“Added successfully”) indicates the contact was copied and the phonebook is updated.
Add a contact from Call Logs, Voicemails, or Recordings
Section titled “Add a contact from Call Logs, Voicemails, or Recordings”You can turn a number from a call log, voicemail, or recording into a company contact, either as a brand-new entry or by attaching the number to one that already exists.
- Sign in to the Cloud Voice App and open Call Logs, Voicemails, or Recordings.
- Right-click the record you want to use.
- To create a new contact:
- Click Add New Contact.
- In the Add to drop-down list, select Company Contacts, then choose a phonebook from the Phonebook List drop-down list.
- Enter the contact’s information.
- Click Save.
- To attach the number to an existing contact:
-
Click Add to Existing Contact.
-
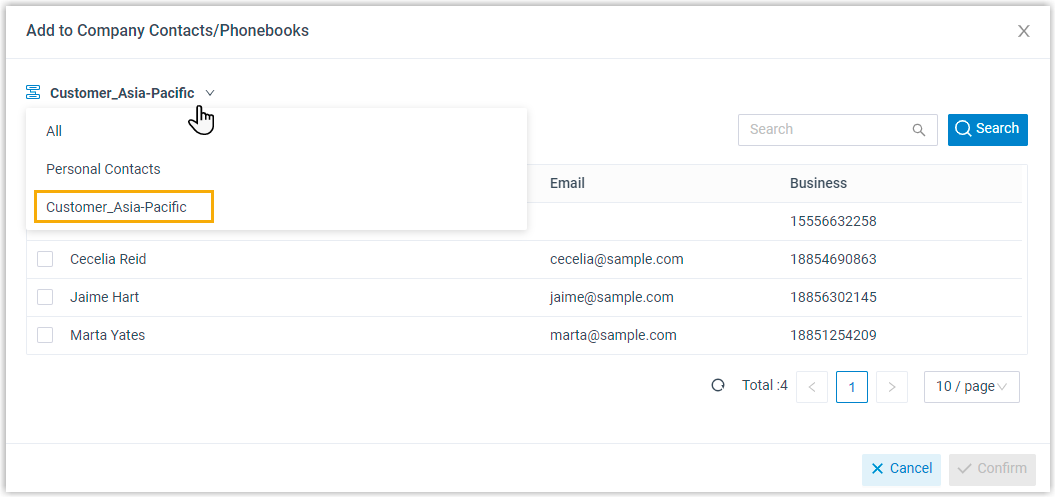
Use the phonebook selector to choose a phonebook.
-
Select the checkbox for the existing contact.
-
Click Confirm, then Save.
-
Edit a company contact
Section titled “Edit a company contact”- Sign in to the Cloud Voice App and open Contacts.
- In the top-left corner of the workspace, use the phonebook selector to choose the phonebook from the drop-down list.
- Find the contact and click the Edit icon.
- Update the contact’s information and click Save.
The contact’s details are saved.
Delete company contacts
Section titled “Delete company contacts”- Sign in to the Cloud Voice App and open Contacts.
- In the top-left corner of the workspace, use the phonebook selector to choose the phonebook from the drop-down list.
- Find the contact, click the More icon, click Delete, then click OK.
Question about this page?
Ask the AI assistant. It starts from this page, then searches the rest of the docs.
Ask Cloud Voice AI
Answers are AI-generated from the docs and may contain mistakes. Verify with the linked pages.