
Start a Scheduled Meeting as the Host
As the scheduled start time approaches, the person who created the meeting, or any participant who has the host password, can open the meeting. This page covers both ways to start a scheduled meeting as its host.
Start a scheduled meeting from the Cloud Voice App
Section titled “Start a scheduled meeting from the Cloud Voice App”The meeting host is normally whoever created the meeting link. If you created the link, launch the meeting directly from the Cloud Voice App.
Prerequisite: Make sure your web browser is allowed to use your computer’s microphone and camera.
Procedure:
-
Sign in to the Cloud Voice App and open Video Conferencing.
-
In the Upcoming Meetings list, click the start icon
 next to the meeting you want to open.
The browser prompts you to let the Cloud Voice App use your microphone.
-
In the prompt, grant microphone and camera access.
a. Click Allow to let the Cloud Voice App use your microphone.
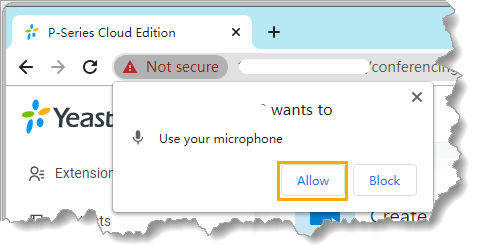
The microphone turns on.
b. Click Allow to let the Cloud Voice App use your camera.
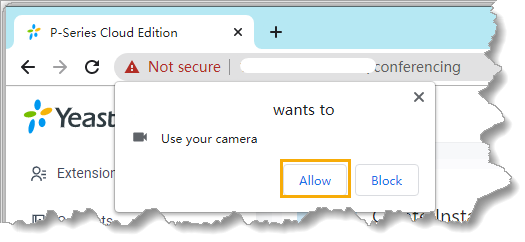
The camera turns on and a preview of your video appears.
-
On the Preparation page, set your initial preferences and review the meeting details.
a. Use the toolbar icons to adjust your audio and video:
 Mute or unmute yourself.
 Turn your camera on or off.
 Switch your camera, microphone, or speaker.
b. Confirm the meeting basics:
- Meeting Name
- Host Password: the credential that grants host control of the meeting.
- Memo: a short note about the meeting.
-
Click Start.
Result: You join the meeting as host. A pop-up window lets you preview or copy the meeting details.
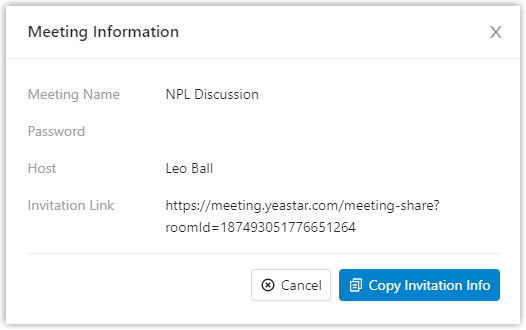
Start a scheduled meeting from an invitation link
Section titled “Start a scheduled meeting from an invitation link”If the meeting creator sent you an invitation link along with a host password, open the link and enter the password to join as the host.
Procedure:
-
Open the invitation link.
You land on the meeting’s join page, and the browser prompts you to let the meeting site use your microphone.
-
In the prompt, allow the meeting site to use your microphone and camera.
a. Click Allow to grant microphone access.
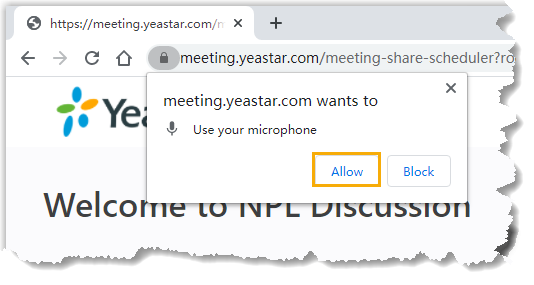
The microphone turns on.
b. Click Allow to grant camera access.
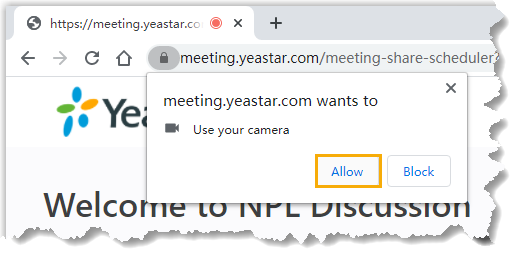
The camera turns on and a preview of your video appears on the left side of the page.
-
On the right side of the page, select the Host tab, then set the basic information, audio, and video as needed.
a. Basic information:
- Meeting Name: Keep the current name or change it.
- Your Name: Enter the name every participant will see.
- Host Password: Enter the host password the meeting creator gave you.
- Memo: Keep the meeting note or edit it.
b. Audio and video:
- Camera: Keep the default camera or pick another.
- Microphone: Keep the default microphone or pick another.
- Speaker: Keep the default speaker or pick another.
-
Click Join.
Result: You join the meeting as host. A pop-up window lets you preview or copy the meeting details.
Question about this page?
Ask the AI assistant. It starts from this page, then searches the rest of the docs.
Ask Cloud Voice AI
Answers are AI-generated from the docs and may contain mistakes. Verify with the linked pages.