
Integrate Cloud Voice with Telnyx Fax
Connecting Cloud Voice to Telnyx Fax gives your team internet-based faxing: extension users send and receive faxes straight from the Cloud Voice App (Desktop or Web), carried over Telnyx’s network instead of a physical fax line.
How the integration works
Section titled “How the integration works”The link between the two systems relies on the Cloud Voice webhook and the Telnyx Fax API V2. A webhook is an automatic notification that one service sends to another when an event happens, and an API (Application Programming Interface) is the connection that lets software send commands to a service. Here is what happens in each direction:
-
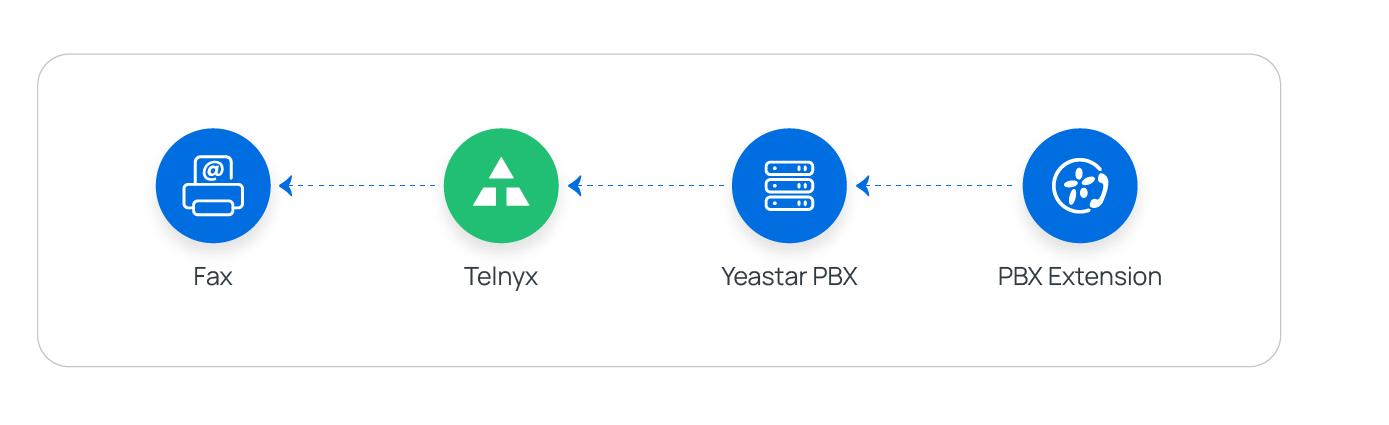
Outbound: When a user sends a fax from the Cloud Voice App, Cloud Voice calls the Telnyx API to hand the fax off for delivery.
-
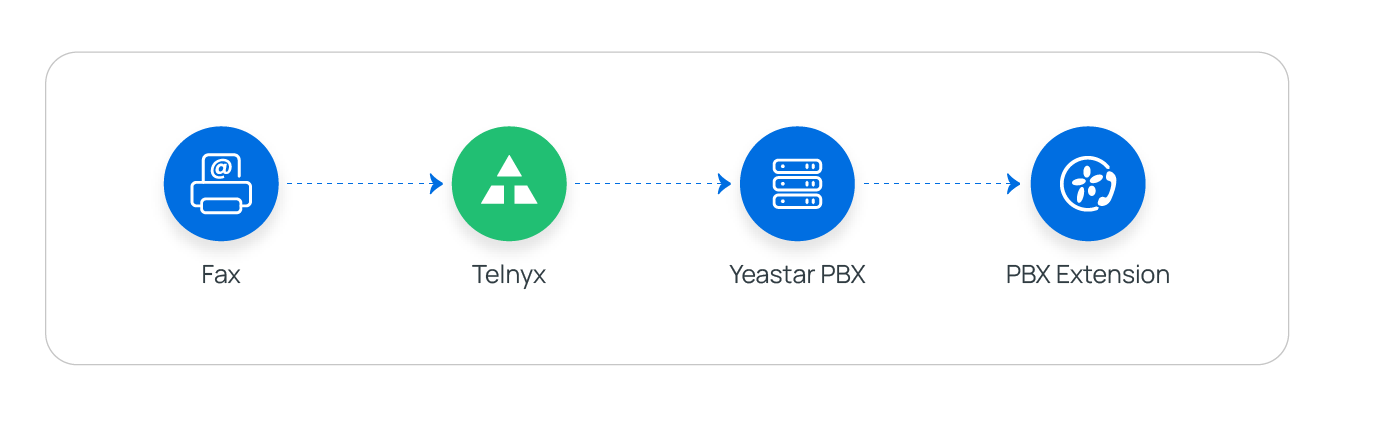
Inbound: When a fax arrives at your Telnyx fax number, Telnyx notifies Cloud Voice through the webhook. Cloud Voice then pulls the fax file back over the API and routes it to the extension users you designate.
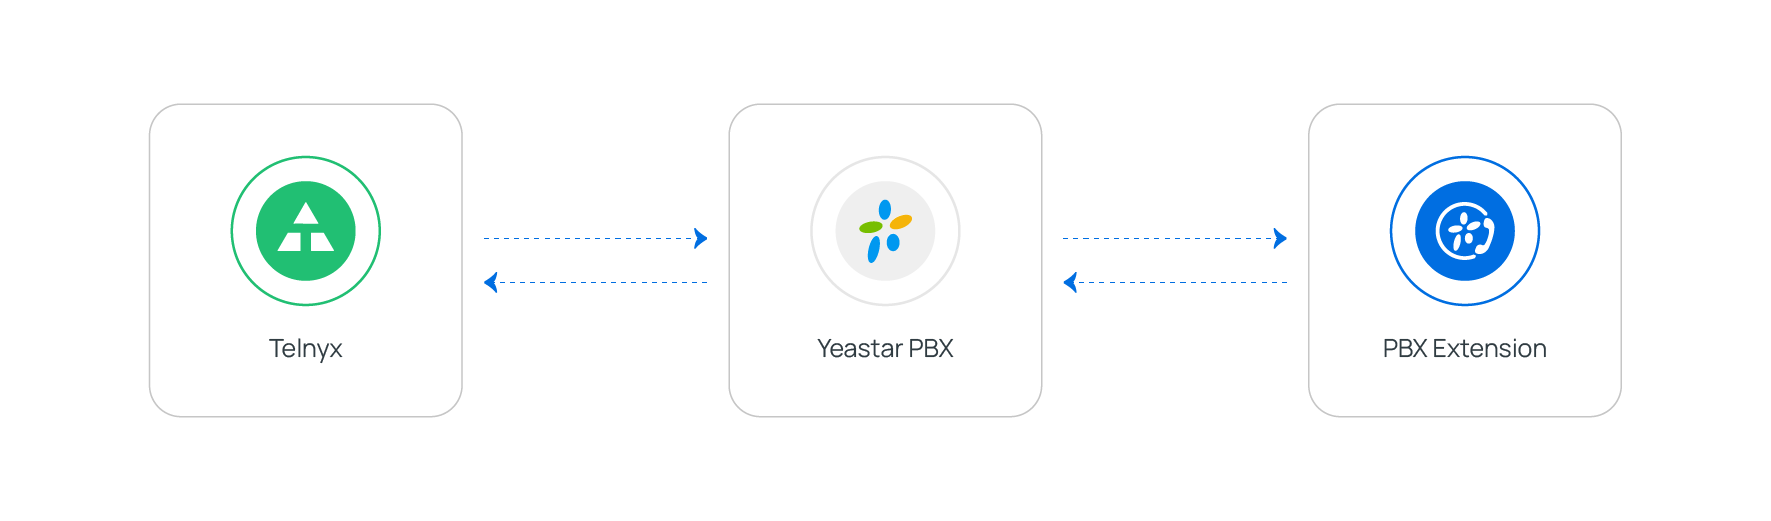
Setting it up comes down to three stages, which the rest of this page walks through:
- Copy the webhook URL from Cloud Voice.
- Build the required resources in Telnyx and collect the credentials they generate, an API key, an outbound voice profile, a fax-capable phone number, and a fax application.
- Return to Cloud Voice, enter those credentials, and finish the fax settings.
Requirements
Section titled “Requirements”Before you begin, confirm your Cloud Voice system meets both of these:
- Firmware: Version 84.20.0.74 or later
- Plan: Enterprise Plan or Ultimate Plan
Step 1. Copy the webhook URL from Cloud Voice
Section titled “Step 1. Copy the webhook URL from Cloud Voice”Telnyx needs this URL when you create the fax application later, so grab it first.
-
Open the fax integration screen.
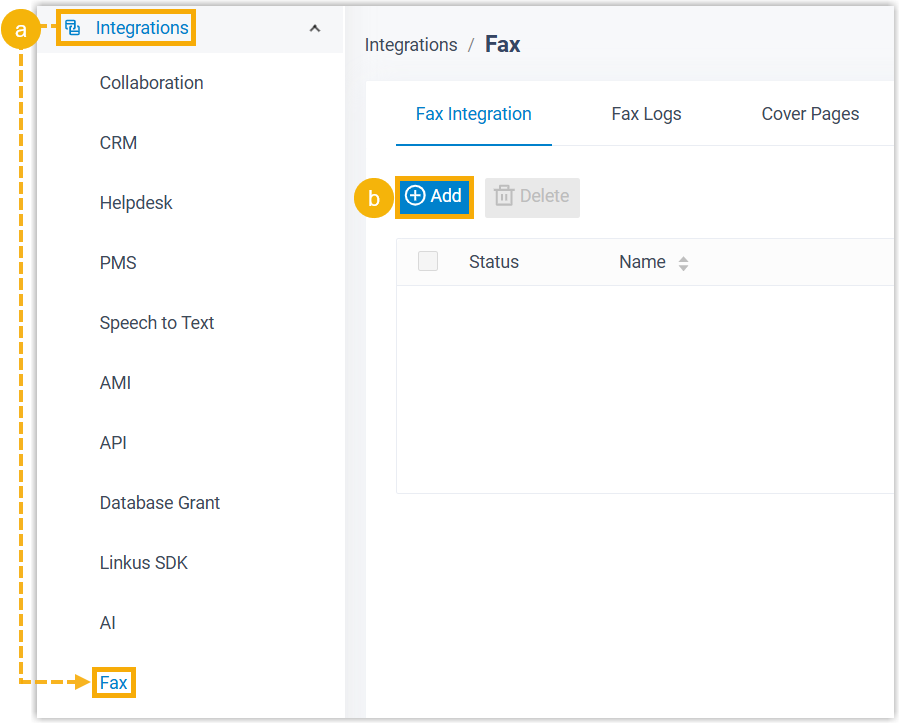
a. Sign in to the Cloud Voice admin portal and go to Integrations > Fax.
b. On the Fax Integration tab, click Add.
-
Retrieve the webhook URL.
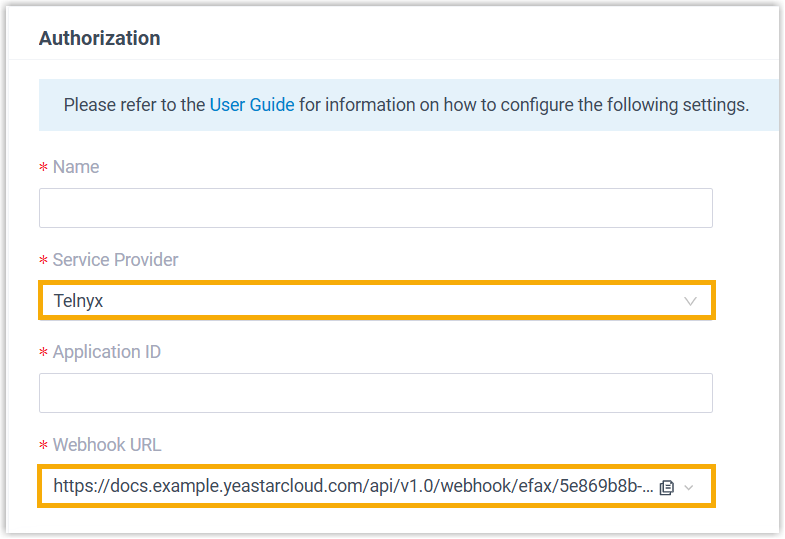
a. Set Service Provider to Telnyx.
b. In the Webhook URL field, click the copy icon
 and keep the URL somewhere handy for Step 2.
Step 2. Create resources and collect credentials in Telnyx
Section titled “Step 2. Create resources and collect credentials in Telnyx”Everything in this step happens inside the Telnyx portal. You’ll create four things and note the credentials each one produces.
1. Create an API key
Section titled “1. Create an API key”-
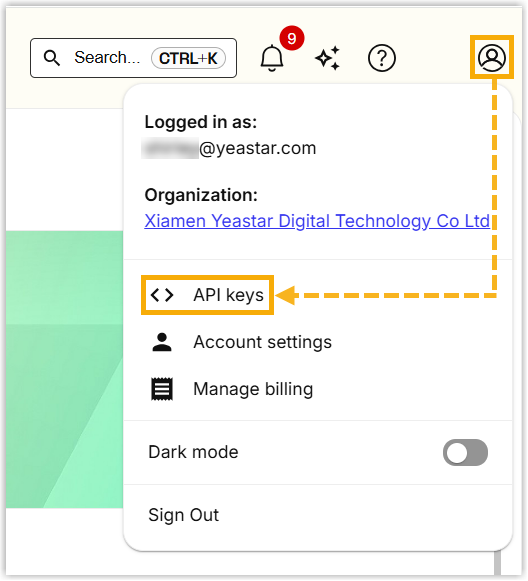
Open the API keys page.
a. Sign in to the Telnyx portal.
b. Click your account in the top-right corner and choose API keys.
-
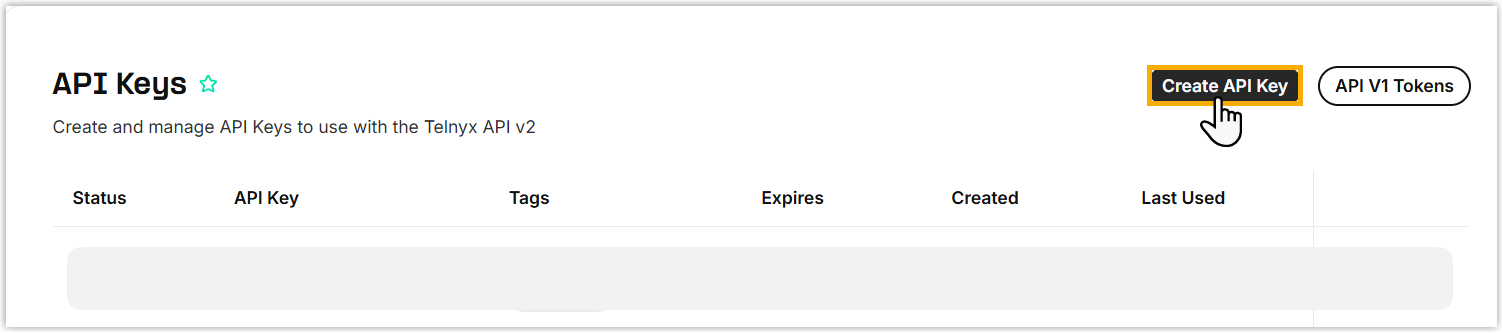
Generate the key.
a. Click Create API Key in the top-right corner.
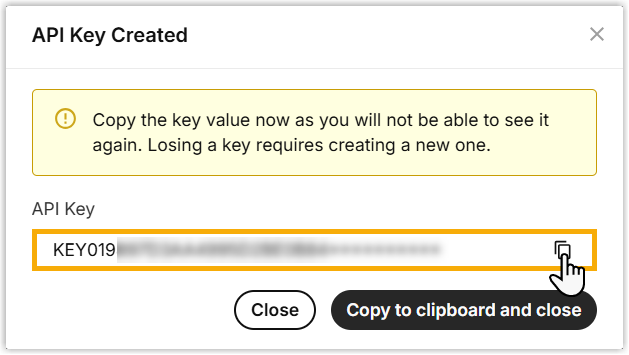
b. In the dialog, set a tag and an expiration date if you want, then click Create. Telnyx generates and displays the new key.
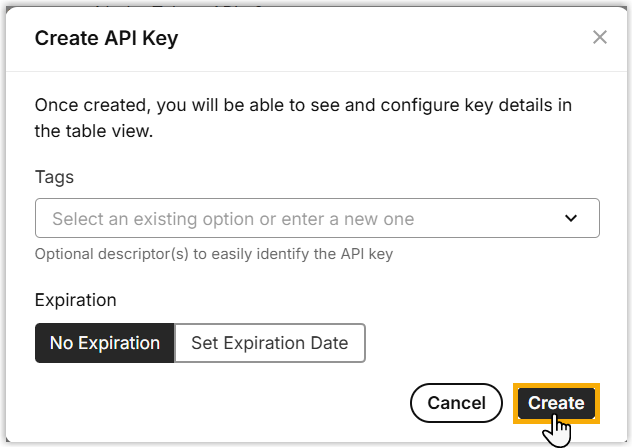
c. Copy the key, save it for later, and close the dialog.
2. Create an outbound voice profile
Section titled “2. Create an outbound voice profile”An outbound voice profile is what later authorizes your fax application to place outbound faxes, so create one now.
-
Open the outbound voice profiles page.
a. Click Back in the top-left corner to return to the home menu.
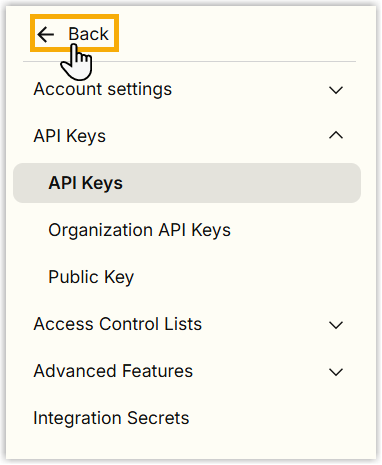
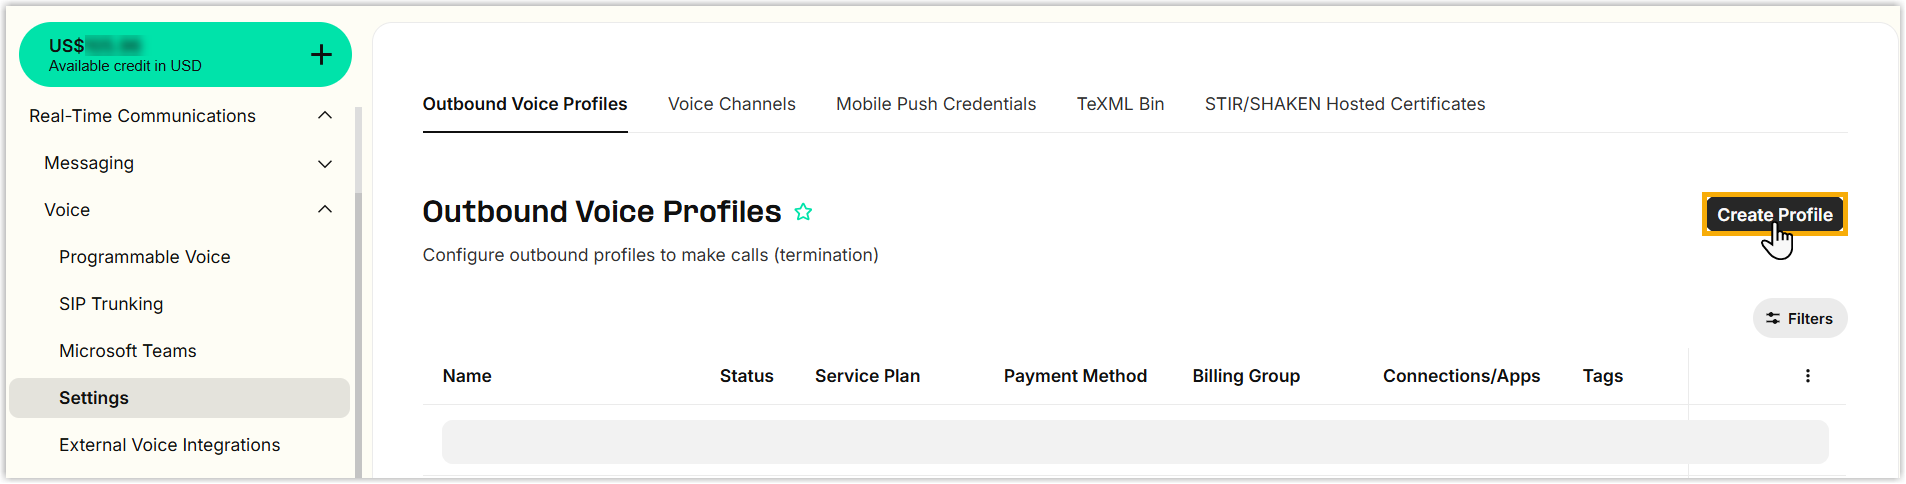
b. In the left navigation, go to Real-Time Communications > Voice > Settings > Outbound Voice Profiles.
-
Click Create Profile in the top-right corner.
-
Set up the profile however suits your account.
3. Buy a fax-capable phone number
Section titled “3. Buy a fax-capable phone number”-
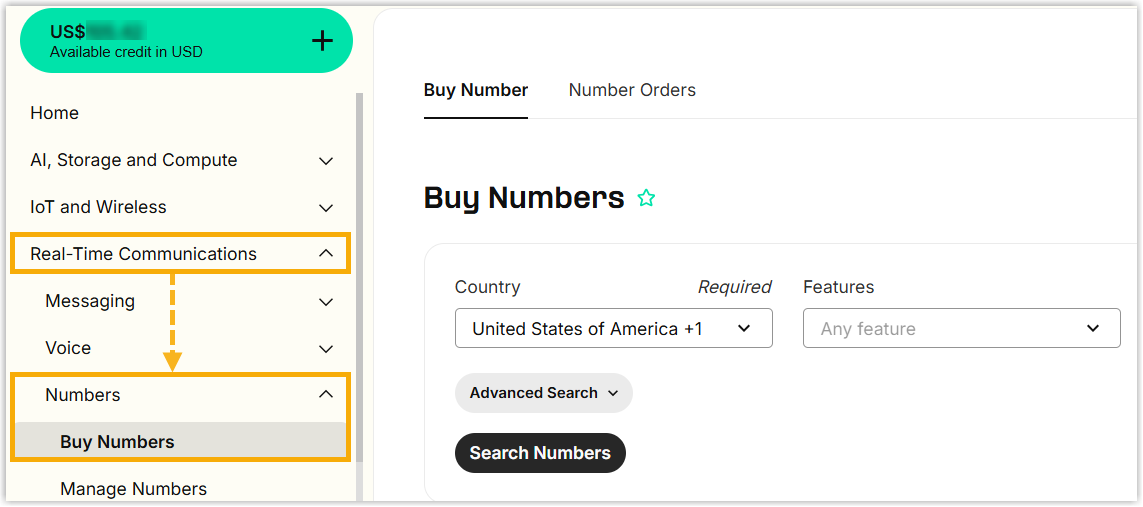
In the left navigation, go to Real-Time Communications > Numbers > Buy Numbers.
-
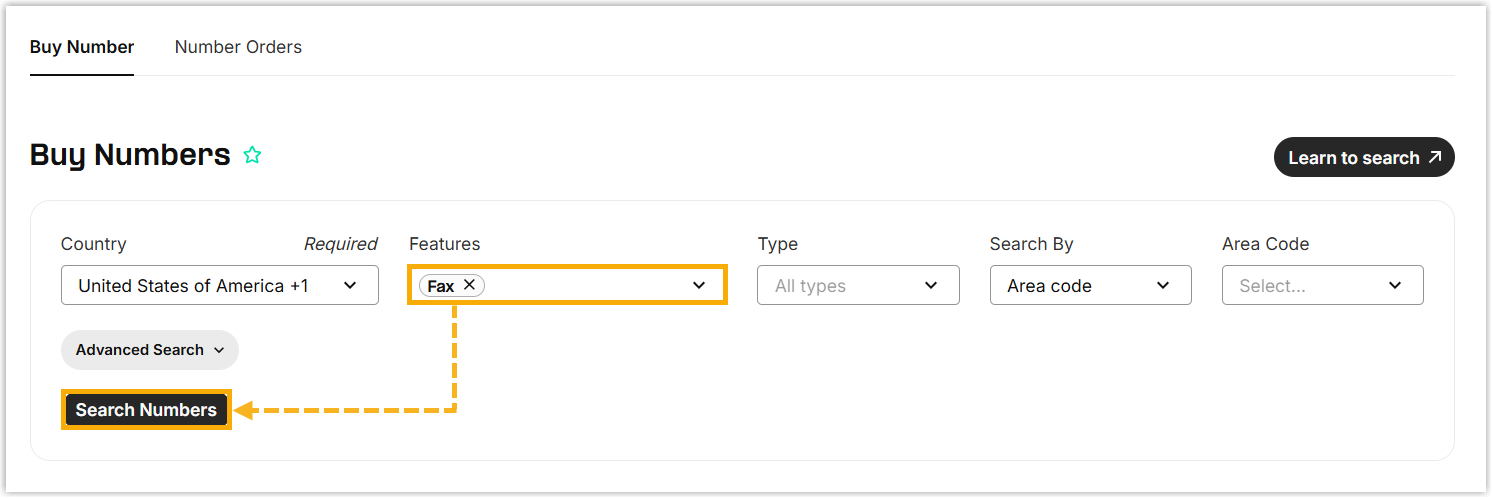
Search for and purchase a number that supports fax.
a. On the Buy Number tab, set Features to Fax, add any other filters you need, and click Search Numbers to list what’s available.
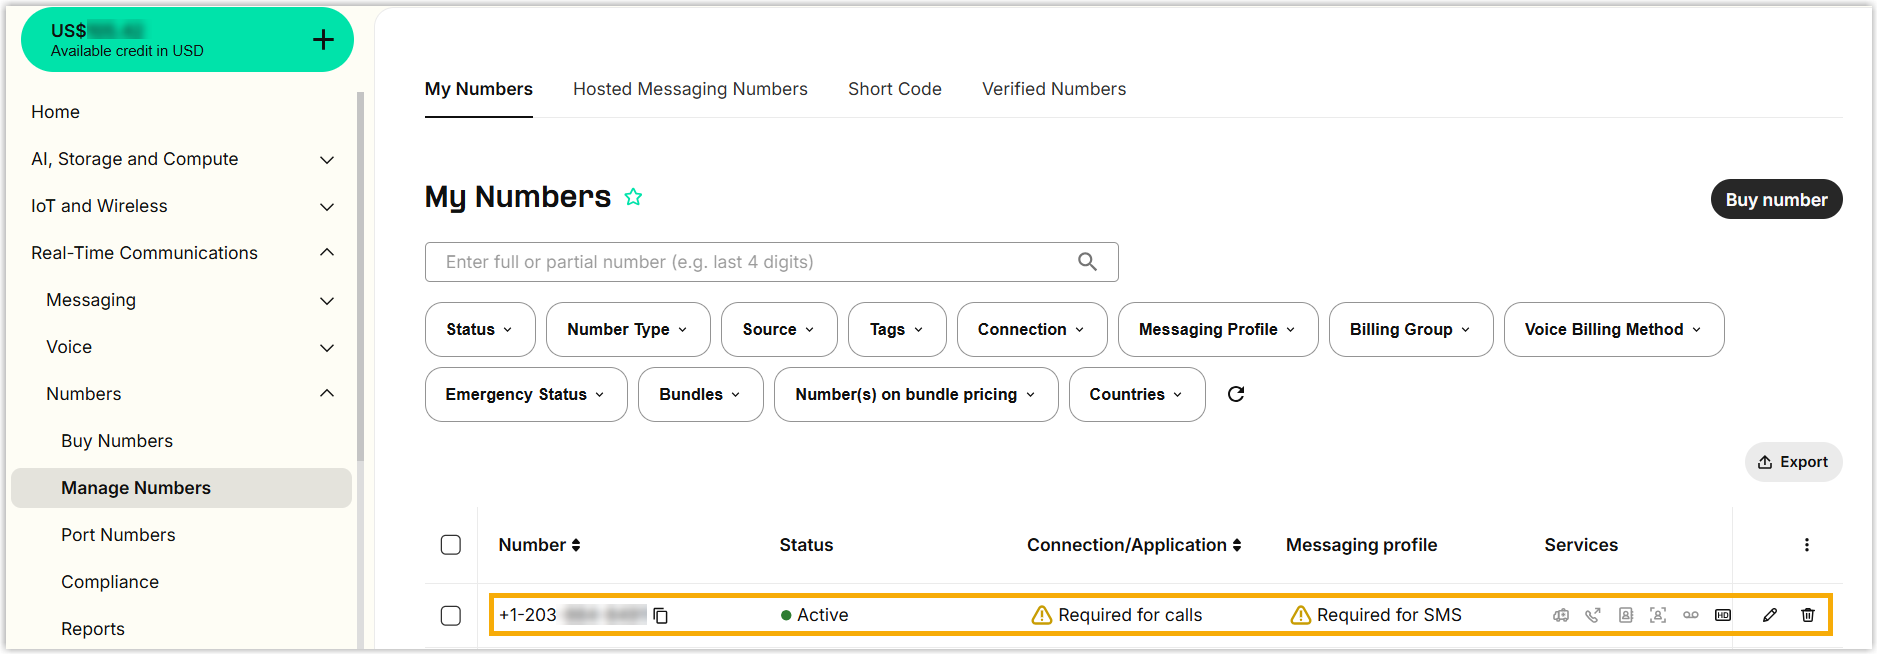
b. Pick a number and complete the purchase. Telnyx sends you to the Manage Numbers page, where the new number appears.
4. Create a fax application
Section titled “4. Create a fax application”-
Open the fax application page.
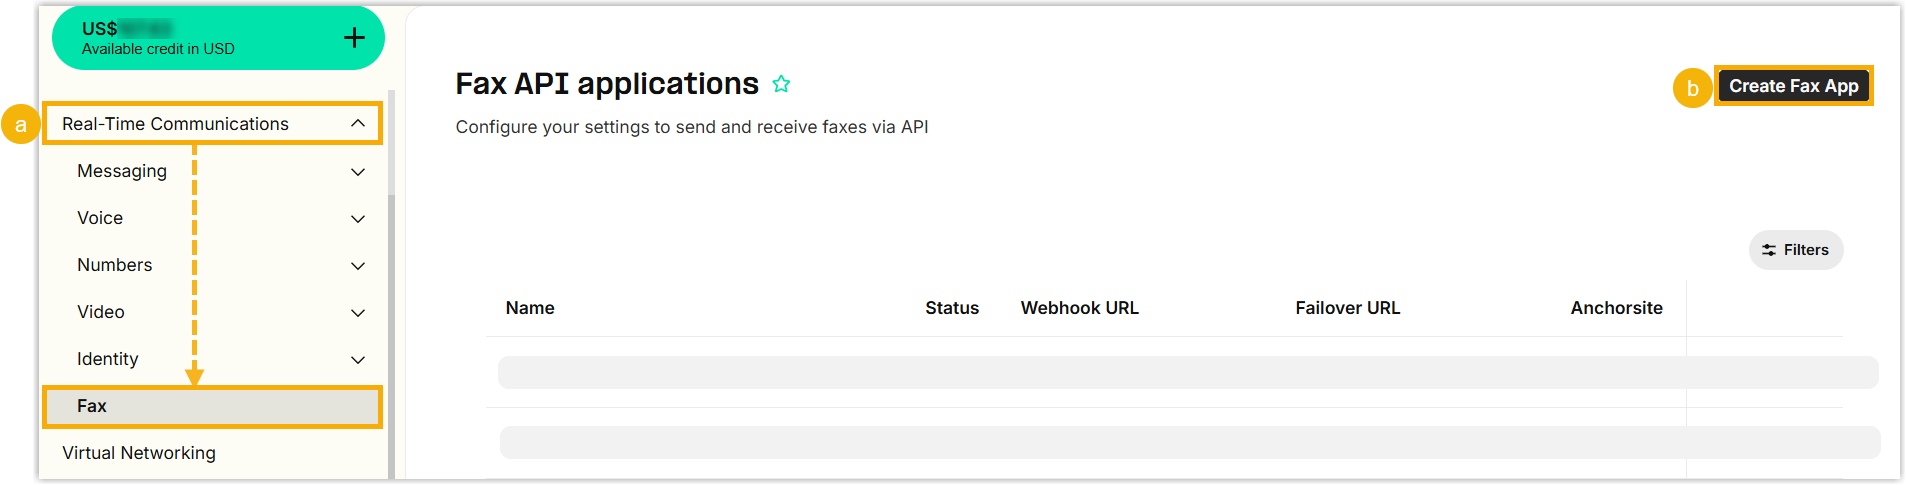
a. In the left navigation, go to Real-Time Communications > Fax.
b. Click Create Fax App in the top-right corner.
-
On the Details step, fill in the following and click Create.
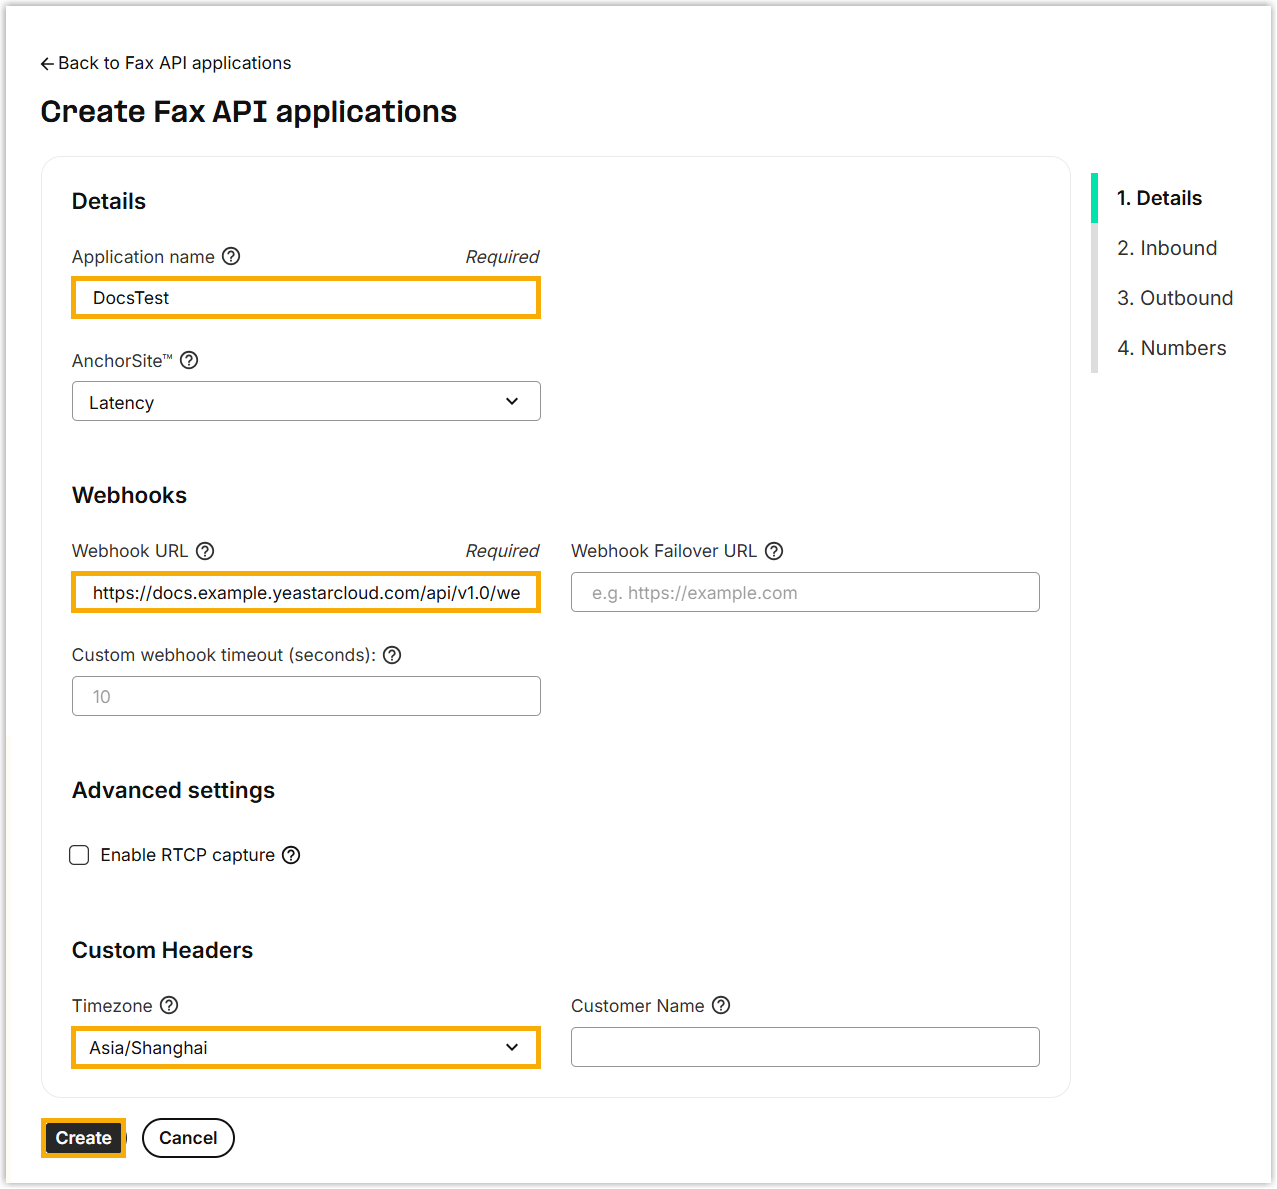
Setting What to enter Application name A label that helps you recognize the application. Webhook URL Paste the webhook URL you copied from Cloud Voice in Step 1. Timezone The time zone to use in the fax header timestamps. -
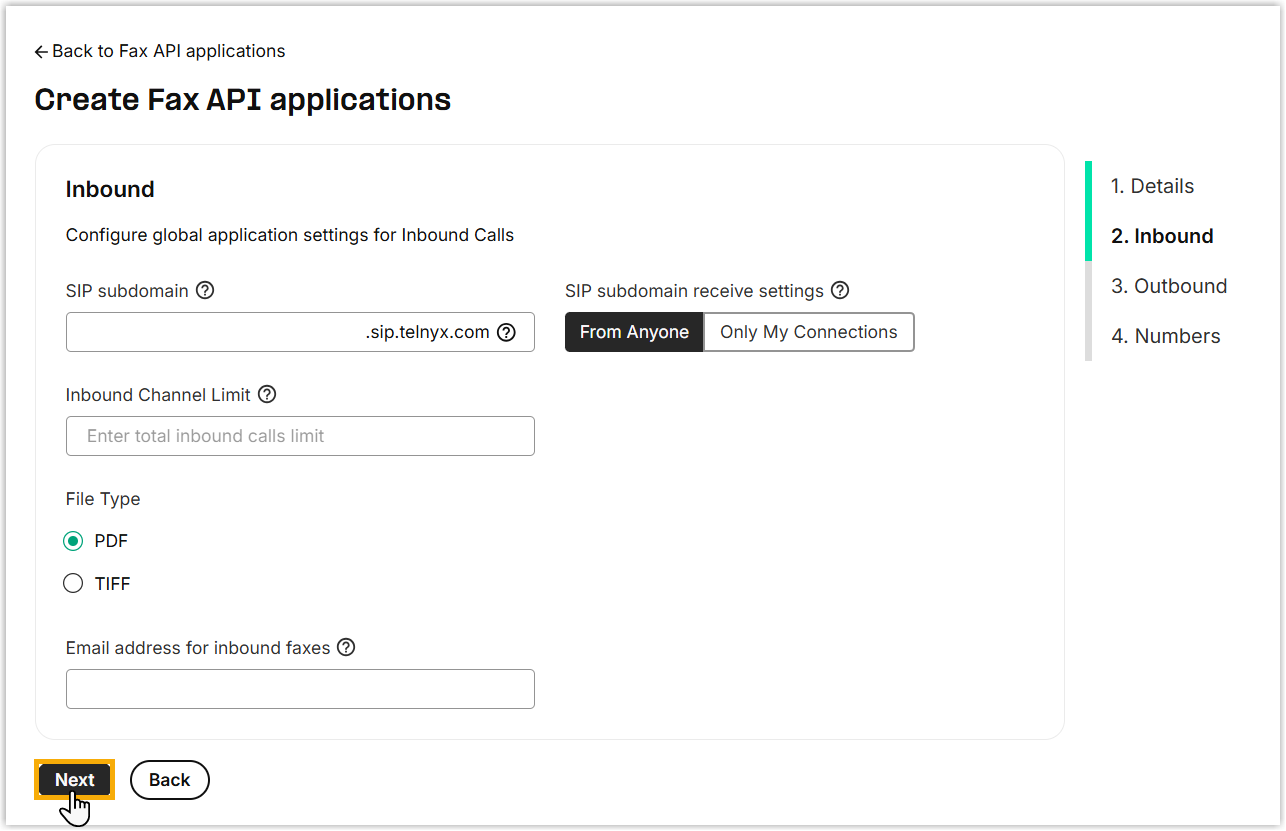
On the Inbound step, leave the defaults or adjust them as needed, then click Next.
-
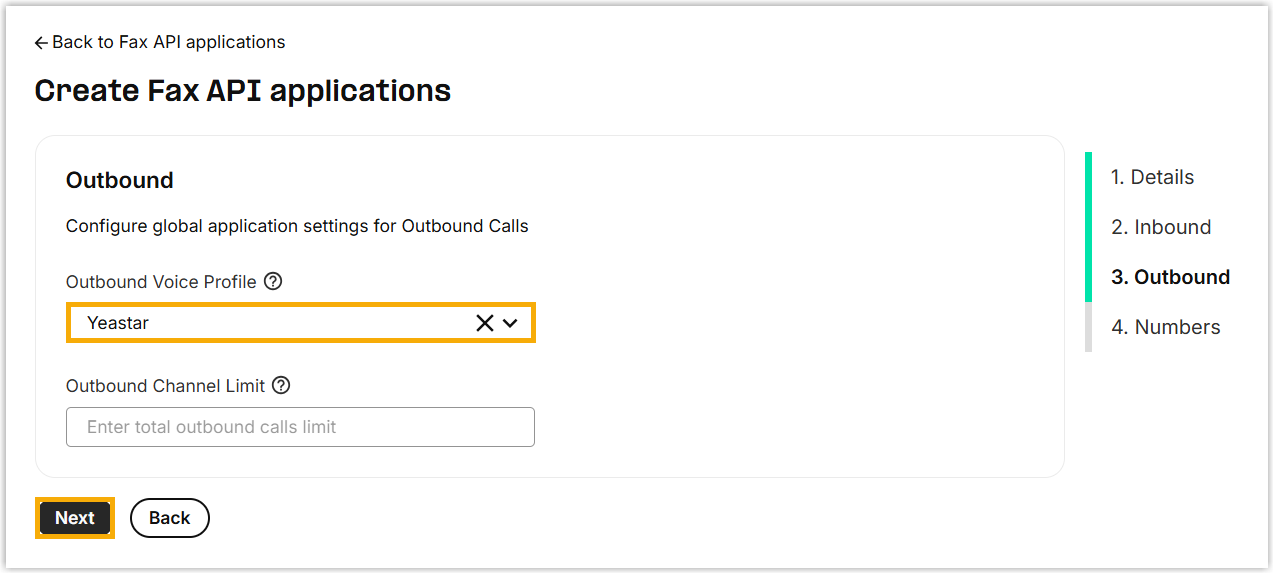
On the Outbound step, choose the outbound voice profile you created earlier from the Outbound Voice Profile list to allow outbound faxing, then click Next.
-
On the Numbers step, click the link icon
 to attach the fax number you bought to this application.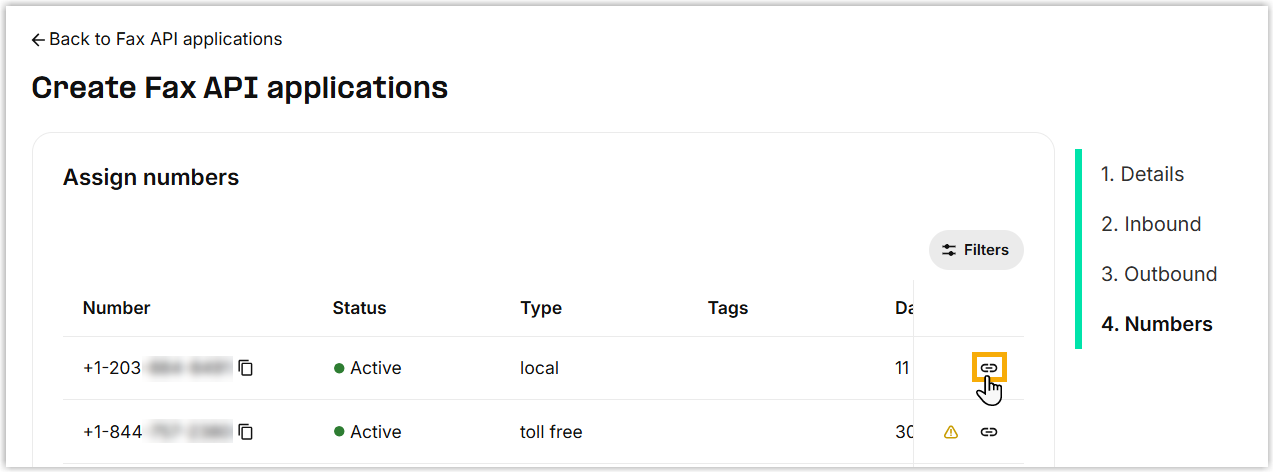
-
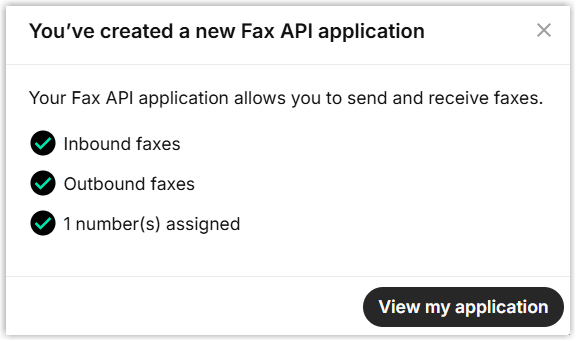
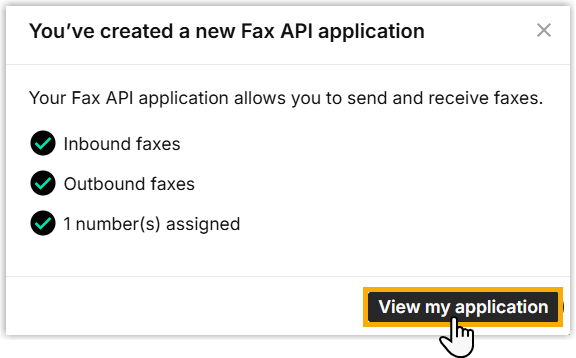
Click Complete in the bottom-left corner. A confirmation window tells you the application is created.
-
Get the application ID.
a. Click View my application.
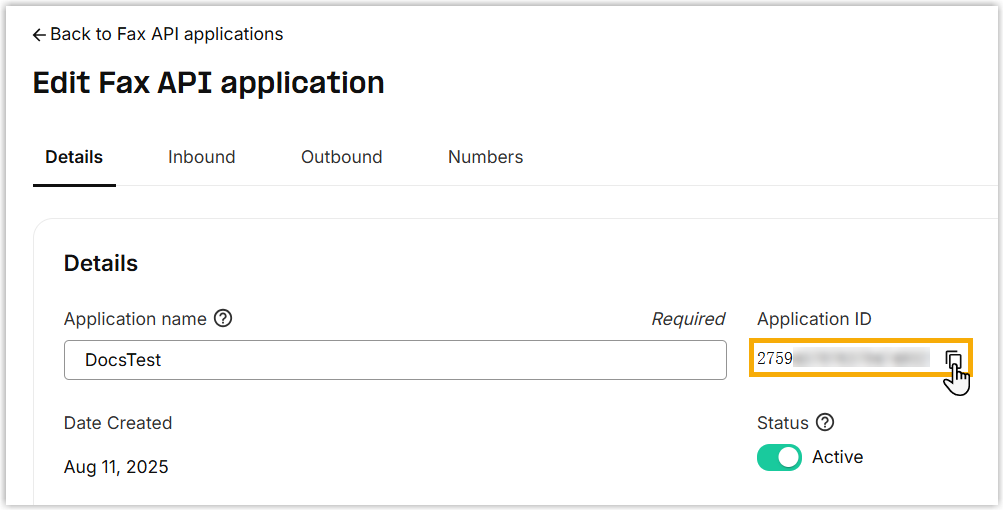
b. On the Details tab, copy the application ID and save it for later.
Step 3. Enter credentials and configure fax settings in Cloud Voice
Section titled “Step 3. Enter credentials and configure fax settings in Cloud Voice”Back in Cloud Voice, plug in the Telnyx credentials and finish the fax settings to complete the integration.
-
Open the fax integration screen.
a. Sign in to the Cloud Voice admin portal and go to Integrations > Fax.
b. On the Fax Integration tab, click Add.
-
Complete the Authorization section.
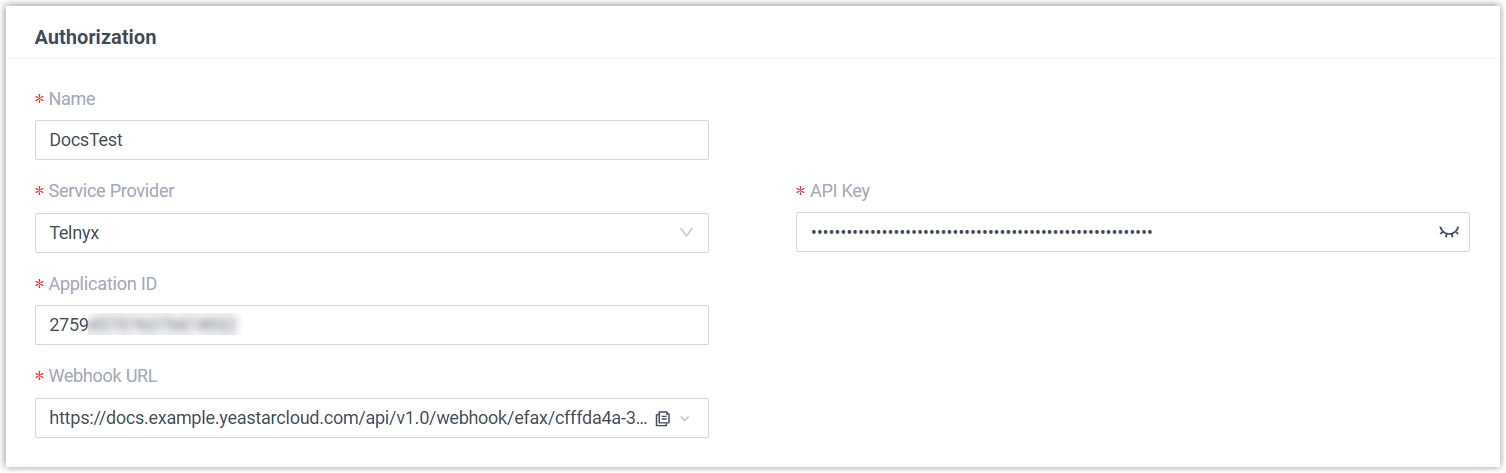
Setting What to enter Name A label that helps you recognize the integration. Service Provider Select Telnyx. API Key Paste the API key you copied from Telnyx. Application ID Paste the application ID you copied from Telnyx. -
Optional: To forward inbound faxes to email addresses as attachments, set this up in the Settings section.
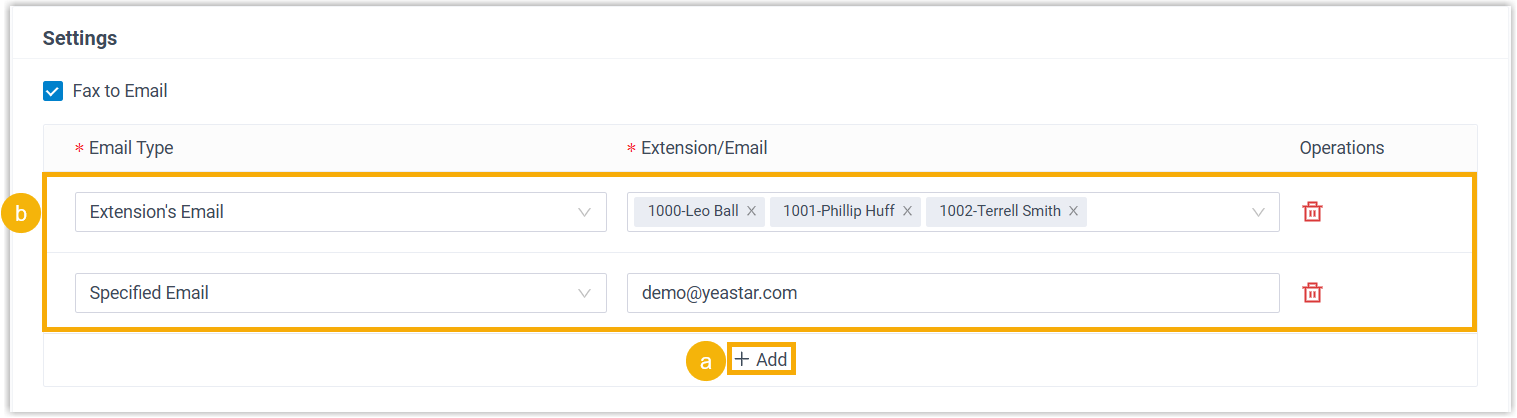
a. In the Settings section, click Add.
b. From the Email Type list, pick the kind of recipient and fill in the matching fields:
-
Extension’s Email: Deliver inbound faxes to extension users’ mailboxes. Choose the extensions from the Extension/Email list.
-
Specified Email: Deliver inbound faxes to a fixed address. Type the address into the Extension/Email field.
-
-
Define your fax number(s) and decide which extension users may send and receive faxes.
a. In the Fax Number section, click Add.
b. In the pop-up window, fill in the following and click Save.
Setting What to enter Fax Number Your Telnyx fax number in E.164 format: a plus sign, the country code, then the number, with no spaces or separators. Example: +12498037994.Fax Reception Destination The extensions or extension groups allowed to receive inbound faxes. Recipients open them in the Cloud Voice App under Fax Management > Fax. Extensions Allowed to Send Fax The extensions or extension groups allowed to send faxes. They send from the Cloud Voice App under Fax Management > Fax. c. To add another fax number, repeat sub-steps a and b.
-
Click Save.
Result
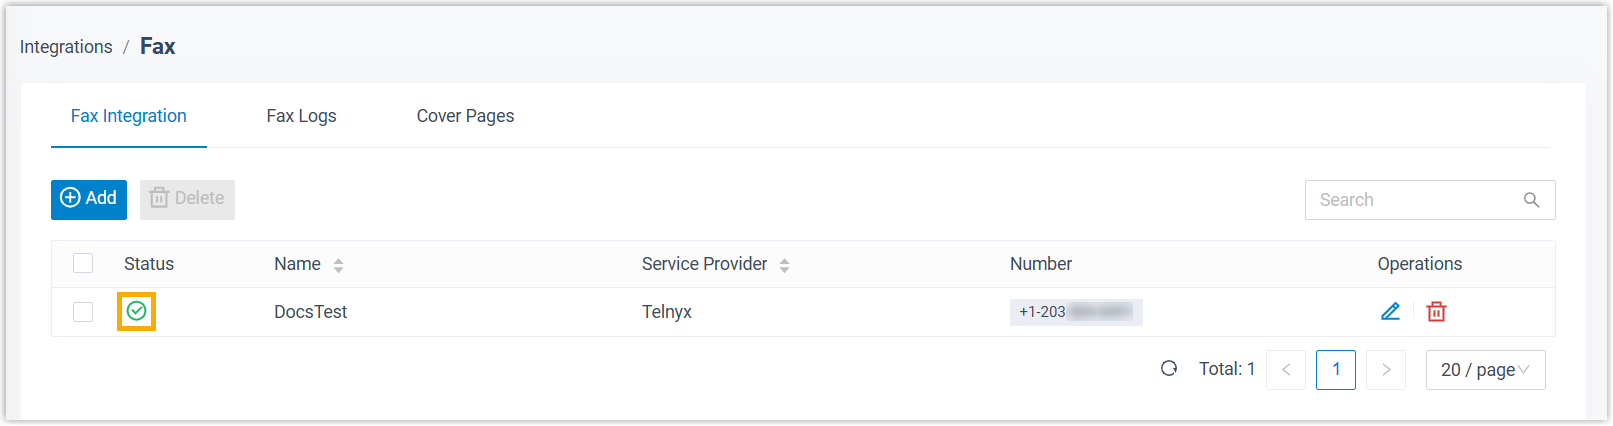
Section titled “Result”The Status column shows a success indicator  , which confirms the Telnyx Fax integration is live.
What to do next
Section titled “What to do next”- Optionally build cover pages that your users can attach to outbound faxes. See Add a Fax Cover Page.
- Show your extension users how to send faxes and read incoming ones from the Cloud Voice App, under Fax Management > Fax.
Question about this page?
Ask the AI assistant. It starts from this page, then searches the rest of the docs.
Ask Cloud Voice AI
Answers are AI-generated from the docs and may contain mistakes. Verify with the linked pages.