
Create a CRM application using HubSpot CLI
Before Cloud Voice can talk to HubSpot, HubSpot needs an app that grants the two systems permission to exchange data. This page walks you through building that app with the HubSpot command-line interface (CLI). Instead of clicking through a web form, you describe the app in a small set of local files, group them into a project, and push the project up to your HubSpot developer account.
Prerequisites
Section titled “Prerequisites”You need a HubSpot developer account.
Overview
Section titled “Overview”Creating the app takes three stages:
- Gather the authentication details you’ll be prompted for.
- Prepare your local machine with the tools HubSpot needs.
- Define the app locally and upload it.
Gather authentication details
Section titled “Gather authentication details”Collect the two credentials you’ll be asked for while building the app: a personal access key from HubSpot and a redirect URL from Cloud Voice.
Generate a personal access key in HubSpot
Section titled “Generate a personal access key in HubSpot”-
Sign in to your HubSpot developer account.
-
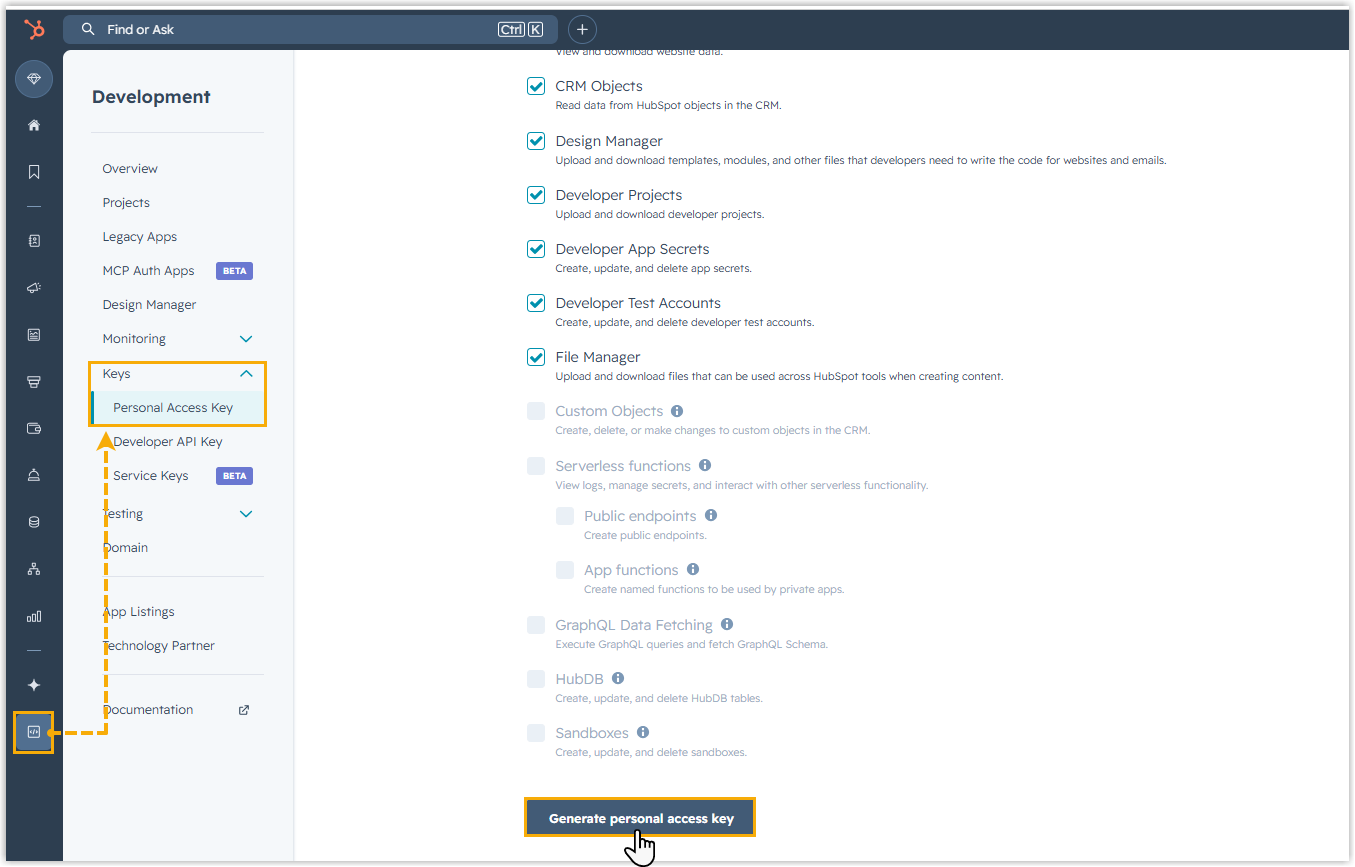
In the left navigation, open Development > Keys > Personal Access Key, then select Generate personal access key.
-
Copy the key that HubSpot displays and keep it somewhere safe, you’ll paste it in later.

Get the redirect URL from Cloud Voice
Section titled “Get the redirect URL from Cloud Voice”-
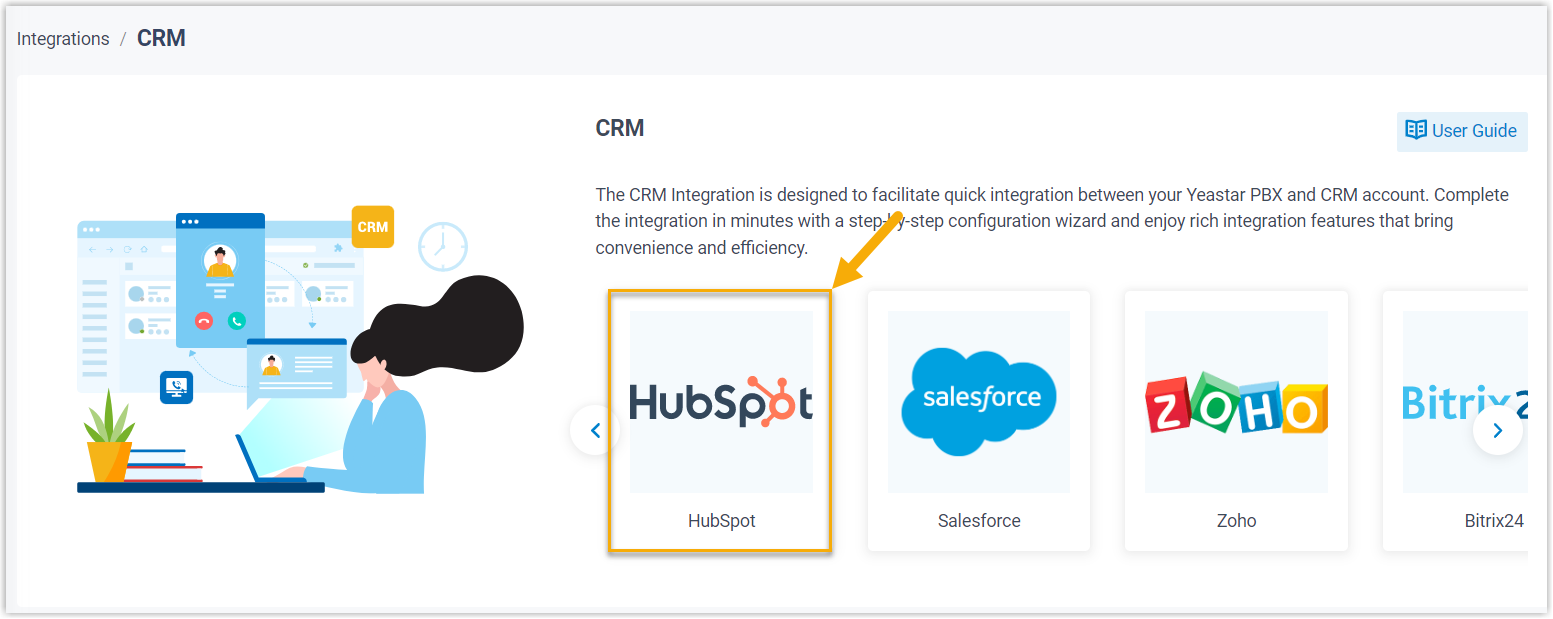
Sign in to Cloud Voice and go to Integrations > CRM.
-
Select HubSpot.
-
Under Network, choose and record the Redirect URL. You’ll add it to the app configuration later.

Set up your local environment
Section titled “Set up your local environment”Install the tools the CLI depends on and connect the CLI to your HubSpot account.
Install Node.js
Section titled “Install Node.js”The CLI runs on Node.js version 20 or later.
-
Download the latest LTS release from nodejs.org and install it.
-
Open a terminal and confirm the install:
Terminal window node --version# Example output: v24.15.0
Install the HubSpot CLI
Section titled “Install the HubSpot CLI”-
In the terminal, install the CLI globally:
Terminal window npm install -g @hubspot/cliOutput similar to
changed 704 packages in 2mmeans the install worked.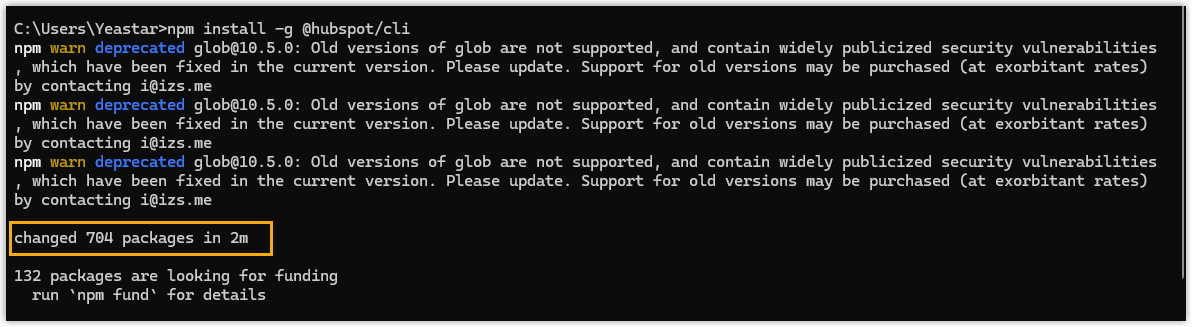
-
Optionally, check the installed version:
Terminal window hs --version# Example output: 8.9.0
Connect the CLI to HubSpot
Section titled “Connect the CLI to HubSpot”-
Run the authentication command:
Terminal window hs account authThe terminal asks for a personal access key.
-
Press any key to continue, then paste the personal access key you generated earlier.
-
Give the account a unique name so you can refer to it in the CLI. Success messages confirm the account is connected and set as the default.

Create and configure the app
Section titled “Create and configure the app”Describe the app in local files, its permissions and redirect URL, then push the project to HubSpot.
-
Create a folder for the project and move into it in the terminal:
Terminal window # Example# Create a folder named "HubSpot CLI" on the D drivemkdir D:\HubSpot CLI# Navigate into the foldercd D:\HubSpot CLI -
Create the project:
a. Run:
Terminal window hs project createb. Answer the prompts:
-
name: A name for the project.
-
dest: Where to create the project.
-
project-base: Select App.
-
distribution: Select Privately.
-
auth: Select OAuth.
-
features: Press Enter to skip and continue.
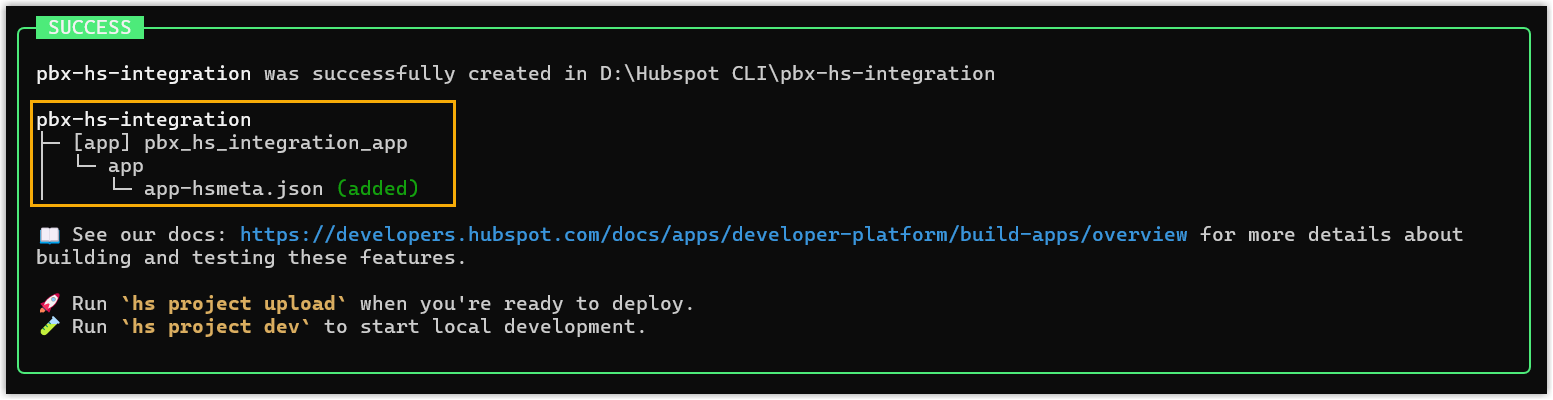
Wait for the
SUCCESSmessage. The project now includes anapp-hsmeta.jsonfile.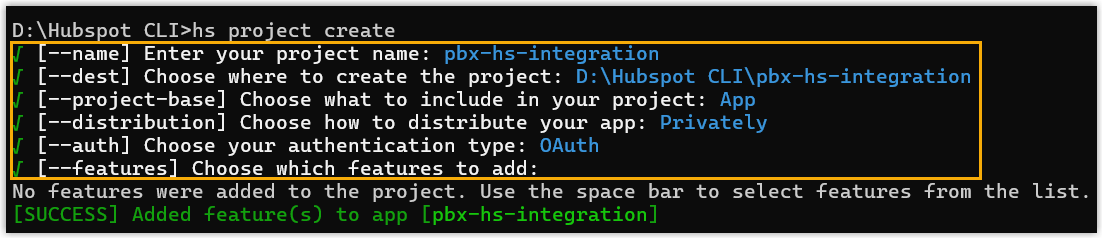
-
-
Edit the app configuration:
a. Locate the
app-hsmeta.jsonfile inside the project:<your_project_folder>/src/app/app-hsmeta.jsonb. Open it in a code editor.
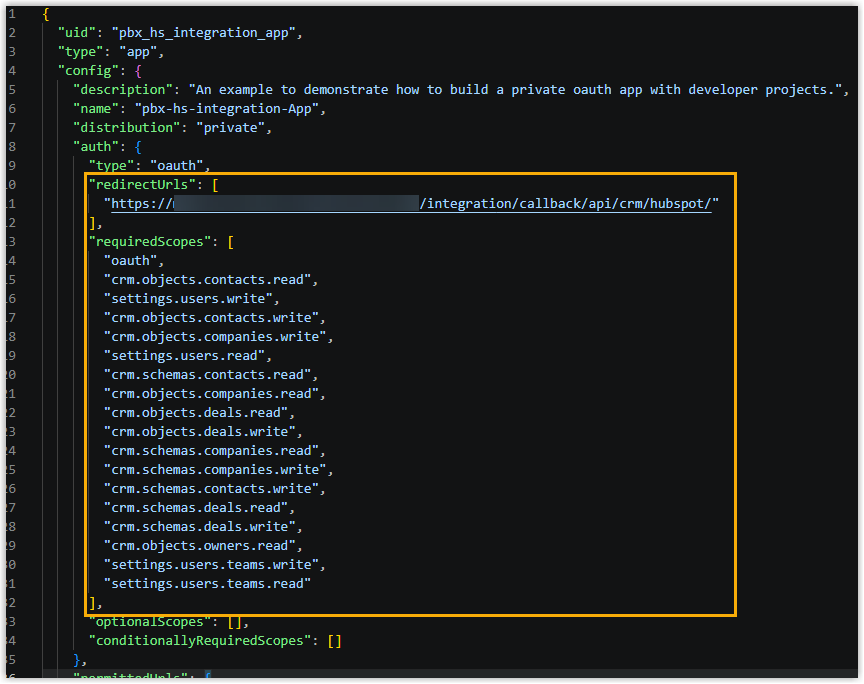
c. Update these settings:
-
redirectUrls: Paste the Redirect URL you copied from Cloud Voice. -
requiredScopes: Set the scopes to the following:"requiredScopes": ["oauth","crm.objects.contacts.read","settings.users.write","crm.objects.contacts.write","crm.objects.companies.write","settings.users.read","crm.schemas.contacts.read","crm.objects.companies.read","crm.objects.deals.read","crm.objects.deals.write","crm.schemas.companies.read","crm.schemas.companies.write","crm.schemas.contacts.write","crm.schemas.deals.read","crm.schemas.deals.write","crm.objects.owners.read","settings.users.teams.write","settings.users.teams.read"]
d. Save the file.
-
-
Upload the project to HubSpot:
a. In the terminal, move to the project’s root folder:
Terminal window # Examplecd D:\HubSpot CLI\pbx-hs-integrationb. Run:
Terminal window hs project uploadThe terminal notes that the project doesn’t exist yet and asks whether to create it.
c. Enter
Yto confirm. HubSpot creates the app and starts a new build.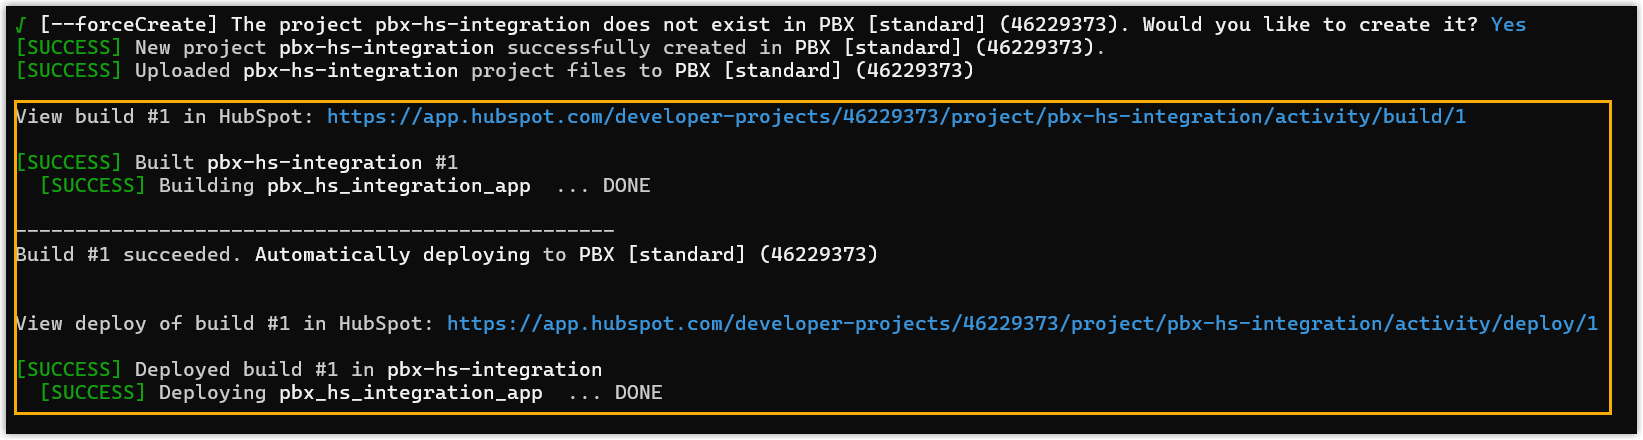
Result
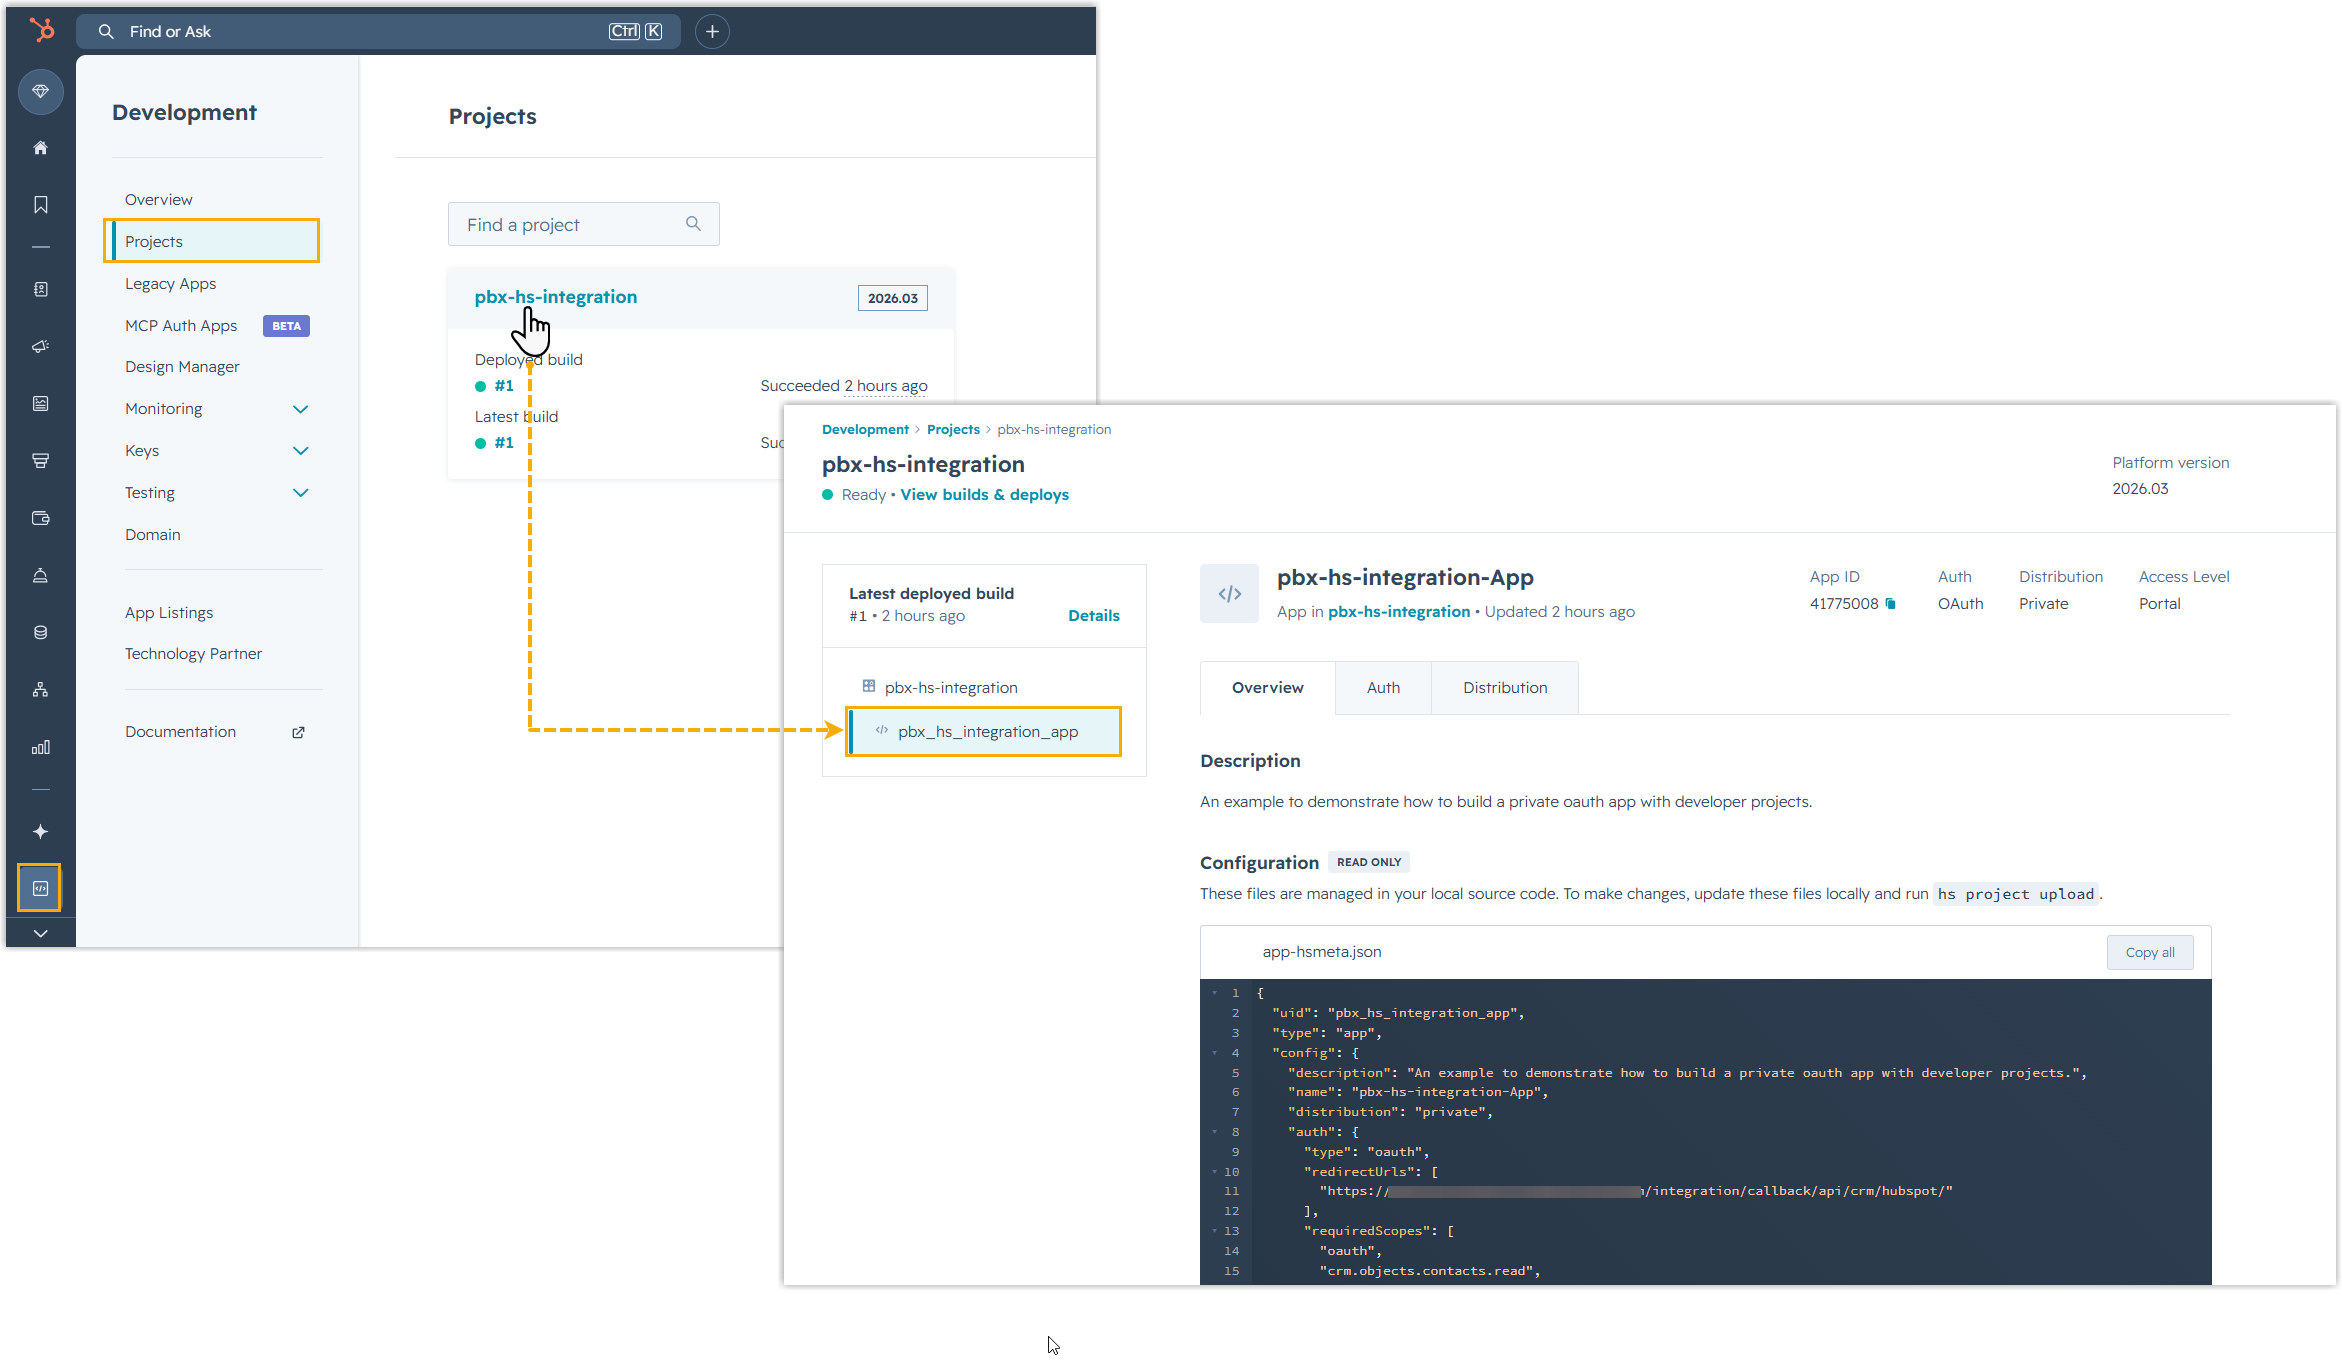
Section titled “Result”The app is created and uploaded to your HubSpot account. To view its details, sign in to HubSpot and go to Development > Projects.
What to do next
Section titled “What to do next”-
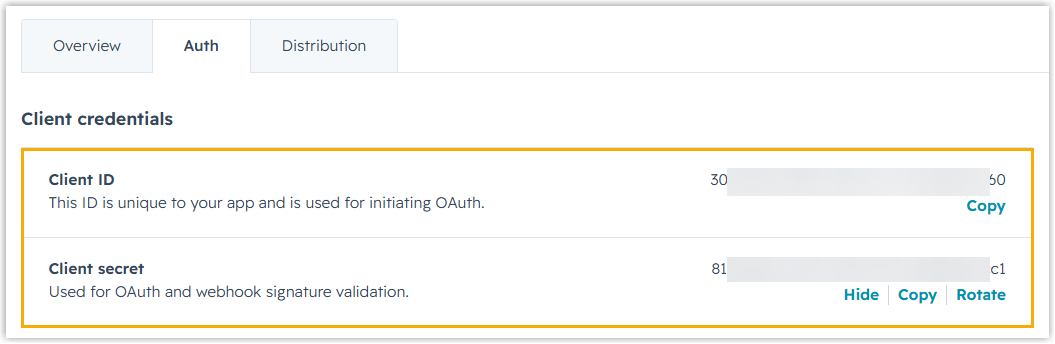
Open the app’s Auth tab to find the Client ID and Client secret you’ll need for the integration.
Question about this page?
Ask the AI assistant. It starts from this page, then searches the rest of the docs.
Ask Cloud Voice AI
Answers are AI-generated from the docs and may contain mistakes. Verify with the linked pages.