
Set up Helpdesk Integration Features
Once Cloud Voice is connected to your custom Helpdesk, you decide which capabilities to switch on and how call and contact data moves between the two systems. Each feature below is configured independently, so enable only the ones your team needs.
Synchronize contacts
Section titled “Synchronize contacts”With contact synchronization on, every inbound and outbound call prompts a lookup in the Helpdesk. When a matching number is found, the corresponding contact is copied into the linked Cloud Voice phonebook. Synchronized contacts are read-only inside Cloud Voice.
-
In the management portal, go to Integrations > Helpdesk.
-
In the Synchronize Contacts Automatically section, turn on the switch.
-
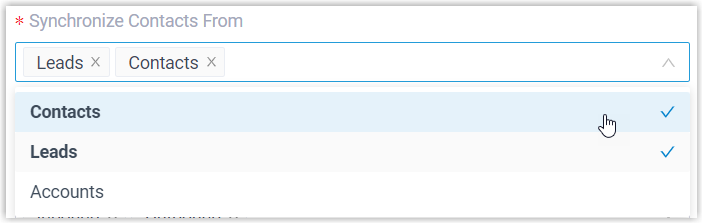
From the Synchronize Contacts From drop-down list, choose which contact type or types should be pulled in from the Helpdesk.
-
From the Synchronize to Phonebook drop-down list, pick an existing empty phonebook or create a new one to hold the incoming contacts.

-
Use the Always Query Helpdesk option to decide whether Cloud Voice searches the Helpdesk in real time.

- Enabled: Cloud Voice queries the Helpdesk in real time and lets associated extension users search Helpdesk contacts as they dial from the Cloud Voice App.
- Disabled: Cloud Voice only reaches out to the Helpdesk when no match is found in the company contacts.
-
Click Save.
Create contacts
Section titled “Create contacts”When this feature is on, a new contact can be added to the Helpdesk, either automatically or by the agent, whenever an associated extension calls or is called by an unknown number.
-
In the management portal, go to Integrations > Helpdesk.
-
In the Create New Contact section, turn on the switch.
-
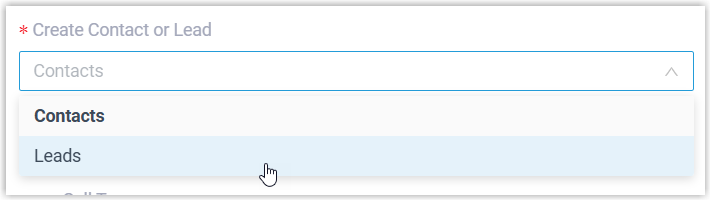
From the Create Contact or Lead drop-down list, choose the type of record to create.
-
In the Create Method section, choose how records are added:
-
Automatically: to have Cloud Voice create the record on its own for specific call types:
-
Select Automatically.
-
From the Call Type drop-down list, choose when a contact is created automatically.
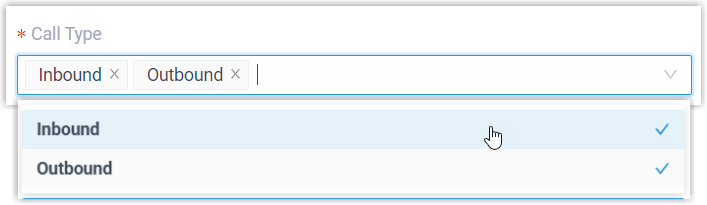
- Inbound: an inbound call from an unknown number that does not match an existing Helpdesk contact.
- Outbound: an outbound call to an unknown number that does not match an existing Helpdesk contact.
-
-
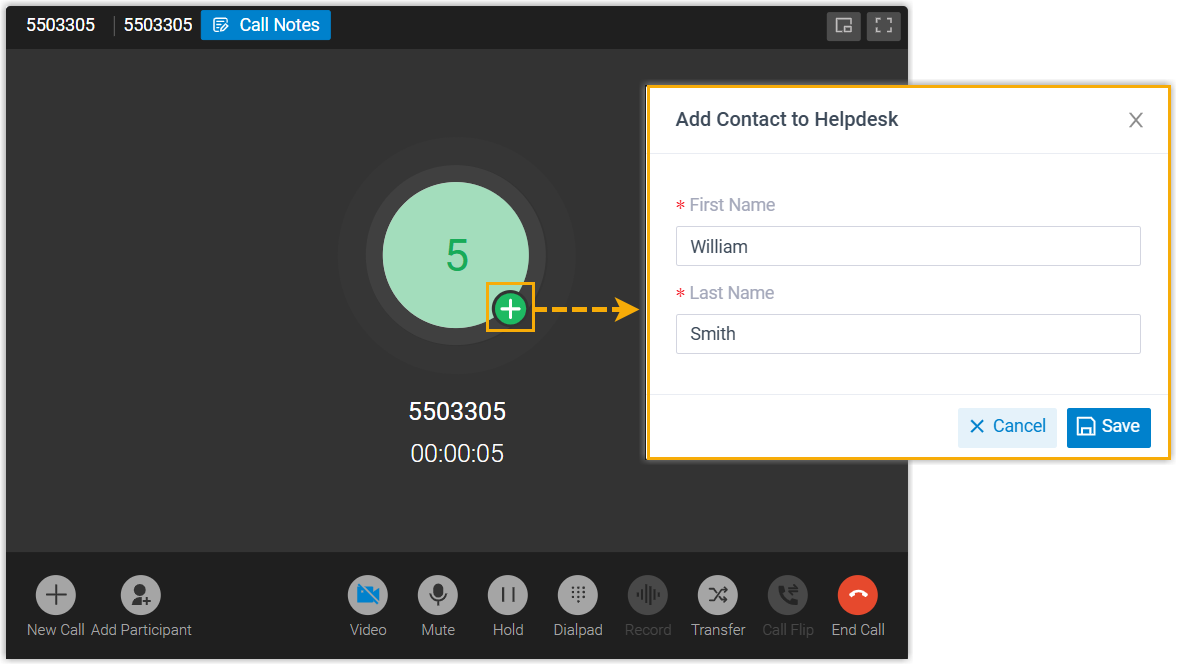
Manually: to let agents add the record themselves during a call. Select Manually; when an agent is on a call with an unknown number, they can save it to the Helpdesk straight from the call window.
-
-
Click Save.
Show a contact pop-up during calls
Section titled “Show a contact pop-up during calls”Call pop-ups are configured per extension. When set up, an agent’s Cloud Voice App web or desktop client can open the contact’s profile automatically at a chosen point in the call, or let the agent open it on demand from the call window.
-
In the management portal, go to Extension and Trunk > Extension.
-
Click
 next to the extension tied to the Helpdesk user.
 -
On the Cloud Voice App tab, scroll to the client you want and select the Open Contact URL Using System-Integrated Helpdesk checkbox.
-
In the Popup Method section, choose how the pop-up behaves:
-
Automatically: to have the Helpdesk profile open on its own:
-
Select Automatically (Only for Incoming Calls).
-
From the Trigger Event drop-down list, set the moment the pop-up appears.
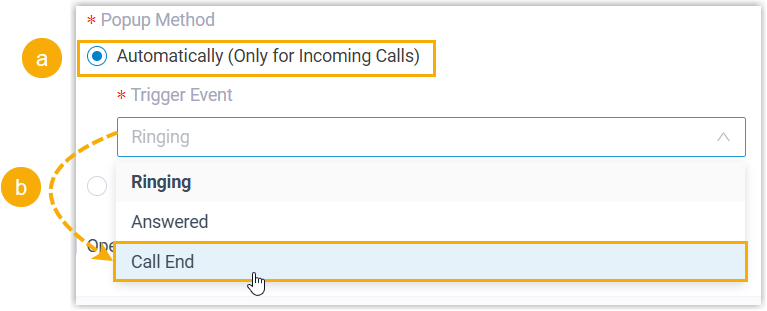
- Ringing: the pop-up opens when an inbound call from a Helpdesk contact starts ringing.
- Answered: the pop-up opens when the agent answers an inbound call from a Helpdesk contact.
- Call End: the pop-up opens once the call with the Helpdesk contact ends.
-
-
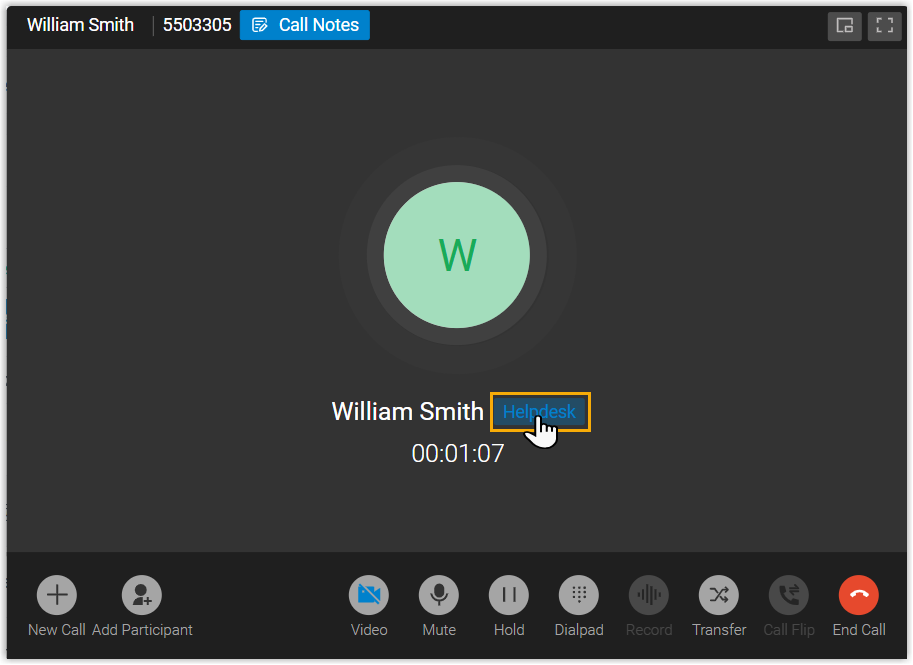
Manually: to let the agent open the profile on demand. Select Manually; during a call with a Helpdesk contact, the agent can open the contact URL from the call window.
-
-
Click Save.
Log calls to the Helpdesk
Section titled “Log calls to the Helpdesk”Call journaling records every outbound, inbound, and missed call in the Helpdesk automatically, giving agents a running history of each conversation.
-
In the management portal, go to Integrations > Helpdesk.
-
In the Call Journal section, turn on the switch.
-
Set the content of each log entry.

- Subject: the title of the call log.
- Description: the body of the call log.
-
Adjust the following options as needed.
Setting Description Play Call Recording When on, Helpdesk users linked to Cloud Voice extensions can view and play call recordings stored on Cloud Voice from inside the Helpdesk. Disable Display Missed Call Records in Unanswered Agents When on, for queue and ring group calls only the agent who answers gets the log in their Helpdesk; the matching missed-call entry is not synced to agents who did not answer. -
Click Save.
Log chat sessions to the Helpdesk
Section titled “Log chat sessions to the Helpdesk”With chat journaling on, once an external chat session between an extension user and a Helpdesk contact closes, whether the agent or the system ends it, every message from that session is synced to the Helpdesk, preserving the full history of the interaction.
-
In the management portal, go to Integrations > Helpdesk.
-
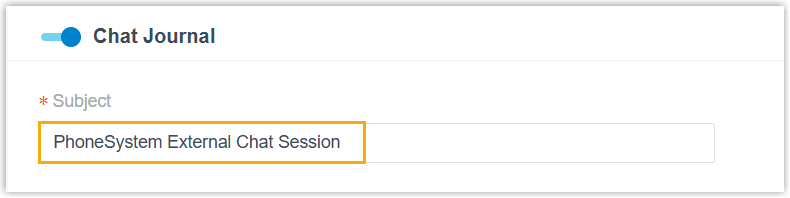
On the Helpdesk integration page, turn on Chat Journal.
-
In the Subject field, set the title used for the synced record.
-
Click Save.
Create tickets automatically
Section titled “Create tickets automatically”You can turn inbound and outbound calls with Helpdesk contacts into support tickets automatically.
-
In the management portal, go to Integrations > Helpdesk.
-
On the Helpdesk integration page, turn on Create New Ticket Automatically.
-
Choose when tickets are raised and for which call types.
When to Create New Ticket Description Before the Call A ticket is raised as soon as the agent receives an inbound call from, or places an outbound call to, a Helpdesk contact. In the The Type of Call to Create Ticket drop-down list, select the call types: Inbound or Outbound. After the Call A ticket is raised once the agent ends the call with a Helpdesk contact. In the The Type of Call to Create Ticket drop-down list, select the call types: Inbound Answered, Inbound No Answer, Outbound Answered, or Outbound No Answer. -
Set the content of the ticket.
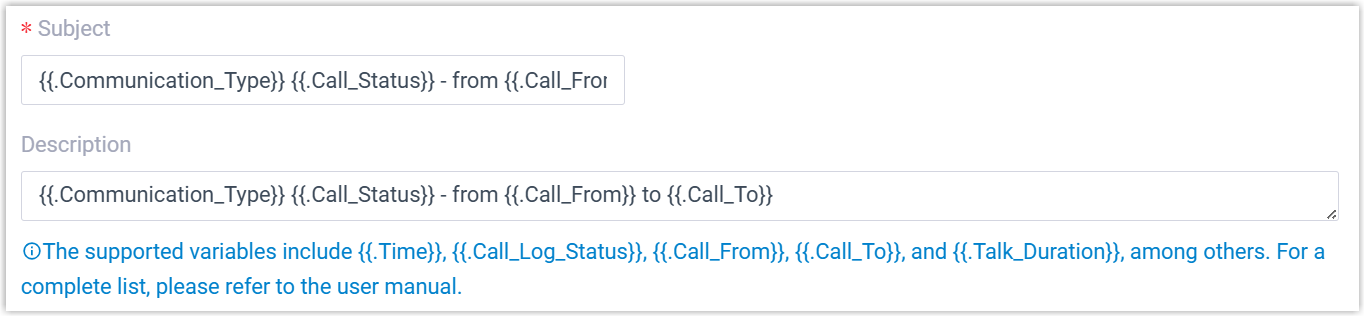
- Subject: the title of the ticket.
- Description: the body of the ticket.
-
Click Save.
Question about this page?
Ask the AI assistant. It starts from this page, then searches the rest of the docs.
Ask Cloud Voice AI
Answers are AI-generated from the docs and may contain mistakes. Verify with the linked pages.