
Set Key Events Based on Time Conditions
An Interactive Voice Response (IVR) menu is the automated greeting that answers a call and asks the caller to press a key to reach a department or destination. That menu does not have to send callers to the same place around the clock. Cloud Voice lets you attach a time condition to your key press events, so pressing 1 during business hours can reach one destination while the same key after hours, or on a holiday, reaches another. You can hold every key to a single schedule, or give each key its own.
Apply one time condition to every key
Section titled “Apply one time condition to every key”Choose this approach when the whole menu should follow the same schedule.
-
Sign in to the phone system web portal and open Call Features > IVR.
-
Edit the IVR you want to change.
-
On the Key Press Event tab, set up the destinations each key should reach.
-
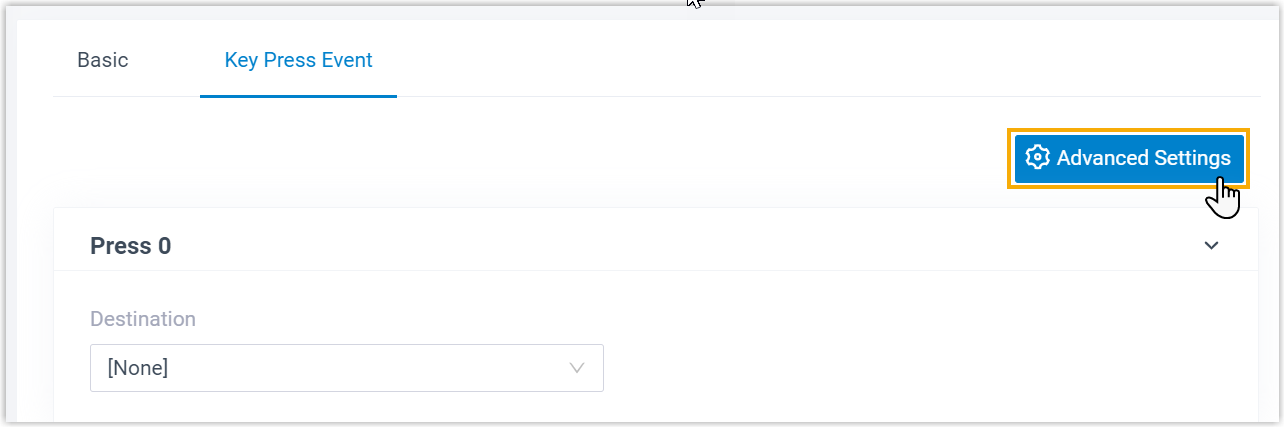
In the top-right corner, click Advanced Settings.
-
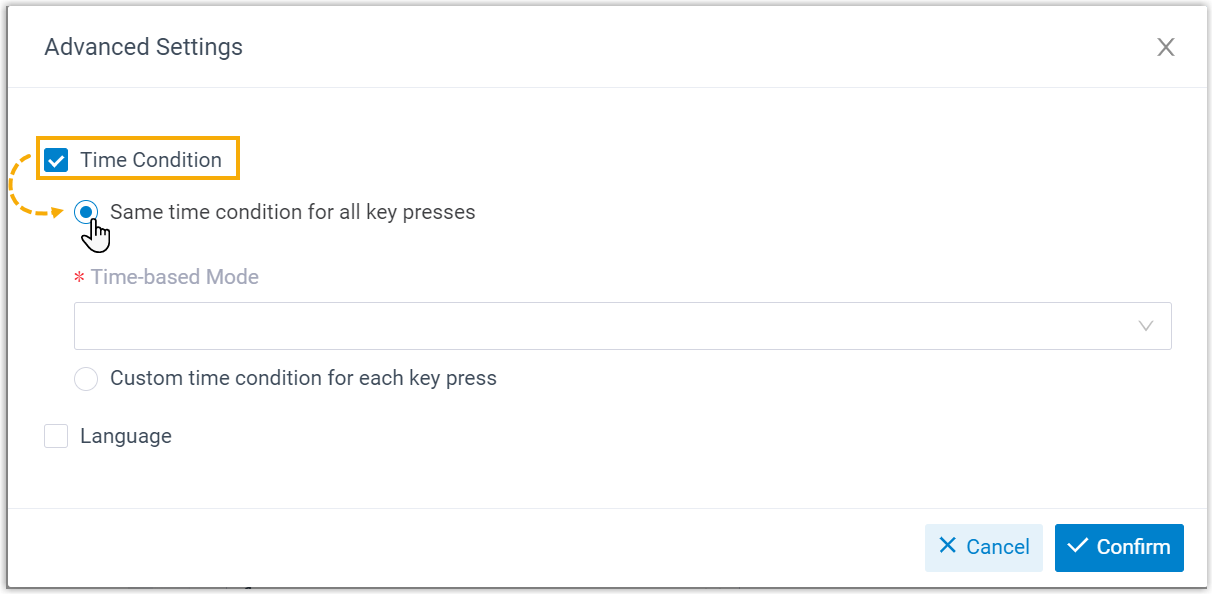
Select the Time Condition checkbox, then choose Same time condition for all key presses.
-
From the Time-based Mode drop-down, pick the schedule that every key will follow, then continue with the matching steps below.
Follow the business hours of a time zone
Section titled “Follow the business hours of a time zone”This mode reuses the business hours, non-working hours, and holidays you maintain under Call Control > Business Hours and Holidays for a given time zone.
-
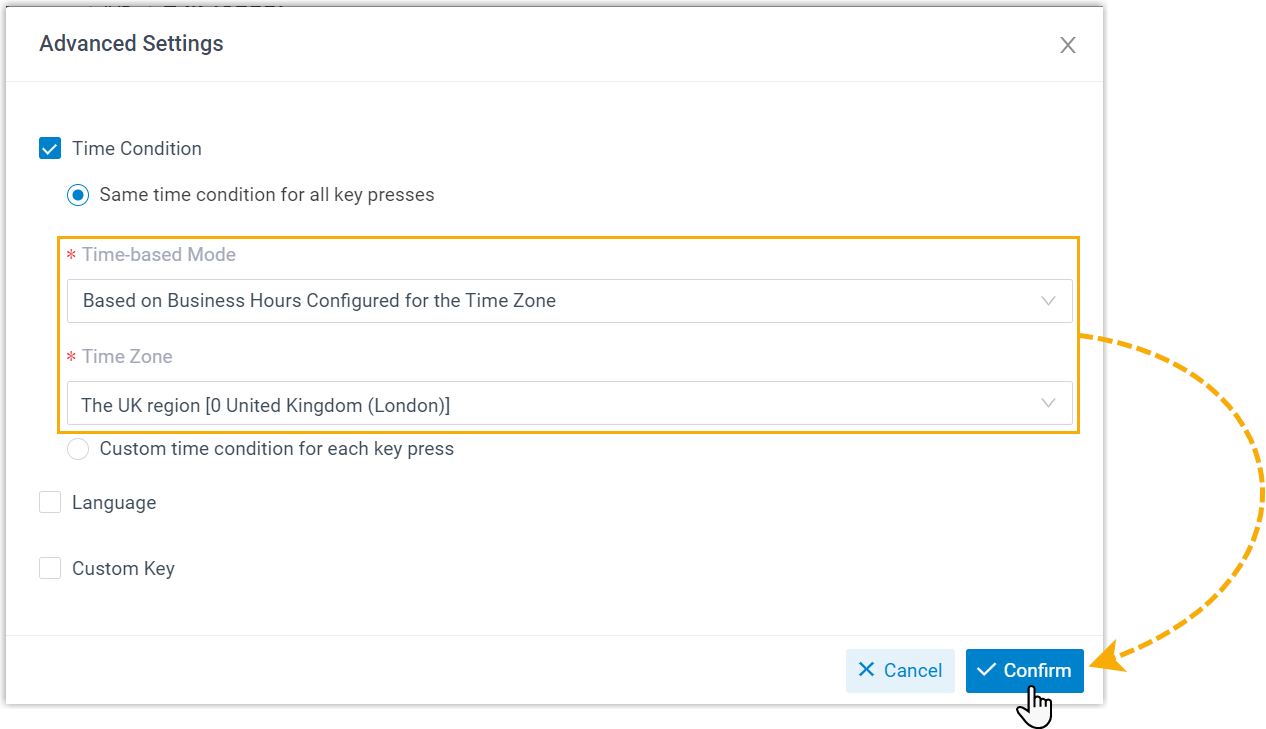
Select Based on Business Hours Configured for the Time Zone, choose the time zone, then click Confirm. The schedule for that time zone now governs every key in the IVR.
-
For each key, set its routing destinations:
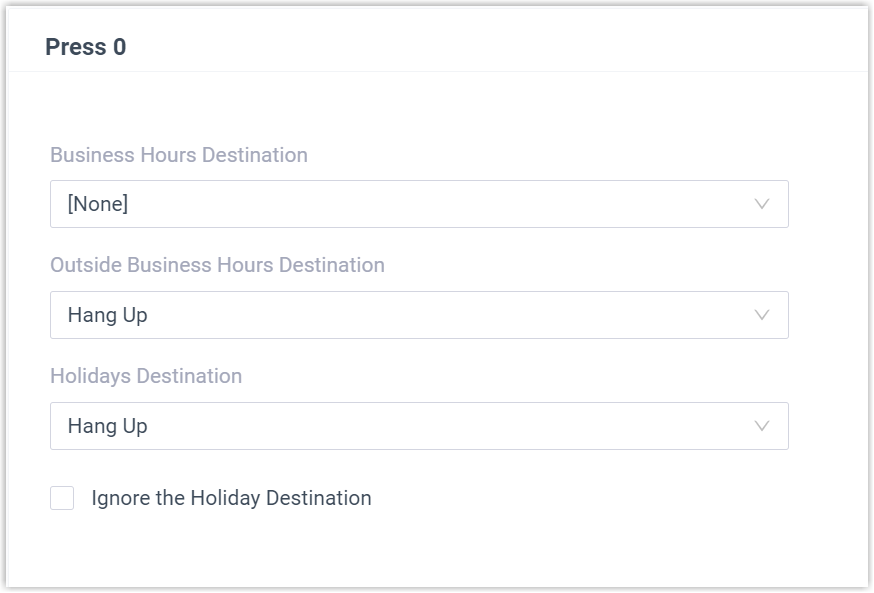
- Business Hours Destination
- Outside Business Hours Destination
- Holidays Destination
-
Repeat step 2 for every key you want to route.
-
Click Save, then Apply.
Follow custom business hours
Section titled “Follow custom business hours”Define a business-hours schedule in the system’s default time zone and apply it to the whole menu.
-
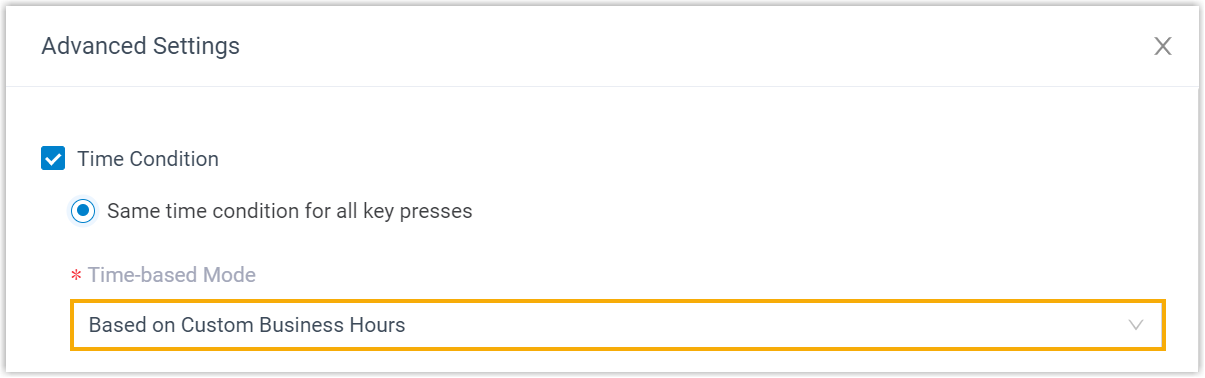
From Time-based Mode, select Based on Custom Business Hours.
-
Click Add Custom Business Hours to build the schedule.
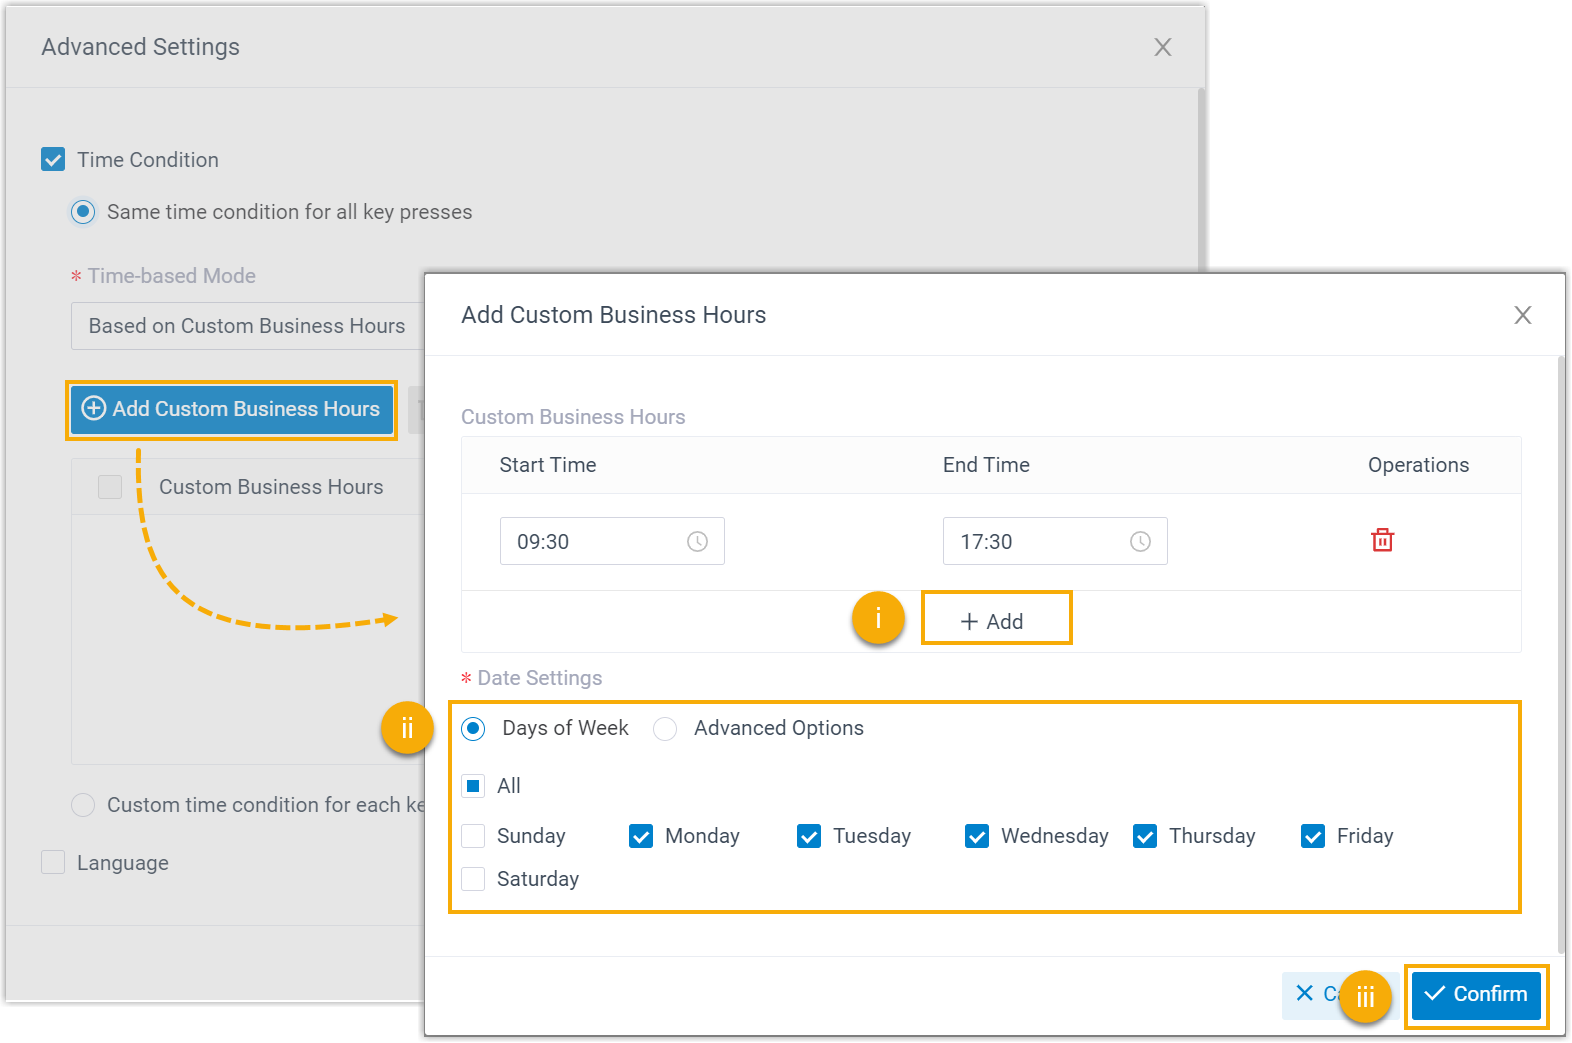
- Click Add and enter the start time and end time.
- Under Date Settings, choose the workdays.
- Click Confirm.
-
Click Confirm to apply these hours to every key in the IVR.
-
For each key, set its routing destinations:
- Business Hours Destination
- Outside Business Hours Destination
- Holidays Destination
-
Repeat step 4 for every key you want to route.
-
Click Save, then Apply.
Follow custom time periods
Section titled “Follow custom time periods”Here the time periods are created per key, even though the menu shares this mode.
-
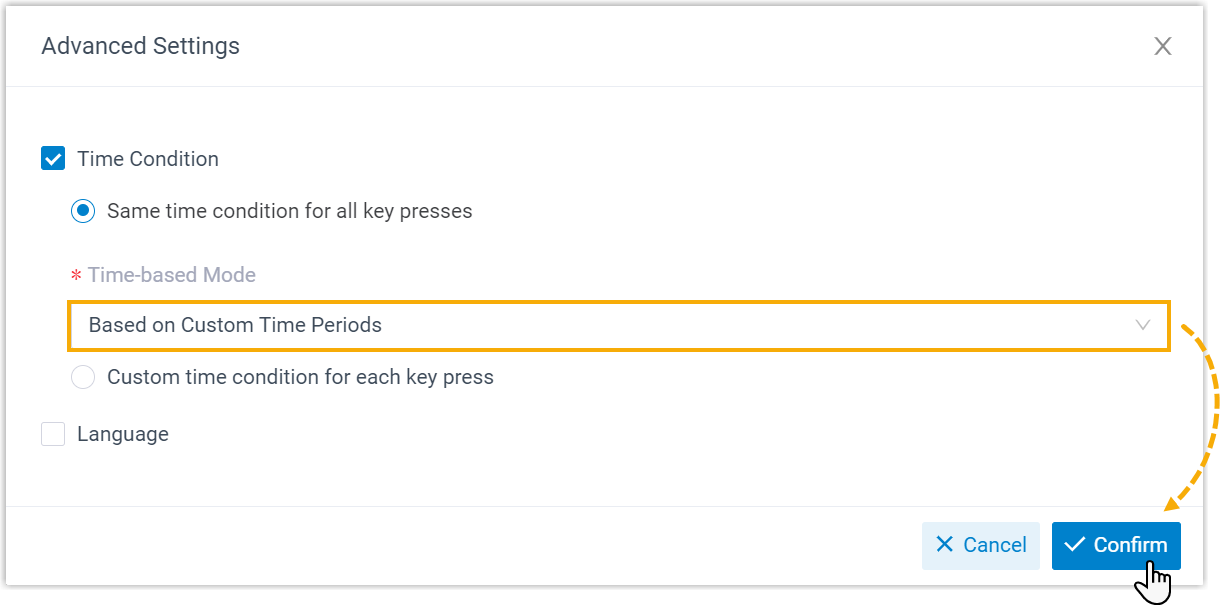
From Time-based Mode, select Based on Custom Time Periods.
-
Under a key, click Add Custom Time Periods to create a period in the system’s default time zone.
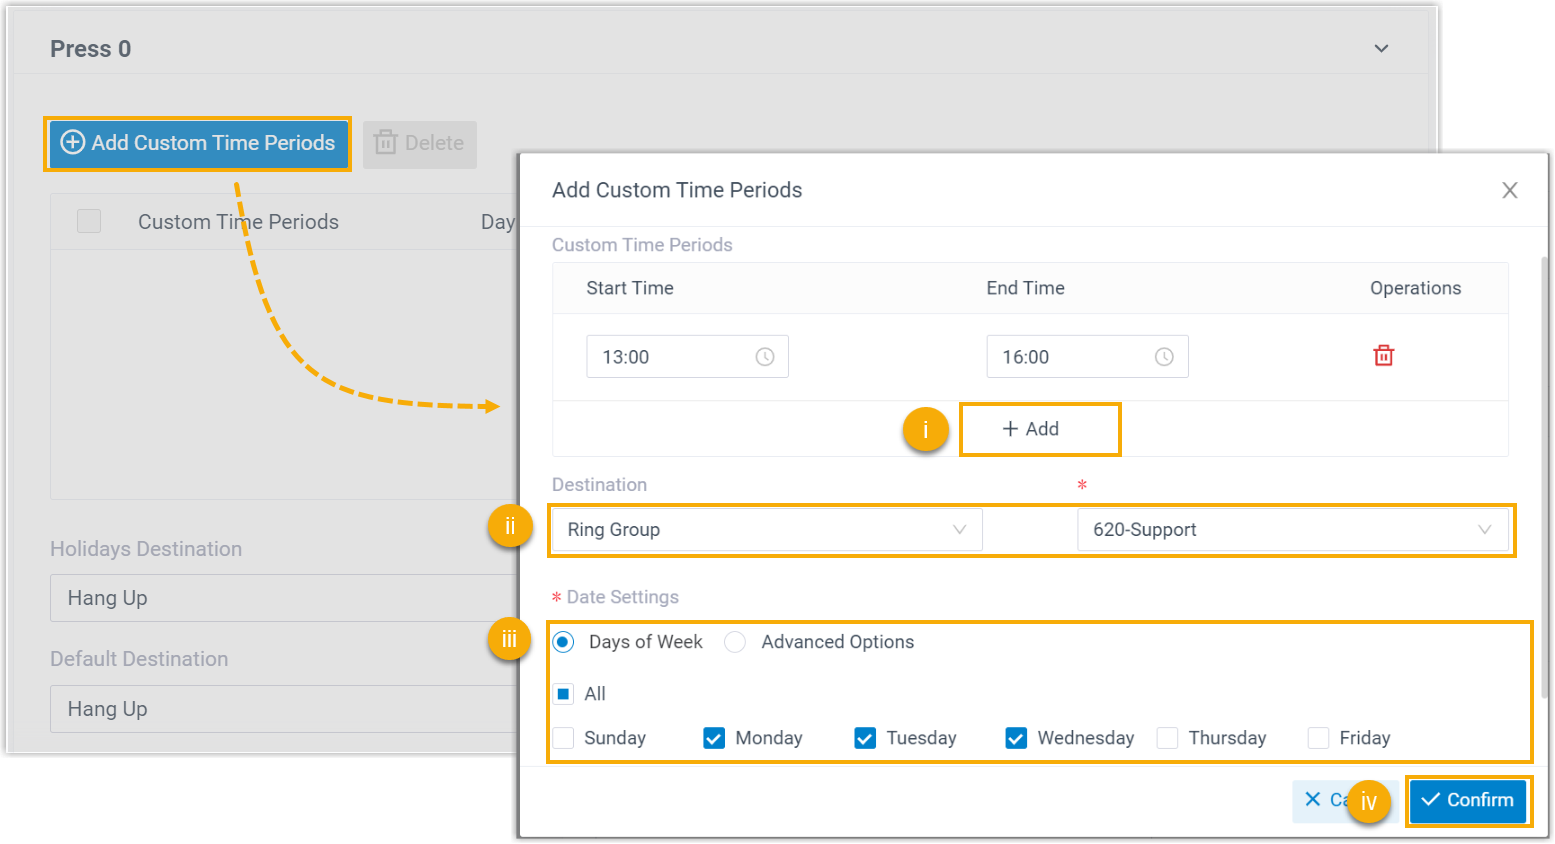
- Click Add and enter the start time and end time.
- In the Destination drop-down, choose where calls that arrive within the period should go.
- Under Date Settings, choose the workdays.
- Click Confirm.
-
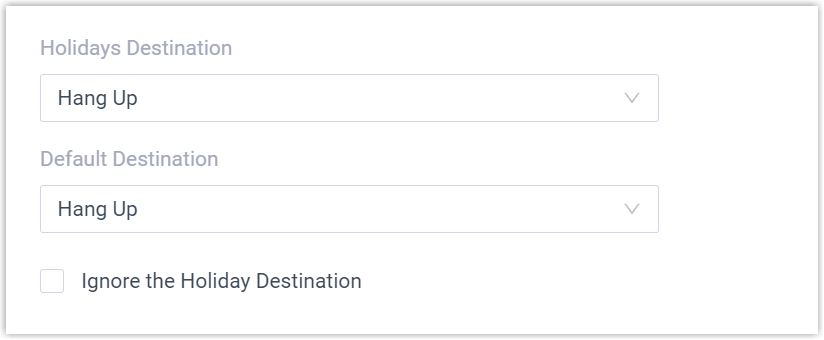
Set the remaining destinations for the key:
-
Holidays Destination: where calls go during holidays.
-
Default Destination: where calls go outside the custom time periods.
-
-
Repeat steps 2 and 3 for every key you want to route.
-
Click Save, then Apply.
Apply a different time condition to each key
Section titled “Apply a different time condition to each key”Choose this approach when individual keys need their own schedules.
-
Sign in to the phone system web portal and open Call Features > IVR.
-
Edit the IVR you want to change.
-
On the Key Press Event tab, turn on per-key time conditions:
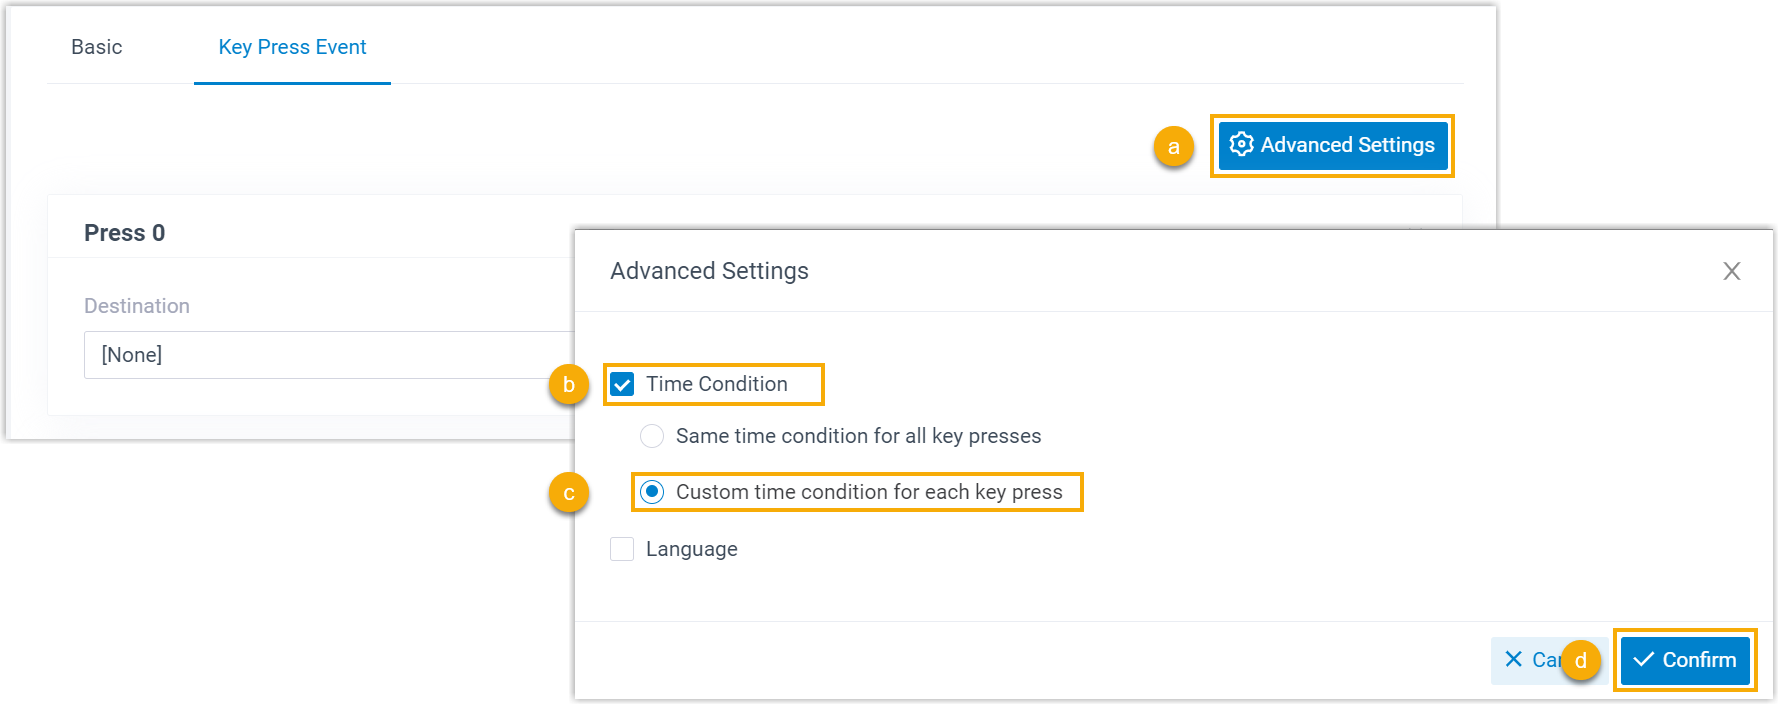
- In the top-right corner, click Advanced Settings.
- Select Time Condition.
- Select Custom time condition for each key press.
- Click Confirm.
-
For each key, open its Time-based Mode drop-down, pick one of the modes below, and set the destinations.
All Time: always send the key’s calls to a single destination.
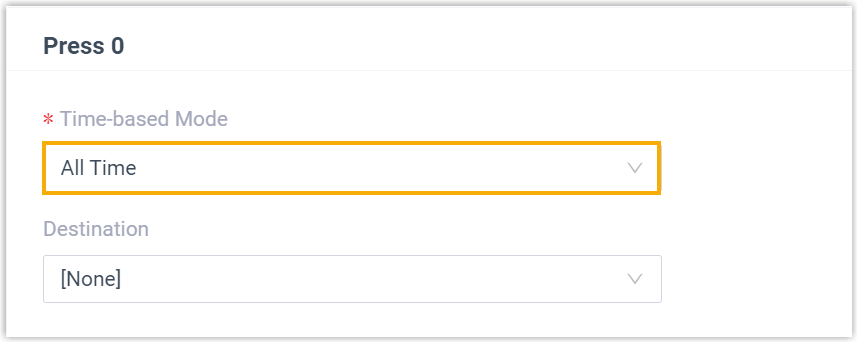
- In Time-based Mode, select All Time.
- In the Destination drop-down, choose the destination.
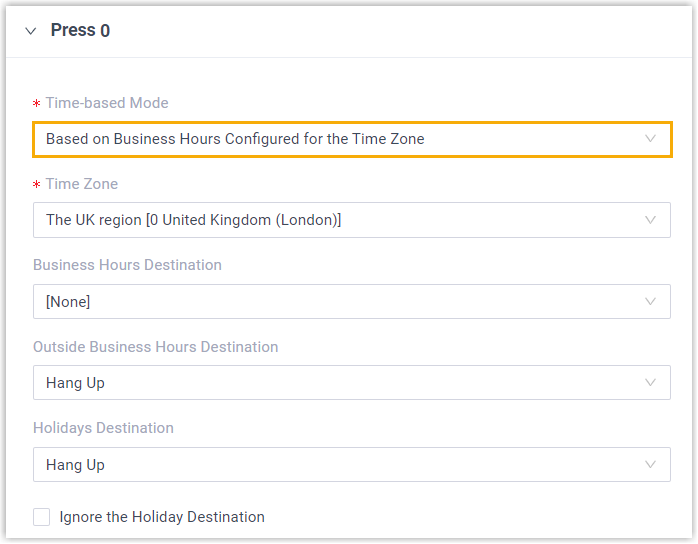
Based on Business Hours Configured for the Time Zone: follow the business hours, non-working hours, and holidays of a time zone defined under Call Control > Business Hours and Holidays.
-
In Time-based Mode, select Based on Business Hours Configured for the Time Zone, then choose the time zone.
-
Set the routing destinations:
- Business Hours Destination
- Outside Business Hours Destination
- Holidays Destination
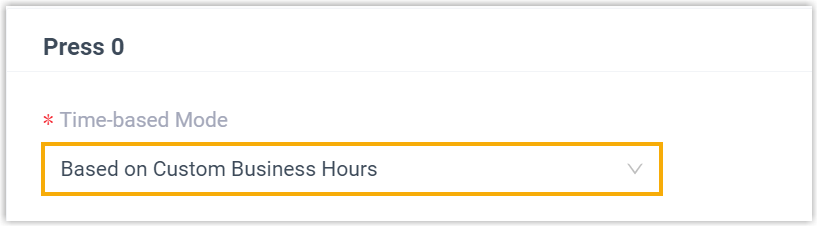
Based on Custom Business Hours: define a business-hours schedule in the system’s default time zone for this key.
-
In Time-based Mode, select Based on Custom Business Hours.
-
Click Add Custom Business Hours to build the schedule.
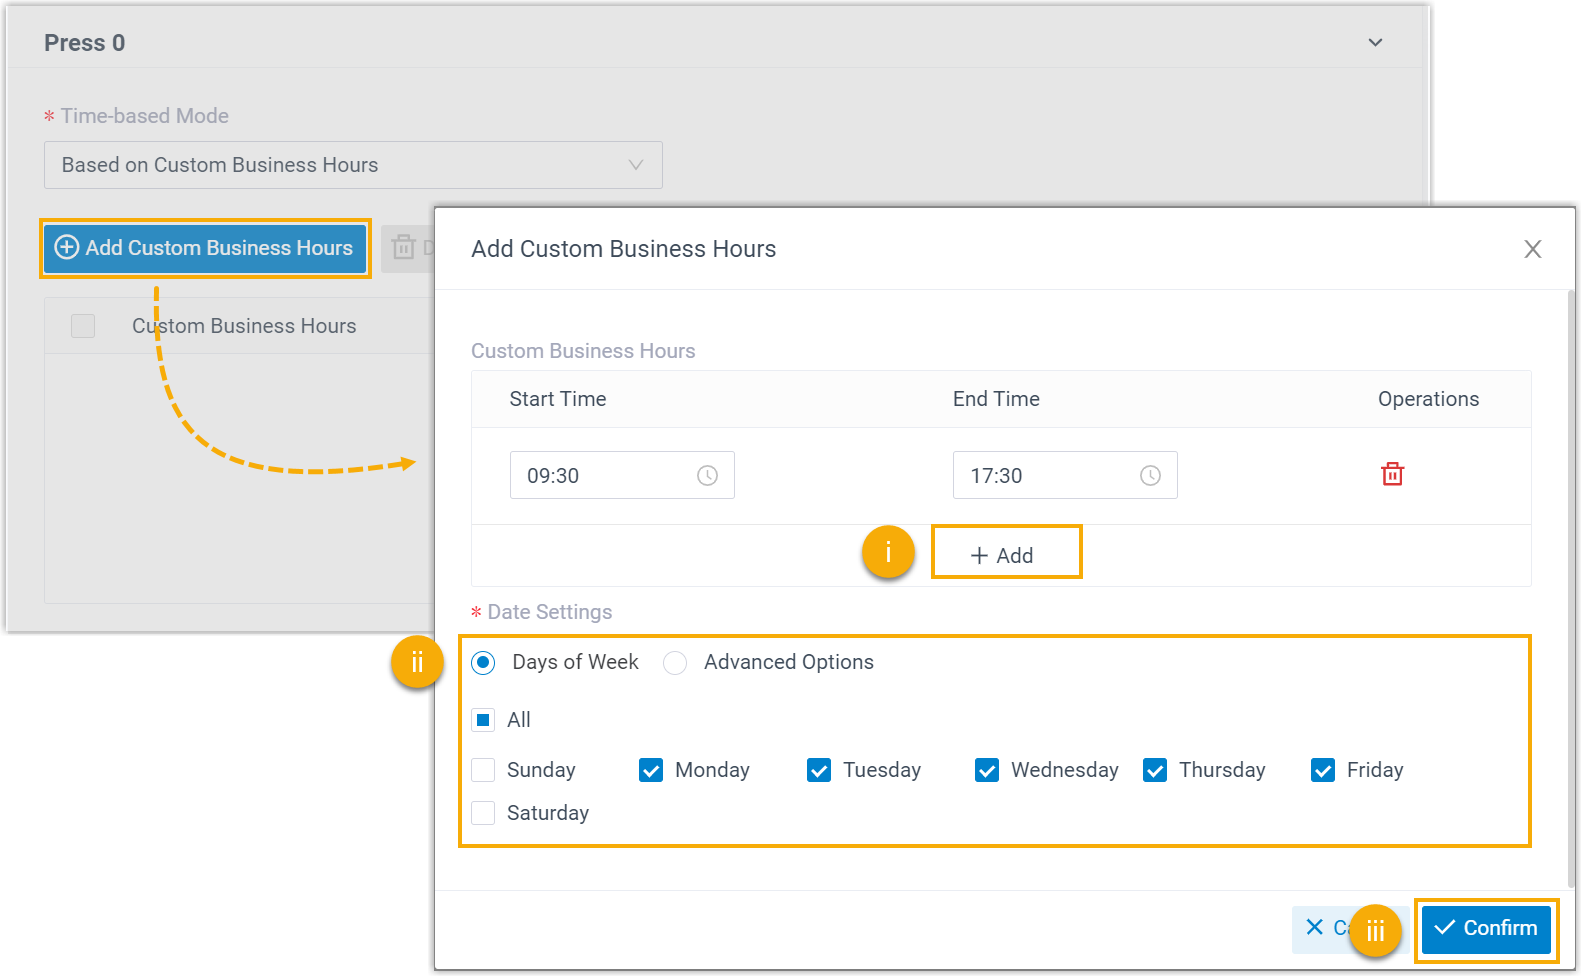
- Click Add and enter the start time and end time.
- Under Date Settings, choose the workdays.
- Click Confirm.
-
Set the routing destinations:
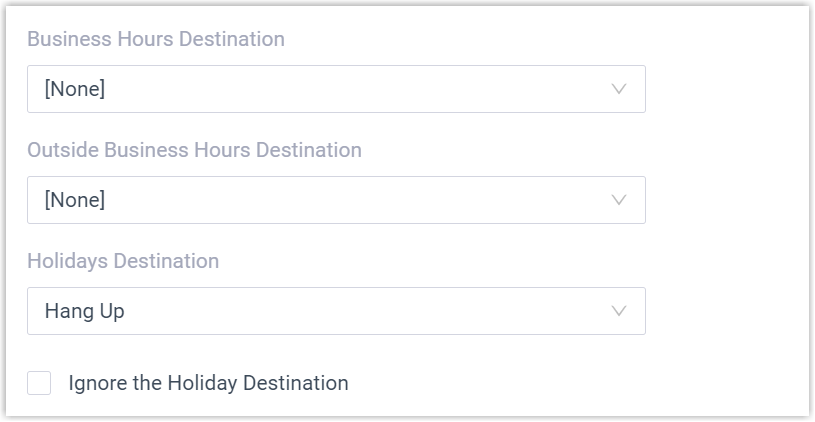
- Business Hours Destination
- Outside Business Hours Destination
- Holidays Destination
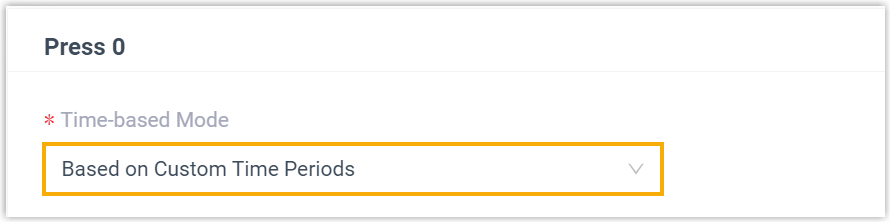
Based on Custom Time Periods: define one or more time periods in the system’s default time zone for this key.
-
In Time-based Mode, select Based on Custom Time Periods.
-
Click Add Custom Time Periods to create a period.
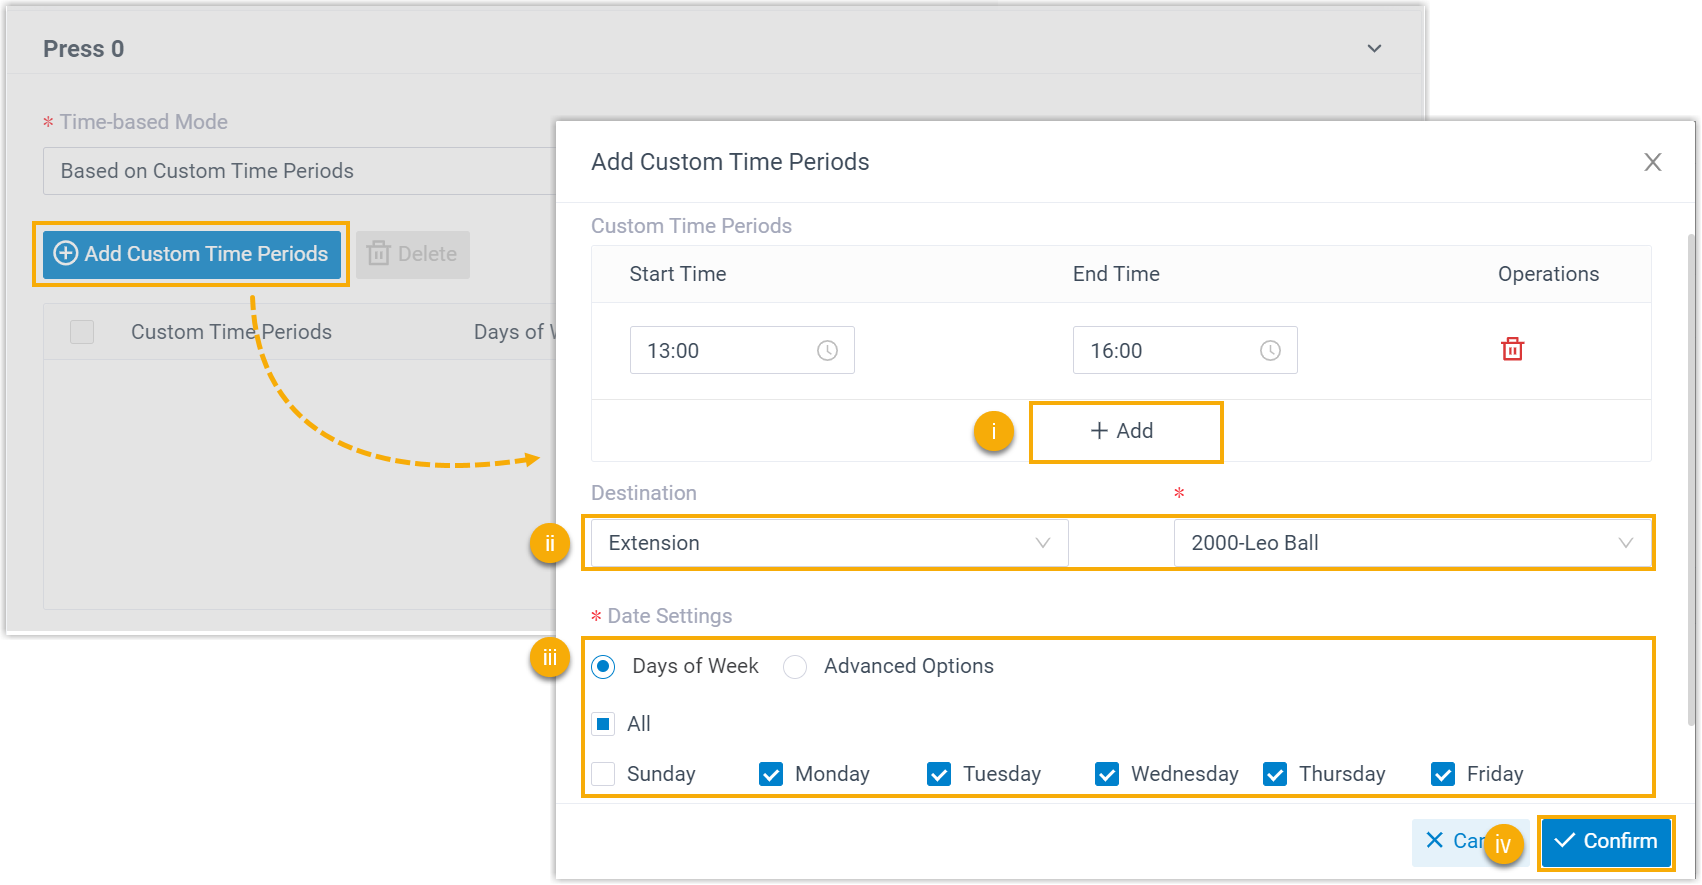
- Click Add and enter the start time and end time.
- In the Destination drop-down, choose where calls that arrive within the period should go.
- Under Date Settings, choose the workdays.
- Click Confirm.
-
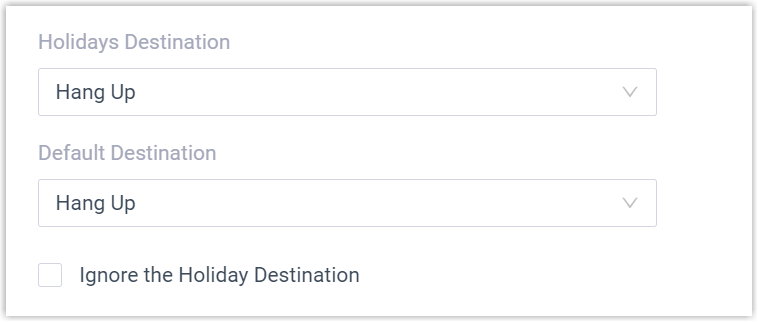
Set the remaining destinations:
-
Holidays Destination: where calls go during holidays.
-
Default Destination: where calls go outside the custom time periods.
-
-
Repeat step 4 for every key you want to route.
-
Click Save, then Apply.
Question about this page?
Ask the AI assistant. It starts from this page, then searches the rest of the docs.
Ask Cloud Voice AI
Answers are AI-generated from the docs and may contain mistakes. Verify with the linked pages.