
Integrate Cloud Voice with Bitrix24 CRM
Linking Cloud Voice to Bitrix24 CRM (Customer Relationship Management, the system that stores your customer and lead records) lets your team handle calls straight from their phone extensions while the call activity stays tied to the CRM. The connection is built on a Bitrix24 inbound webhook. A webhook is a preset web address that lets one system call another system’s API (Application Programming Interface, the doorway a program uses to read or change data in another program). This particular webhook uses the Bitrix24 REST API to grant Cloud Voice access to your CRM data. This page walks you through the three parts of the setup: creating the webhook in Bitrix24, entering its details on Cloud Voice, and matching your Bitrix24 users to their extensions.
Before you start
Section titled “Before you start”Confirm that both systems meet these requirements.
Bitrix24
- Edition and plan: A Bitrix24 Cloud Edition account on any of these plans: Basic, Standard, Professional, or Enterprise.
- Account: Sign in with the Main Administrator account to perform the integration.
Cloud Voice
- Firmware: Version 84.23.0.83 or later.
Step 1. Create an inbound webhook in Bitrix24
Section titled “Step 1. Create an inbound webhook in Bitrix24”The inbound webhook is what allows Cloud Voice to reach your Bitrix24 account over the API. “Inbound” here means the webhook receives requests coming into Bitrix24 (from Cloud Voice).
-
Sign in to Bitrix24 with the Main Administrator account.
-
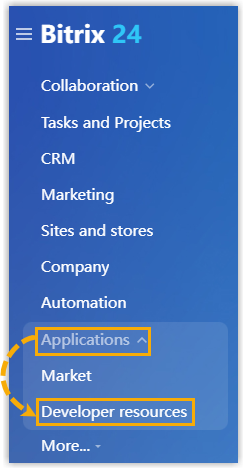
In the left-hand menu, go to Applications > Developer resources.
-
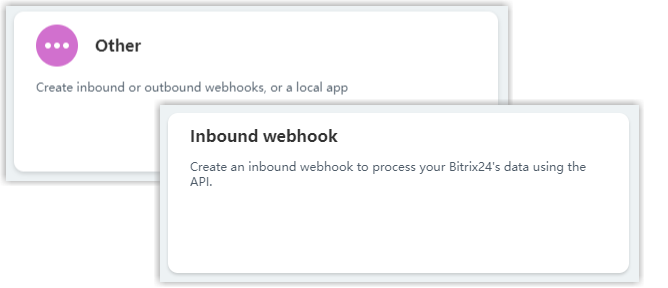
Open the Common use cases tab, choose Other, then select Inbound webhook.
-
On the configuration page, set up the webhook:
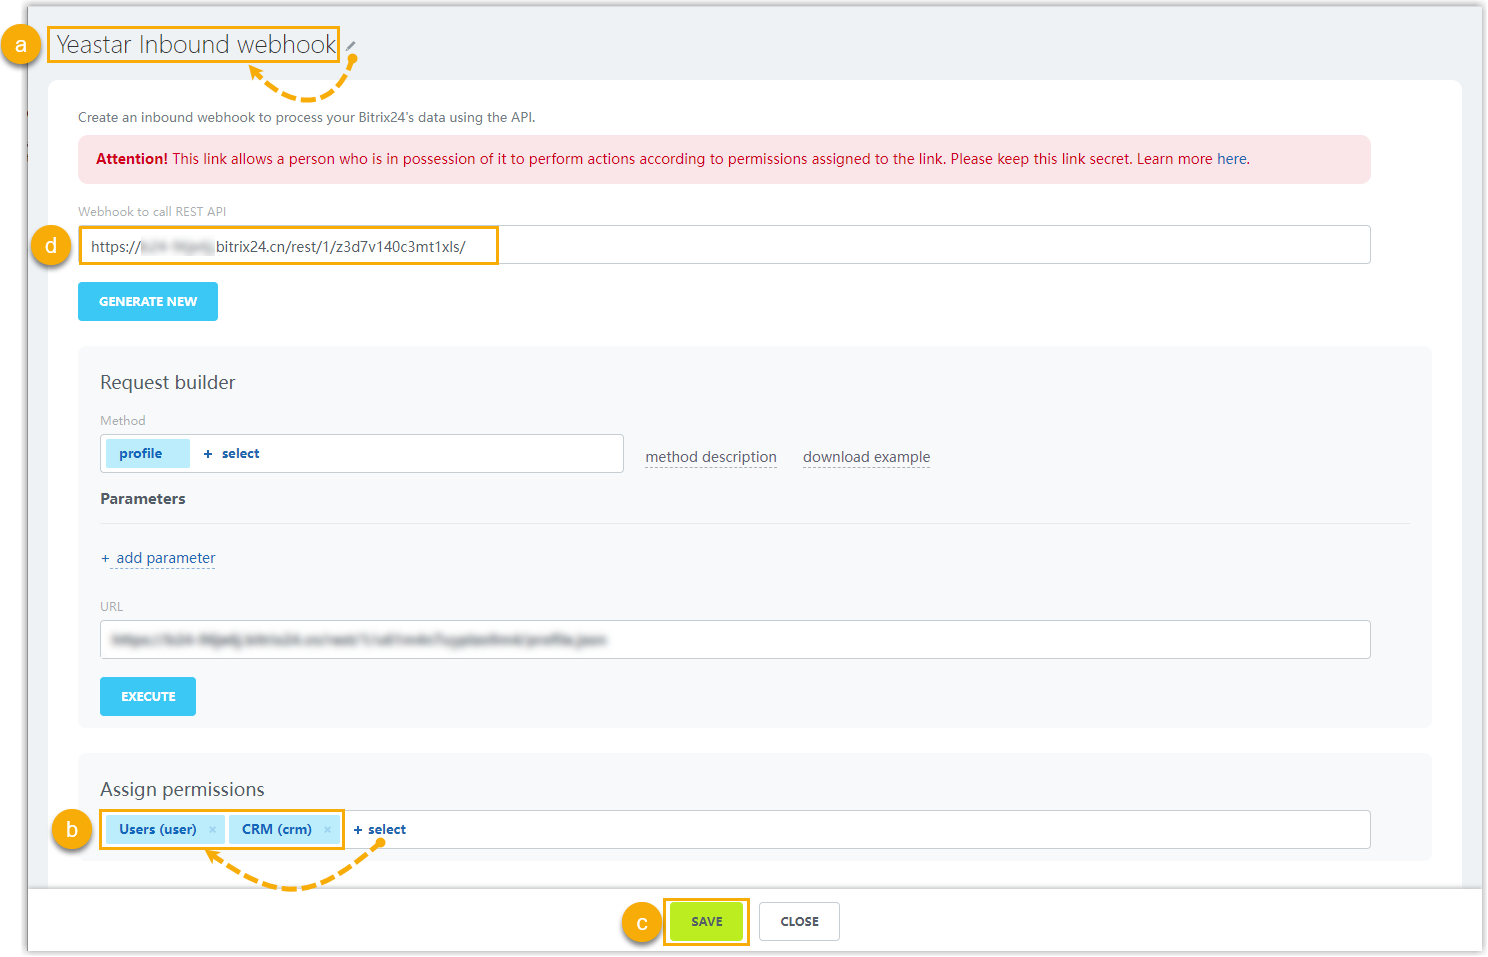
a. Select the edit icon next to the webhook name and give it a recognizable name, for example
Cloud Voice inbound webhook.b. In the Assign permissions section, click + select and add both Users (user) and CRM (crm).
c. Click Save.
d. Copy the address shown in the Webhook to call REST API field. You will paste this into Cloud Voice in the next step.
Step 2. Connect Cloud Voice to Bitrix24 CRM
Section titled “Step 2. Connect Cloud Voice to Bitrix24 CRM”Enter your Bitrix24 domain and the webhook address on Cloud Voice to establish the link.
-
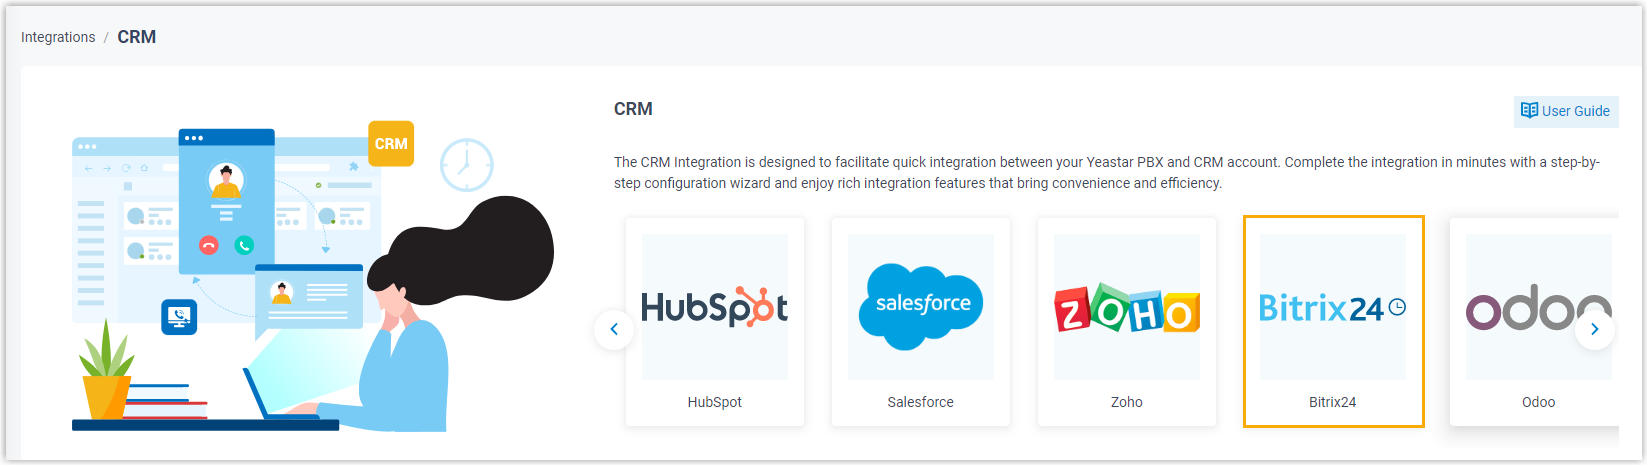
Sign in to the Cloud Voice management portal and go to Integrations > CRM.
-
Select Bitrix24.
-
In the Inbound Webhook URL field, paste the REST API address you copied from Bitrix24.

-
In the Your Bitrix24 Address field, enter your Bitrix24 domain name.

-
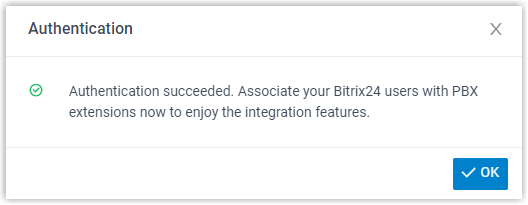
Click Save. When authentication succeeds, a confirmation pop-up appears.
-
Click OK. The Status field now reads Connected, showing that Cloud Voice is linked to Bitrix24 CRM.

Step 3. Map Bitrix24 users to extensions
Section titled “Step 3. Map Bitrix24 users to extensions”Associating each Bitrix24 user with a Cloud Voice extension is what enables calling from within the CRM. A user who is not mapped to an extension cannot place or receive calls through Bitrix24.
-
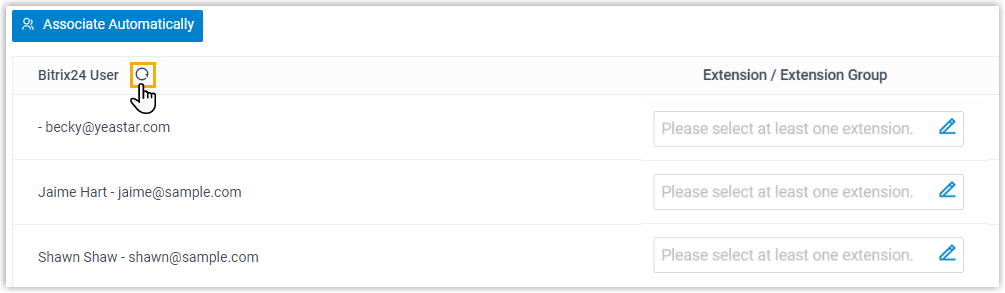
On the CRM integration page, select the refresh icon beside Bitrix24 User to pull in the current list of Bitrix24 users.
-
Match the users to extensions using one of the following methods.
Match automatically
If your users have the same email address on their Bitrix24 accounts and their Cloud Voice extensions, you can pair them in one step.
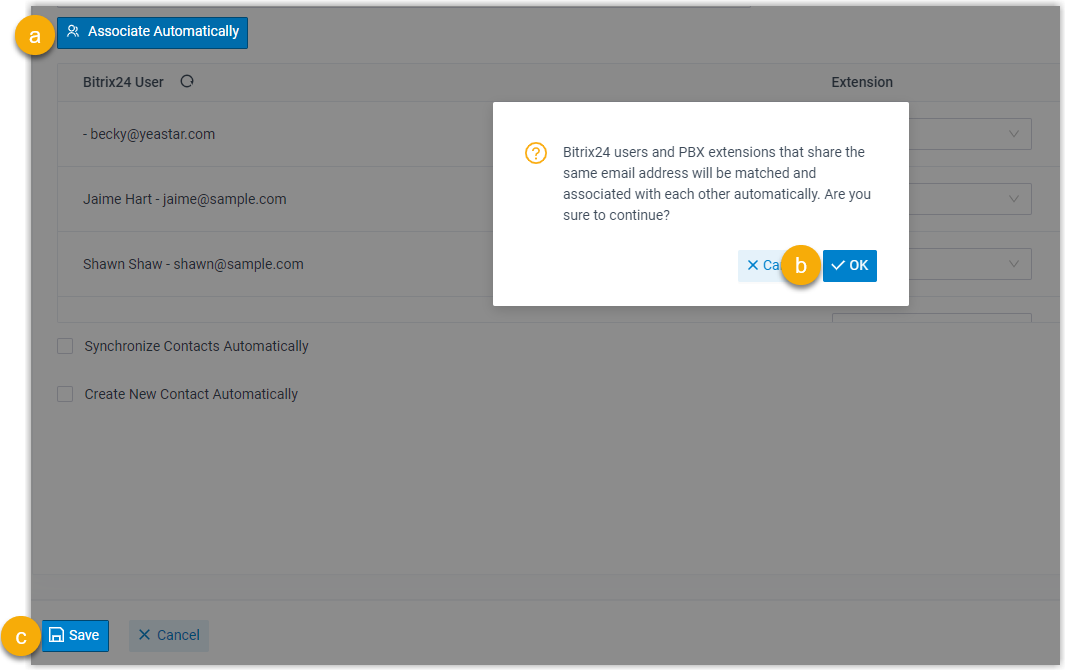
a. Click Associate Automatically.
b. In the pop-up window, click OK.
c. Click Save.
Match manually
If a user’s Bitrix24 email differs from the email on their extension, pair them by hand.
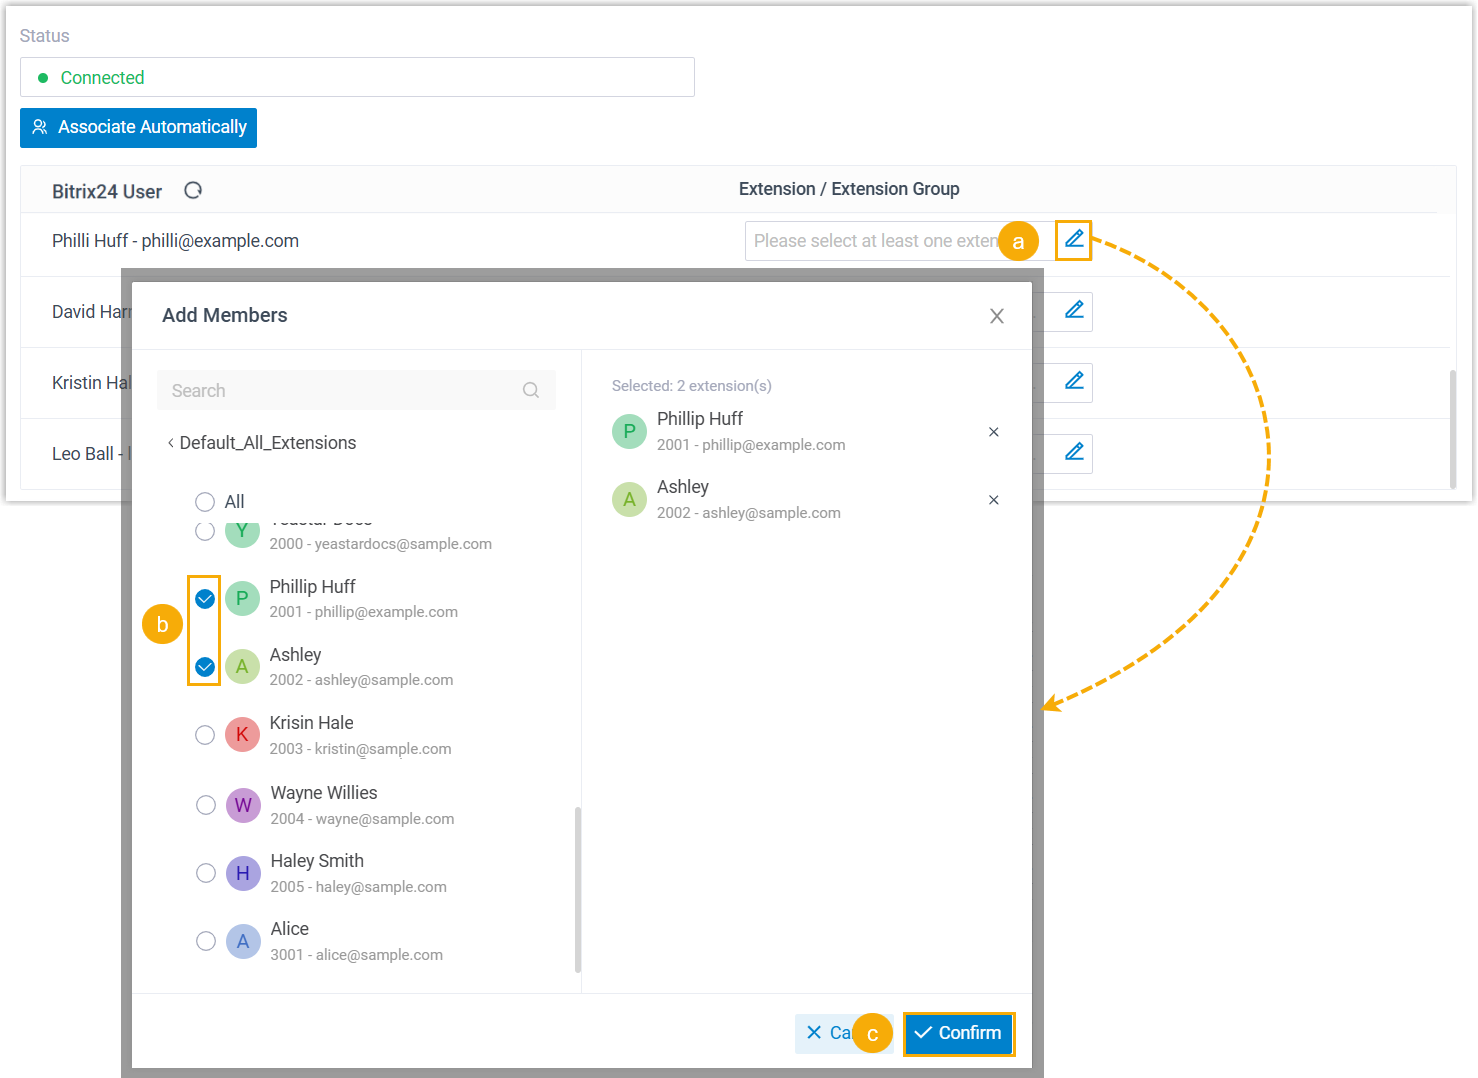
a. In the Extension / Extension Group field next to the Bitrix24 user, select the edit icon.
b. In the pop-up window, choose the extension or extensions for that user.
c. Click Confirm.
d. Click Save.
Result
Section titled “Result”- Cloud Voice and Bitrix24 CRM are now integrated.
- The mapped Bitrix24 users can place and answer calls on their Cloud Voice extensions.
Next steps
Section titled “Next steps”Question about this page?
Ask the AI assistant. It starts from this page, then searches the rest of the docs.
Ask Cloud Voice AI
Answers are AI-generated from the docs and may contain mistakes. Verify with the linked pages.