
Register 2N IP Intercom with Cloud Voice Extension
A 2N IP intercom joins Cloud Voice the same way any SIP phone does: you hand it the credentials for a dedicated extension, and from then on the door station can dial your other extensions and be reached by them. All of the registration work happens in the intercom’s own web interface, using an extension you set up earlier on the PBX.
Before you begin
Section titled “Before you begin”- Create an extension for the 2N IP intercom on Cloud Voice, and have these details on hand:
-
The extension number, its registration name, and its registration password.
-
The domain name of your PBX and the SIP registration port.
-
- Give the 2N IP intercom network connectivity so you can reach its web interface.
Sign in to the intercom
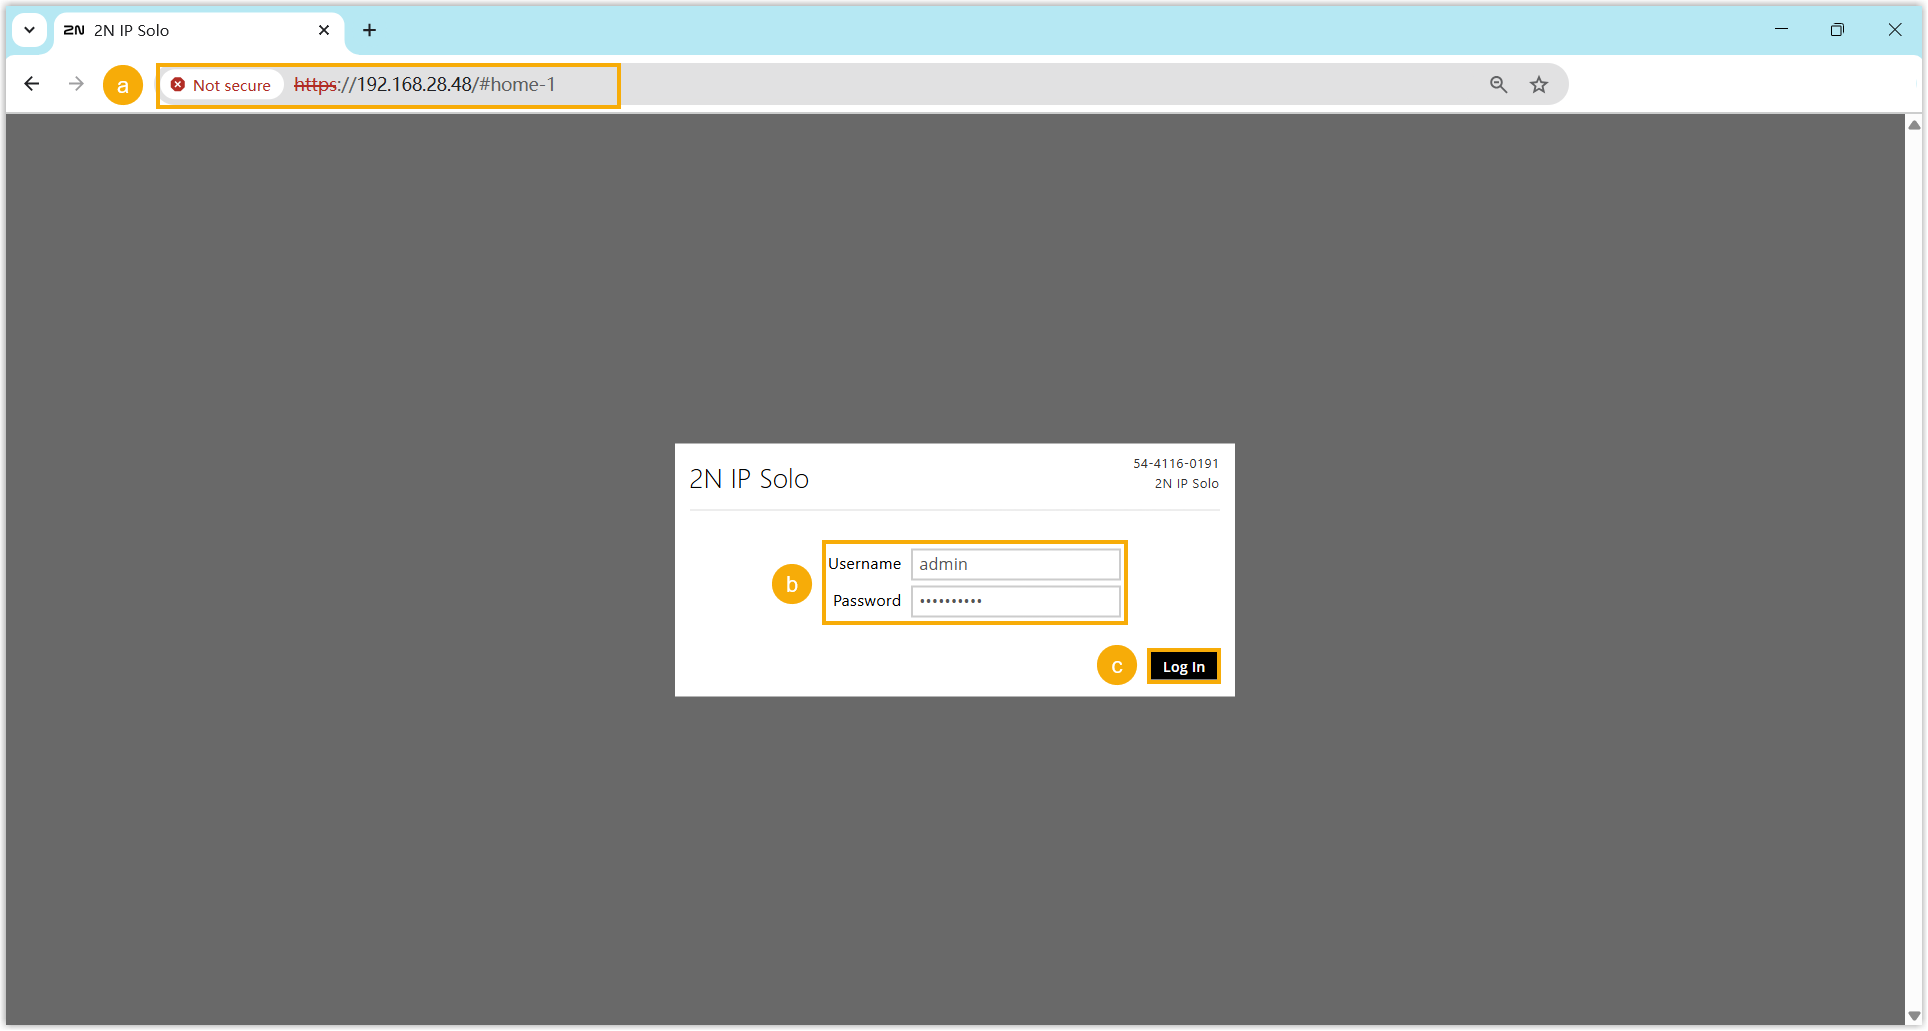
Section titled “Sign in to the intercom”- Open a browser and enter the IP address of the 2N IP intercom in the address bar.
- Sign in with the username
adminand its password. - Select Log In.
Open the SIP settings
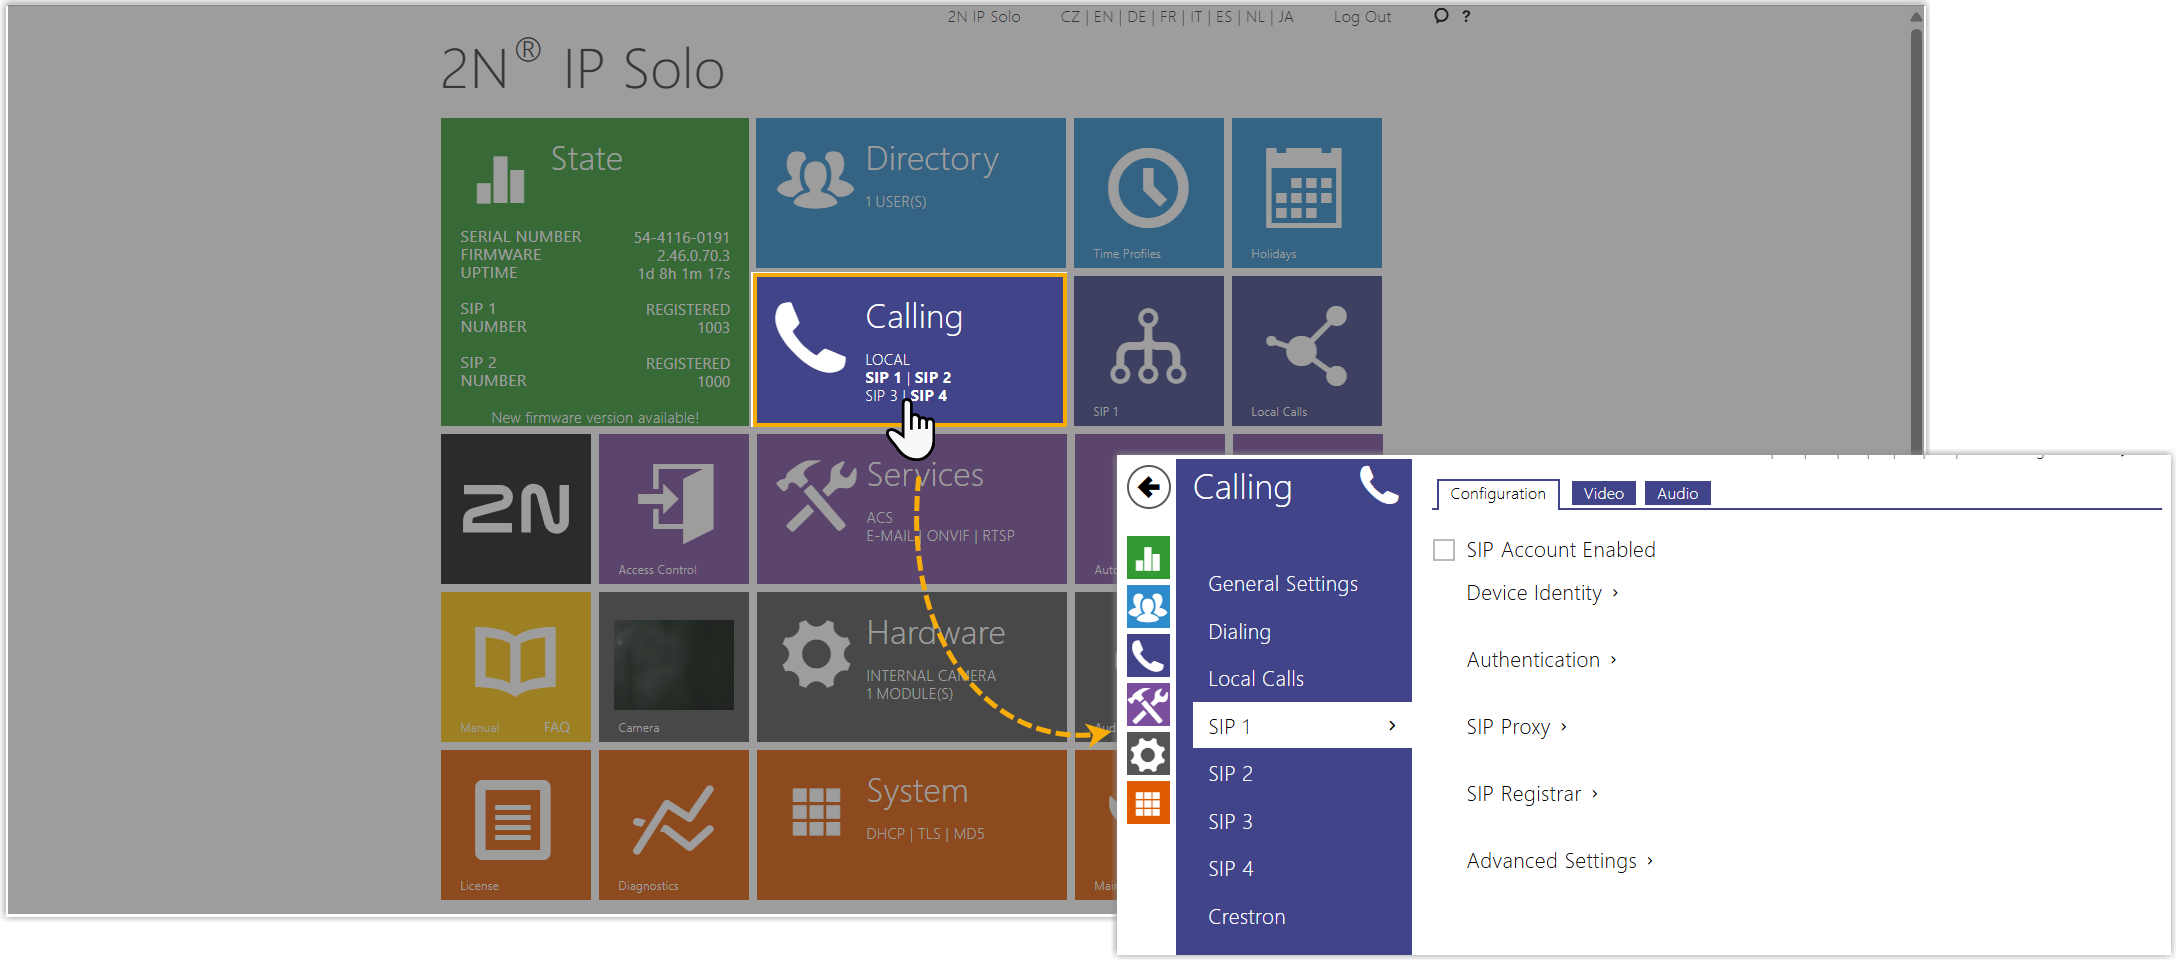
Section titled “Open the SIP settings”In the intercom’s web interface, go to Calling > SIP 1. This is where you enter the account details for the Cloud Voice extension.
Enter the extension credentials
Section titled “Enter the extension credentials”-
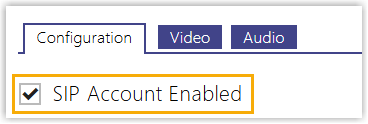
Turn on SIP Account Enabled.
-
Under Device Identity, fill in the extension’s identity.
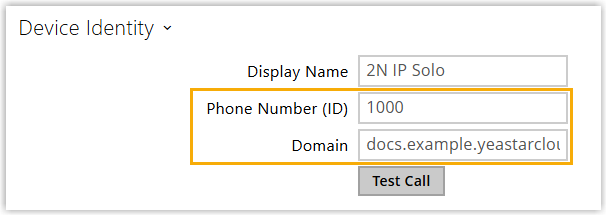
- Phone Number (ID): The extension number.
- Domain: The domain name of your PBX.
-
Under Authentication, supply the registration credentials.
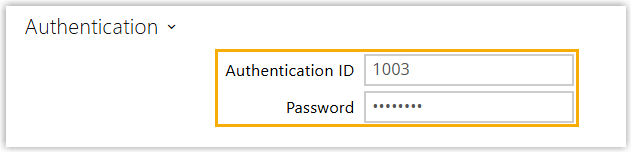
- Authentication ID: The extension’s registration name.
- Password: The extension’s registration password.
-
Under SIP Proxy, point the intercom at the PBX.
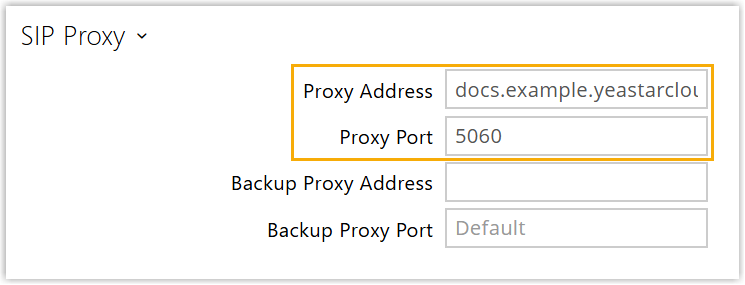
- Proxy Address: The domain name of your PBX.
- Proxy Port: The SIP port of the PBX (
5060by default).
-
Under SIP Registrar, turn on Registration Enabled, then complete the fields.
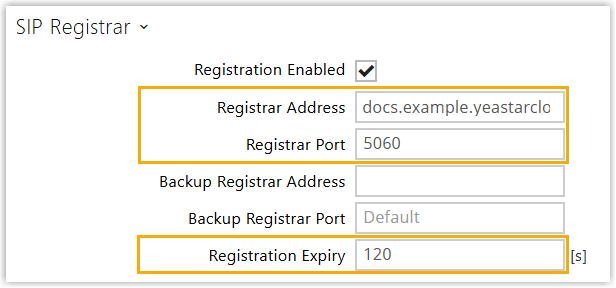
- Registrar Address: The domain name of your PBX.
- Registrar Port: The SIP registration port of the PBX (
5060by default). - Registration Expiry: Set a registration interval, or keep the default.
-
In the bottom-right corner, select Save.
Confirm the result
Section titled “Confirm the result”When the extension registers successfully, the Registration State of the SIP line reads REGISTERED.

What to do next
Section titled “What to do next”Configure Call and Door Release for PBX Extensions on the Intercom so the door station rings the right extensions and unlocks the door on the matching code.
Question about this page?
Ask the AI assistant. It starts from this page, then searches the rest of the docs.
Ask Cloud Voice AI
Answers are AI-generated from the docs and may contain mistakes. Verify with the linked pages.