
Set up Contact Synchronization from Zendesk
Once Cloud Voice is connected to Zendesk, you can have your Zendesk contacts copied into a Cloud Voice phonebook automatically. This is a one-directional sync: records move from Zendesk into Cloud Voice, and the resulting phonebook is read-only.
Before you begin
Section titled “Before you begin”Make sure you have already integrated Cloud Voice with Zendesk.
Turn on synchronization
Section titled “Turn on synchronization”-
Sign in to the PBX (Private Branch Exchange, your phone system) web portal and open Integrations > Helpdesk.
-
On the Zendesk integration page, switch on Synchronize Contacts Automatically.
-
Use the Synchronize to Phonebook drop-down to choose where the contacts should land. Pick an existing empty phonebook, or create a new one for this purpose.
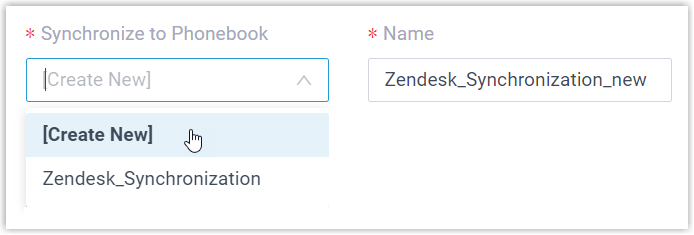
-
Decide how you want the Always Query Helpdesk option set. This controls whether Cloud Voice looks up contact details in Zendesk in real time.

- Enabled: Cloud Voice queries Zendesk on every lookup, and extension users can search Zendesk contacts as they dial from the Cloud Voice App.
- Disabled: Cloud Voice only reaches out to Zendesk when no match is found in your company contacts.
-
Click Save.
What you get
Section titled “What you get”In Contacts > Phonebooks, the linked phonebook is marked with a helpdesk label.


From then on, whenever the linked extension takes an inbound call from a Zendesk contact or dials one, the matching contact record is pulled into the Cloud Voice phonebook automatically.
Some contacts won’t sync
Section titled “Some contacts won’t sync”Records with missing details can fail to synchronize. Confirm that each contact has the following, then run the directory sync again:
- A value in either the First name or the Last name field.
- At least one phone-number field filled in.
Question about this page?
Ask the AI assistant. It starts from this page, then searches the rest of the docs.
Ask Cloud Voice AI
Answers are AI-generated from the docs and may contain mistakes. Verify with the linked pages.