
Configure Call and Door Release for PBX Extensions on the Intercom
After a 2N IP (Internet Protocol) intercom is registered to your PBX (Private Branch Exchange, your phone system), you can direct its call button to specific extensions and enable remote door release. Once this is in place, a visitor’s press rings the assigned extensions, and the person who answers can unlock the entrance directly from the Cloud Voice App, without leaving their desk or walking to the door.
Prerequisites
Section titled “Prerequisites”- You have created extensions for the indoor receivers on the PBX.
- You have set up the network for the 2N IP intercom and registered a PBX extension on the device.
Overview
Section titled “Overview”Setting up call and door release involves three tasks. The first two are required; the third is optional.
- Configure the call destination.
- Set the DTMF code for door release.
- (Optional) Customize the audio prompt for door release.
Complete each task on the web interface of the 2N IP intercom.
Configure the call destination
Section titled “Configure the call destination”Tell the intercom which extensions to ring when a visitor presses the call button.
-
Sign in to the 2N IP intercom web interface.
-
Add each person you want to reach, along with their PBX extension:
a. Go to Directory > Users and click Add User.
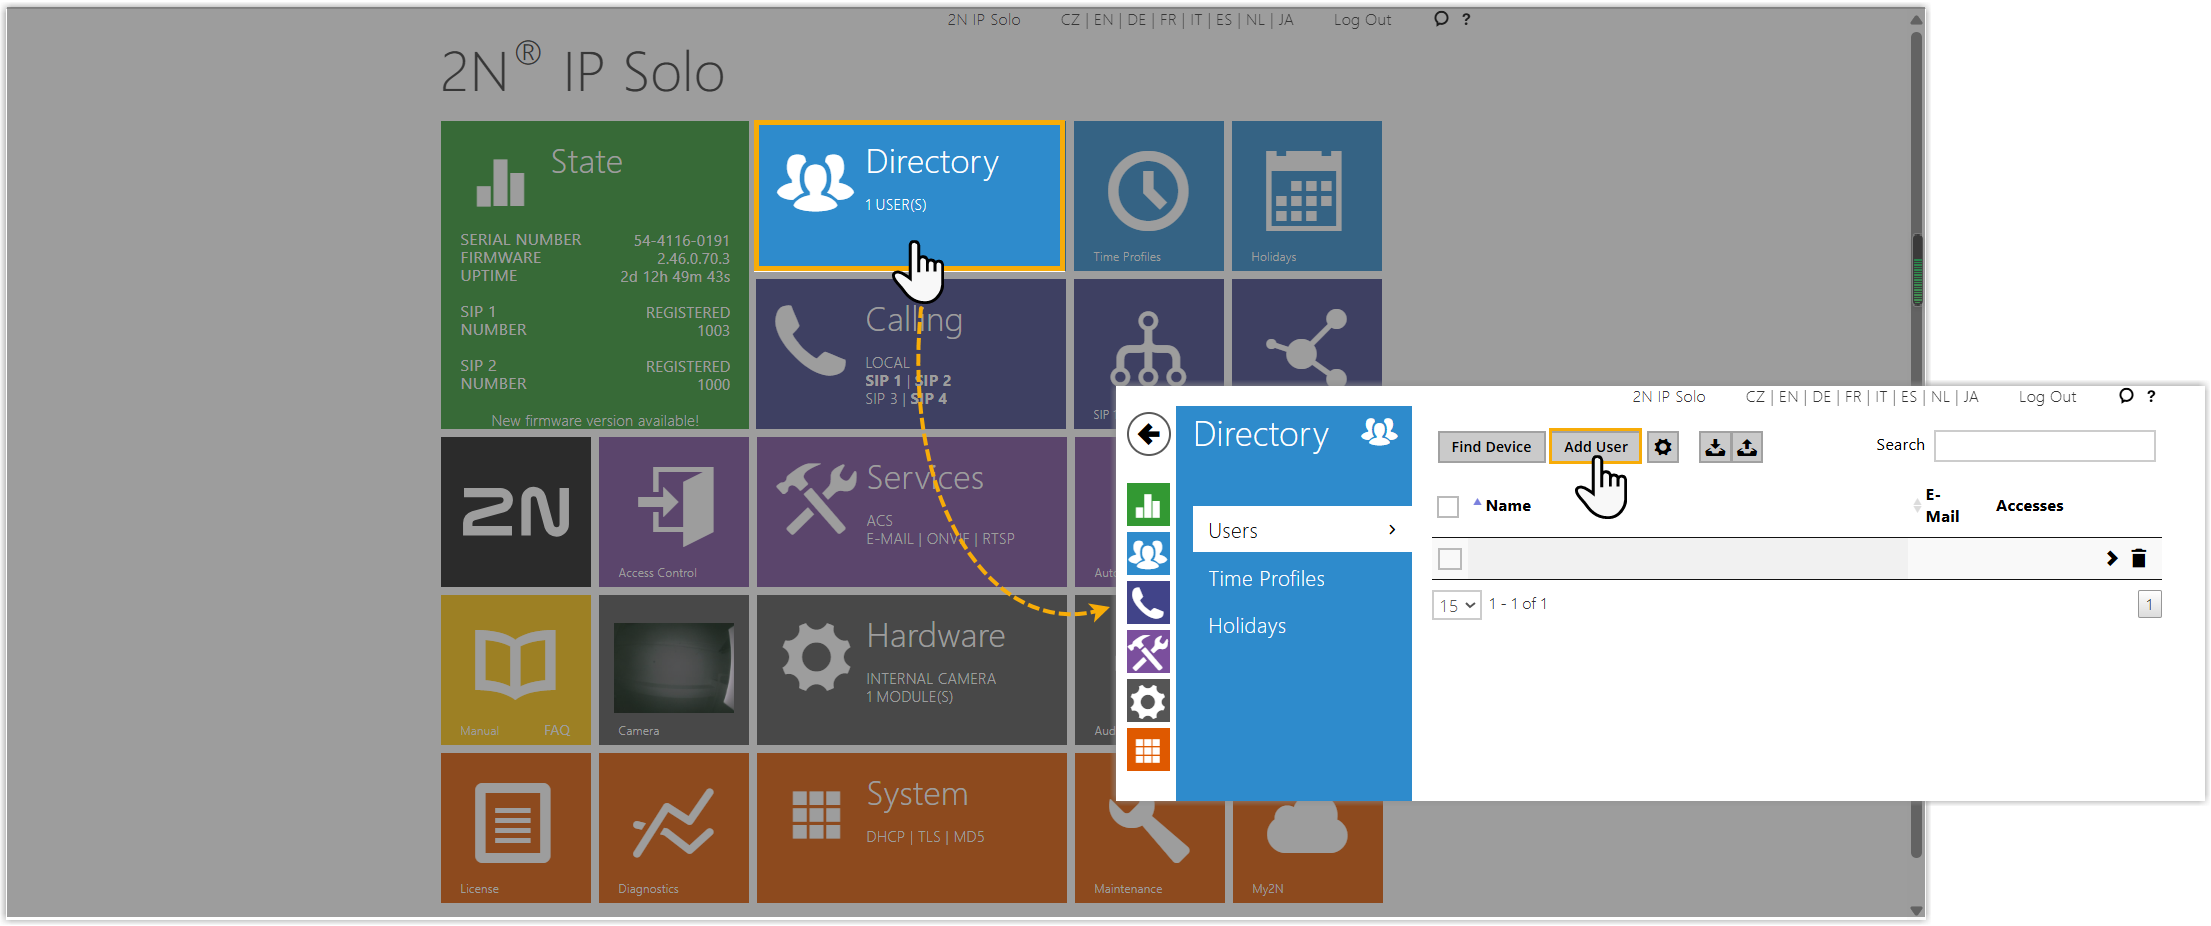
b. Fill in the following fields:
- Name: A label that identifies the user.
- Phone Number: The user’s PBX extension number.
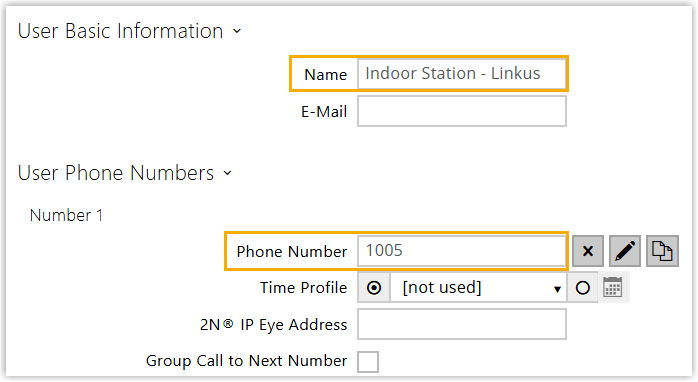
c. Click Save at the bottom right.
-
Link the users to the call button:
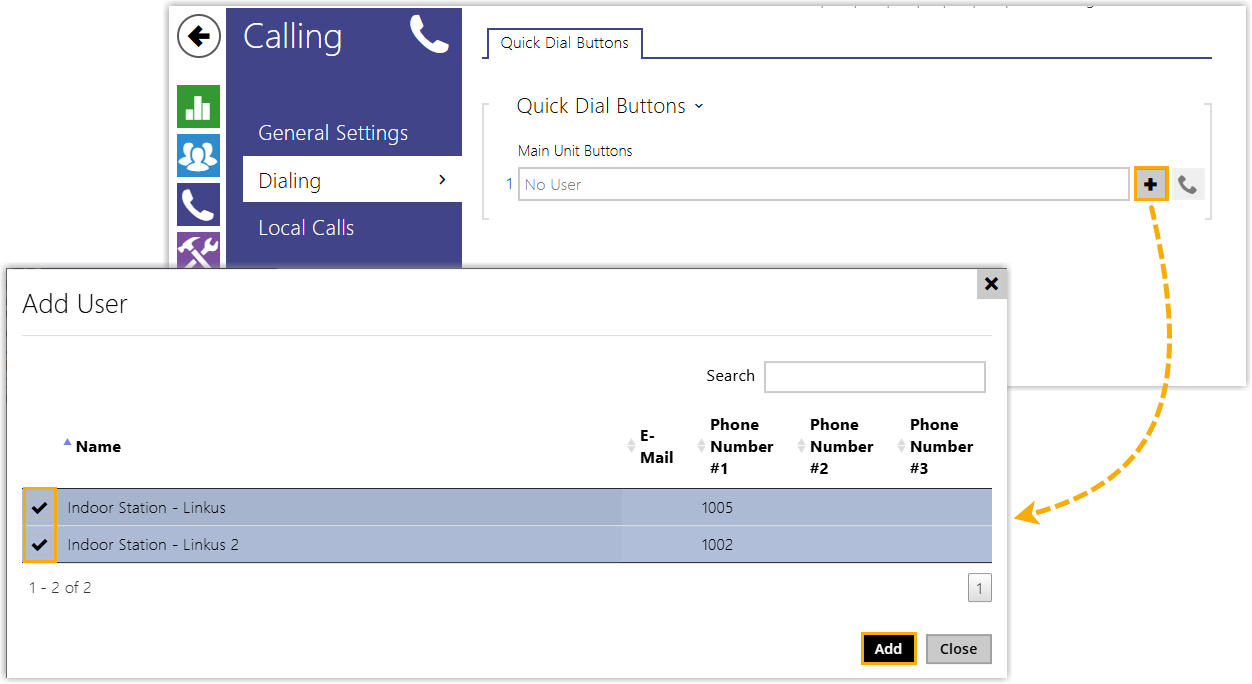
a. Go to Calling > Dialing and click the add icon
 under Main Unit Buttons.
b. In the dialog, select the user or users you added, then click Add.
c. Click Save at the bottom right.
Set the DTMF code for door release
Section titled “Set the DTMF code for door release”Define the code an extension user enters during a call to open the door.
-
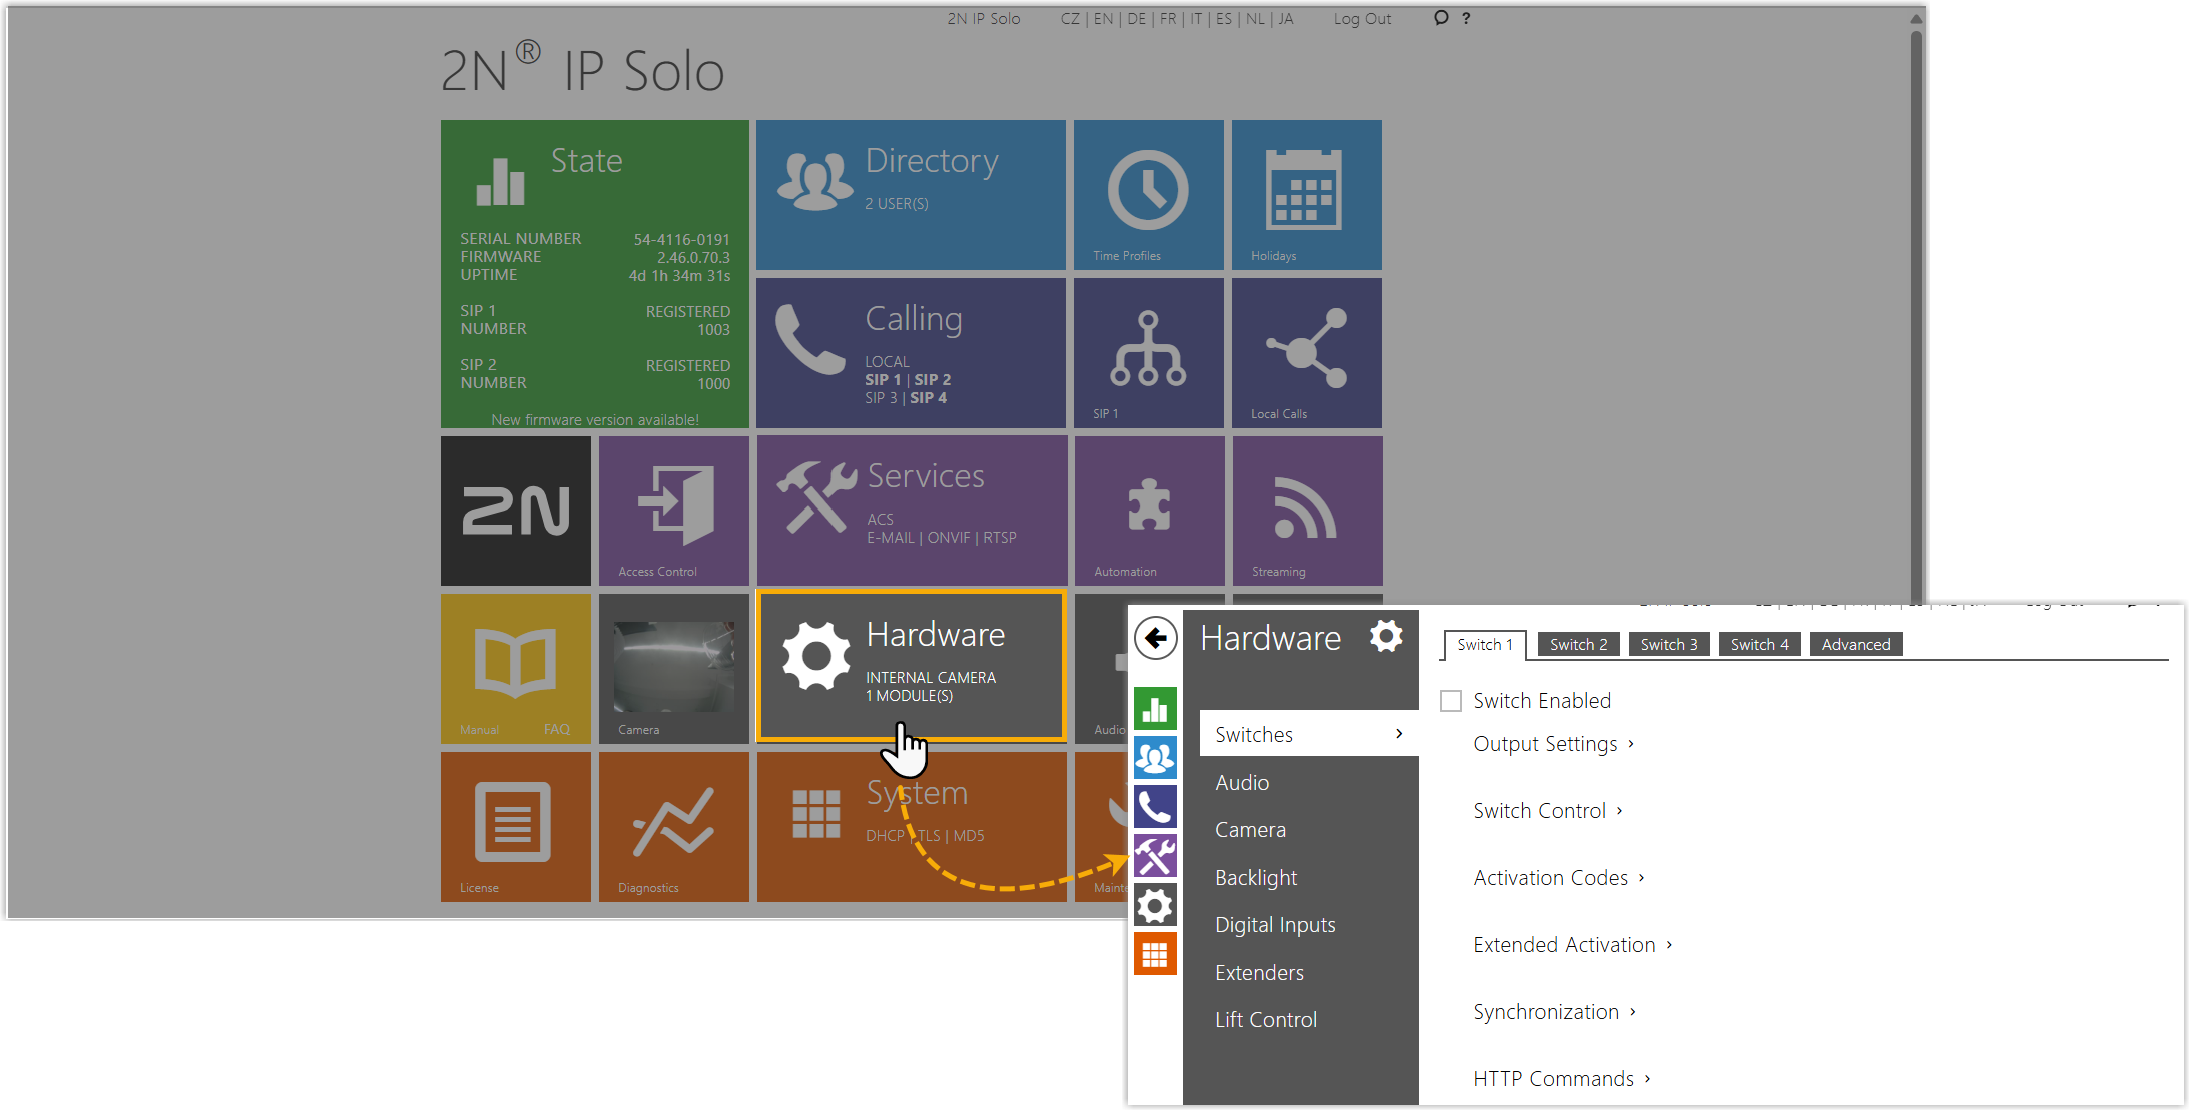
Go to Hardware > Switches.
-
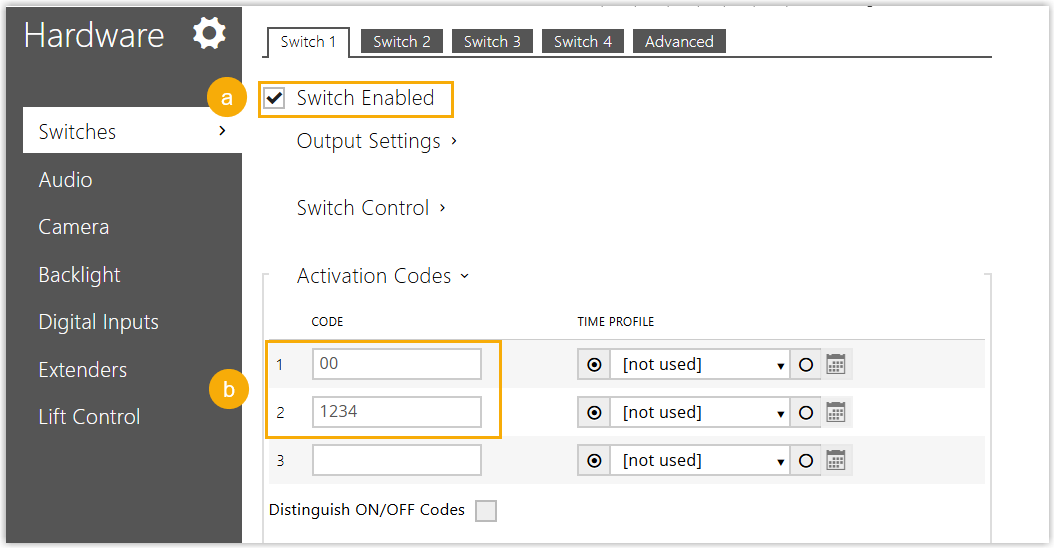
On the Switch 1 tab, set up the door-release code:
- Select the Switch Enabled checkbox.
- In Activation Codes, enter one or more DTMF codes.
-
Click Save at the bottom right.
(Optional) Customize the audio prompt for door release
Section titled “(Optional) Customize the audio prompt for door release”Choose the sound the intercom plays when the door is released.
-
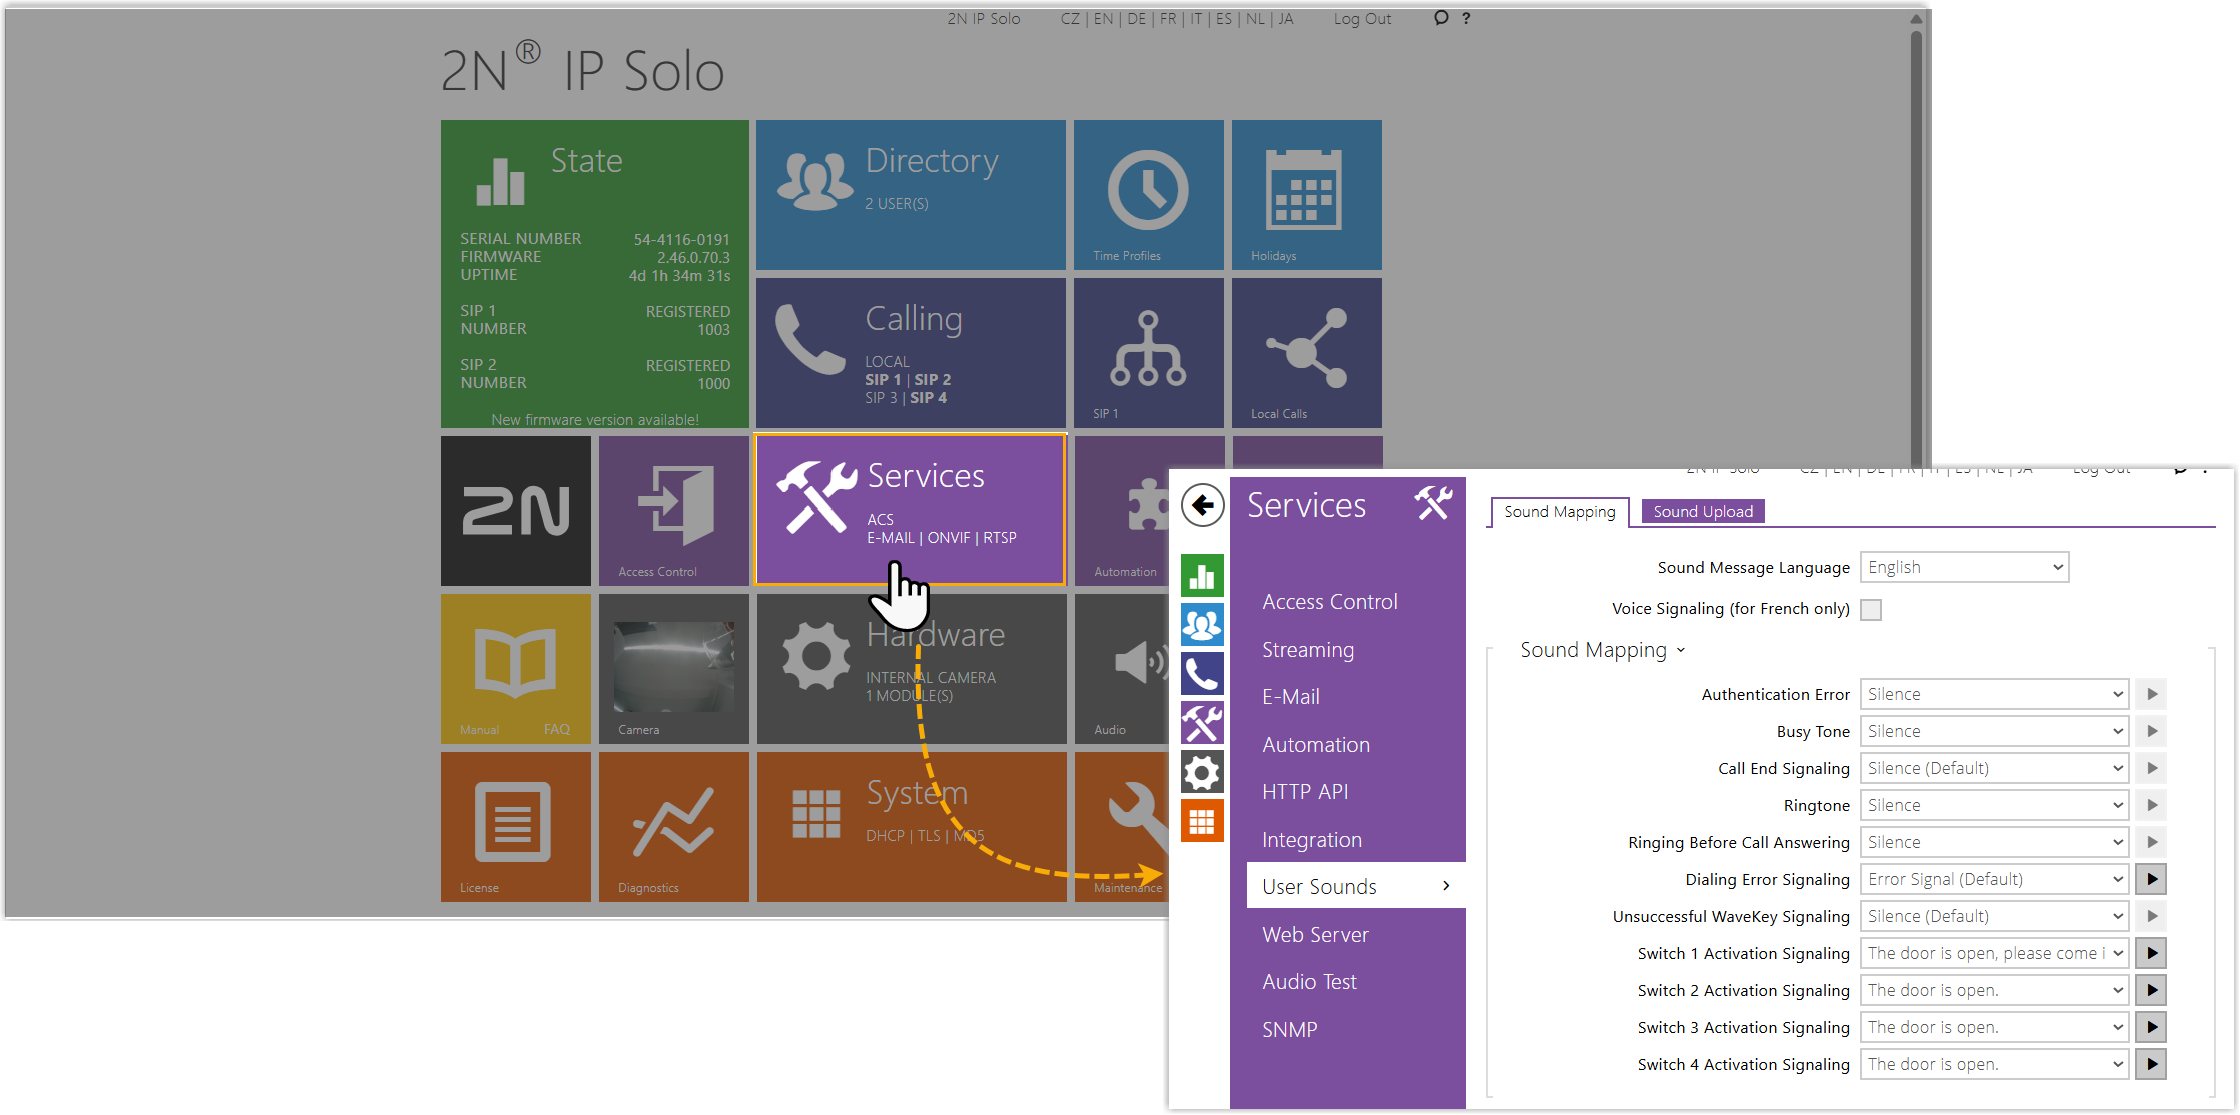
Go to Services > User Sounds.
-
On the Sound Mapping tab, pick the sound you want for Switch 1.
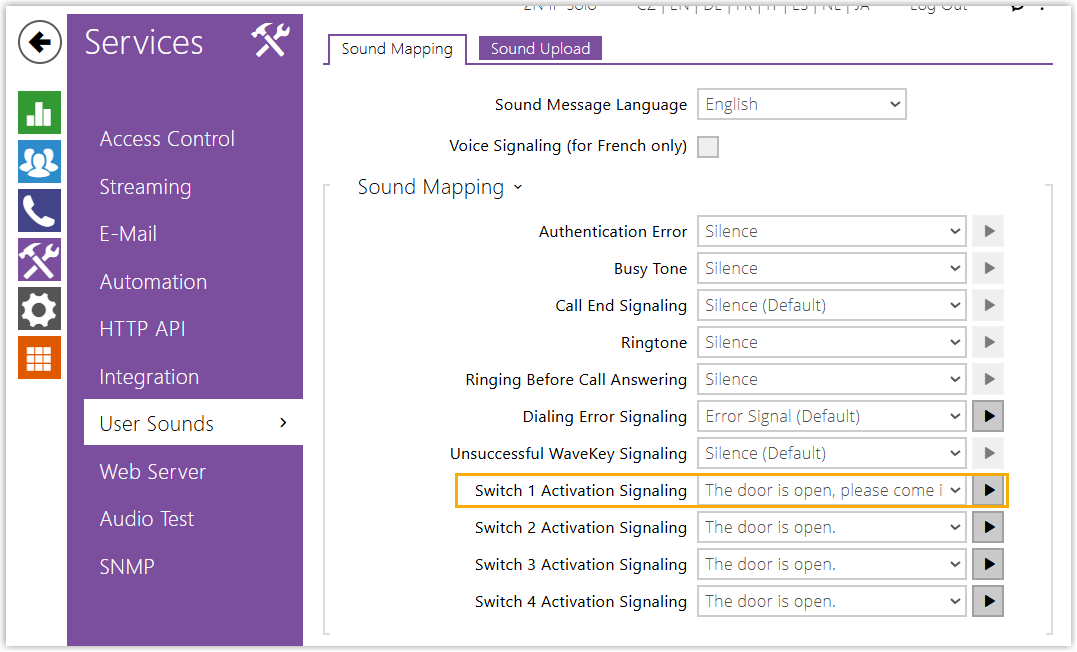
Whenever the door is released with a code from the Switch 1 tab, the intercom plays the sound you assigned here.
Result
Section titled “Result”- Pressing the call button on the 2N IP intercom places a video call to the extensions you designated.
- Assigned extension users see the video feed and can answer on the Cloud Voice App. To let the visitor in, the user dials a switch code followed by
*during the call (for example,00*or1234*). The intercom announces “The door is open, please come in.”, confirming the door has unlocked.
Question about this page?
Ask the AI assistant. It starts from this page, then searches the rest of the docs.
Ask Cloud Voice AI
Answers are AI-generated from the docs and may contain mistakes. Verify with the linked pages.