
2N IP Intercom Integration Preparation
Complete the following groundwork before you connect a 2N IP intercom to Cloud Voice. First you create the extensions that the door station and its indoor receivers depend on, then you place the intercom on your network so its web interface is reachable for the configuration that follows.
Create extensions on Cloud Voice
Section titled “Create extensions on Cloud Voice”You need more than one extension on the PBX (Private Branch Exchange, the system that runs your Cloud Voice phone service) for this integration. One extension is registered to the 2N IP intercom itself, and the remaining extensions are handed to the people who answer visitor calls and open the door.
Extension for the 2N IP intercom (door station)
Section titled “Extension for the 2N IP intercom (door station)”- Sign in to the PBX web portal and go to Extension and Trunk > Extension, then click Add > Add.
- On the User tab, do the following:
-
Fill in the user and extension details, or leave the defaults in place.
-
Make a note of the values below. You will enter them on the 2N IP intercom later when you register the extension to the device.

- Extension Number
- Registration Name
- Registration Password
-
If you want receivers to see video from the door station before they pick up, turn on video preview for this extension.
-
Open the Features tab.
-
Scroll to the Door Phone Application section and enable the preview mode you want.

-
Video Preview: When enabled, an incoming door-station call shows a preview control the callee can tap (
 ) in the Cloud Voice App to view the video while the call is still ringing.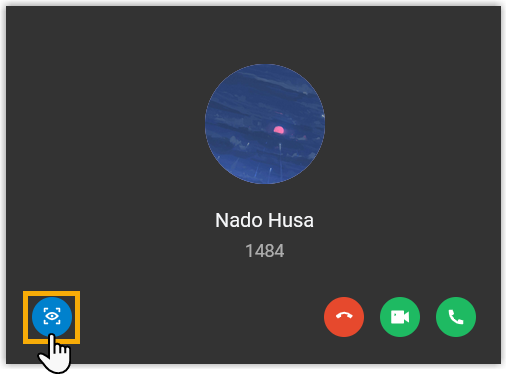
-
Auto Preview: When enabled, an incoming door-station call opens the video automatically in the callee’s Cloud Voice App while it rings, with no action needed.
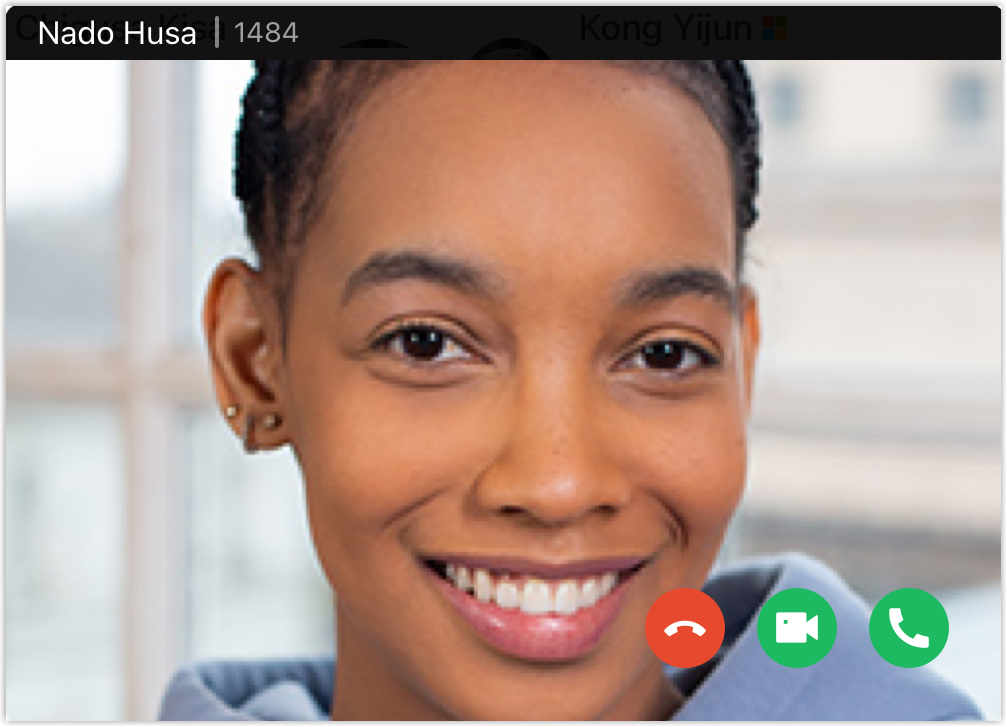
-
-
-
- Click Save, then Apply.
Extensions for indoor receivers
Section titled “Extensions for indoor receivers”-
Sign in to the PBX web portal and go to Extension and Trunk > Extension, then click Add > Add.
-
On the User tab, fill in the user and extension details, or leave the defaults in place.
-
On the Presence tab, set up call handling so visitor calls are never missed when the extension user steps away.
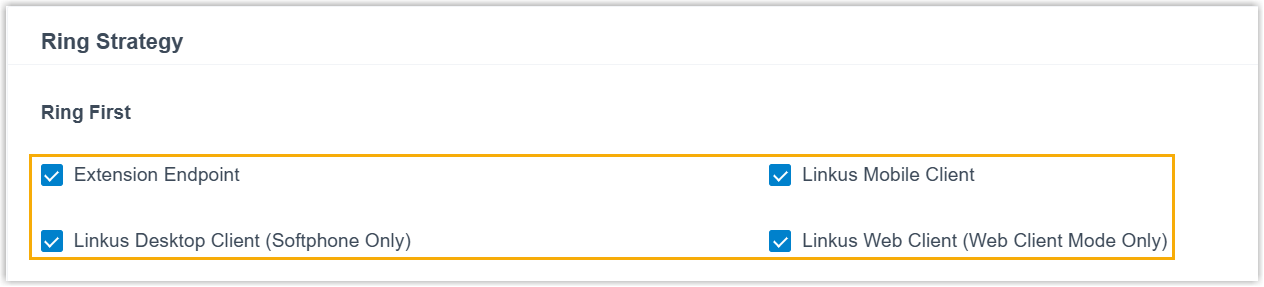
Setting What it does Call forwarding Sends the call on to a fallback number (for example, the user’s mobile) whenever the extension can’t take it. In the Call Forwarding section, select the unavailable condition to cover for internal calls (No Answer or When Busy), then choose a destination for it. Simultaneous ring Rings several of the user’s registered devices at once so whoever is nearest can answer straight away. In the Ring Strategy section, select the registered devices that should ring. 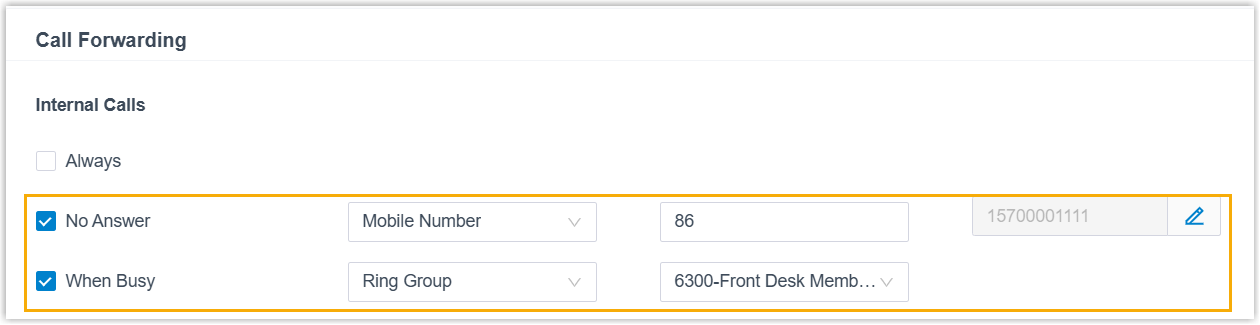
-
Click Save, then Apply.
Configure the network for the 2N IP intercom
Section titled “Configure the network for the 2N IP intercom”Find the 2N IP intercom on your network and set its IP (Internet Protocol) address so you can open the device’s web interface for the rest of the setup.
Prerequisites
Section titled “Prerequisites”- Install the 2N Network Scanner on your computer.
- Put the 2N IP intercom on the same LAN (local area network) as that computer, then factory reset it.
- Have the intercom’s web interface credentials on hand.
-
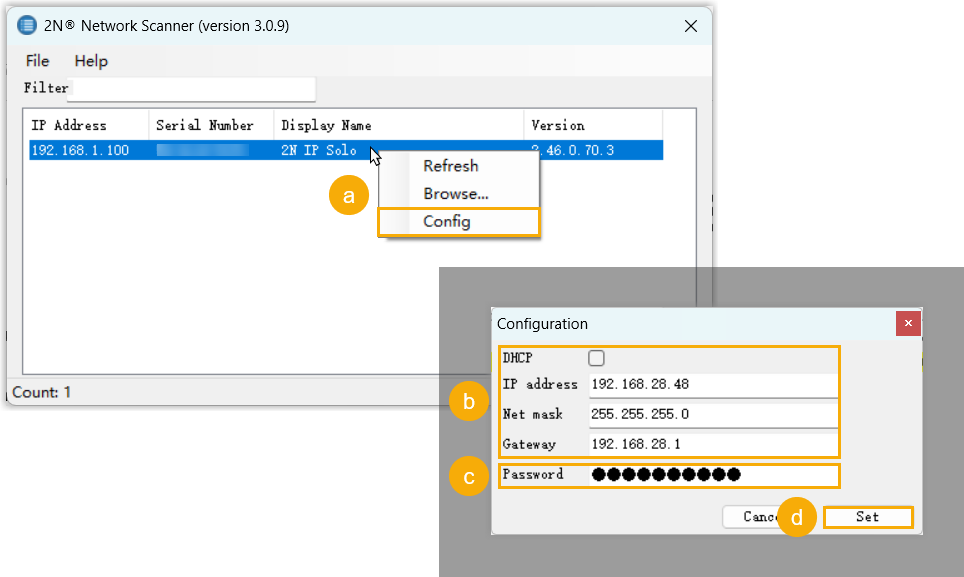
Launch the 2N Network Scanner on your computer. It finds every 2N IP intercom on the local network and lists each one’s device type, firmware version, and current IP address.
-
Change the intercom’s IP address.
-
Right-click the intercom and choose Config.
-
Set how the address is assigned:
- For a dynamic address, select DHCP (Dynamic Host Configuration Protocol), which lets your network hand the intercom an address automatically.
- For a static address, enter the IP address, net mask, and gateway.
-
In the Password field, enter the device password (
2nin this example). -
Click Set.
-
Result
Section titled “Result”-
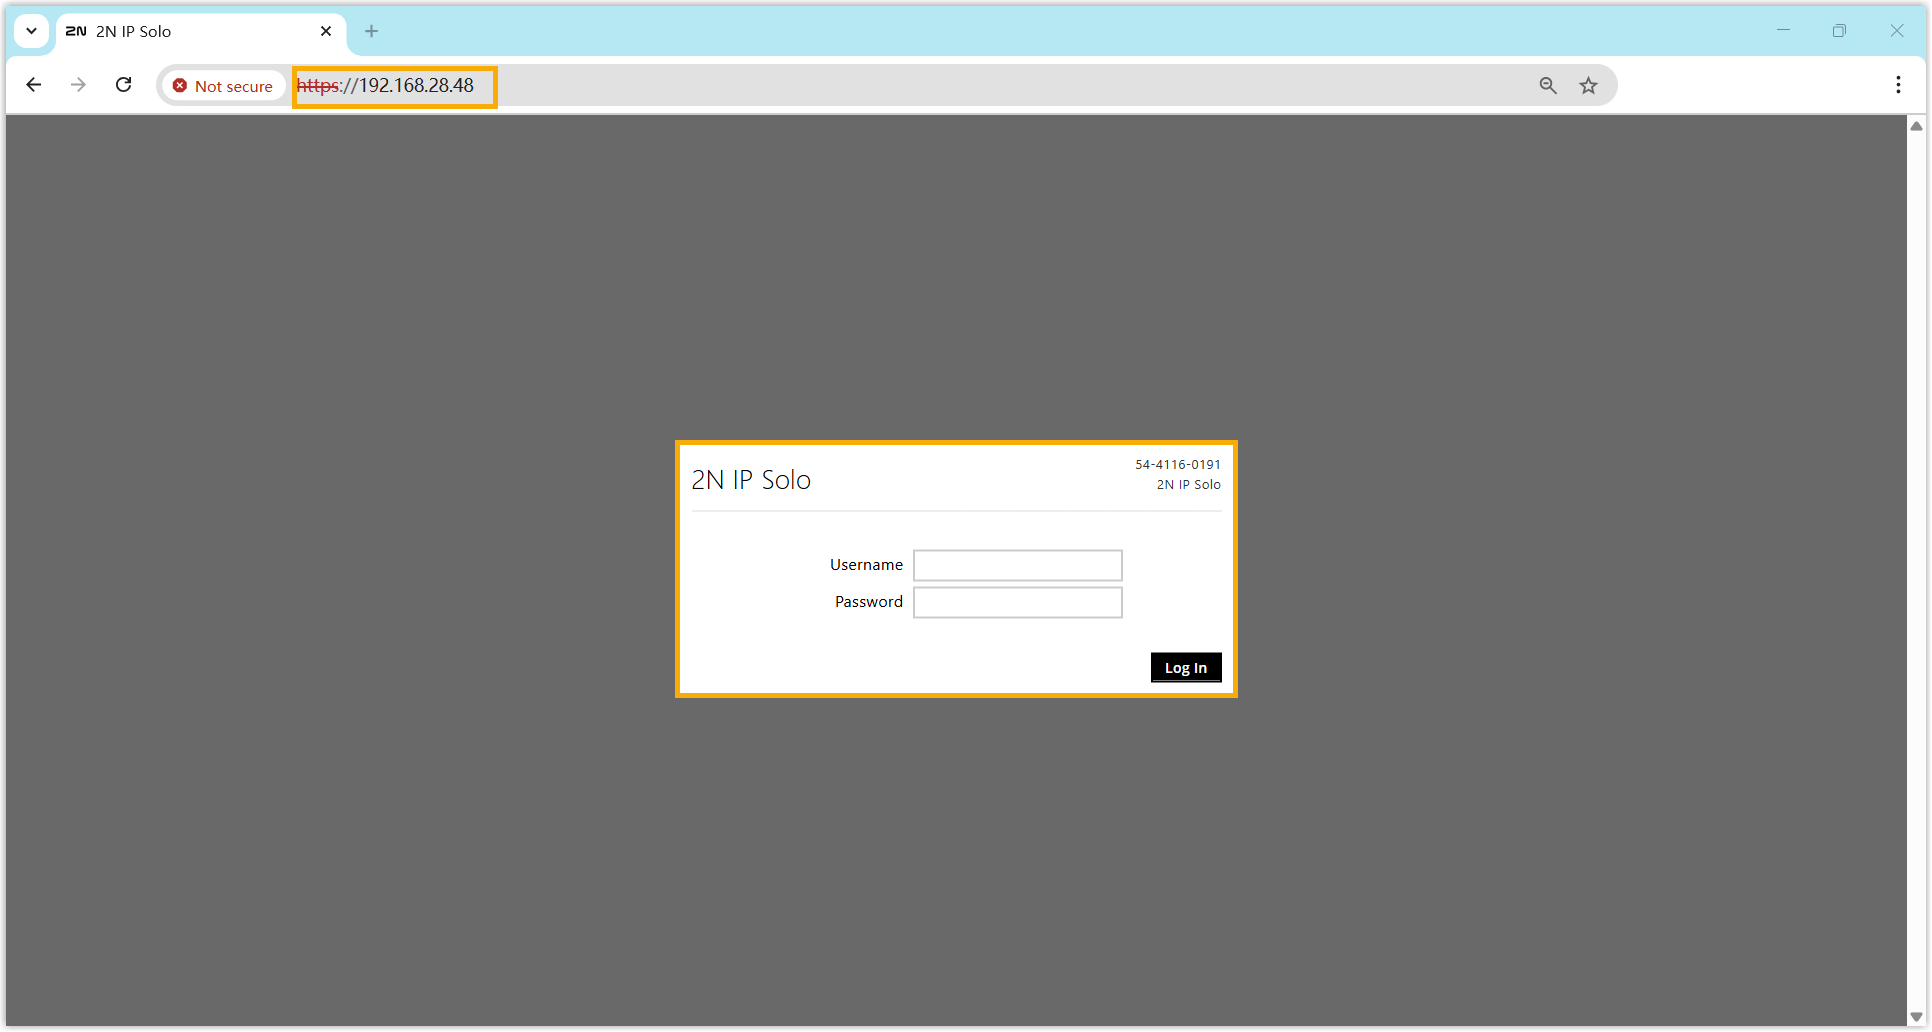
The device list shows the intercom’s new IP address, which confirms the network settings took effect.
-
You can now browse to that IP address to reach the intercom’s web interface.
Next steps
Section titled “Next steps”Question about this page?
Ask the AI assistant. It starts from this page, then searches the rest of the docs.
Ask Cloud Voice AI
Answers are AI-generated from the docs and may contain mistakes. Verify with the linked pages.