
Integrate Cloud Voice with Microsoft SQL
Link Cloud Voice to a Microsoft SQL database and your PBX (Private Branch Exchange, the phone system) checks every inbound (incoming) call against that database. When the caller’s number matches a stored record, the matching contact name is shown with the call, so staff can see who is calling before they answer.
Requirements
Section titled “Requirements”| Item | Requirement |
|---|---|
| Cloud Voice | Plan: Enterprise Plan (EP) or Ultimate Plan (UP) Firmware: Version 84.16.0.70 or later |
| Microsoft SQL | None. Any version of Microsoft SQL Server can be integrated with Cloud Voice. |
Step 1. Turn on the Microsoft SQL integration
Section titled “Step 1. Turn on the Microsoft SQL integration”-
Open the Microsoft SQL configuration page.
-
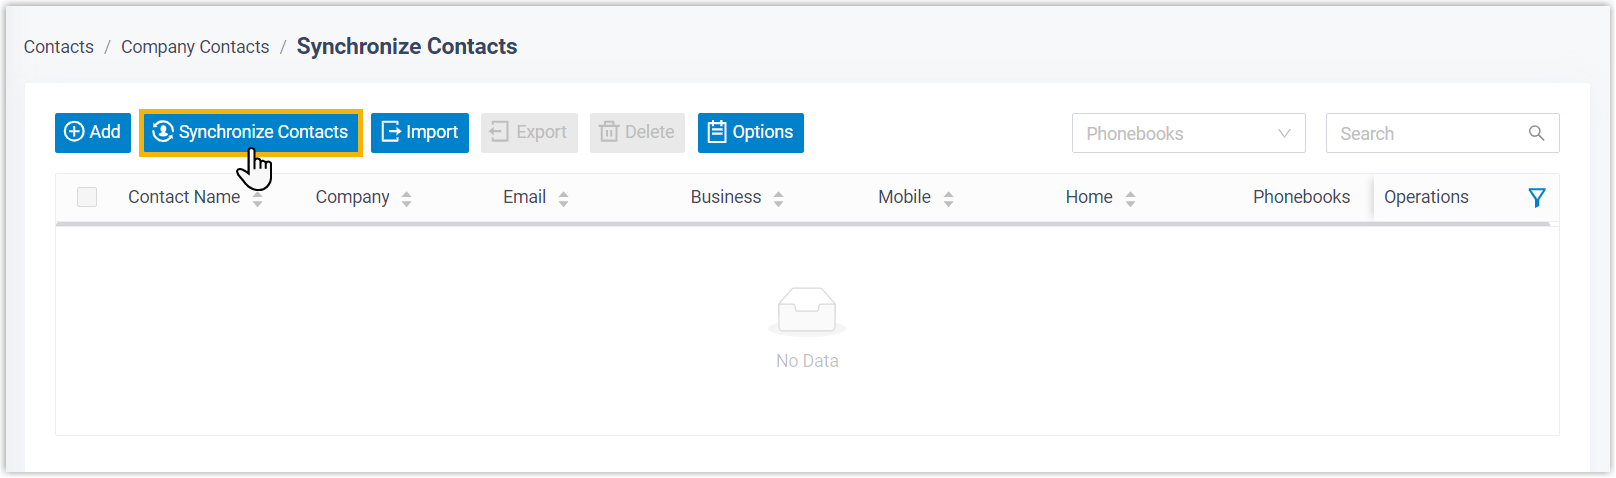
Sign in to the PBX web portal and go to Contacts > Company Contacts.
-
Click Synchronize Contacts near the top of the page.
-
-
Switch on Enable Microsoft SQL Integration, then fill in the connection details described below.
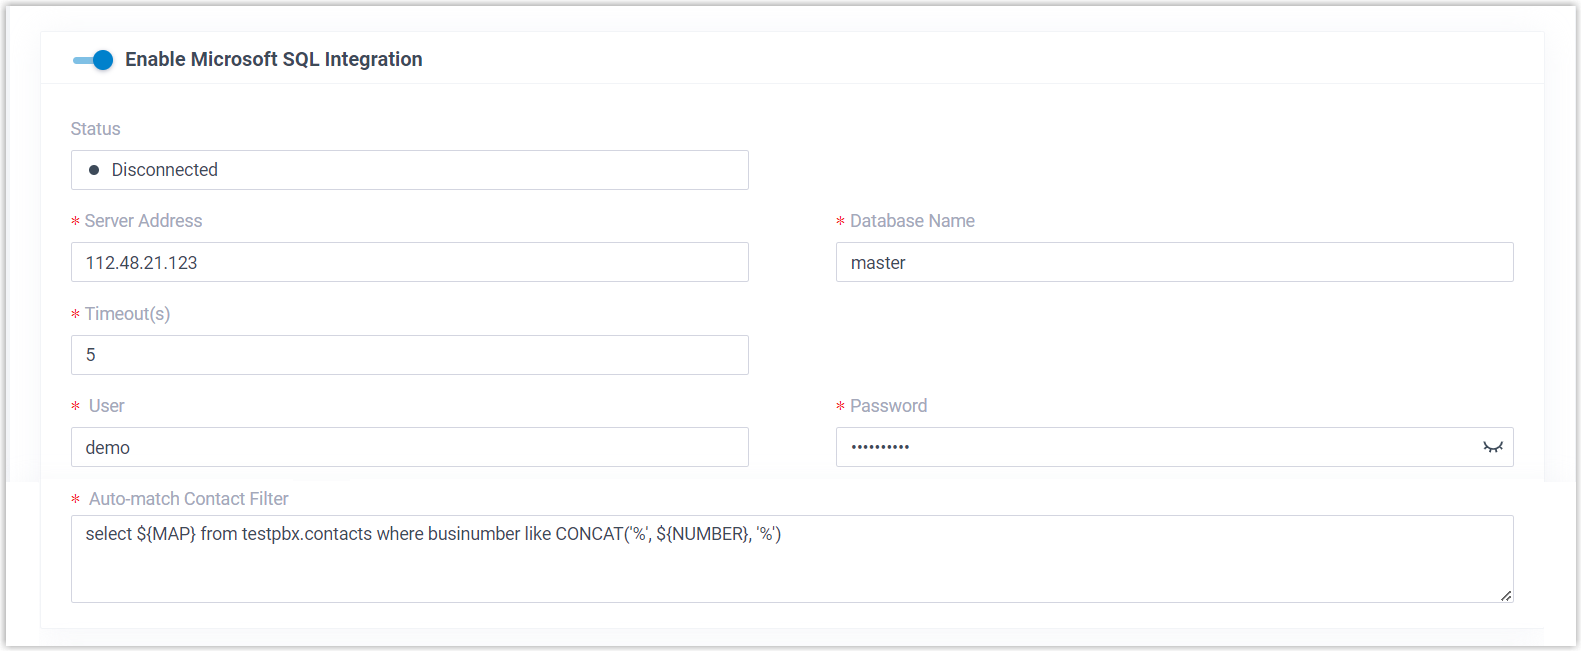
Setting Description Server Address Point Cloud Voice at your Microsoft SQL server.
If the server listens on the default port1433, enter only its IP address or domain name, for example112.48.21.123.
If the server uses a different port, append it after a colon, for example112.48.21.123:20001.Database Name The name of the database to query. Timeout(s) How long, in seconds, to wait when connecting to the server before the attempt times out. User The account name used to sign in to the database. Password The password for that account. Auto-match Contact Filter A SELECTstatement that tells Cloud Voice how to look up a caller’s number, written asselect ${MAP} from {schema_name}.{table_name} where {condition_to_filter_number}. See the breakdown below.
Building the Auto-match Contact Filter
Section titled “Building the Auto-match Contact Filter”Take this statement as a model:
select ${MAP} from testpbx.contacts where businumber like CONCAT('%', ${NUMBER}, '%')Each part does the following:
select ${MAP}, names the database column whose value you want shown as the caller ID name. At runtime,${MAP}is substituted with the PBX field or fields (First Name, Last Name, or both) that you enable in the Map section during Step 2.from testpbx.contacts, the table to read from. Always give it as a two-part name in the form{schema_name}.{table_name}.where businumber like CONCAT('%', ${NUMBER}, '%'), returns the rows where thebusinumbercolumn contains the caller’s number (${NUMBER}) anywhere within it.
Step 2. Map fields between Cloud Voice and Microsoft SQL
Section titled “Step 2. Map fields between Cloud Voice and Microsoft SQL”-
Scroll down to the Map section.
-
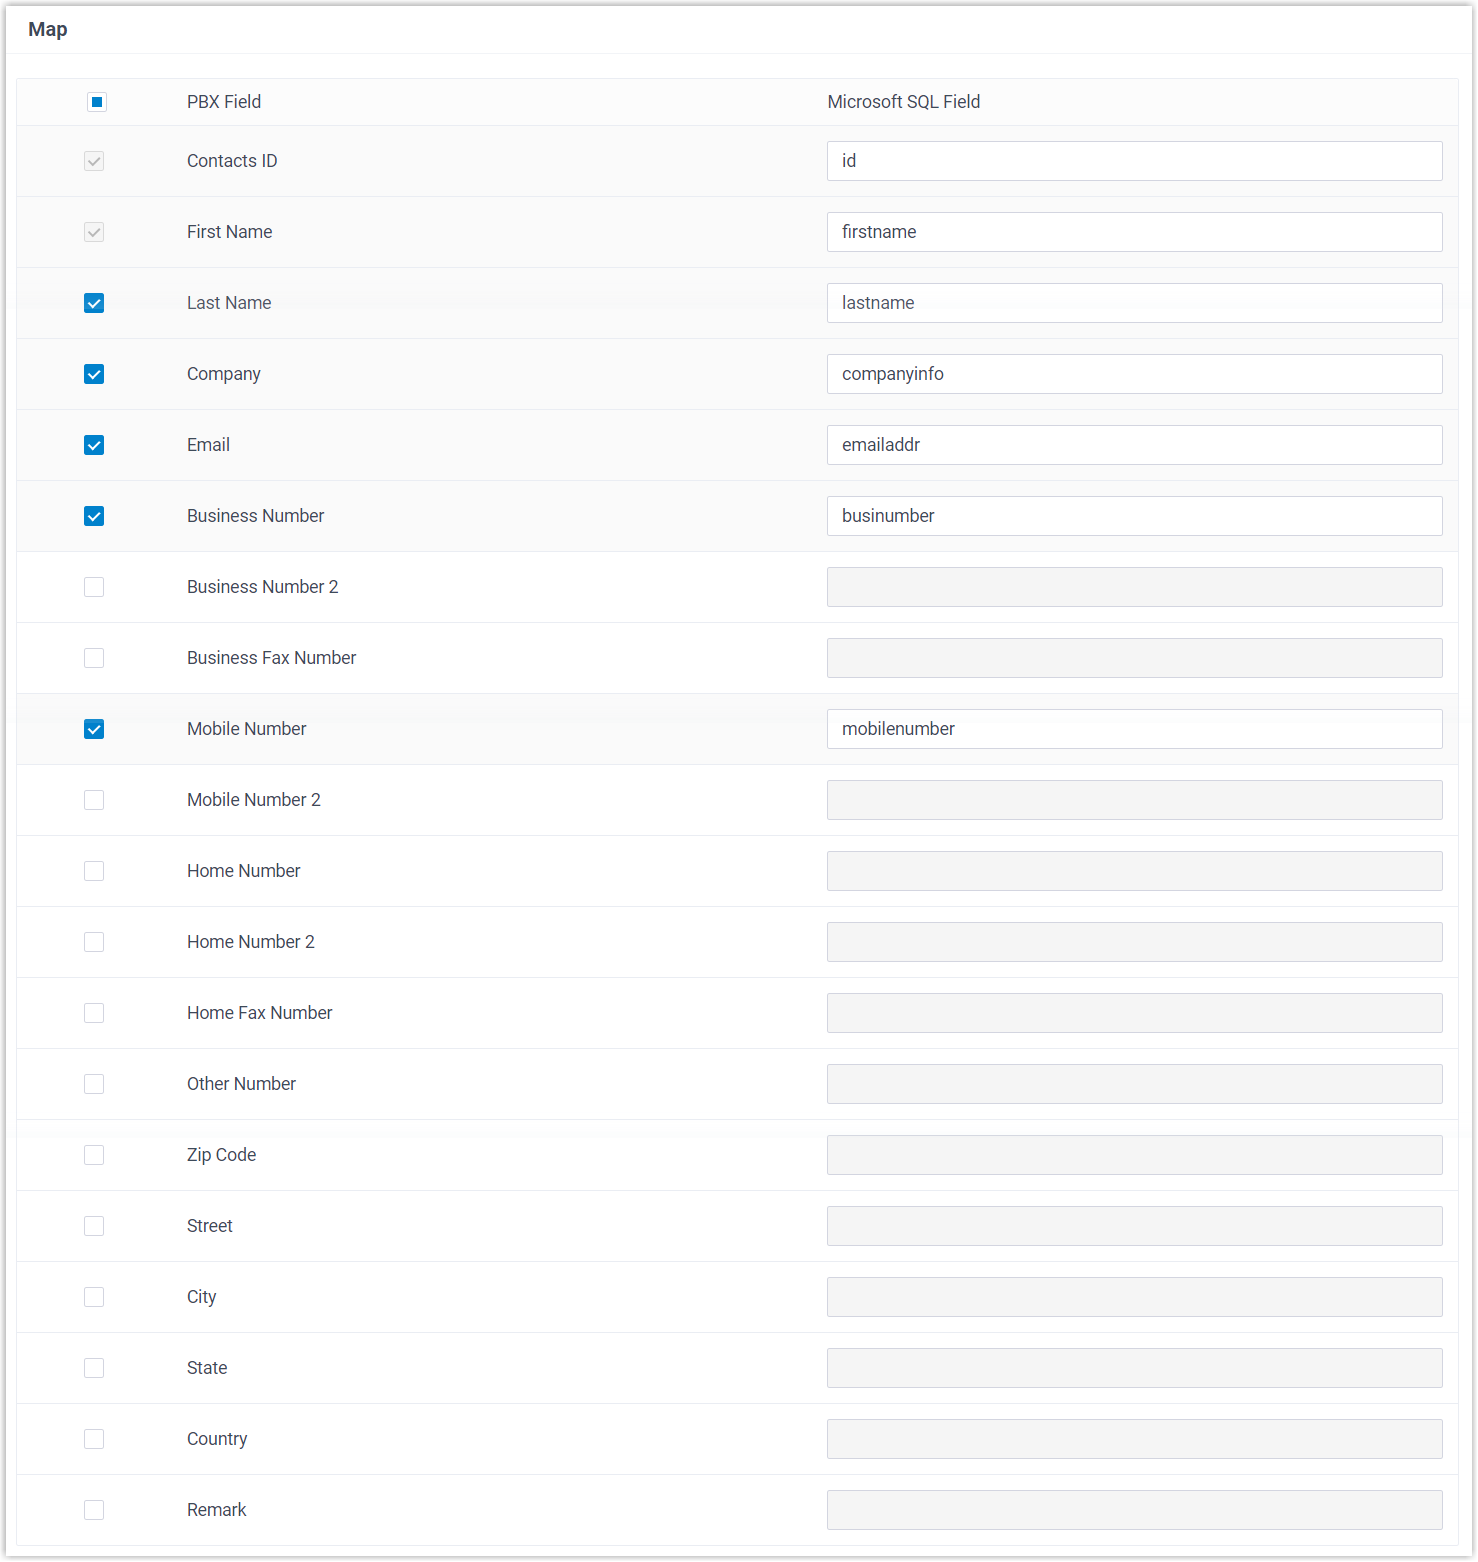
Map the fields needed to display the caller’s name.

-
For Contacts ID, First Name, and Business Number, enter the matching column name from your Microsoft SQL contacts table. Once saved, an inbound call that matches a record shows the contact’s first name.
-
Optional: to show the last name as well, select the Last Name checkbox and enter its corresponding Microsoft SQL column.
-
-
To pull Microsoft SQL contacts into the PBX, enable and map the additional fields you want to sync.
-
Click Save.
Result
Section titled “Result”-
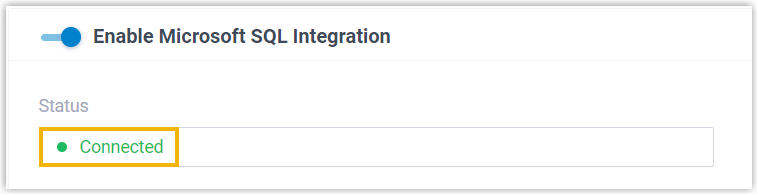
Cloud Voice is connected to your Microsoft SQL server.
-
When an inbound call matches a record in your database, the caller’s name is displayed.
What to do next
Section titled “What to do next”To let extension users call your Microsoft SQL contacts directly from the Cloud Voice App, set up contact synchronization from the Microsoft SQL server. For details, see Set up Contact Synchronization from Microsoft SQL.
Question about this page?
Ask the AI assistant. It starts from this page, then searches the rest of the docs.
Ask Cloud Voice AI
Answers are AI-generated from the docs and may contain mistakes. Verify with the linked pages.