
Manually Register a Dinstar IP Phone
If a Dinstar IP phone can’t be auto-provisioned, you can still bring it online by typing an extension’s registration details directly into the phone’s web interface. This walkthrough uses a Dinstar C60S running firmware 2.60.11.7.0 as the example, but the same approach applies to any Dinstar phone that speaks SIP.
Supported devices
Section titled “Supported devices”Any Dinstar IP phone that supports SIP (Session Initiation Protocol), the standard that phones use to register with and place calls through Cloud Voice.
Before you start
Section titled “Before you start”Registering the phone is a two-part job:
- Collect the extension’s registration details from Cloud Voice.
- Enter those details in the Dinstar phone’s web interface.
Step 1. Collect the registration details from Cloud Voice
Section titled “Step 1. Collect the registration details from Cloud Voice”Sign in to the Cloud Voice management portal and gather the values below. Keep them handy for Step 2.
| Detail | Where to find it |
|---|---|
| Extension credentials | Go to Extension and Trunk > Extension, click the edit icon next to the extension, then open User > Extension Information. Record the Extension Number, Registration Name, and Registration Password. |
| Transport protocol | Go to Extension and Trunk > Extension, click the edit icon next to the extension, then open Advanced > VoIP Settings > Transport. Note which protocol the extension uses (UDP, TCP, or TLS). This example uses UDP (User Datagram Protocol). |
| PBX domain name | The domain name of your Cloud Voice system (the PBX, or Private Branch Exchange). This example uses pbx.example.com. |
| SIP registration port | The SIP registration port is 5060. |
The extension credentials appear on the Extension Information tab:

The transport protocol is set under Advanced > VoIP Settings:

Step 2. Register the extension on the Dinstar phone
Section titled “Step 2. Register the extension on the Dinstar phone”-
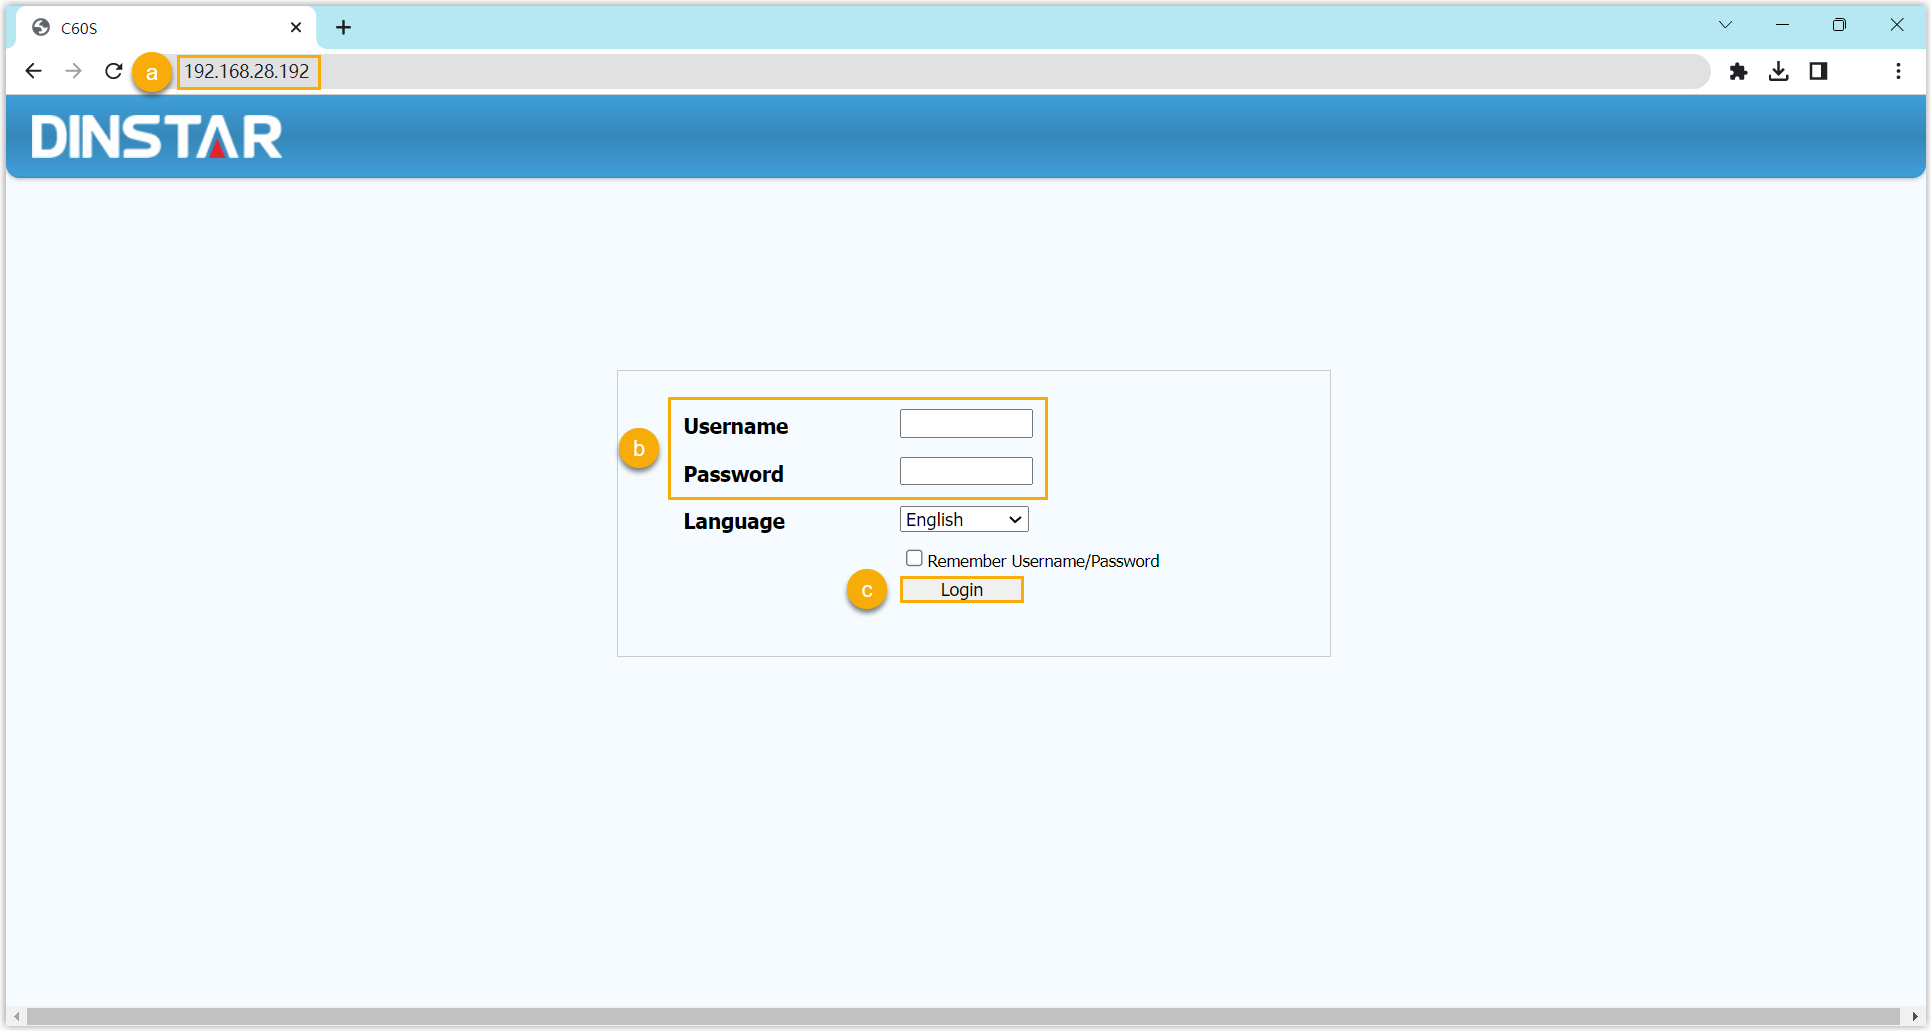
Log in to the phone’s web interface.
a. Enter the phone’s IP address in your browser’s address bar.
b. Enter the username
adminand its password. This example uses the default passwordadmin.c. Click Login.
-
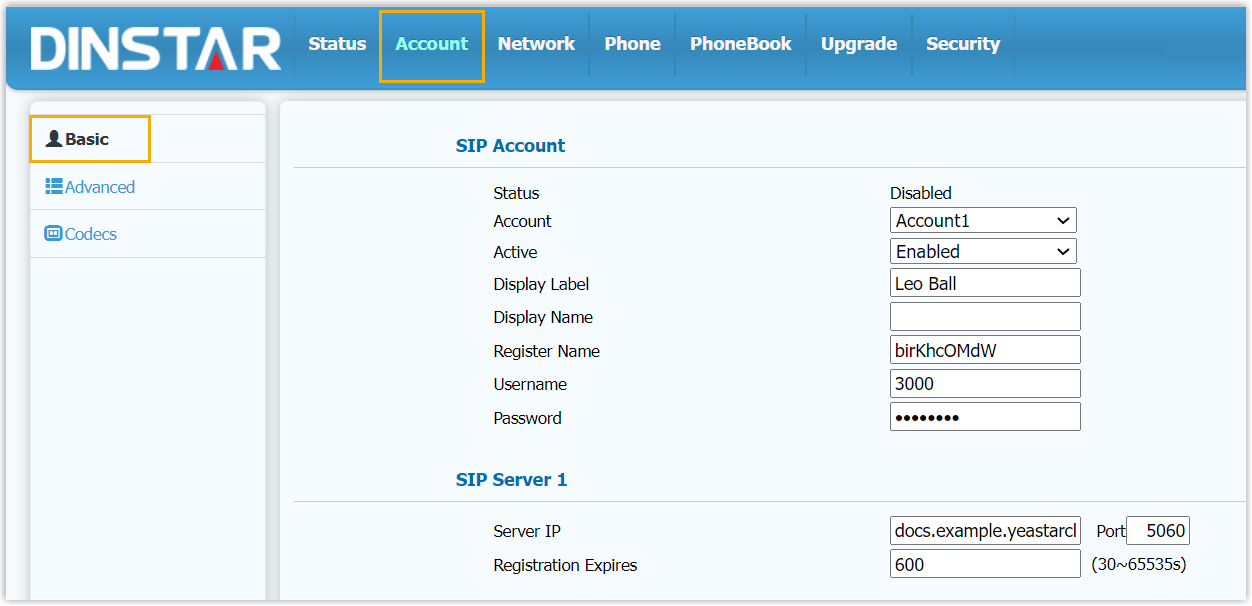
Go to Account > Basic and fill in the registration settings.
a. From the Account drop-down, choose an available account.
b. From the Active drop-down, select Enabled.
c. Enter the extension credentials:
- Display Label: a name for the account; this shows on the phone’s screen.
- Register Name: the extension’s registration name.
- Username: the extension number.
- Password: the extension’s registration password.
d. Enter the server details:
- Server IP: your Cloud Voice domain name.
- Port: the SIP registration port.
-
Click Submit.
Result
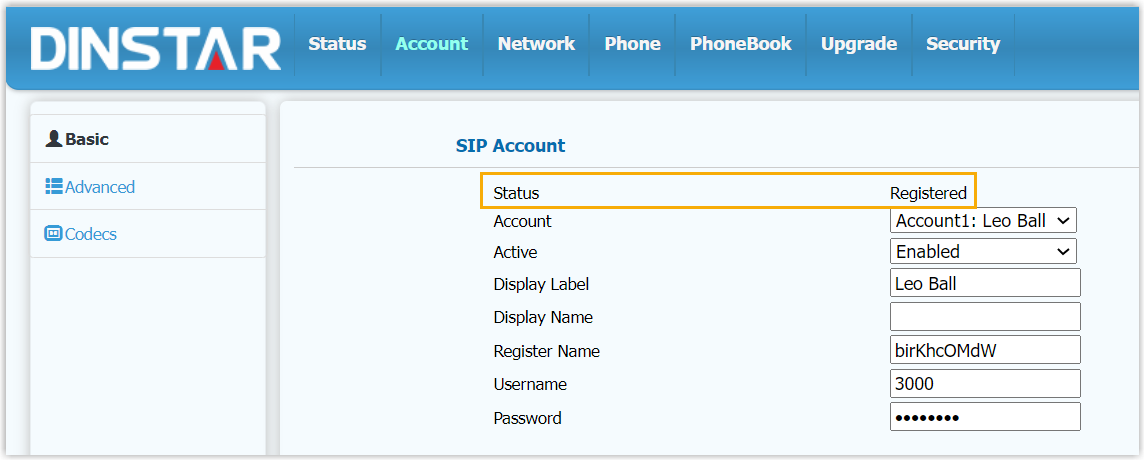
Section titled “Result”The extension registers with Cloud Voice. Confirm it worked by checking the Status field for the account.
Question about this page?
Ask the AI assistant. It starts from this page, then searches the rest of the docs.
Ask Cloud Voice AI
Answers are AI-generated from the docs and may contain mistakes. Verify with the linked pages.