
Auto Provision a Fanvil DECT System with Cloud Voice
A DECT (Digital Enhanced Cordless Telecommunications) system is made up of a base station and one or more cordless handsets. This guide walks you through auto-provisioning a Fanvil DECT base station with Cloud Voice, pairing the handsets to that base station, and registering each handset to an extension. Once finished, the handsets behave like any other Cloud Voice extension and can place and receive calls.
Requirements
Section titled “Requirements”Before you begin, confirm that your Fanvil base station and Cloud Voice system meet the minimum firmware versions below.
| Base Station | Base Station Firmware | Cloud Voice Version |
|---|---|---|
| W710D | 1.18.11 or later | 84.14.0.26 or later |
| W710H | 1.0.14.5 or later | 84.14.0.26 or later |
The examples throughout this guide use the following hardware and firmware:
| Component | Model | Firmware |
|---|---|---|
| Fanvil DECT base station | W710D | v1.18.11 |
| Fanvil DECT handset | W610D | v1.16.2 |
Prerequisites
Section titled “Prerequisites”- Only one DHCP (Dynamic Host Configuration Protocol, the service that hands out IP addresses) server may be active on the subnet where the base station and handsets are deployed. If more than one is present, the base station cannot obtain an IP address.
- Download and install the Fanvil Device Manager (an IP scanning tool) on a computer that sits on the same subnet as the DECT system.
- Download the auto-provisioning template for the phone model you plan to use, available at Auto Provisioning > Resource Repository > Default Templates.
- Have the base station’s Vendor, Model, and MAC (Media Access Control) address on hand. The MAC address is the hardware identifier printed on the base station’s label.
Step 1. Add the base station in Cloud Voice
Section titled “Step 1. Add the base station in Cloud Voice”Start in the Cloud Voice management portal, where you register the base station, set its provisioning options, and hand out extensions to the handsets.
-
Sign in to the Cloud Voice management portal and go to Auto Provisioning > Phones.
-
Click Add > Add.
-
Under IP Phone, fill in the device details.
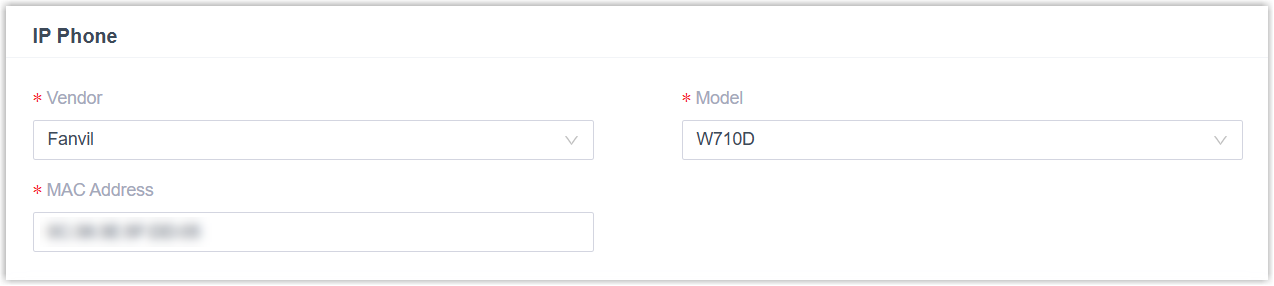
- Vendor: Select Fanvil.
- Model: Select the base station model. This example uses W710D.
- MAC Address: Enter the MAC address of the base station.
-
Under Options, configure the provisioning settings.

- Template: Choose a template from the drop-down list. You can use the default template that matches the phone model, or build your own custom auto-provisioning template.
- Provisioning Link: This link is generated for you and points to where the phone’s configuration file is stored.
- Authentication for the First-time Auto Provisioning: Clear this checkbox.
-
Under Assign Extension, give each handset an extension. You can do this one handset at a time or in bulk.
To assign extensions individually:
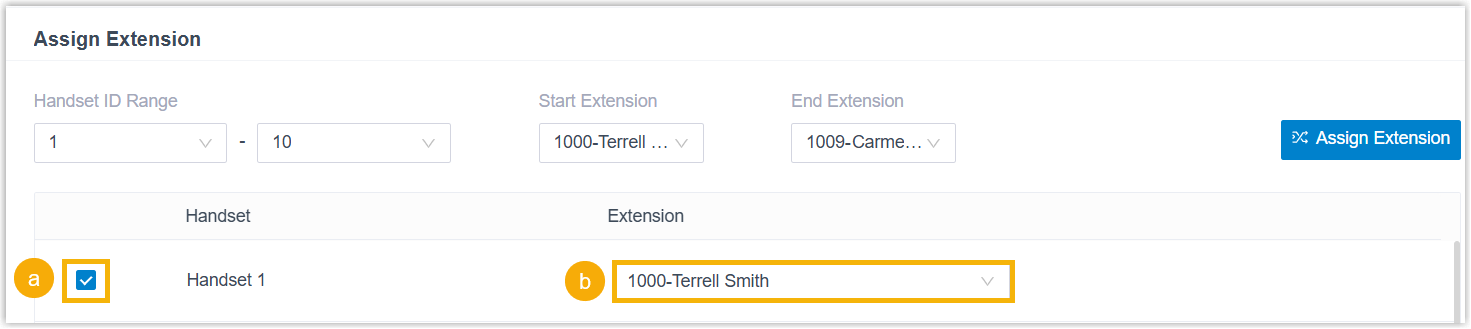
- Select the checkbox next to the handset.
- Pick an extension from the Extension drop-down list.
To assign extensions in bulk:
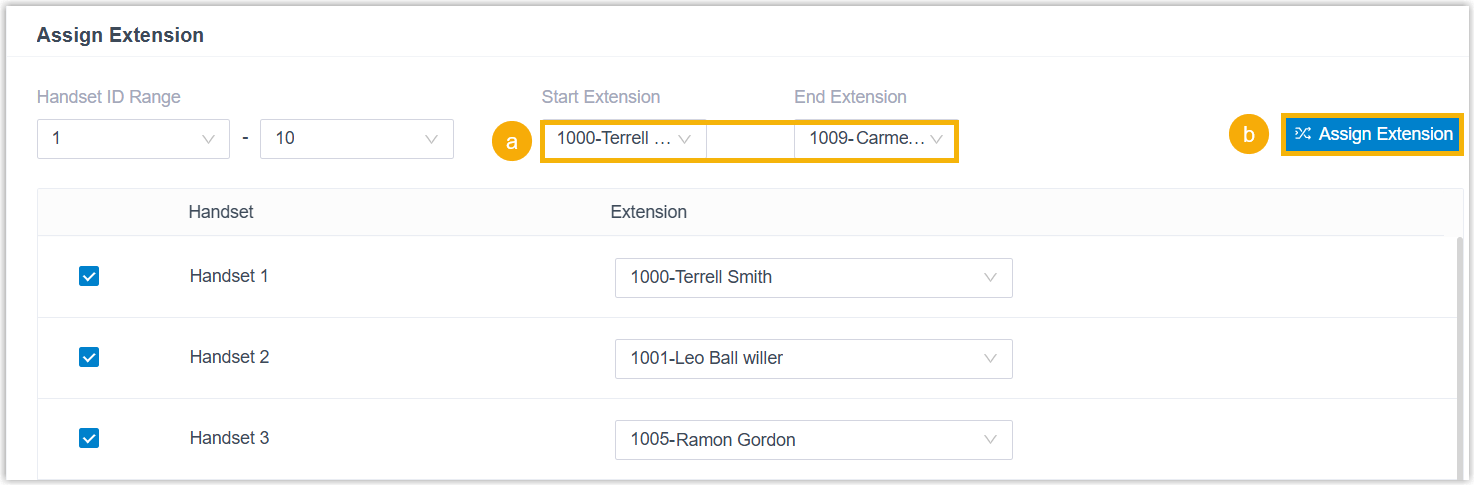
- Set a range using the Start Extension and End Extension drop-down lists.
- Click Assign Extension. The handsets are enabled and given the extensions in sequence.
-
Optional: Adjust any other settings you need.
-
Click Save.
The base station is added and now appears in the Auto Provisioning phone list, and Cloud Voice records an RPS Request Success event notification. (RPS, the Redirection and Provisioning Service, is what points the phone to its configuration file when it boots, so this message confirms the base station’s provisioning details were accepted.)
Step 2. Find the base station’s IP address
Section titled “Step 2. Find the base station’s IP address”Reset the base station so it pulls an IP address from the DHCP server, then locate that address with the Fanvil Device Manager.
-
Press and hold the Reset Key on the base station for at least 10 seconds. When all three LEDs begin flashing rapidly, release it.
The base station reboots, which takes a few minutes. Once the three LEDs are lit steadily, the device has obtained an IP address from the DHCP server and downloaded its configuration from Cloud Voice.
-
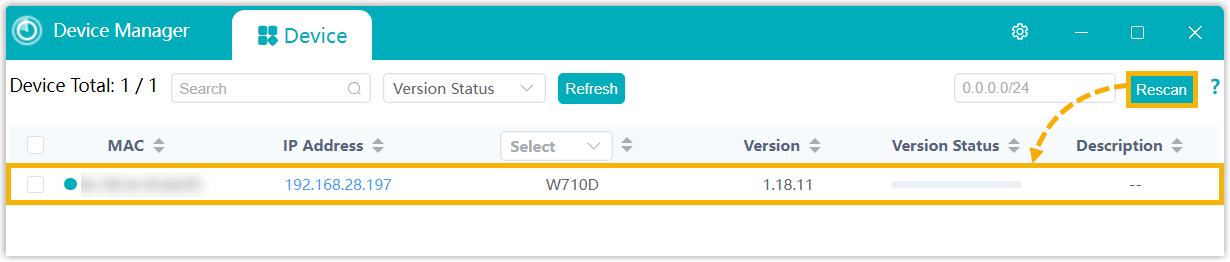
Open the Fanvil Device Manager and click Rescan.
The base station appears in the Device list with its IP address.
Step 3. Pair a handset with the base station
Section titled “Step 3. Pair a handset with the base station”Put the base station into registration mode, then pair the handset with it.
-
Enable registration mode from the base station’s web interface.
-
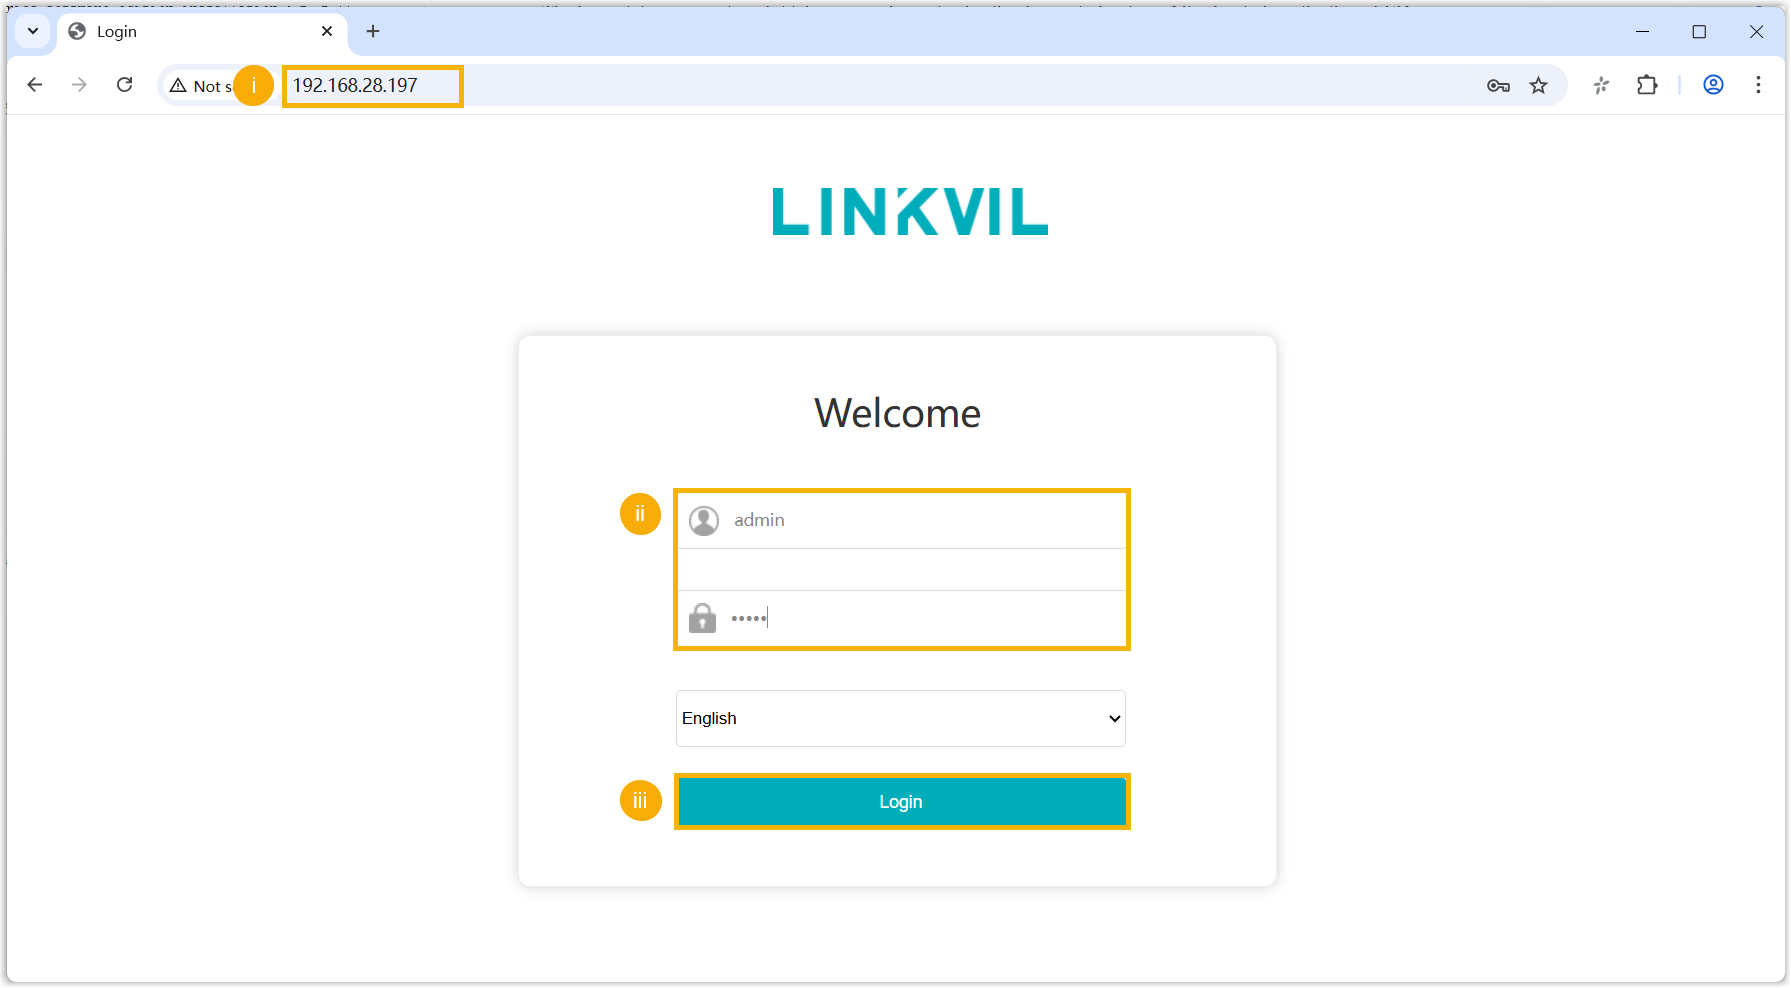
Browse to the base station’s IP address to open its web interface.
-
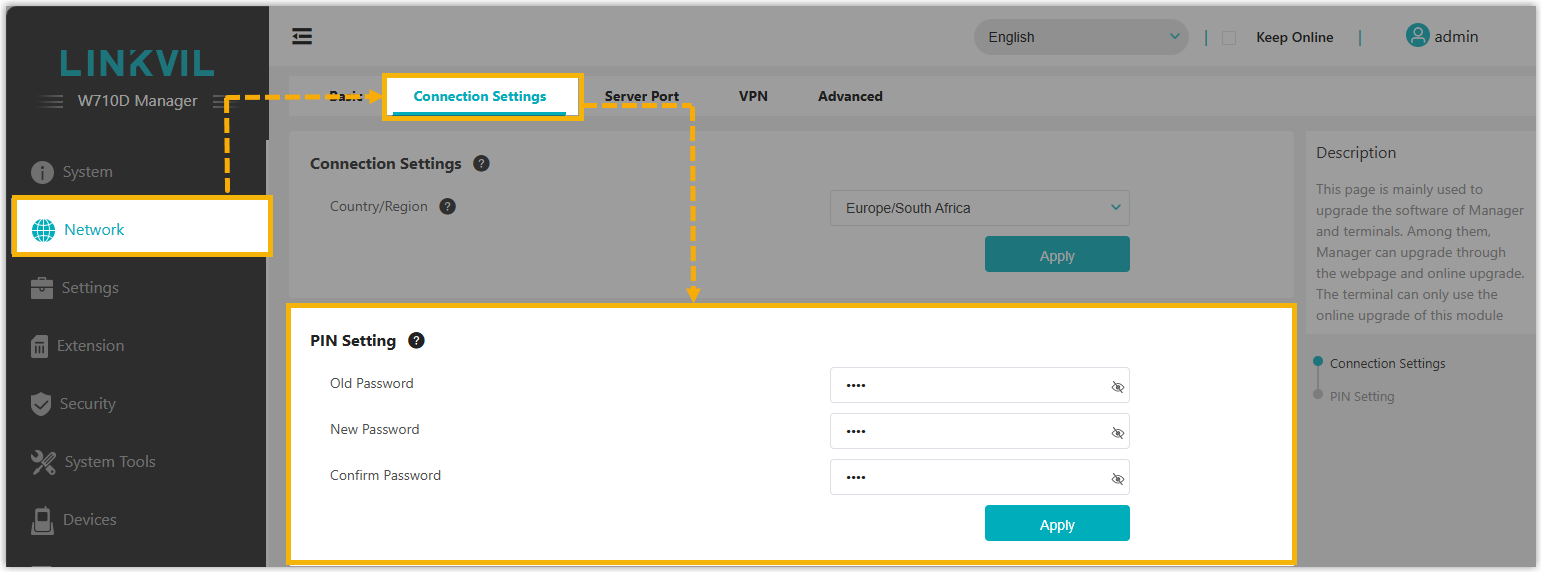
Optional: Go to Network > Connection Settings > PIN Settings and change the default PIN to tighten registration security.
-
Go to Devices > Maintenance.
-
In the Settings section, turn on Auto Authorized and click Apply.
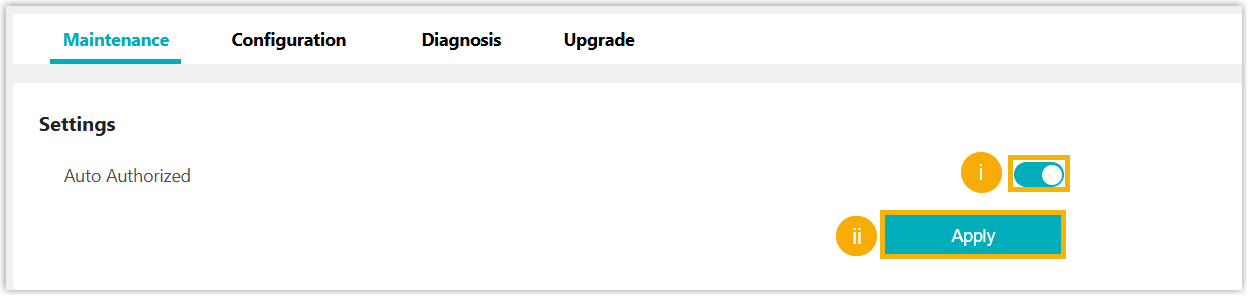
Registration mode is now active on the base station.
-
-
Pair the handset from the handset itself.
-
Go to Menu > Network > Available Network.
-
Press Scan to search for the base station. Its RFPI (Radio Fixed Part Identity) appears on the handset screen.
-
Press Link, then enter the base station’s PIN to finish pairing. In this example, enter the W710D default PIN
1234.When pairing succeeds, a green check
 appears next to the base station’s RFPI.
-
Step 4. Register a handset to an extension
Section titled “Step 4. Register a handset to an extension”Back on the base station, register the paired handset to the extension you assigned earlier.
-
In the base station web interface, go to Devices > Maintenance > Maintenance. The paired handset is listed.
-
Click the edit icon
 for the handset you want to register.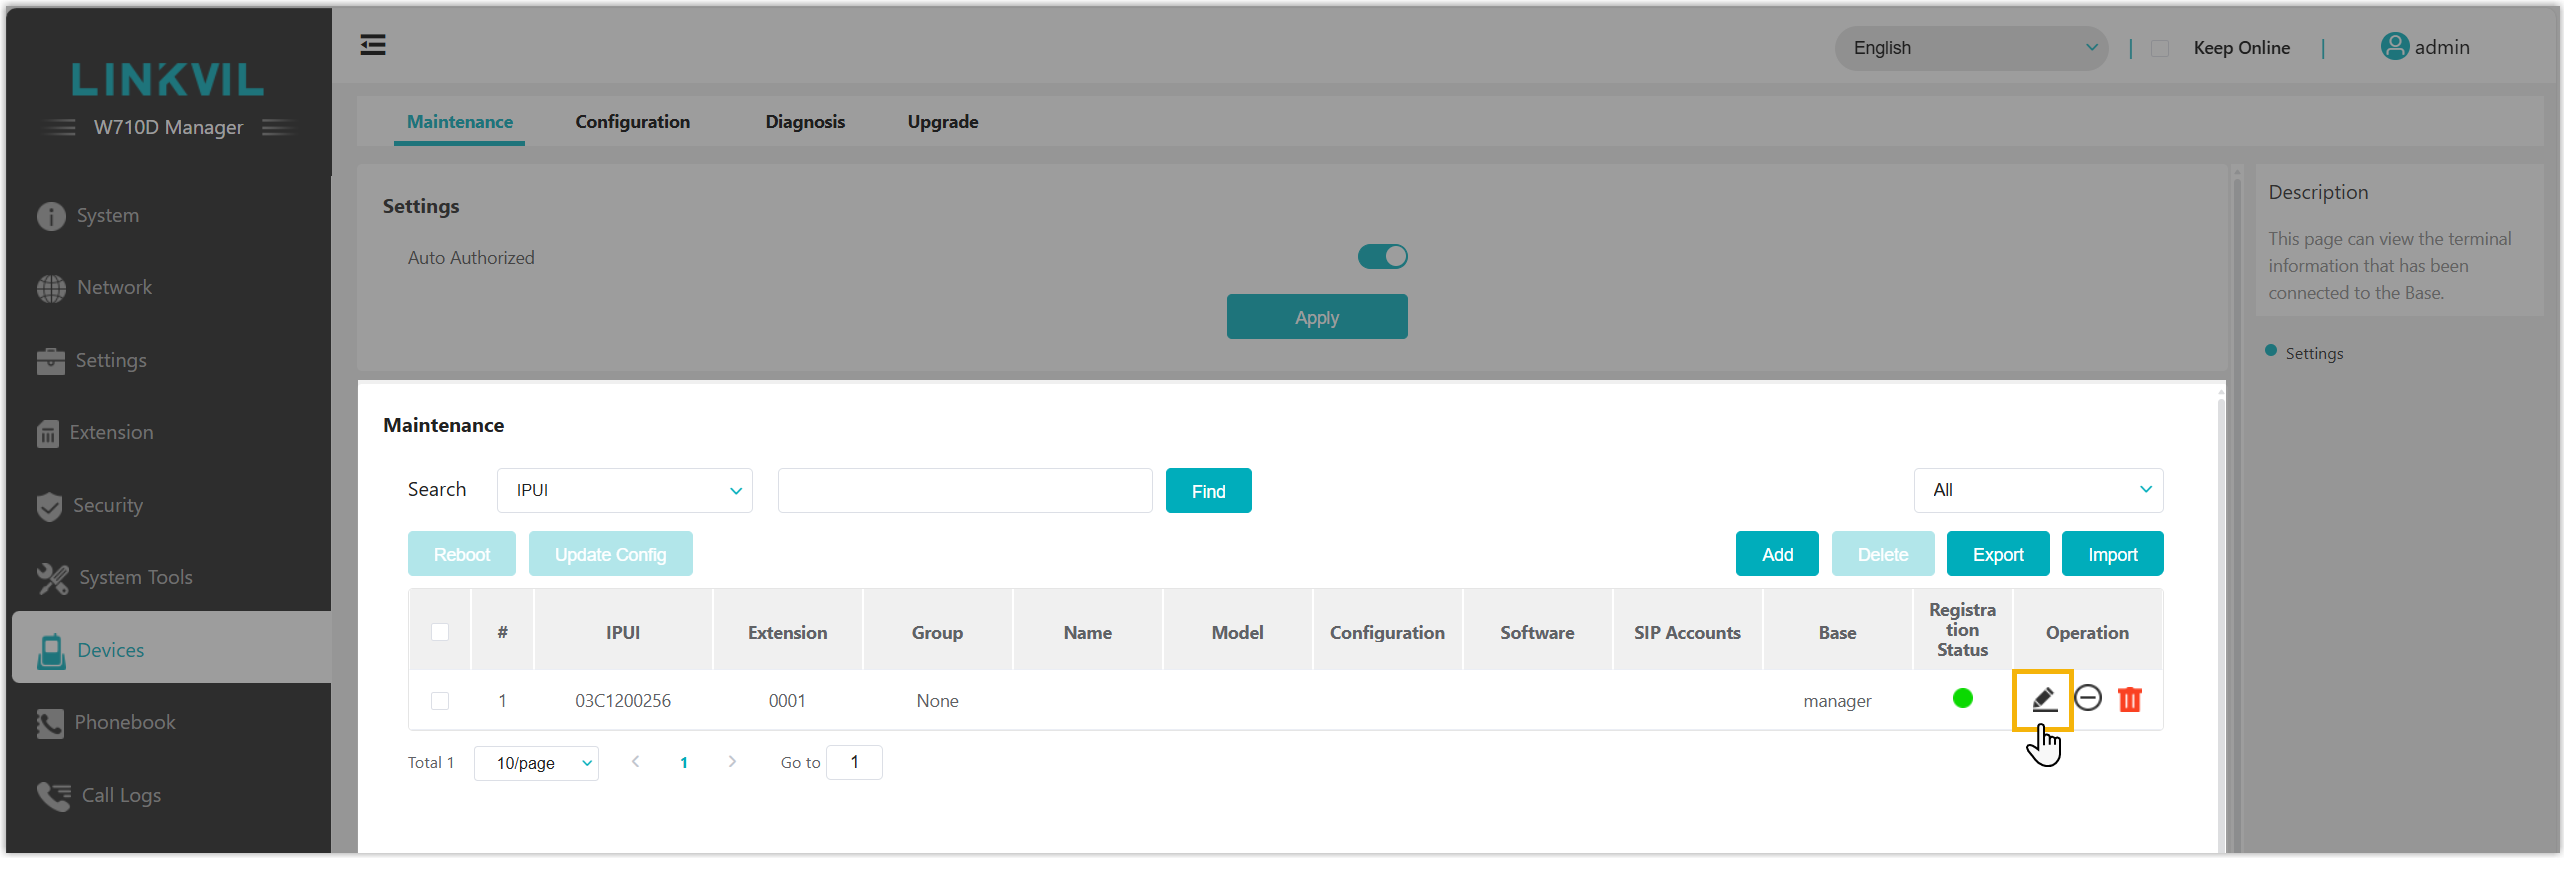
-
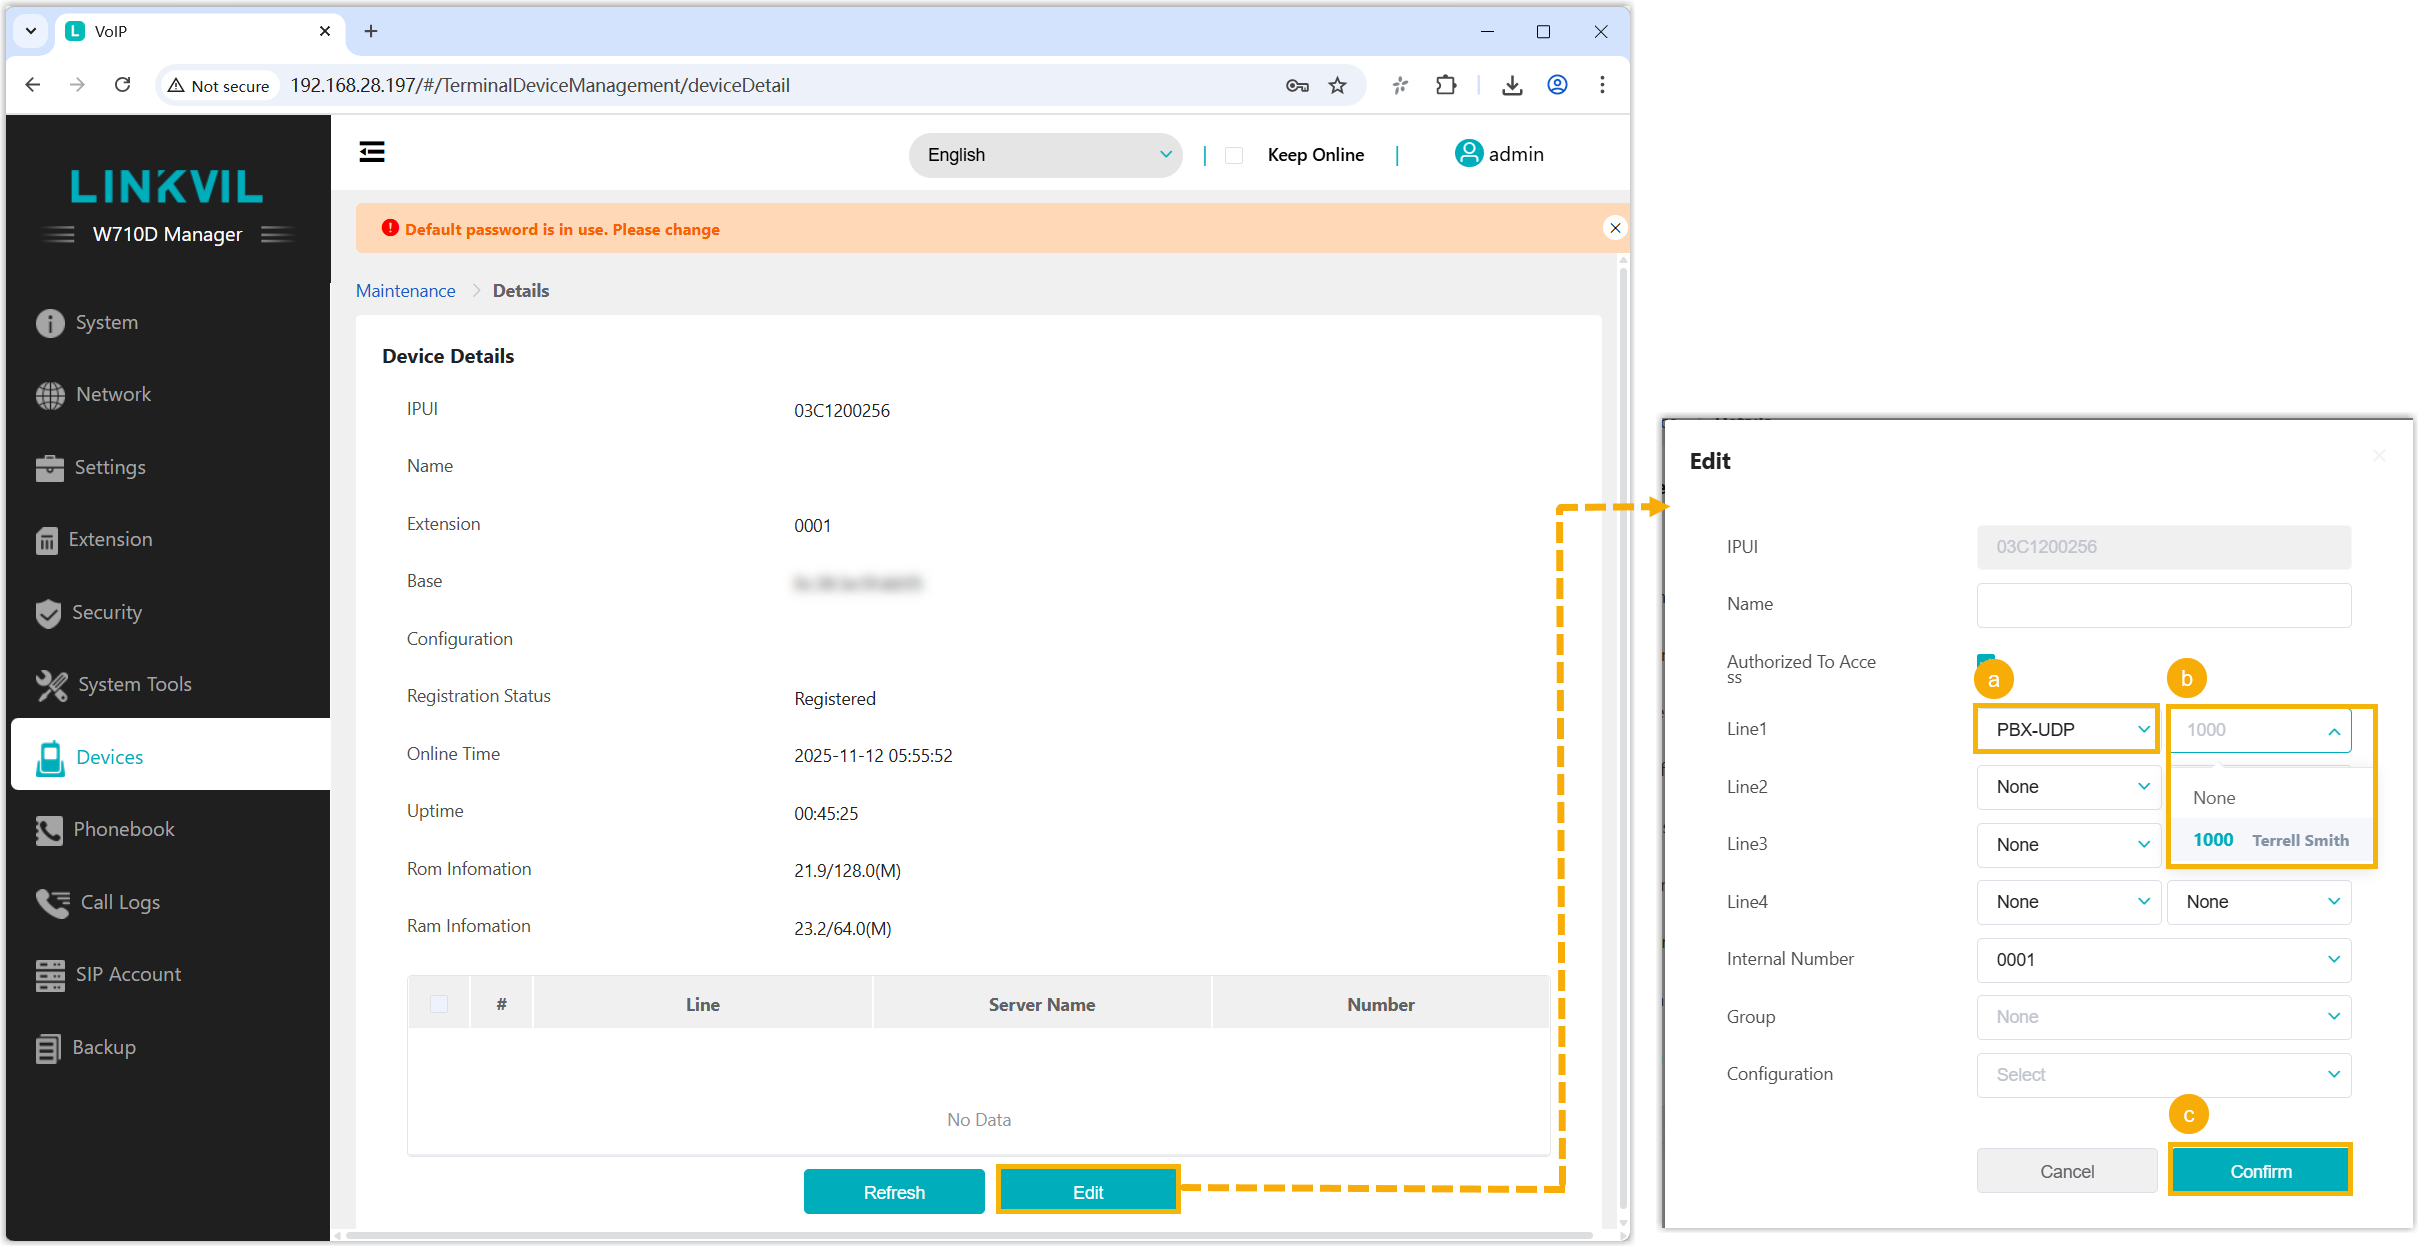
On the device details page, click Edit and complete the following in the pop-up window.
-
In the first Line1 drop-down, select the transport protocol that matches the extension.
-
In the second Line1 drop-down, select the extension.
-
Click Confirm.
-
Result
Section titled “Result”The handset is now registered to the base station and, through it, associated with the assigned Cloud Voice extension.
-
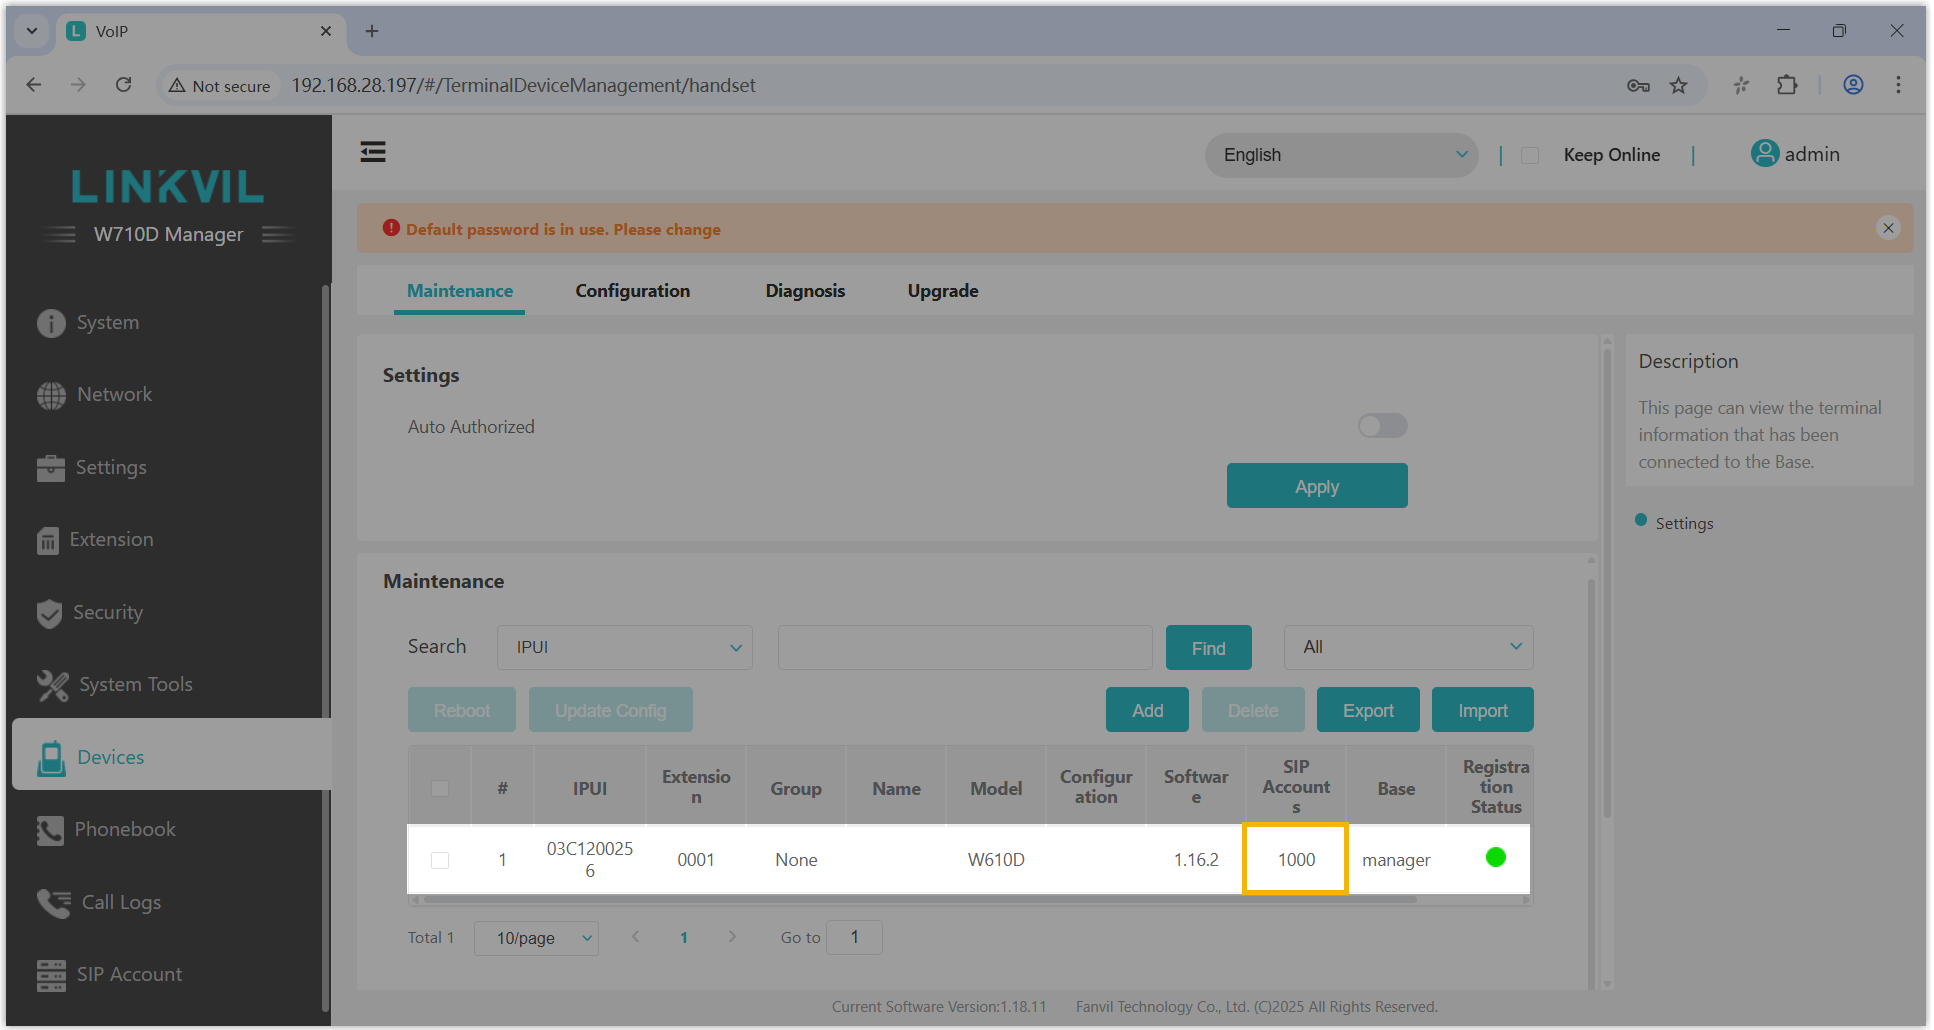
In the base station web interface, the handset shows its extension number at Devices > Maintenance > Maintenance.
-
In the Cloud Voice management portal, you can check the extension’s registration status at Auto Provisioning > Phones.

-
On the handset, the assigned extension name is shown on the home screen.
The registered handset can now be used as a Cloud Voice extension to make and receive calls.
Question about this page?
Ask the AI assistant. It starts from this page, then searches the rest of the docs.
Ask Cloud Voice AI
Answers are AI-generated from the docs and may contain mistakes. Verify with the linked pages.