
Provision a Unify IP Phone
Auto provisioning lets Cloud Voice hand a phone its configuration from the server, so you never have to type settings into the handset itself. Unify OpenScape phones find that configuration through DHCP (Dynamic Host Configuration Protocol) option 66, which means provisioning happens in two parts: first you add the phone in Cloud Voice, then you tell your DHCP server where the phone should fetch its files. This page walks through the process with an OpenScape CP210 as the working example; the same steps apply to the other supported models.
Supported models and firmware
Section titled “Supported models and firmware”Before you begin, confirm that both the phone and Cloud Voice meet the minimum firmware versions below.
| Model | Phone firmware | Cloud Voice version |
|---|---|---|
| OpenScape CP200 | V2 R4.13.0 or later | 84.19.0.23 or later |
| OpenScape CP210 | V2 R0.4.0 SIP 220614 or later | 84.19.0.23 or later |
| OpenScape CP400 | V2 R4.13.0 or later | 84.19.0.23 or later |
| OpenScape CP410 | V2 R4.13.0 or later | 84.19.0.23 or later |
Before you start
Section titled “Before you start”-
Have a DHCP server running on the same subnet as the phone so it can lease the phone an IP address.
-
If the phone was used previously, factory-reset it first.
-
Collect the phone’s details: vendor, model, and MAC (Media Access Control) address, the unique hardware ID printed on a label on the phone.
-
Download the default auto provisioning template for your phone model. The templates live under Auto Provisioning > Resource Repository > Default Templates.
-
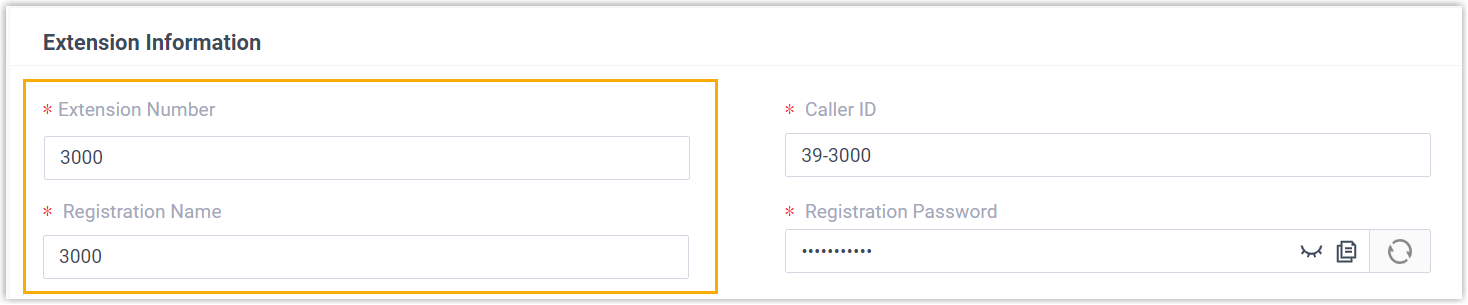
On the extension you plan to assign, set the Registration Name to match the Extension Number. Edit the extension under Extension and Trunk > Extension, then open User > Extension Information.
Step 1: Add the Unify phone in Cloud Voice
Section titled “Step 1: Add the Unify phone in Cloud Voice”Adding the phone generates a configuration file keyed to its MAC address.
-
Sign in to the Cloud Voice web portal and go to Auto Provisioning > Phones.
-
Click Add > Add.
-
In the IP Phone section, fill in the phone’s details.
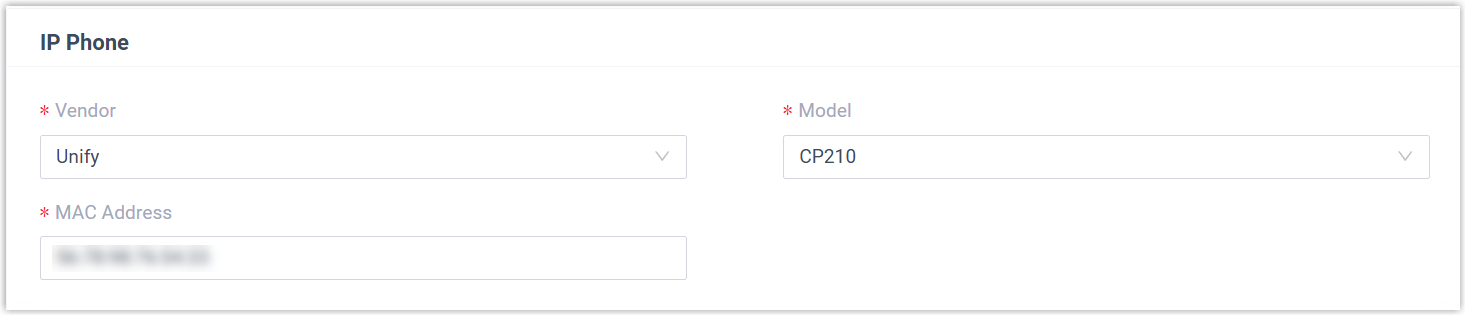
- Vendor: Choose Unify.
- Model: Pick your phone model. This example uses CP210.
- MAC Address: Type the phone’s MAC address.
-
In the Options section, set the following.

-
Template: Select a template from the drop-down list.
-
Provisioning Link: This link is generated automatically and points to where the phone’s configuration file is stored.
-
-
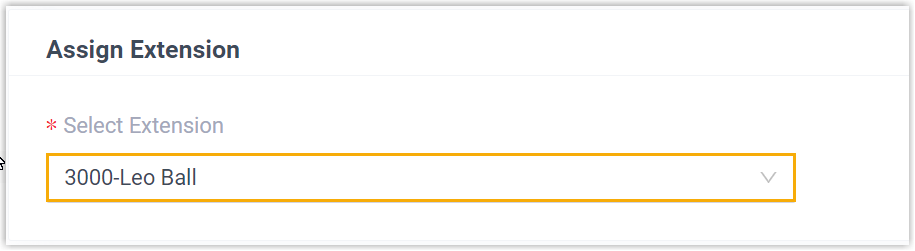
In the Assign Extension section, assign an extension to the phone.
-
Click Save. The phone now appears in the Auto Provisioning phone list.
Step 2: Configure DHCP option 66
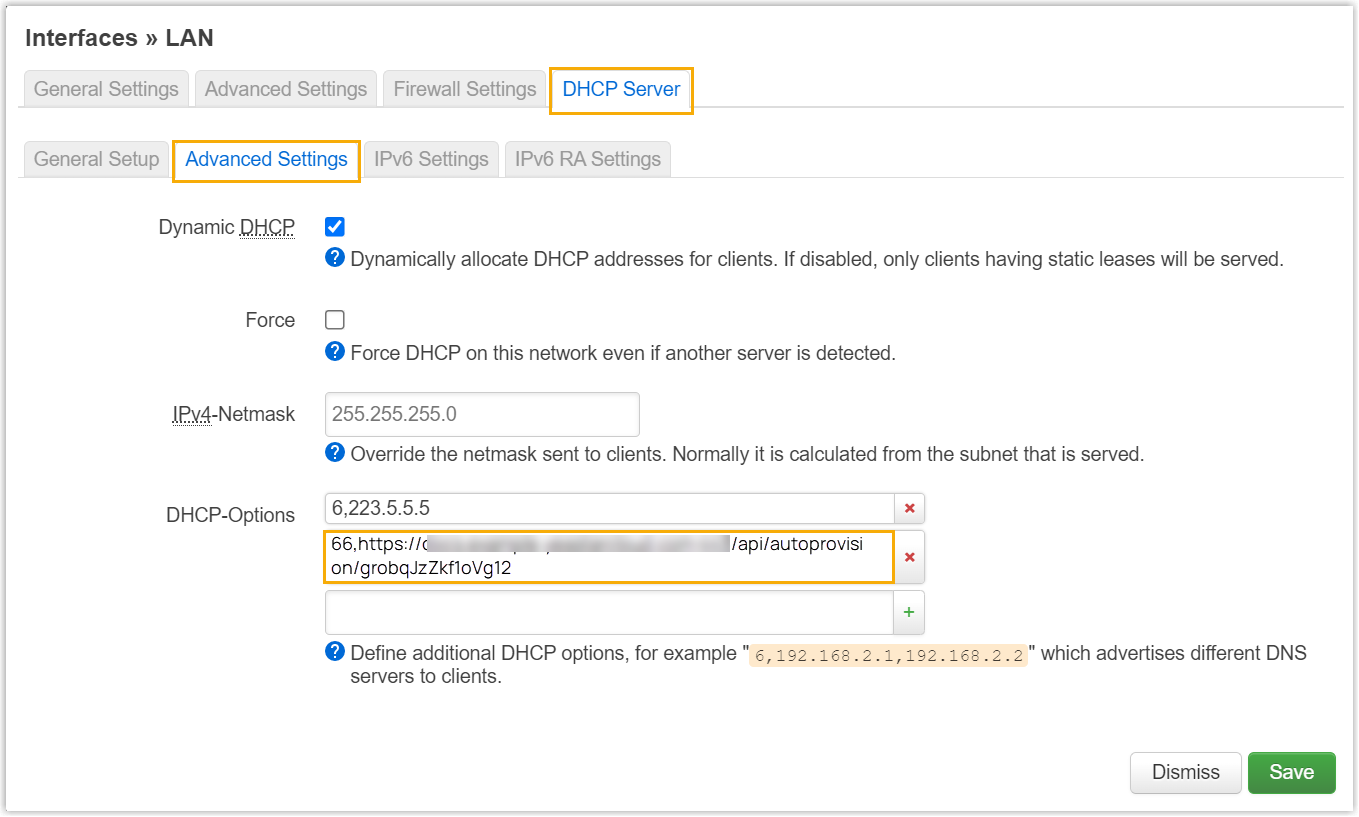
Section titled “Step 2: Configure DHCP option 66”Option 66 delivers the provisioning link you took from Cloud Voice to the phone, so the phone knows where to retrieve its configuration files. This example sets up a DHCP server on the phone’s network to hand out that link.
-
In the Cloud Voice web portal, open the phone’s detail page and copy its provisioning link.

-
On your DHCP server, create option 66 and set its value to the provisioning link.
Result
Section titled “Result”-
When the phone reboots, it leases an IP address from the DHCP server, downloads its configuration from Cloud Voice over the provisioning link, and applies the settings automatically.
-
The extension registers successfully on the phone. To confirm, check the registration status under Auto Provisioning > Phones in the web portal.

Question about this page?
Ask the AI assistant. It starts from this page, then searches the rest of the docs.
Ask Cloud Voice AI
Answers are AI-generated from the docs and may contain mistakes. Verify with the linked pages.