
Auto Provision Yealink IP Phone
With auto provisioning, Cloud Voice delivers a complete configuration to a Yealink handset, and the phone registers its assigned extension on its own, with nothing to type on the device. The walkthrough below uses a Yealink SIP-T53W (firmware 96.85.0.5) as the example, but the same procedure covers every supported model.
Supported models and firmware
Section titled “Supported models and firmware”Confirm that both the phone and your Cloud Voice system meet the minimum firmware levels for the model you plan to provision.
| Model | Minimum phone firmware | Minimum system firmware |
|---|---|---|
| AX83H | 180.86.0.5 | 84.16.0.25 |
| AX86R | 180.86.0.5 | 84.18.0.59 |
| CP920 | 78.85.0.5 | 84.5.0.86 |
| CP925 | 148.86.0.5 | 84.5.0.86 |
| CP960 | 73.85.0.5 | 84.5.0.86 |
| CP965 | 143.86.0.5 | 84.5.0.86 |
| SIP-CP935W | 149.86.0.5 | 84.6.0.24 |
| SIP-T19P_E2 | 53.84.0.125 | 84.5.0.86 |
| SIP-T20P | 9.73.0.50 | 84.18.0.102 |
| SIP-T21_E2 | 52.84.0.125 | 84.5.0.86 |
| SIP-T21P_E2 | 52.84.0.125 | 84.5.0.86 |
| SIP-T22P | 7.73.0.50 | 84.18.0.102 |
| SIP-T23P | 44.84.0.125 | 84.5.0.86 |
| SIP-T23G | 44.84.0.125 | 84.5.0.86 |
| SIP-T26P | 6.73.0.50 | 84.18.0.102 |
| SIP-T27G | 69.85.0.5 | 84.5.0.86 |
| SIP-T28P | 2.73.0.50 | 84.18.0.102 |
| SIP-T29G | 46.83.0.120 | 84.5.0.86 |
| SIP-T30 | 124.85.0.15 | 84.5.0.86 |
| SIP-T30P | 124.85.0.15 | 84.5.0.86 |
| SIP-T31 | 124.85.0.15 | 84.5.0.86 |
| SIP-T31G | 124.85.0.15 | 84.5.0.86 |
| SIP-T31P | 124.85.0.15 | 84.5.0.86 |
| SIP-T31W | 124.86.0.75 | 84.12.0.32 |
| SIP-T32G | 32.70.0.125 | 84.18.0.102 |
| SIP-T33G | 124.85.0.15 | 84.5.0.86 |
| SIP-T33P | 124.85.0.15 | 84.5.0.86 |
| SIP-T34W | 124.86.0.75 | 84.12.0.32 |
| SIP-T38G | 38.70.0.185 | 84.18.0.102 |
| SIP-T40P | 54.84.0.125 | 84.5.0.86 |
| SIP-T40G | 76.84.0.125 | 84.5.0.86 |
| SIP-T41P | 36.83.0.120 | 84.5.0.86 |
| SIP-T41S | 66.85.0.5 | 84.5.0.86 |
| SIP-T41U | 108.85.0.39 | 84.5.0.86 |
| SIP-T42G | 29.83.0.120 | 84.5.0.86 |
| SIP-T42S | 66.85.0.5 | 84.5.0.86 |
| SIP-T42U | 108.85.0.39 | 84.5.0.86 |
| SIP-T43U | 108.85.0.39 | 84.5.0.86 |
| SIP-T44U | 108.86.0.90 | 84.10.0.32 |
| SIP-T44W | 108.86.0.90 | 84.10.0.32 |
| SIP-T46G | 28.83.0.120 | 84.5.0.86 |
| SIP-T46S | 66.85.0.5 | 84.5.0.86 |
| SIP-T46U | 108.85.0.39 | 84.5.0.86 |
| SIP-T48G | 35.83.0.120 | 84.5.0.86 |
| SIP-T48S | 66.85.0.5 | 84.5.0.86 |
| SIP-T48U | 108.85.0.39 | 84.5.0.86 |
| SIP-T52S | 70.84.0.70 | 84.5.0.86 |
| SIP-T53 | 96.85.0.5 | 84.5.0.86 |
| SIP-T53W | 96.85.0.5 | 84.5.0.86 |
| SIP-T54S | 70.84.0.70 | 84.5.0.86 |
| SIP-T54W | 96.85.0.5 | 84.5.0.86 |
| SIP-T56A | 58.83.0.15 | 84.5.0.86 |
| SIP-T57W | 96.85.0.5 | 84.5.0.86 |
| SIP-T58 | 58.85.0.5 | 84.5.0.86 |
| SIP-T58W | 150.86.0.5 | 84.5.0.86 |
| SIP-T73W | 185.87.0.15 | 84.19.0.70 |
| SIP-T73U | 185.87.0.15 | 84.19.0.70 |
| SIP-T74LTE | 185.87.0.33 | 84.19.0.70 |
| SIP-T74W | 185.87.0.15 | 84.19.0.70 |
| SIP-T74U | 185.87.0.15 | 84.19.0.70 |
| SIP-T77U | 185.87.0.15 | 84.19.0.70 |
| SIP-T85W | 185.87.0.15 | 84.19.0.70 |
| SIP-T87W | 185.87.0.15 | 84.19.0.70 |
| SIP-T88W | 192.87.0.5 | 84.19.0.70 |
| SIP-T88V | 192.87.0.5 | 84.19.0.70 |
| SIP-W90DM | 130.85.0.15 | 84.5.0.86 |
| VP59 | 91.85.0.5 | 84.5.0.86 |
| W60B (W53P, W41P, W60P, CP930W-Base) | 77.83.0.85 | 84.5.0.86 |
| W70B (W79P, W76P, W73P) | 146.85.0.20 | 84.5.0.86 |
| W75DM | 175.85.0.5 | 84.14.0.26 |
| W80B | W80DM-103.83.0.80 | 84.5.0.86 |
| W90DM | 130.85.0.15 | 84.5.0.86 |
| T64LTE | 132.86.0.25 | 84.16.0.71 |
| T67LTE | 132.86.0.35 | 84.16.0.71 |
Before you begin
Section titled “Before you begin”- Make sure the default provisioning template for your phone model has been added under Auto Provisioning > Resource Repository > Default Templates.
- If the phone was in service before, reset it to factory defaults so old settings do not interfere.
- Have the phone’s vendor, model, and MAC (Media Access Control) address ready. The MAC address is the phone’s unique hardware ID, usually printed on a label on the underside of the device.
Step 1: Add the phone in Cloud Voice
Section titled “Step 1: Add the phone in Cloud Voice”-
Sign in to the management portal and go to Auto Provisioning > Phones.
-
Click Add > Add.
-
In the IP Phone section, identify the device:
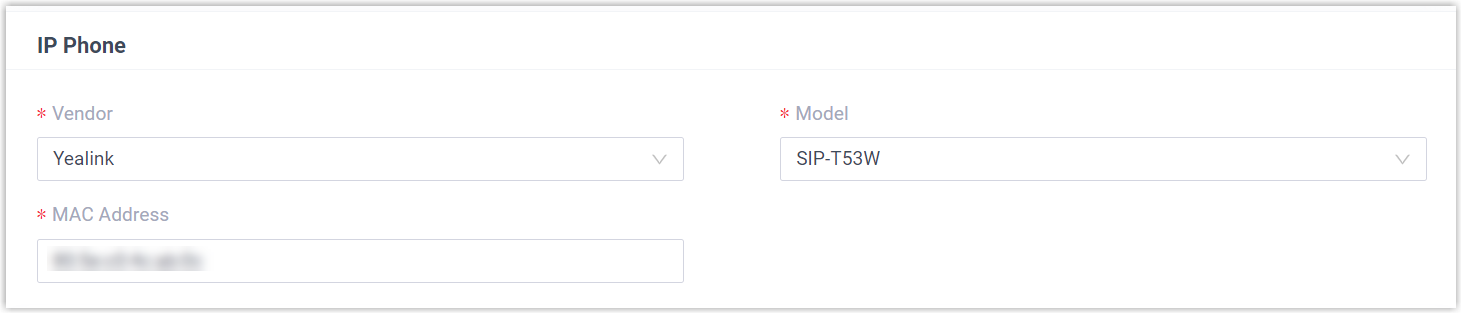
- Vendor: Choose Yealink.
- Model: Choose the phone model. This example uses SIP-T53W.
- MAC Address: Type the phone’s MAC address.
-
In the Options section, set the provisioning behavior:

- Template: Pick a template from the list. Use the default template that matches the phone model, or a custom template you have built.
- Provisioning Link: This link is generated for you and points to where the phone’s configuration file is stored. No action is needed.
- Authentication for the First-time Auto Provisioning: When turned on, the user must enter credentials on the phone before the first provisioning run can proceed.
-
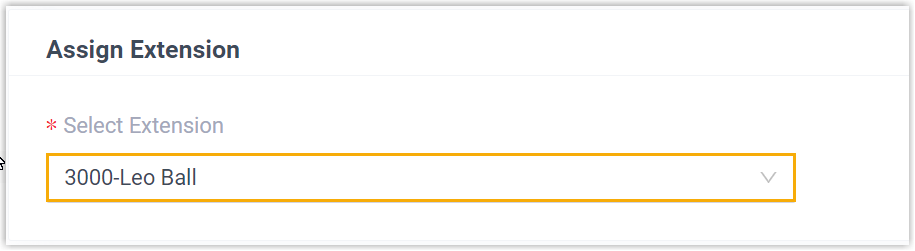
In the Assign Extension section, select the extension to bind to this phone.
-
Click Save. The system posts an RPS Request Success event notification to confirm the request. RPS (Redirection and Provisioning Service) is the cloud service that, when the phone boots, points it to the location where its configuration file is stored.
-
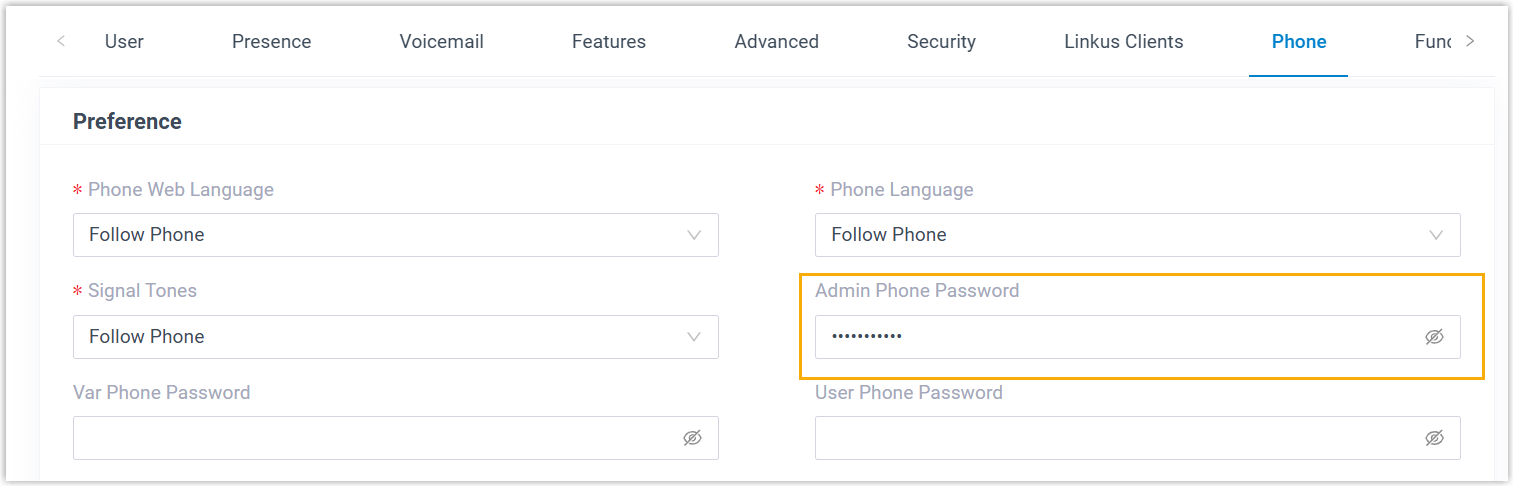
Set a password for the phone’s Admin account.
-
Click the edit icon
 next to the phone.
 -
In the Preference section, enter a password in the Admin Phone Password field.
-
Click Save.
-
Step 2: Trigger provisioning on the phone
Section titled “Step 2: Trigger provisioning on the phone”-
Reboot the Yealink phone.
-
If you left Authentication for the First-time Auto Provisioning enabled, the phone prompts for credentials. Enter them on the handset:
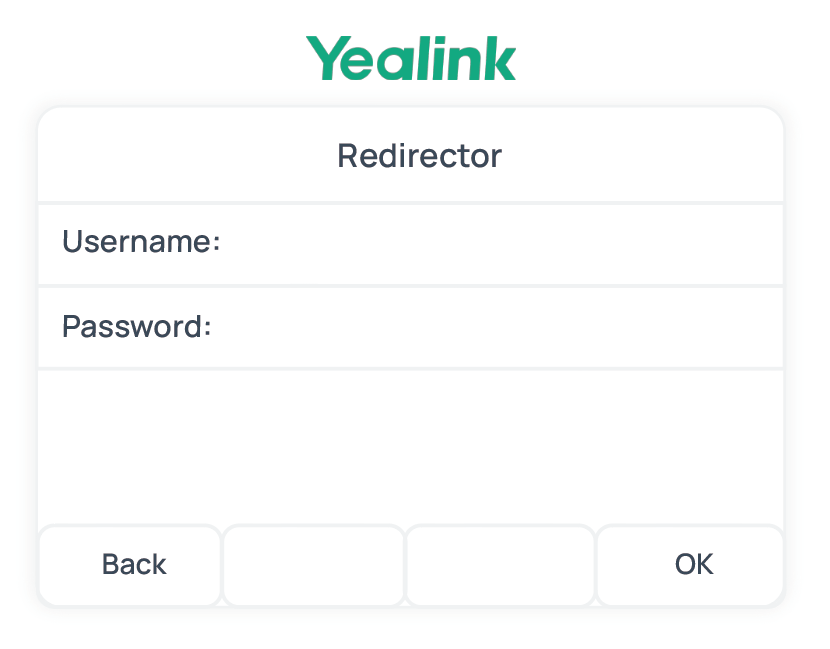
- Username: The extension number assigned to the phone.
- Password: The extension’s Voicemail Access PIN.
Result
Section titled “Result”-
The phone downloads its configuration from Cloud Voice and applies the settings on its own.
-
The extension registers on the phone. Confirm the registration state under Auto Provisioning > Phones in the portal.

Question about this page?
Ask the AI assistant. It starts from this page, then searches the rest of the docs.
Ask Cloud Voice AI
Answers are AI-generated from the docs and may contain mistakes. Verify with the linked pages.