
Provision a Mitel DECT System with Cloud Voice
A DECT (Digital Enhanced Cordless Telecommunications) system has two parts: a base station and one or more DECT handsets. This guide covers provisioning a Mitel DECT base station with Cloud Voice, subscribing the handsets to that base station, and logging each handset in to an extension. When you finish, the handsets work like any other Cloud Voice extension and can place and receive calls.
Requirements
Section titled “Requirements”Confirm that your Mitel base station firmware and Cloud Voice version meet the minimums below.
| Base Station | Base Station Firmware | Cloud Voice Version |
|---|---|---|
| RFP 44 | 9.1 or later | 84.18.0.18 or later |
| RFP 45 | 9.1 or later | 84.18.0.18 or later |
| RFP 47 | 9.1 or later | 84.18.0.18 or later |
| RFP 48 | 9.1 or later | 84.18.0.18 or later |
The examples in this guide use the following hardware and firmware:
| Component | Model | Firmware |
|---|---|---|
| Mitel DECT base station | RFP 44 | v9.1 |
| Mitel DECT handset | 732d | v9.0.3.33 |
Prerequisites
Section titled “Prerequisites”- The base station already has an IP (Internet Protocol) address configured, and you can reach its web interface at that address.
- You have the base station’s Vendor, Model, and MAC (Media Access Control) address on hand. The MAC address is a unique hardware ID, usually printed on a label on the base station.
- You have downloaded the auto-provisioning template for the phone model you plan to use, available at Auto Provisioning > Resource Repository > Default Templates.
Step 1. Add the base station in Cloud Voice
Section titled “Step 1. Add the base station in Cloud Voice”In the Cloud Voice management portal, register the base station, set its provisioning options, and assign extensions to the handsets.
-
Sign in to the Cloud Voice management portal and go to Auto Provisioning > Phones.
-
Click Add > Add.
-
Under IP Phone, enter the device details.
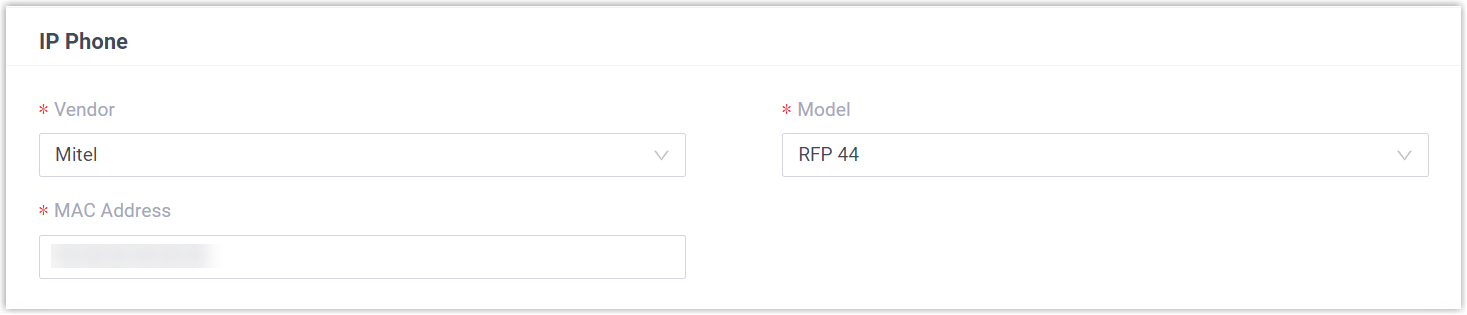
- Vendor: Select Mitel.
- Model: Select the base station model. This example uses RFP 44.
- MAC Address: Enter the MAC address of the base station.
-
Under Options, configure the provisioning settings.

- Template: Choose a template from the drop-down list. You can use the default template that matches the phone model, or build your own custom auto-provisioning template.
- Provisioning Link: This link is generated for you and points to where the phone’s configuration file is stored.
-
Under Assign Extension, give each handset an extension. You can assign them one at a time or in bulk.
To assign extensions individually:
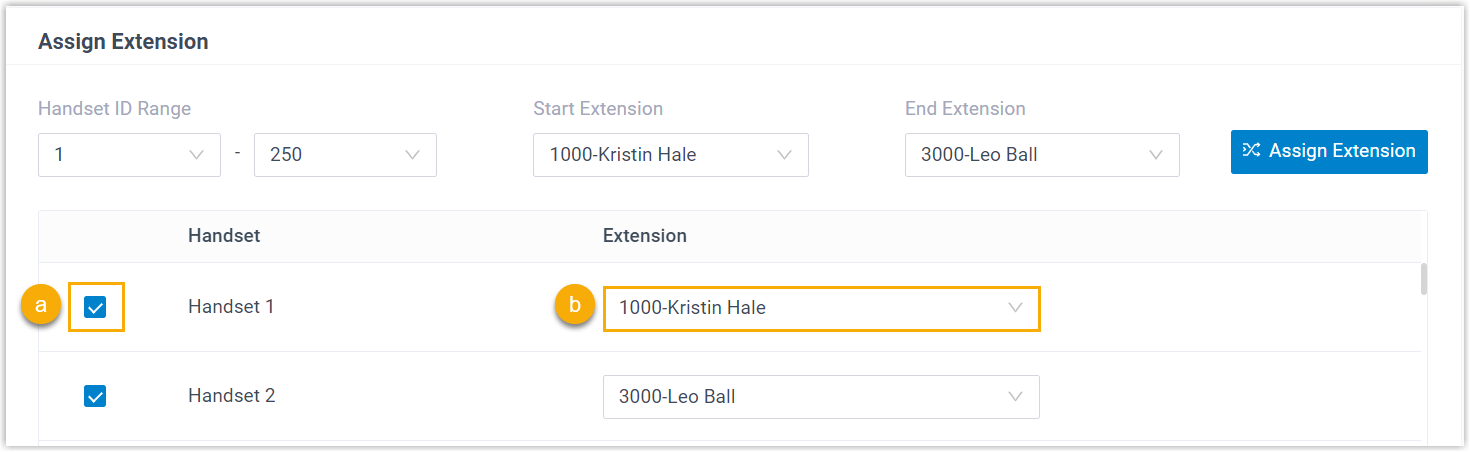
- Select the checkbox next to the handset.
- Pick an extension from the Extension drop-down list.
To assign extensions in bulk:
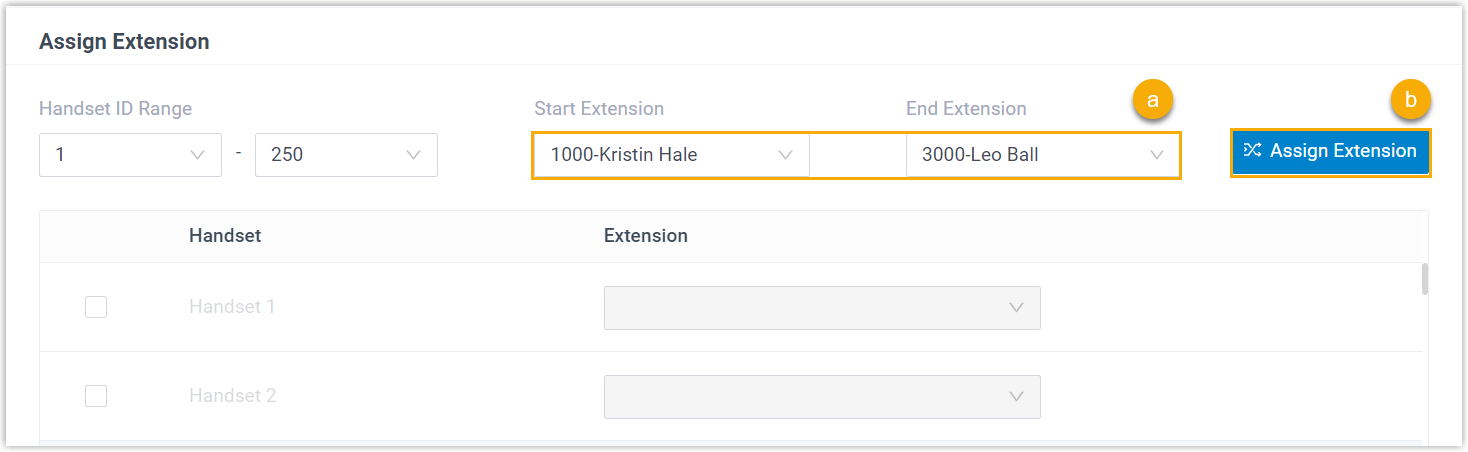
- Set a range using the Start Extension and End Extension fields.
- Click Assign Extension.
-
Under Preference, choose a time zone from the Time Zone drop-down list.
-
Optional: Adjust any other settings you need.
-
Click Save.
Step 2. Set the provisioning URL on the base station
Section titled “Step 2. Set the provisioning URL on the base station”Enter the provisioning link from Cloud Voice into the Mitel base station manually.
-
Log in to the base station’s web interface.
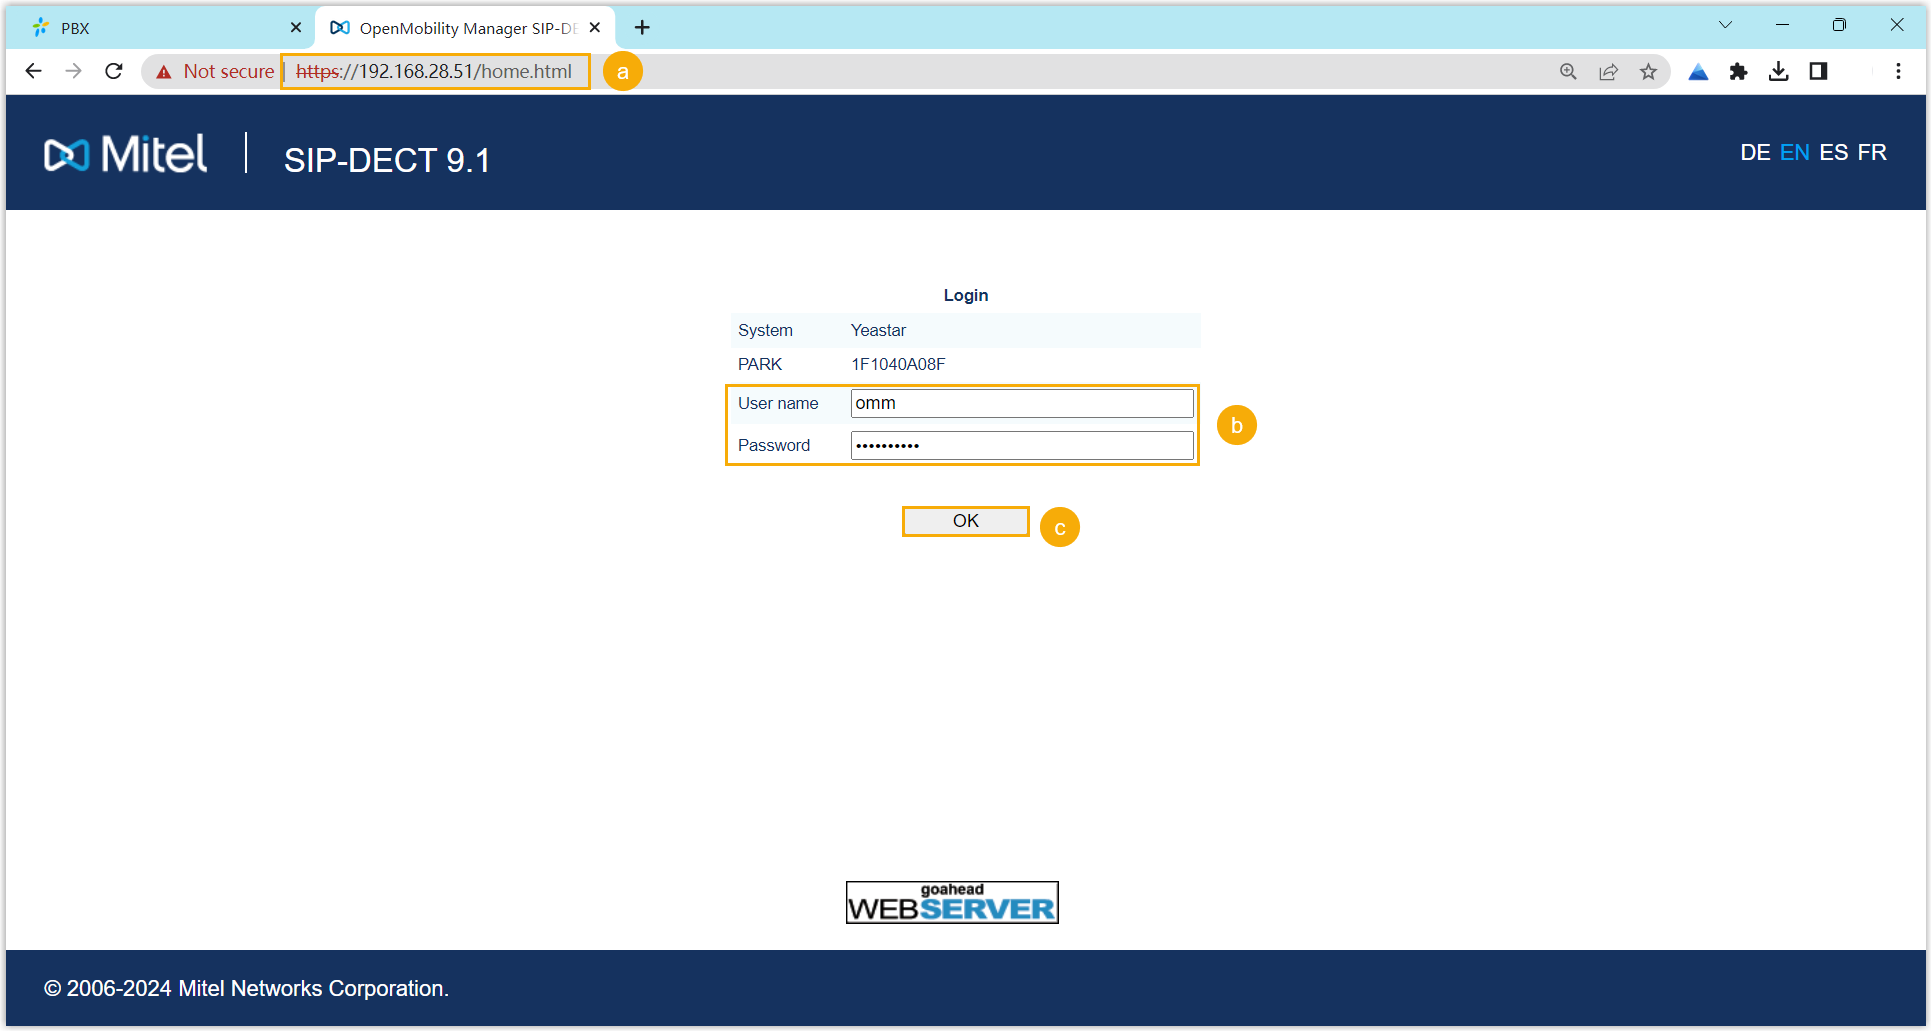
- Enter the base station’s IP address in your browser’s address bar.
- Enter the username and its password.
- Click OK.
-
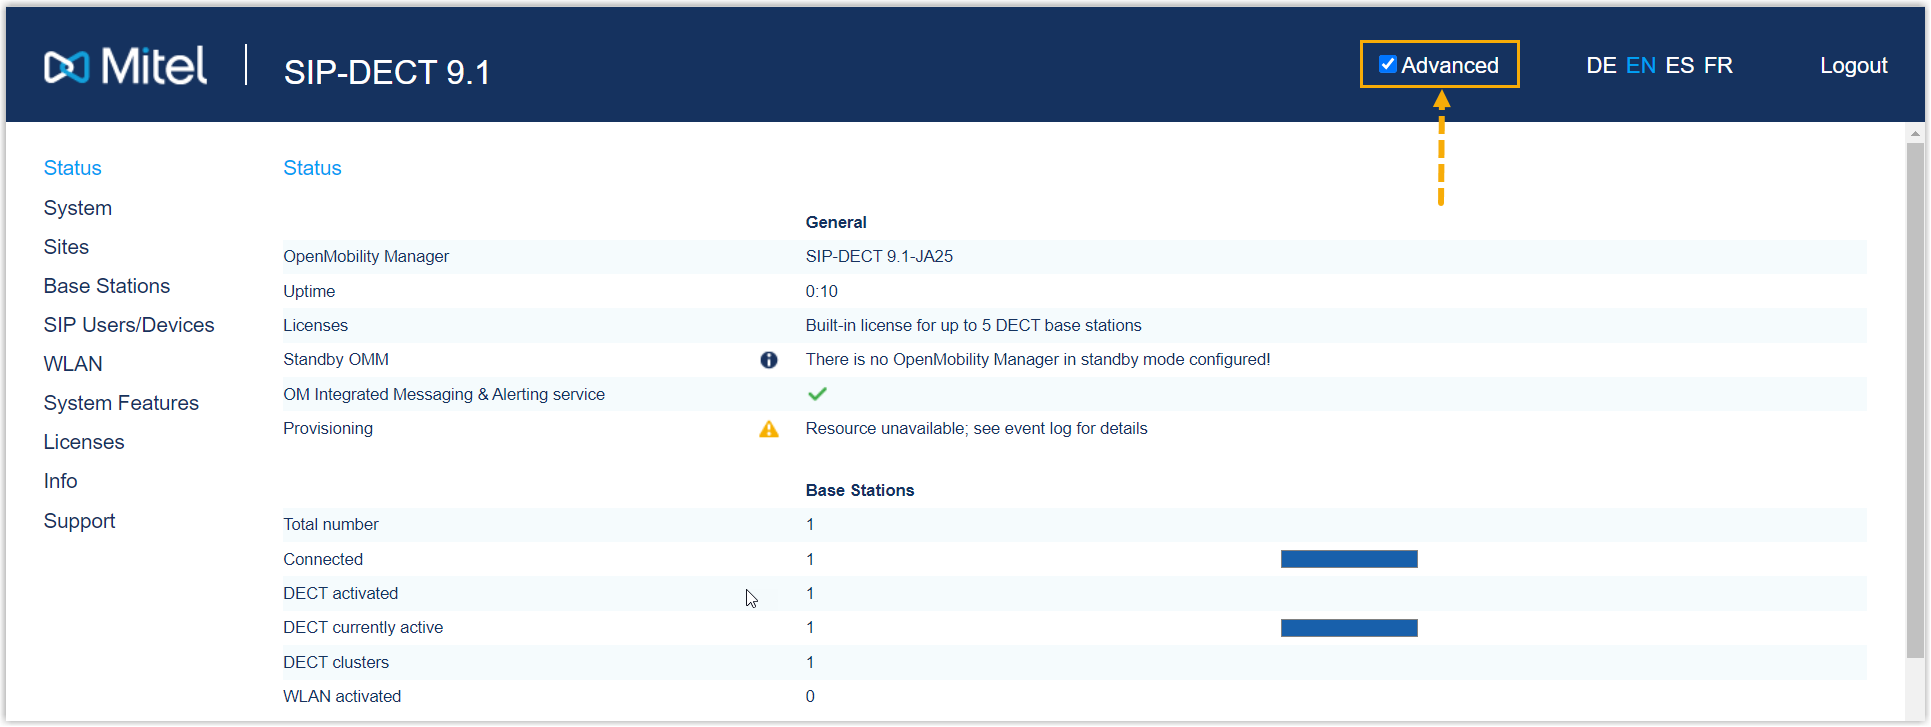
On the top menu, select the Advanced checkbox to reveal the advanced settings.
-
In the left navigation bar, go to System > Provisioning & Software Update.
-
In the Provisioning URL section, do the following:
-
Select the Active checkbox.
-
Fill in the fields below using the provisioning link you noted in Step 1.
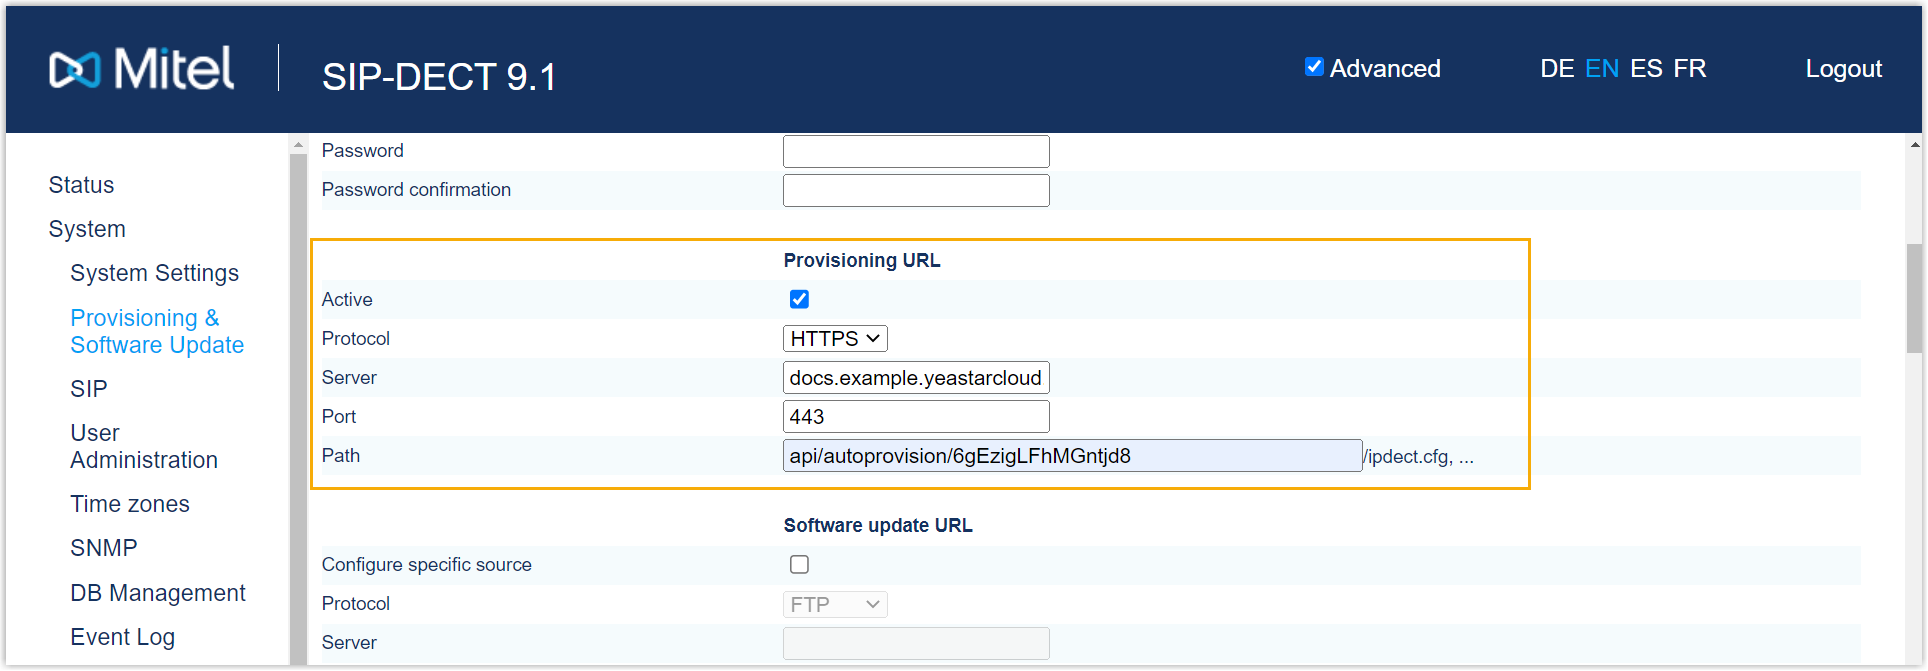
- Protocol: Select HTTP or HTTPS, matching the prefix of the link.
- Server: Enter the server address (IP address or domain name).
- Port: Enter the server port.
- Path: Enter the file path, for example
api/autoprovision/6gEzigLFhMGntjd8.
-
-
At the top of the page, click OK.
-
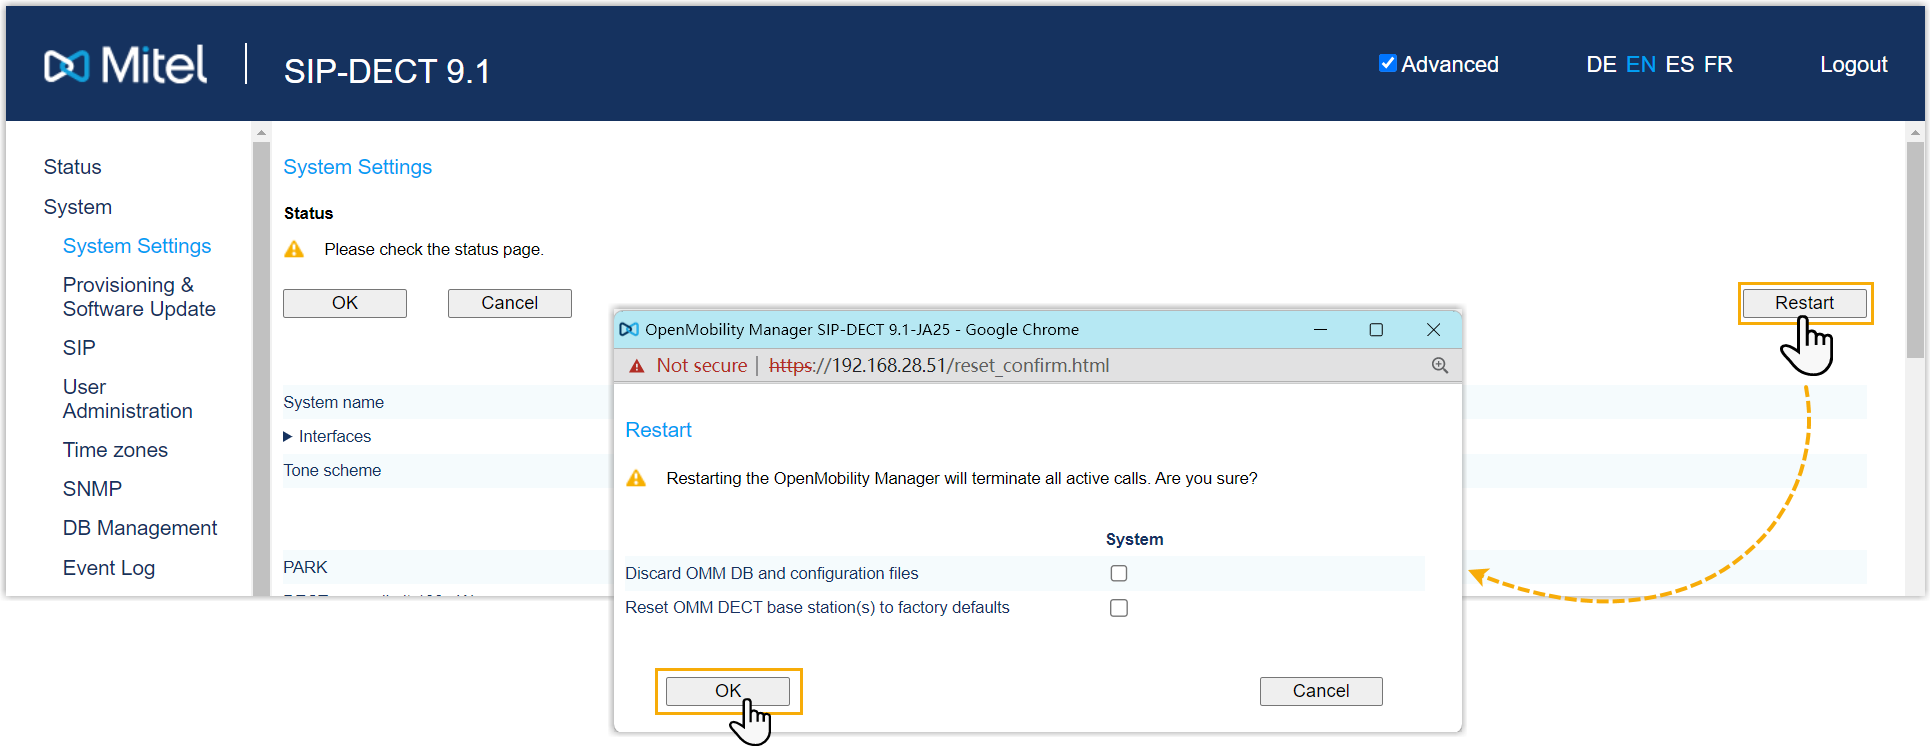
Go to System > System Settings, then click Restart and OK to start provisioning.
After the base station restarts, wait a few minutes. When a green check
 appears for it at SIP Users/Devices > Subscription, the base station has downloaded its configuration file from Cloud Voice.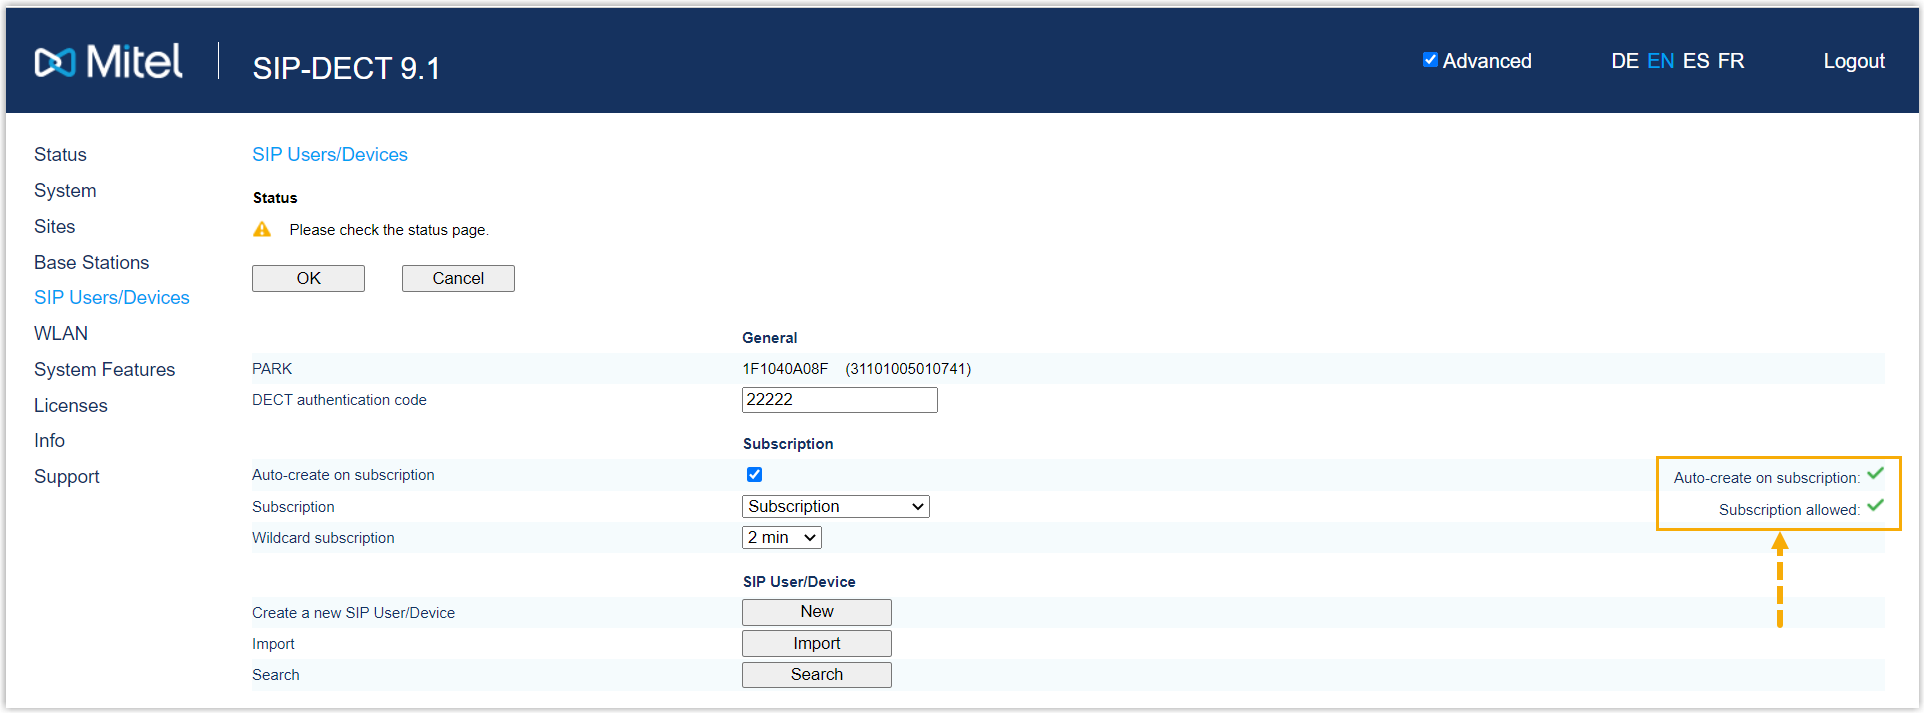
-
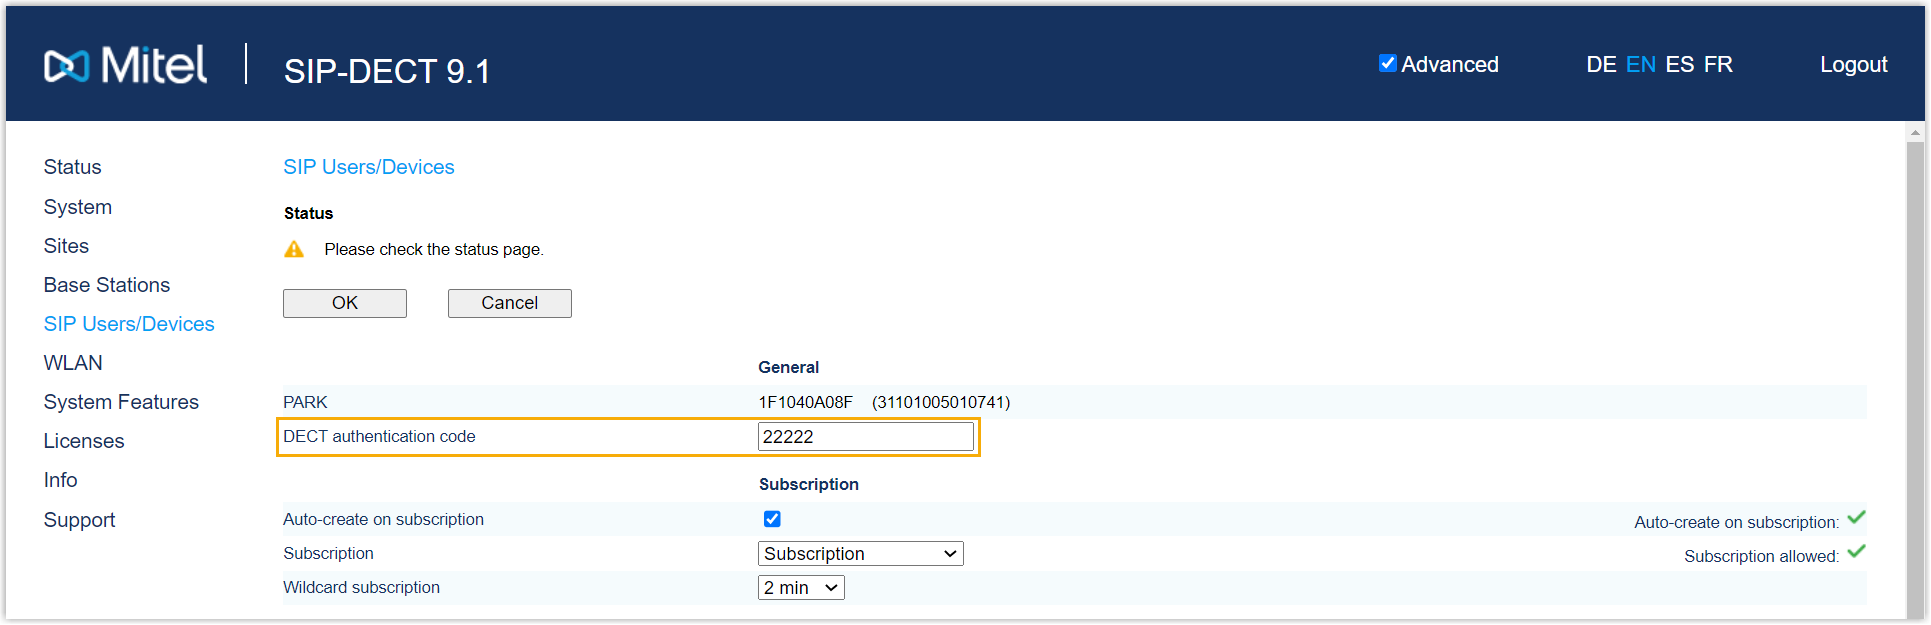
Go to SIP Users/Devices > General > DECT authentication code, set an authentication code, and write it down. You will enter this code when subscribing the handset in Step 3.
Step 3. Subscribe and log in a handset
Section titled “Step 3. Subscribe and log in a handset”Subscribe the handset to the base station, then log it in to its assigned extension.
-
Subscribe the handset to the base station.
-
On the handset, go to the More options icon
 > System > Subscription.
The handset searches for a base station. When it finds one, it prompts you for an authentication code.
-
Enter the authentication code you set in Step 2, then press Next and Ok.
The handset shows “success”, confirming it is subscribed to the base station.
-
-
Log in to the handset.
- On the handset, press Log in.
- On the Number page, enter the extension number assigned to the handset, then press Ok.
- On the User login page, enter the extension number again, then press Ok.
Result
Section titled “Result”The handset is now subscribed to the base station and, through it, associated with its assigned Cloud Voice extension.
-
In the base station web interface, you can check the handset’s subscription status at SIP Users/Devices > SIP user.

-
In the Cloud Voice management portal, you can check the extension’s registration status at Auto Provisioning > Phones.

The registered handsets can now be used as Cloud Voice extensions to make and receive calls.
Question about this page?
Ask the AI assistant. It starts from this page, then searches the rest of the docs.
Ask Cloud Voice AI
Answers are AI-generated from the docs and may contain mistakes. Verify with the linked pages.