
Manually Register an Htek IP Phone with Cloud Voice
If you prefer to set up an Htek desk phone by hand rather than through auto provisioning, you can enter the extension’s SIP (Session Initiation Protocol) credentials directly in the phone’s web interface. SIP is the signaling standard that lets the phone register with, and place calls through, Cloud Voice. This walkthrough uses an Htek UC921G running firmware 2.0.4.8.18 as its example, but the same steps apply to any Htek phone that supports SIP.
The task has two halves: first you collect the extension’s registration details from Cloud Voice, then you type those details into the phone.
Supported devices
Section titled “Supported devices”Any Htek IP phone that supports the SIP standard.
Step 1. Collect the registration details from Cloud Voice
Section titled “Step 1. Collect the registration details from Cloud Voice”Sign in to the Cloud Voice web portal and record the values below. You will type them into the phone in Step 2. Cloud Voice acts as your PBX (Private Branch Exchange), the phone system that registers extensions and routes calls.
Extension credentials
Go to Extension and Trunk > Extension, click the edit icon  next to the extension, then open User > Extension Information and note down:
- Extension Number
- Registration Name
- Registration Password

Transport protocol
Go to Extension and Trunk > Extension, click the edit icon, then open Advanced > VoIP Settings (VoIP stands for Voice over Internet Protocol) and note the value in the Transport field. This tells you how SIP signaling travels between the phone and Cloud Voice. The options are UDP (User Datagram Protocol), TCP (Transmission Control Protocol), and TLS (Transport Layer Security). This example uses UDP.

PBX domain name
The domain name your Cloud Voice system is reached at. This example uses pbx.example.com.
SIP registration port
The default SIP registration port is 5060.
Step 2. Register the extension on the Htek phone
Section titled “Step 2. Register the extension on the Htek phone”-
Sign in to the phone’s web interface.
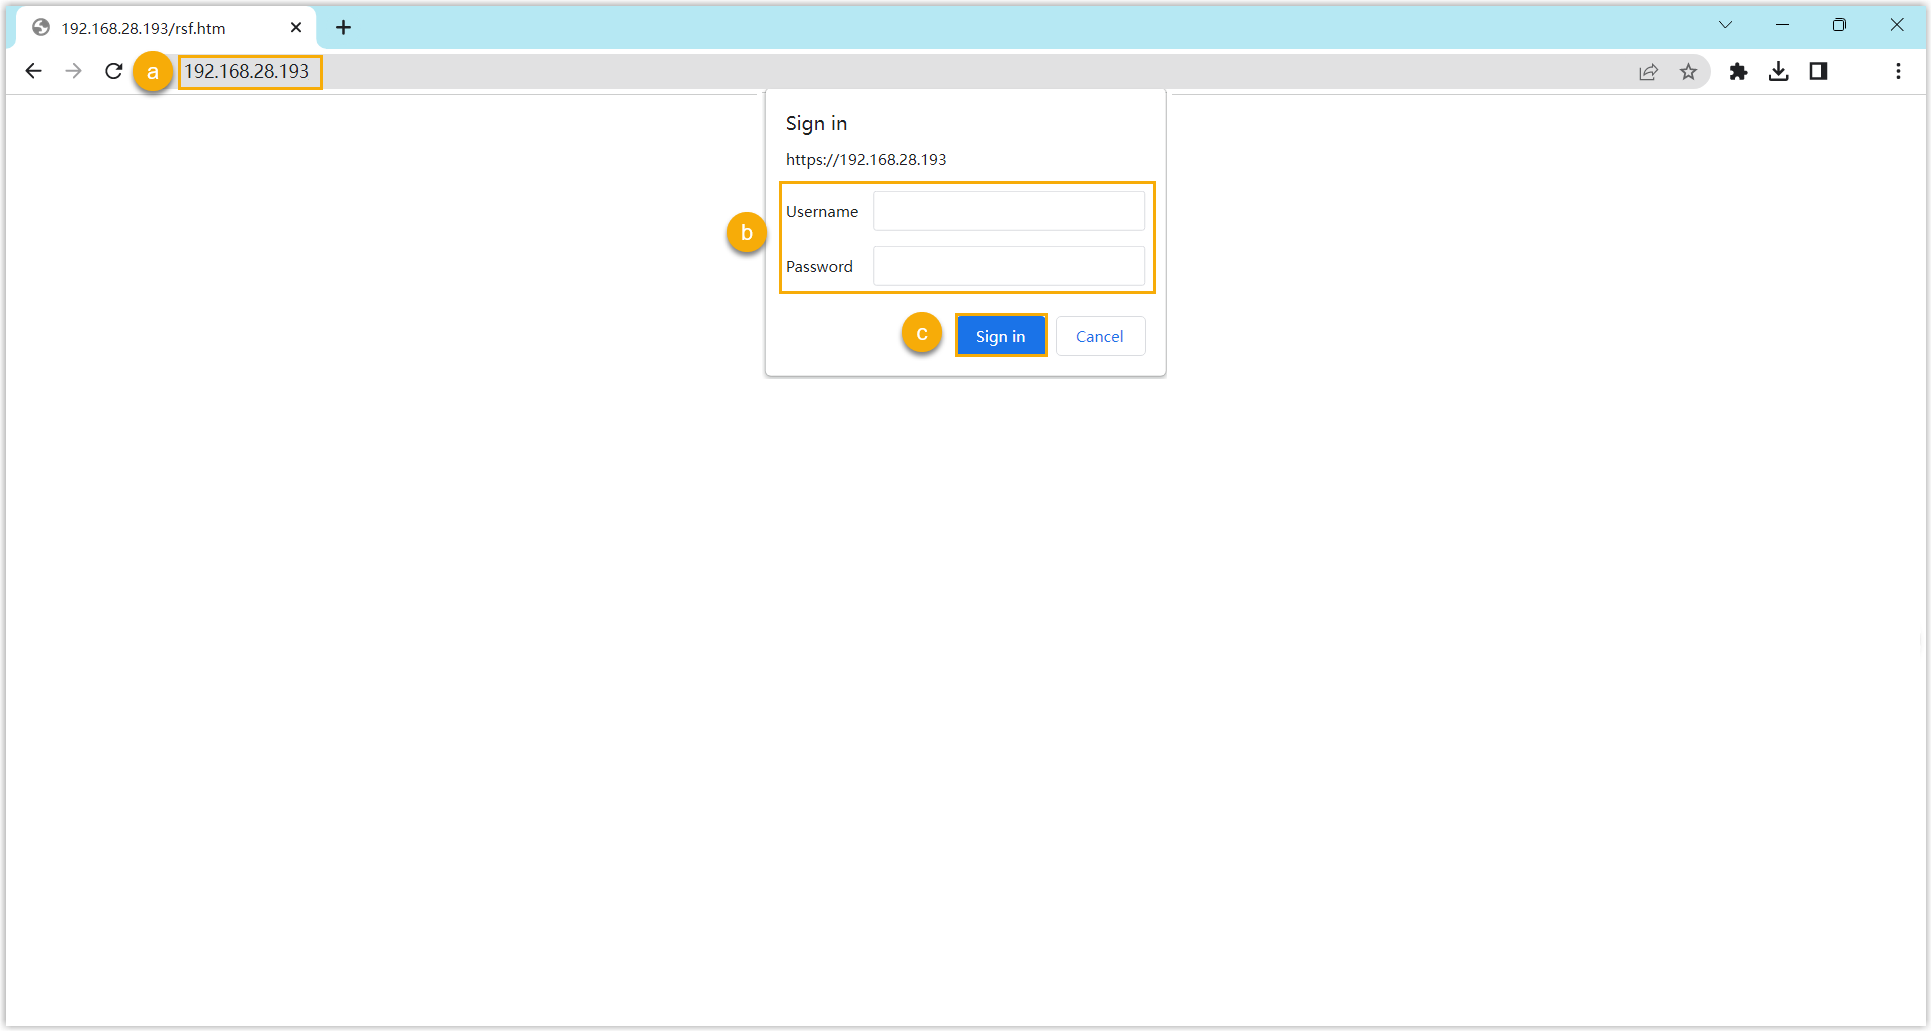
a. In your browser’s address bar, enter the phone’s IP address.
b. Enter the username
adminand its password. On a factory-default phone the password is alsoadmin.c. Click Sign in.
-
Go to Profile > Basic and edit a profile for registration. A profile holds the shared connection settings (server and transport) that one or more accounts can reuse.
a. Set the following, then note which profile you edited so you can select it later:
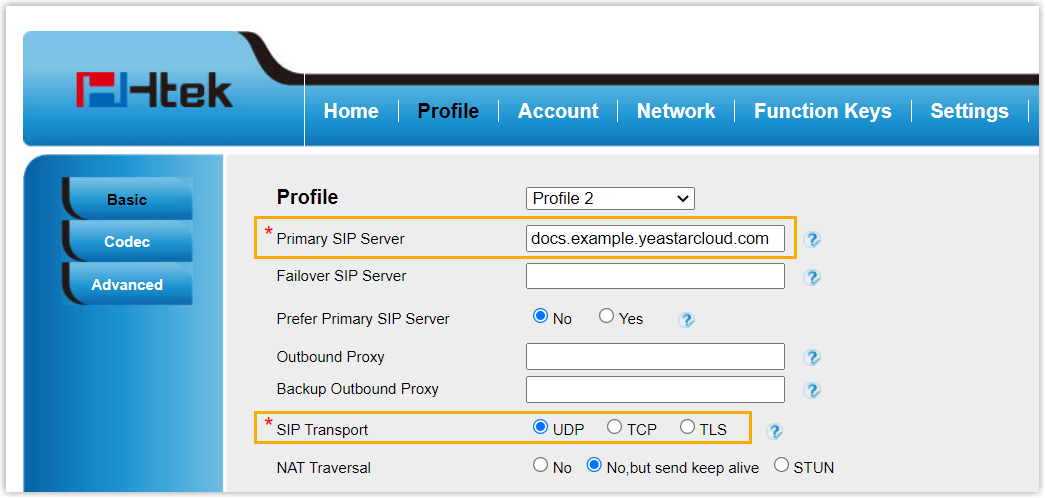
- Primary SIP Server: Enter the PBX domain name.
- SIP Transport: Select the extension’s transport protocol. In this example, select UDP.
b. At the bottom of the page, click SaveSet.
-
Go to Account > Basic and complete the account settings.
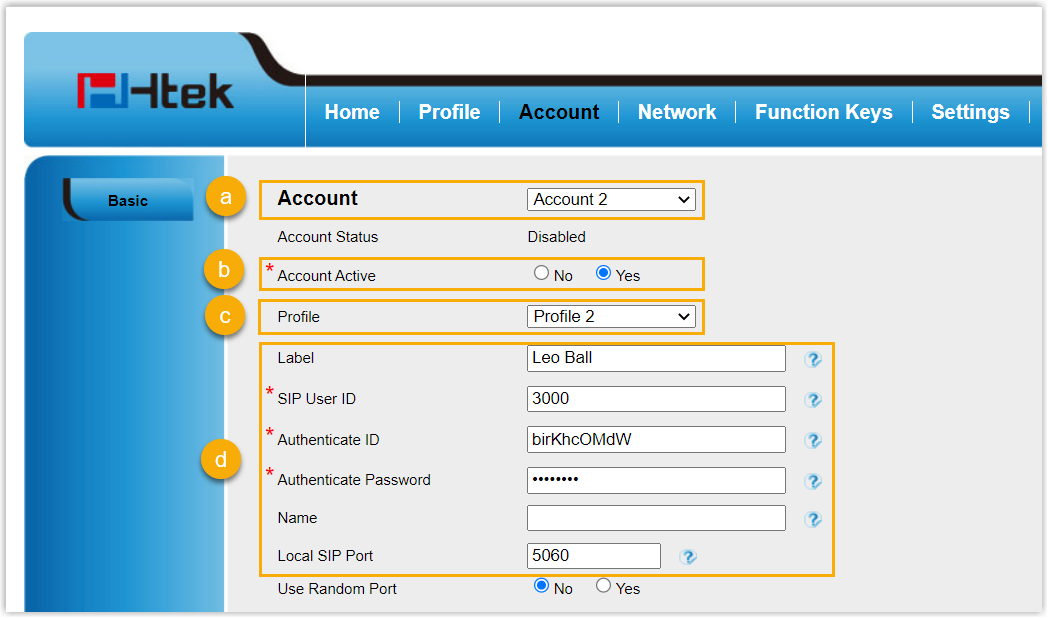
a. From the Account drop-down, select an available account.
b. Set Account Active to Yes to enable the account.
c. From the Profile drop-down, select the profile you edited in Step 2.
d. Enter the extension credentials:
- Label: A display name for the account, shown on the phone screen.
- SIP User ID: The extension number.
- Authenticate ID: The extension’s registration name.
- Authenticate Password: The extension’s registration password.
- Local SIP Port: The SIP registration port.
e. At the bottom of the page, click SaveSet.
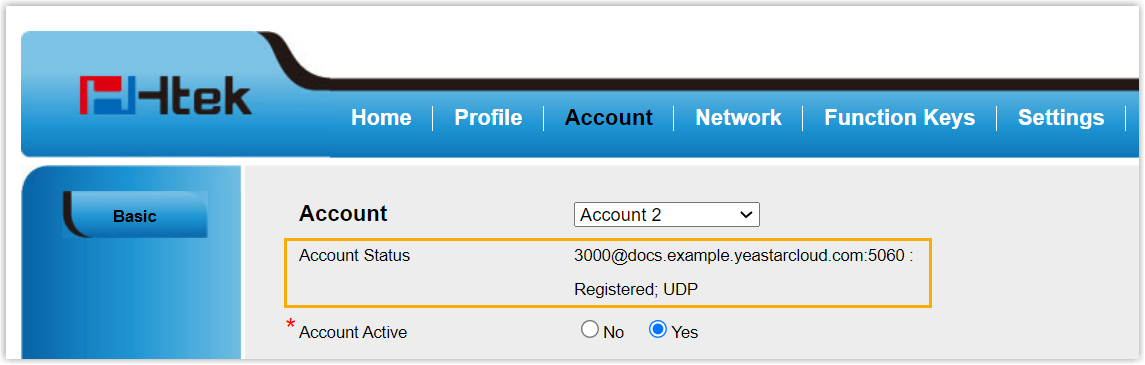
Result
Section titled “Result”The extension registers with Cloud Voice. Confirm success by checking the Account Status field.
Question about this page?
Ask the AI assistant. It starts from this page, then searches the rest of the docs.
Ask Cloud Voice AI
Answers are AI-generated from the docs and may contain mistakes. Verify with the linked pages.