
Auto-Provision a Gigaset DECT System with Cloud Voice
A Gigaset DECT (Digital Enhanced Cordless Telecommunications) system has two parts: a base station and one or more cordless handsets. DECT is a short-range wireless standard, so the handsets can roam around your site while still working as office phones. This page shows you how to auto-provision the base station from Cloud Voice, then register the handsets to it. Once the handsets are registered, each one behaves as an extension on your Cloud Voice PBX (private branch exchange, your phone system) that can make and receive calls.
Requirements
Section titled “Requirements”The base station and Cloud Voice must both be running compatible firmware, as shown below.
| Base station | Base station firmware | Cloud Voice firmware |
|---|---|---|
| N870 IP PRO | 2.38.1 or later | 84.5.0.86 or later |
| N670 IP PRO | 2.38.1 or later | 84.5.0.86 or later |
| N610 IP PRO | 2.52.0 or later | 84.5.0.86 or later |
The example in this page uses the following equipment and firmware.
| Device | Model | Firmware |
|---|---|---|
| Base station | N870 IP PRO | v2.38.1 |
| Handset | S650H PRO | v114.074.04 |
| Handset | SL750H PRO | v116.074.04 |
Before you begin
Section titled “Before you begin”Complete these prerequisites first:
- Confirm that only one DHCP (Dynamic Host Configuration Protocol) server is running on the subnet shared by the base station and handsets. A DHCP server is what hands out IP (Internet Protocol) addresses on the network. If more than one is present, the base station may not obtain a valid IP address and provisioning will fail.
- Download the auto-provisioning template for your phone model under Auto Provisioning > Resource Repository > Default Templates.
- Have the base station’s Vendor, Model, and MAC address (the hardware address printed on the device label) on hand.
Step 1. Add the base station in Cloud Voice
Section titled “Step 1. Add the base station in Cloud Voice”Register the base station in Cloud Voice. Based on its MAC address, the system builds the configuration file the device will download.
-
Sign in to the PBX web portal and go to Auto Provisioning > Phones.
-
Click Add > Add.
-
In the IP Phone section, fill in the device details.
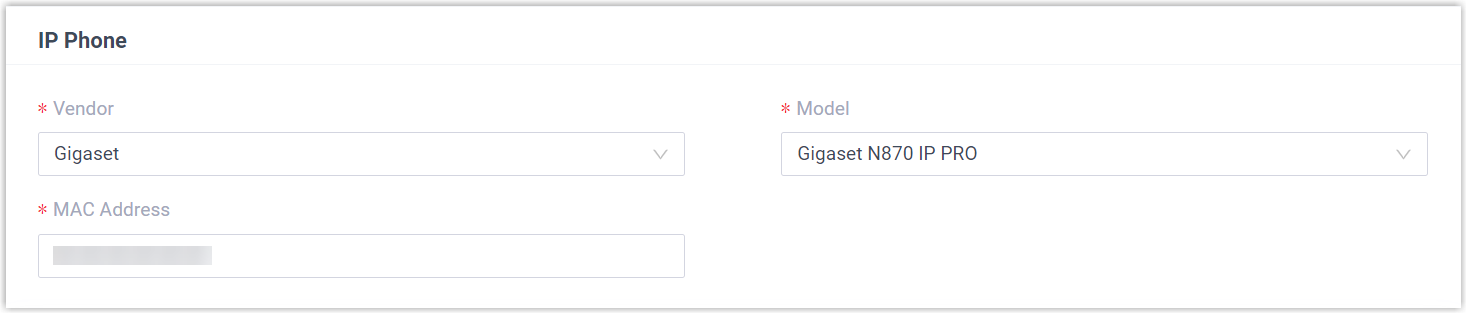
- Vendor: Select Gigaset.
- Model: Select your device model. This example uses Gigaset N870 IP PRO.
- MAC Address: Enter the MAC address of the base station.
-
In the Options section, set the provisioning options.

- Template: Choose a template from the drop-down list. You can use the default template that matches the phone model, or build your own custom template.
- Provisioning Link: Generated automatically. It points to the location where the phone’s configuration file is stored.
-
In the Assign Extension section, map extensions to the handsets. You can do this one handset at a time or in bulk.
To assign extensions individually:

a. From the Handset Mode drop-down list, choose how to associate the handset:
- Fixed Number Mode: Tie the handset to a specific extension number.
- IPUI Mode: Tie the handset to its unique IPUI (International Portable User Identity) code, the hardware ID built into each handset.
b. Select the checkbox for the handset you want.
c. From the Extension drop-down list, pick the extension.
d. If you chose IPUI Mode, enter the handset’s IPUI code in the IPUI field.
To assign extensions in bulk:
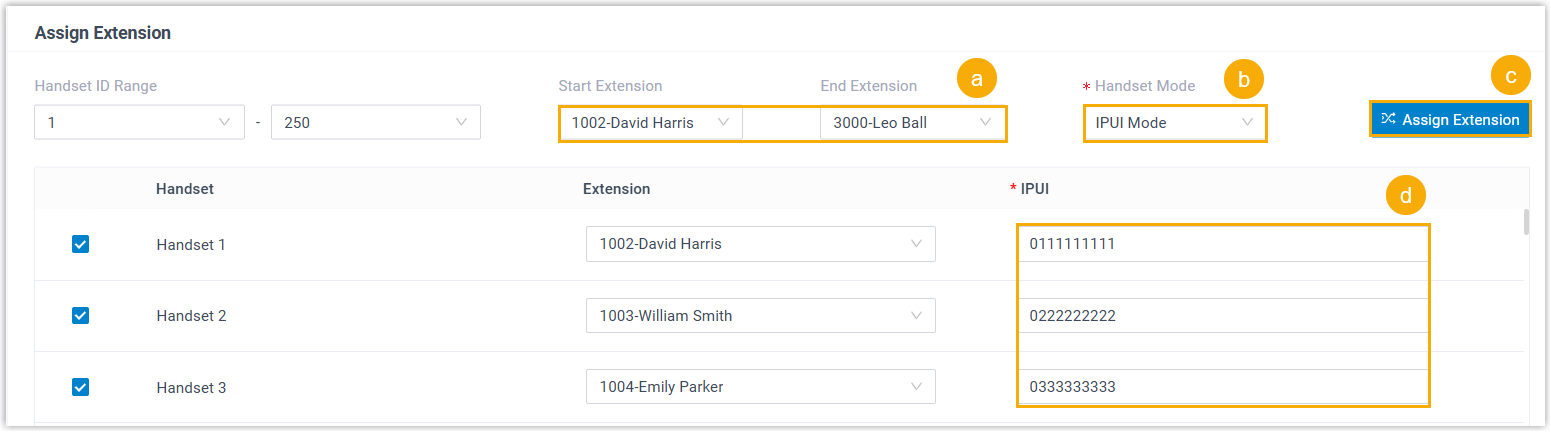
a. Set the extension range with the Start Extension and End Extension drop-down lists.
b. From the Handset Mode drop-down list, choose how to associate the handsets (Fixed Number Mode or IPUI Mode, as described above).
c. Click Assign Extension. The handsets are enabled automatically and given the extensions in order.
d. If you chose IPUI Mode, enter each handset’s IPUI code in the IPUI field.
-
(Optional) Adjust any other settings your deployment needs.
-
Click Save.
The base station is added and appears in the Auto Provisioning phone list, and Cloud Voice raises an RPS Request Success event notification.
Step 2. Enable dynamic IP on the base station
Section titled “Step 2. Enable dynamic IP on the base station”Use the button on the base station to switch its device role so it can pull an IP address from the DHCP server on the subnet.
-
Press and hold the device button for at least 10 seconds, until both LEDs switch off, then release it. The device is now in programming mode.
-
Briefly press the device button until both LEDs turn blue, then release it. The device role switches to Integrator/DECT Manager with dynamic IP enabled.
-
Press and hold the device button until both LEDs turn red, then release it. The base station resets. Booting into the new role takes a few minutes; once it’s up, the device receives an IP address from the DHCP server and downloads its configuration from Cloud Voice automatically.
Step 3. Register the handsets to the base station
Section titled “Step 3. Register the handsets to the base station”Put the base station into registration mode, then confirm registration on each handset.
-
Sign in to the base station’s web interface.
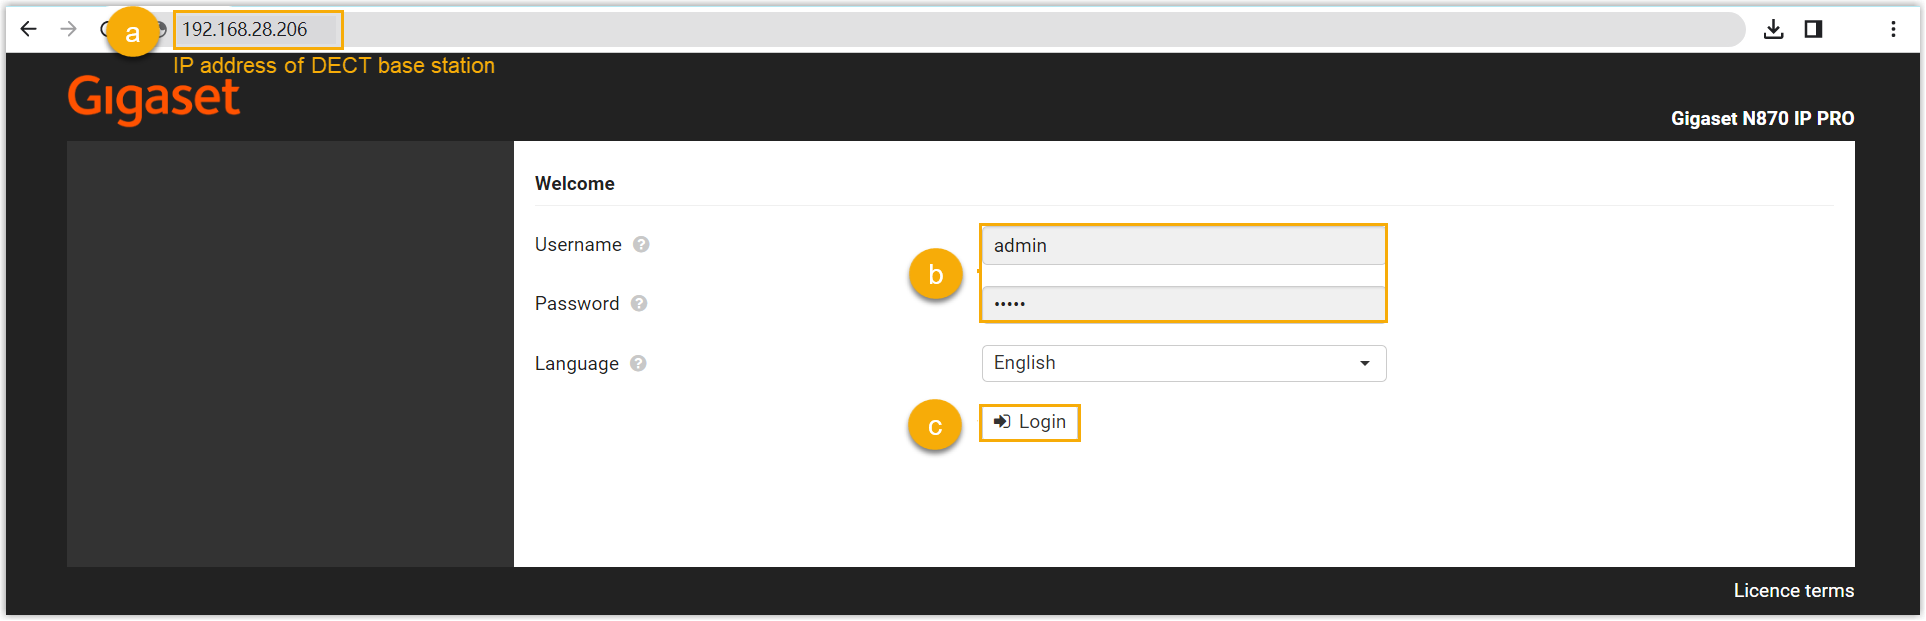
a. Enter the base station’s IP address in your browser’s address bar.
b. Enter the username
adminand the default passwordadmin.c. Click Login.
-
Change the default password, choose a DECT radio frequency band, then click Set.
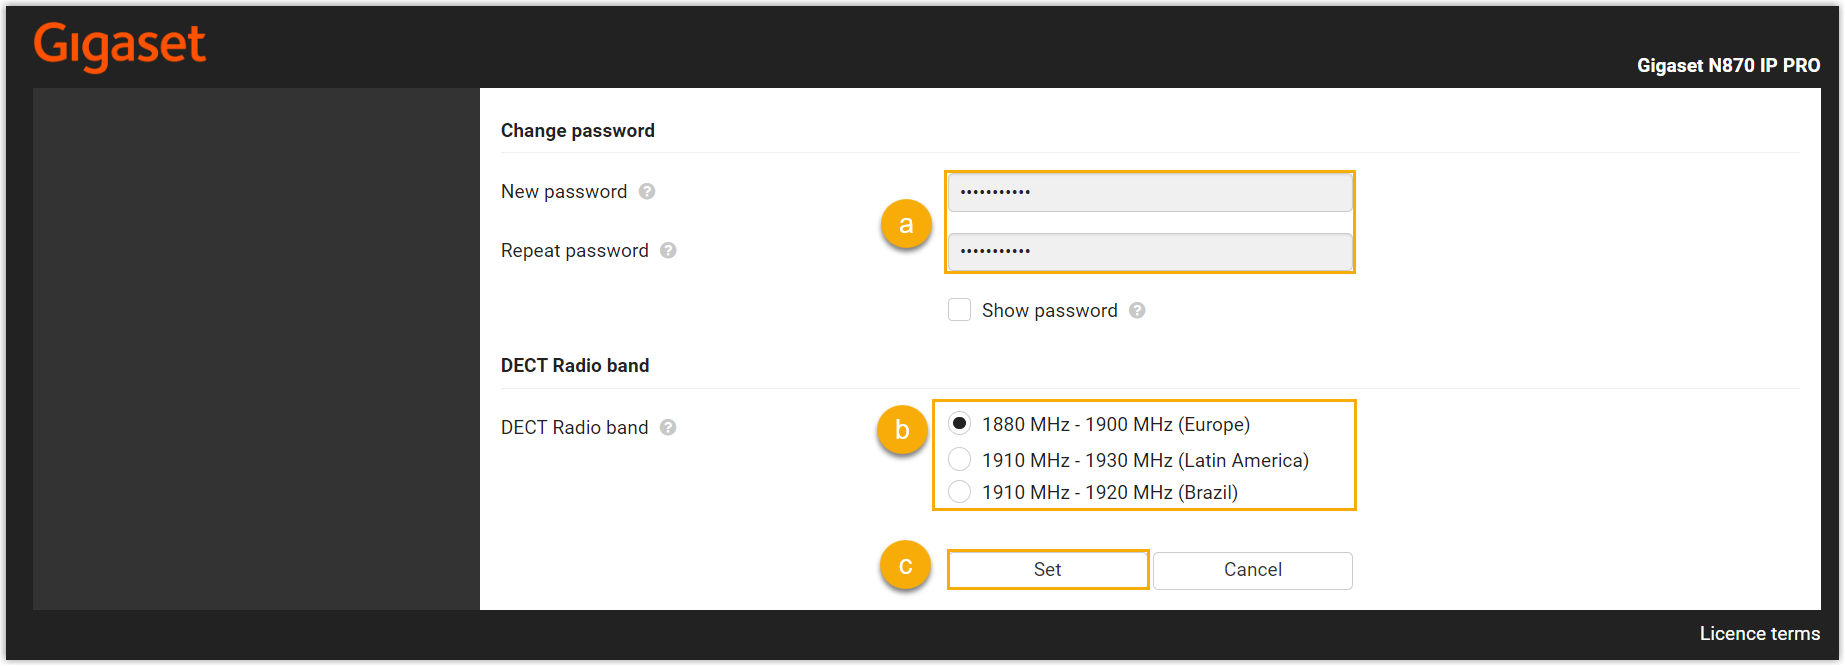
You are taken to the base station’s web interface.
-
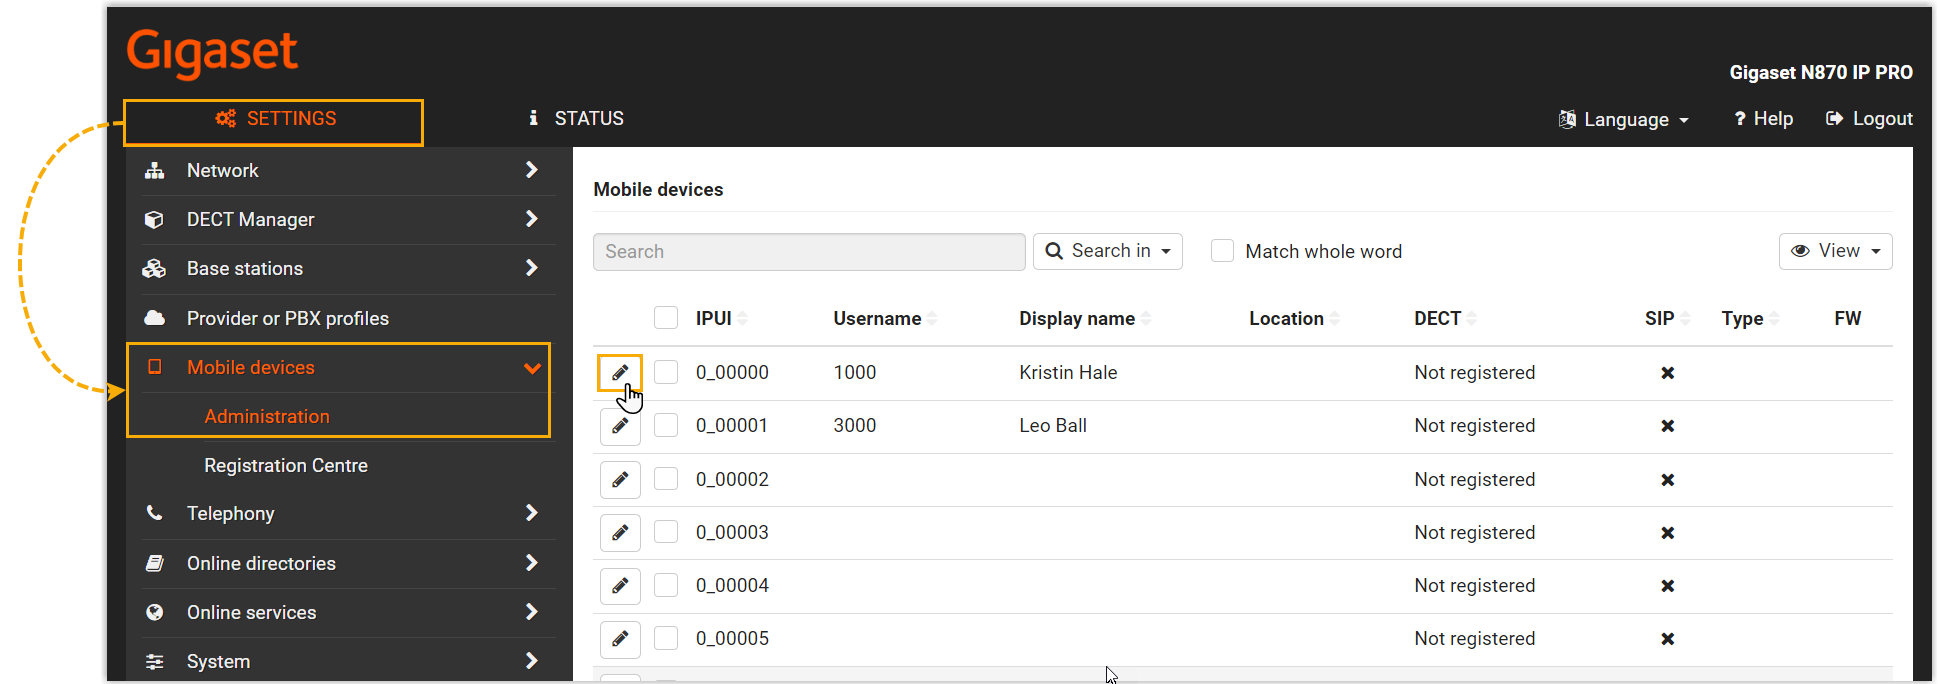
On the SETTINGS tab, go to Mobile devices > Administration, then click the edit icon next to a handset that has an extension assigned.
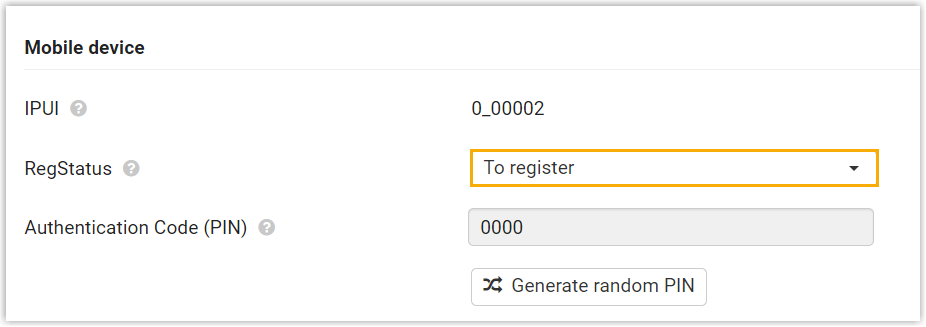
a. In the RegStatus drop-down list, select To register.
b. In the Authentication Code (PIN) field, set a PIN and note it down, you’ll enter it on the handset shortly. This example keeps the default PIN
0000.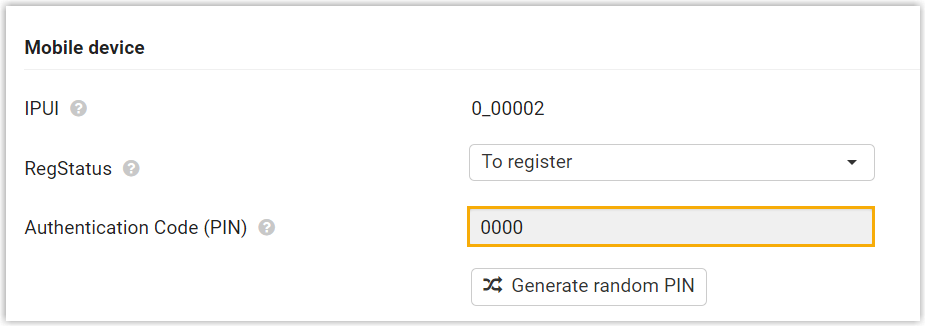
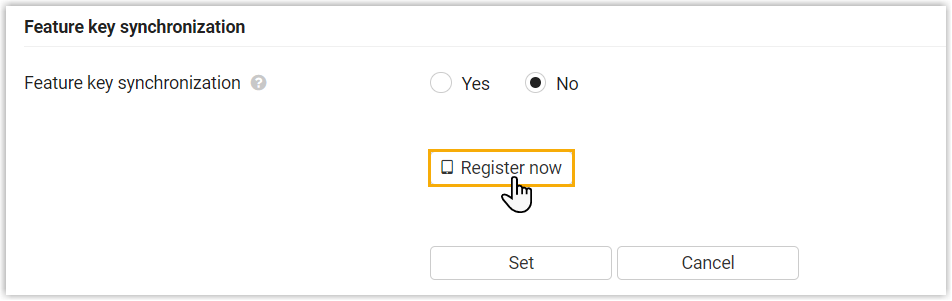
c. Scroll to the bottom and click Register now.
-
Repeat the previous step for every other handset that has an extension assigned, until all of them show a status of To register.
-
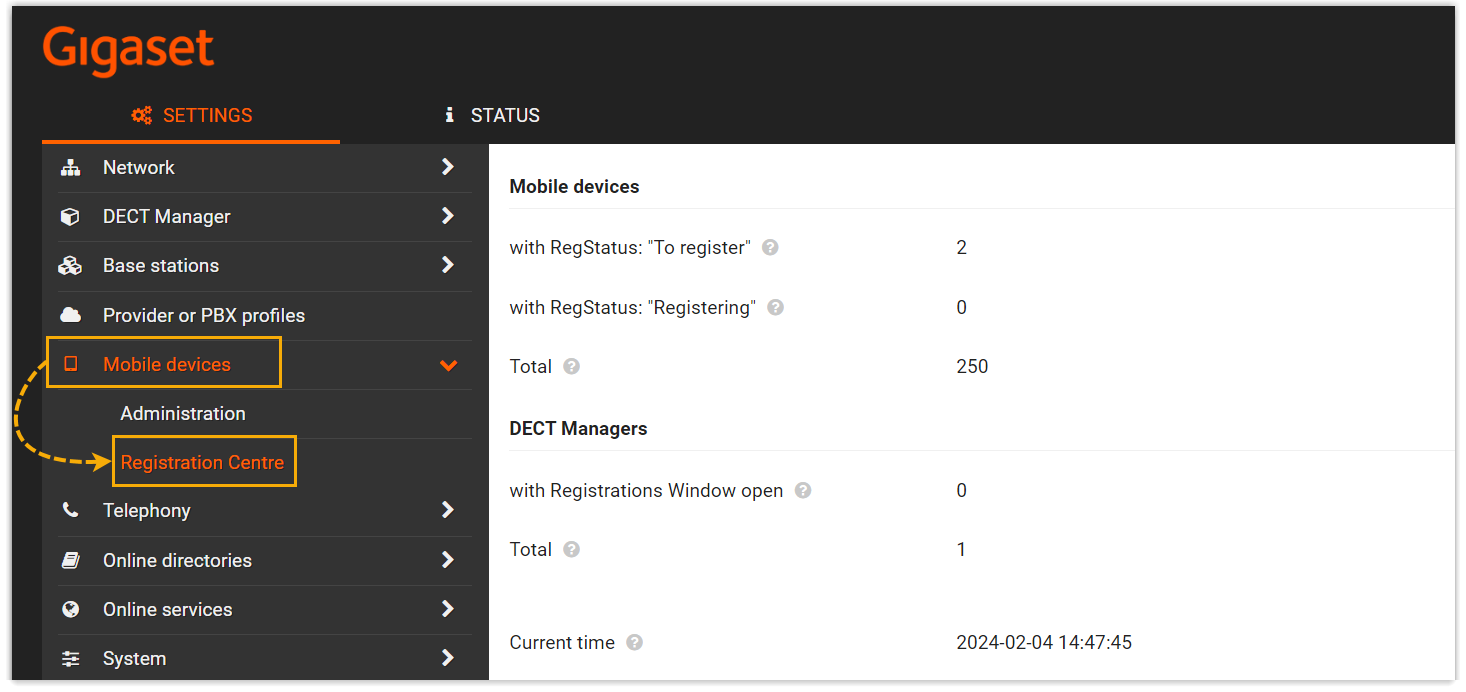
Go to Mobile devices > Registration Centre > DECT Managers and configure registration.
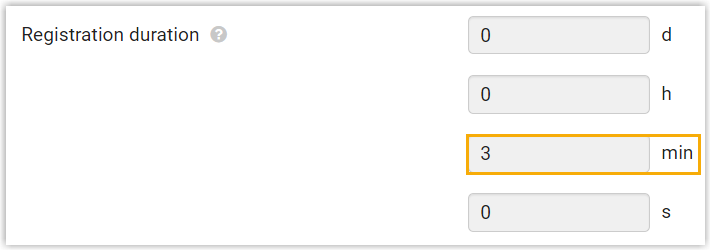
a. Under Registration duration, set how long the base station stays in registration mode. This example keeps the default of 3 minutes.
b. Under Registration start time, open the registration window:
-
To begin immediately, click Start now.

-
To begin later, enter a time in the Registration start time field, then click Set at the bottom of the page.

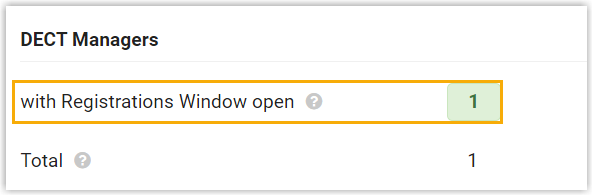
This example uses Start now. The with Registrations Window open field then shows 1, confirming the base station is in registration mode for the set duration.
-
-
Confirm the registration on each handset.
a. On the handset, go to Menu > Settings > Registration > Register Handset. The handset searches for a base station in registration mode. When it finds one, it prompts you for a system PIN.
b. Enter the PIN you set on the base station, then press OK.
Result
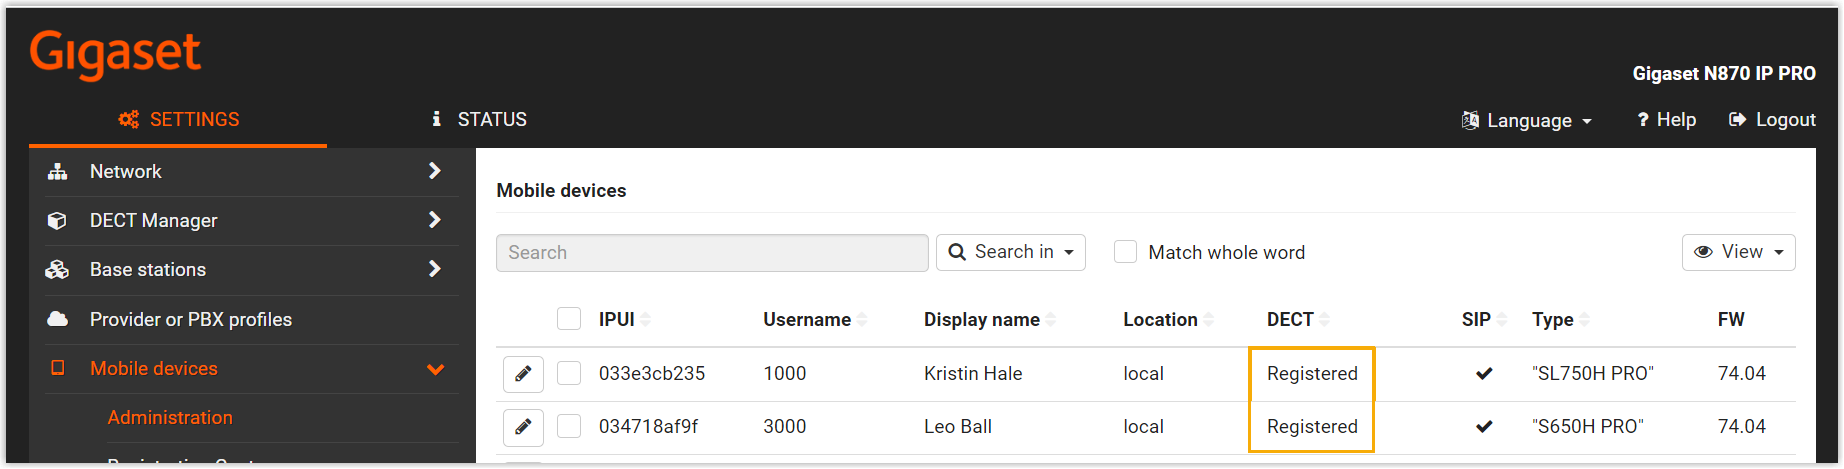
Section titled “Result”- The handsets are registered to the base station and, through it, associated with their assigned Cloud Voice extensions. You can verify this in two places:
-
On the base station, under SETTINGS > Mobile devices > Administration, check each handset’s registration status.
-
In the PBX web portal, under Auto Provisioning > Phones, check the extensions’ registration status.

-
- The registered handsets can now be used as extensions to make and receive calls.
Question about this page?
Ask the AI assistant. It starts from this page, then searches the rest of the docs.
Ask Cloud Voice AI
Answers are AI-generated from the docs and may contain mistakes. Verify with the linked pages.