
Auto Provision Tiptel IP Phone
With auto provisioning, Cloud Voice delivers a ready-made configuration to a Tiptel desk phone, so the handset registers its assigned extension without anyone entering account details on the device. (An IP phone, short for Internet Protocol phone, makes calls over your data network instead of a traditional analog phone line.) This walkthrough uses a Tiptel 3310 running firmware 2.42.6.5.55 as the example, but the procedure is the same for every supported model.
Supported models and firmware
Section titled “Supported models and firmware”Check that the phone and your Cloud Voice system are both running at least the firmware versions listed for the model you plan to provision.
| Model | Minimum phone firmware | Minimum system firmware |
|---|---|---|
| 3310 | 2.42.6.5.55 | 84.7.0.17 |
| 3320 | 2.42.6.5.55 | 84.7.0.17 |
| 3330 | 2.42.6.5.55 | 84.7.0.17 |
| 3340 | 2.42.6.5.55 | 84.7.0.17 |
Before you begin
Section titled “Before you begin”- Confirm that the default provisioning template for your model is available under Auto Provisioning > Resource Repository > Default Templates.
- Reset the phone to factory defaults if it was in service previously, so leftover settings do not interfere.
- Collect the phone’s vendor, model, and MAC address before you create the entry. MAC (Media Access Control) is the unique hardware address of the phone, usually printed on a label on the underside of the device or on its box.
Step 1: Add the Tiptel phone in Cloud Voice
Section titled “Step 1: Add the Tiptel phone in Cloud Voice”-
Sign in to the management portal and open Auto Provisioning > Phones.
-
Click Add > Add.
-
Under IP Phone, describe the device:
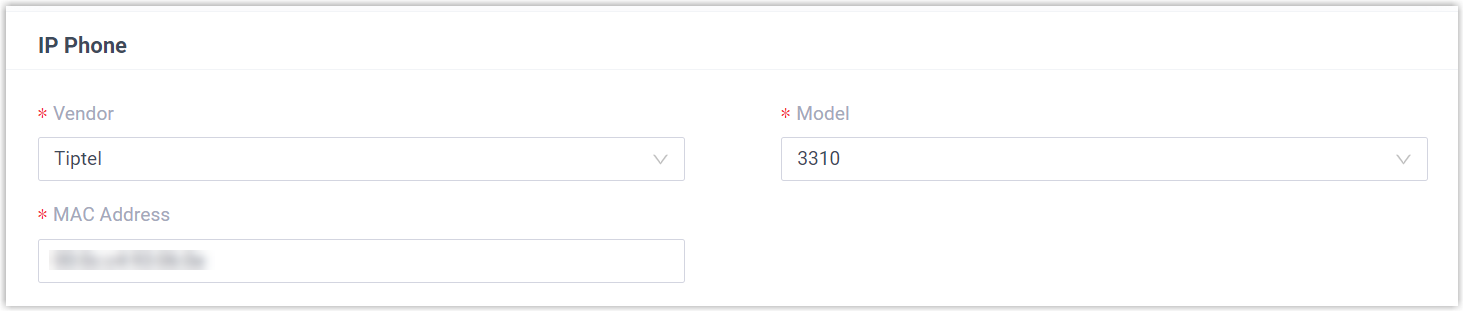
- Vendor: Choose Tiptel.
- Model: Choose the phone model. This example uses 3310.
- MAC Address: Type the MAC address printed on the phone.
-
Under Options, set how the phone provisions:

- Template: Select a template from the list. Use the default template that matches your phone model, or a custom template you have created for your own configuration.
- Provisioning Link: Cloud Voice generates this link automatically. It points to where the phone’s configuration file is stored, so you do not need to change it.
- Authentication for the First-time Auto Provisioning: When enabled, the phone prompts the user for credentials before it runs provisioning for the first time.
-
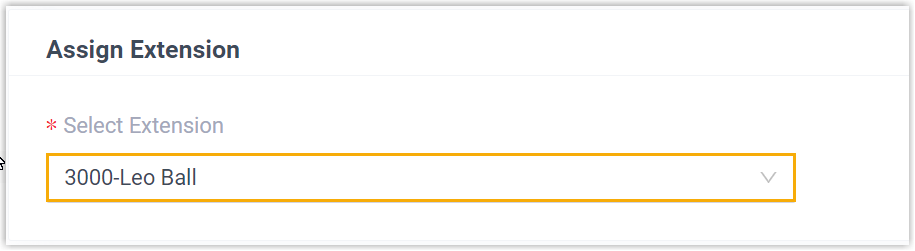
Under Assign Extension, pick the extension to bind to this phone.
-
Click Save. Cloud Voice sends an RPS Request Success event notification to confirm the request went through. RPS (Redirection and Provisioning Service) is the cloud service that points the phone to your Cloud Voice system the first time it boots.
Step 2: Trigger provisioning on the phone
Section titled “Step 2: Trigger provisioning on the phone”-
Reboot the Tiptel phone.
-
If you kept Authentication for the First-time Auto Provisioning enabled, the phone asks for credentials. Enter them on the handset:
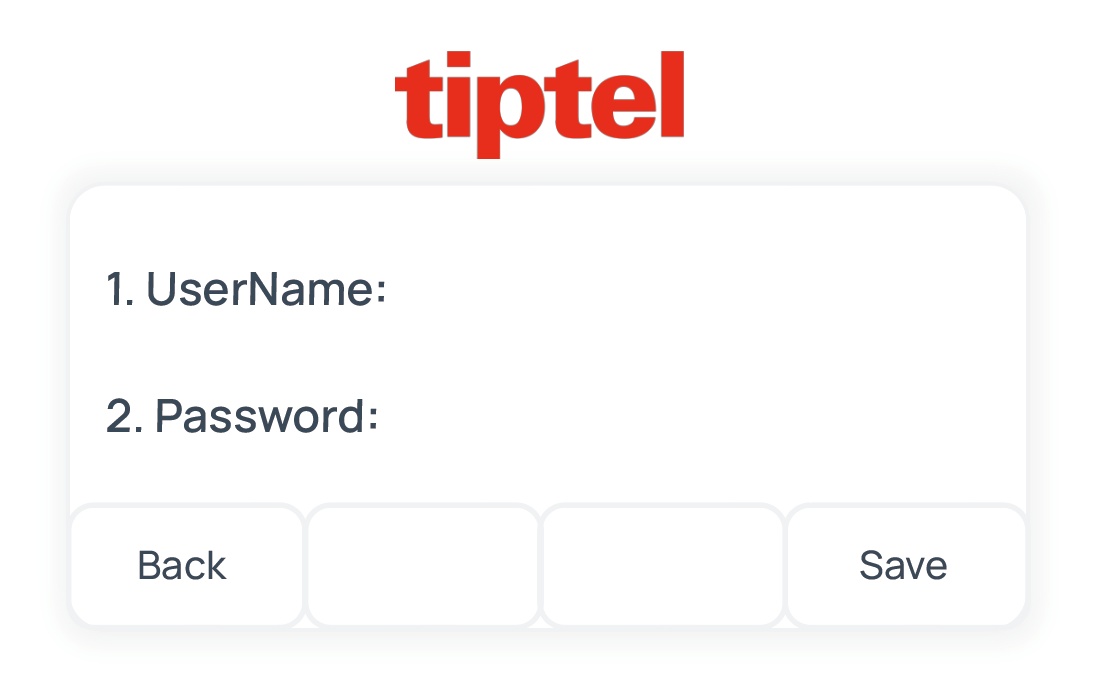
- UserName: The extension number assigned to the phone.
- Password: The extension’s Voicemail Access PIN.
Result
Section titled “Result”-
The phone downloads its configuration from Cloud Voice and applies the settings on its own.
-
The assigned extension registers on the phone. Verify the registration state under Auto Provisioning > Phones in the portal.

Question about this page?
Ask the AI assistant. It starts from this page, then searches the rest of the docs.
Ask Cloud Voice AI
Answers are AI-generated from the docs and may contain mistakes. Verify with the linked pages.