
Provision a Flat-Phone with Cloud Voice
Flat-Phone desk phones can be brought online automatically through Cloud Voice auto provisioning combined with DHCP (Dynamic Host Configuration Protocol) option 66. Auto provisioning means you configure the phone centrally in the management portal instead of typing settings into the handset by hand, which is what makes it practical to roll out many phones at once.
Here is the sequence: you add the phone in the portal, Cloud Voice builds a configuration file keyed to the phone’s MAC (Media Access Control) address, and the DHCP server tells the phone where to find that file when it boots. DHCP option 66 is the field that carries that location. This guide uses a Flat-Phone B10 running firmware 15.66.7.12.234 as the working example.
Requirements
Section titled “Requirements”Confirm that your Flat-Phone and Cloud Voice are running firmware versions no older than the ones listed below. Provisioning may not work if either side is behind these minimums.
| Model | Phone Firmware | Cloud Voice Version |
|---|---|---|
| B6 | 15.63.11.12.234 or later | 84.19.0.110 or later |
| B10 | 15.66.7.12.234 or later | 84.19.0.110 or later |
| C10 | 15.60.11.12.234 or later | 84.19.0.110 or later |
Prerequisites
Section titled “Prerequisites”-
A DHCP server is available on the subnet to assign the phone an IP (Internet Protocol) address.
-
The auto-provisioning template for the phone model has been downloaded. You get it from Auto Provisioning > Resource Repository > Default Templates in the management portal. This template holds the base settings Cloud Voice applies to the phone, so it must be in place before you provision.
-
The phone has been reset if it was used previously.
-
You have the phone’s Vendor, Model, and MAC address on hand. The MAC address is usually printed on a label on the underside of the phone.
Step 1. Add the Flat-Phone in Cloud Voice
Section titled “Step 1. Add the Flat-Phone in Cloud Voice”Register the phone in the management portal. Cloud Voice generates a configuration file for it based on the MAC address you enter, so that file is unique to this one handset.
-
Sign in to the Cloud Voice management portal and go to Auto Provisioning > Phones.
-
Click Add > Add.
-
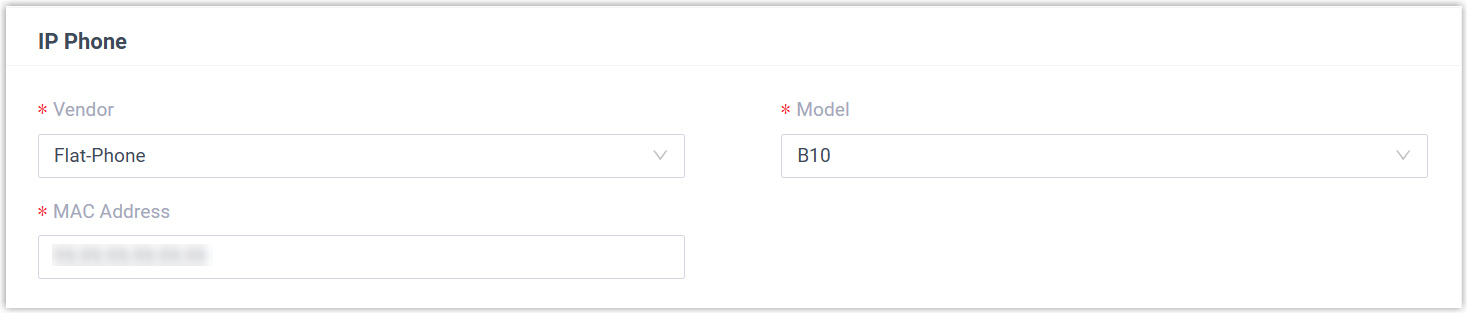
Under IP Phone, enter the device details.
-
Vendor: Select Flat-Phone.
-
Model: Select the phone model. This example uses B10.
-
MAC Address: Enter the phone’s MAC address.
-
-
Under Options, configure the provisioning settings.

-
Template: Choose a template from the drop-down list.
-
Provisioning Link: Cloud Voice generates this link automatically. It points to where the phone’s configuration file is stored.
-
-
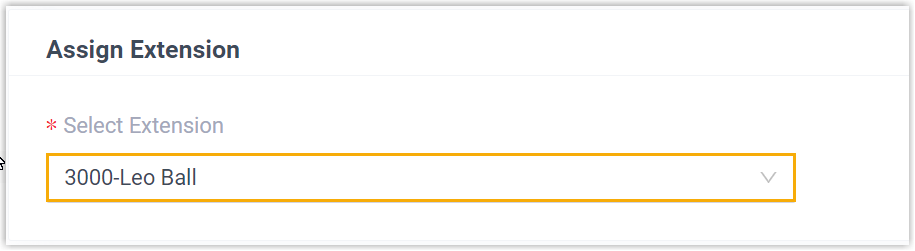
Under Assign Extension, assign an extension to the phone.
-
Click Save.
Step 2. Configure DHCP option 66 on the DHCP server
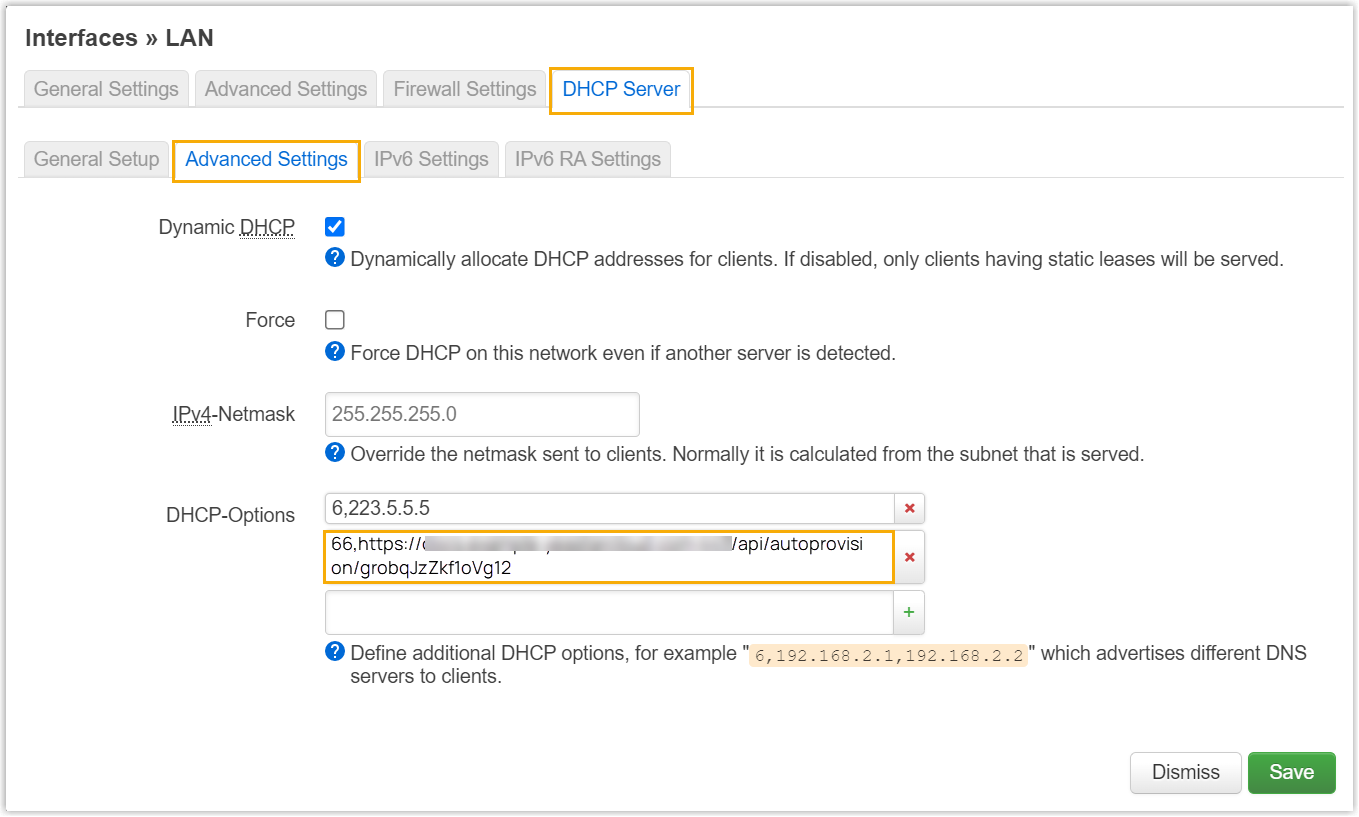
Section titled “Step 2. Configure DHCP option 66 on the DHCP server”On the subnet where the phone is deployed, point DHCP option 66 at the provisioning link so the phone knows where to fetch its configuration when it boots.
-
In the management portal, open the phone’s detail page and copy its provisioning link.

-
On the DHCP server, set option 66 to the provisioning link. The example below shows how this looks once configured.
Result
Section titled “Result”-
Once the phone reboots, it obtains an IP address from the DHCP server, downloads its configuration from Cloud Voice over the provisioning link, and applies the settings automatically.
-
The extension registers on the phone. You can confirm the registration status at Auto Provisioning > Phones in the management portal.

Question about this page?
Ask the AI assistant. It starts from this page, then searches the rest of the docs.
Ask Cloud Voice AI
Answers are AI-generated from the docs and may contain mistakes. Verify with the linked pages.