
Set Distinctive Ringtones for Queue Calls
Assigning a unique ringtone to a call queue lets agents recognize where a call is coming from before they answer. It is most helpful for agents who belong to several queues at once, since the ringtone alone tells them how to greet the caller.
You can apply distinctive queue ringtones two ways, depending on where the agent takes calls:
Ringtone on an IP phone
Section titled “Ringtone on an IP phone”To play a different ringtone for each queue on an agent’s desk phone, push the setting to the phone through Auto Provisioning. The workflow has two parts: tag the queue with an alert info string on the PBX (Private Branch Exchange, your Cloud Voice phone system), then map that alert info to a ringtone on the agent’s extension.
Prerequisite: the agent’s extension is already linked to an IP phone through Auto Provisioning. If it is not, set that up first using one of these methods:
Step 1: Tag the queue with an alert info string
Section titled “Step 1: Tag the queue with an alert info string”The alert info is the signal that tells the phone which ringtone to play when a call arrives through the queue.
-
In the PBX web portal, go to Call Features > Queue and edit the queue you want.
-
Open the Preferences tab.
-
Under Basic, type a value in the Queue Alert Info field. This example uses
Support.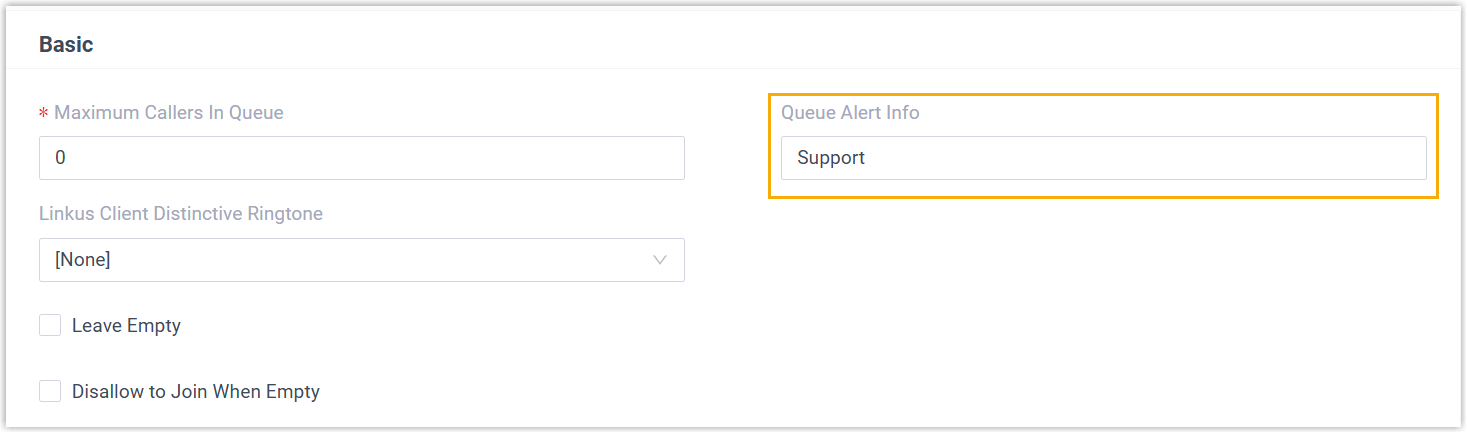
-
Click Save.
Step 2: Map the alert info to a ringtone on the extension
Section titled “Step 2: Map the alert info to a ringtone on the extension”- Assign a queue ringtone on the agent’s extension:
-
In the PBX web portal, go to Extension and Trunk > Extension and edit the agent’s extension.
-
Open the Phone tab.
-
Under Distinctive Ringtone, click Add.
-
In the Alert Info field, choose the alert info you defined for the queue. This example uses
Support. -
In the Ringtone field, choose the ringtone to play for those calls. This example uses
Ring3.wav.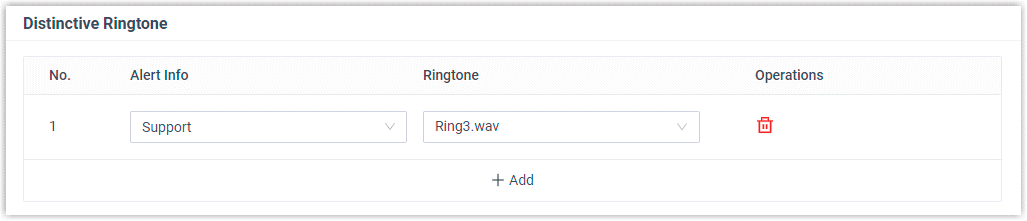
-
Click Save.
-
- Reprovision the phone so the change takes effect:
- Go to Auto Provisioning > Phones.
- Click the refresh icon
 next to the phone assigned to the agent’s extension.
Result: when a call comes in through the Support queue, the agent’s phone rings with Ring3.wav.
Ringtone in the Cloud Voice App
Section titled “Ringtone in the Cloud Voice App”You can attach a ringtone to a queue so that it plays in agents’ Cloud Voice App whenever a call arrives from that queue.
-
In the PBX web portal, go to Call Features > Queue and edit the queue you want.
-
Open the Preferences tab.
-
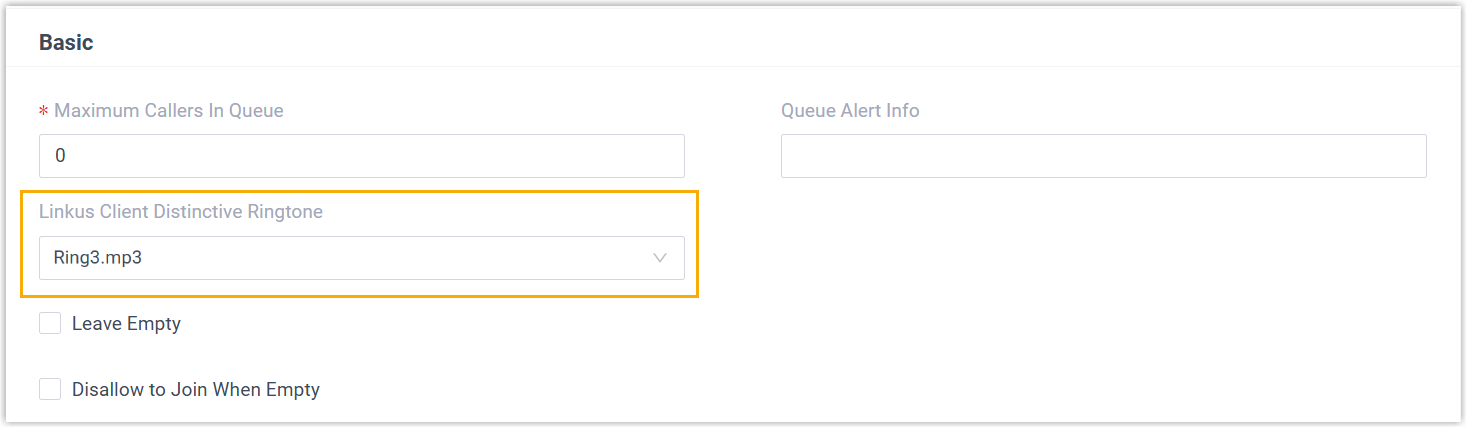
From the Cloud Voice App Distinctive Ringtone drop-down, pick a built-in ringtone or upload your own.
-
Click Save.
Question about this page?
Ask the AI assistant. It starts from this page, then searches the rest of the docs.
Ask Cloud Voice AI
Answers are AI-generated from the docs and may contain mistakes. Verify with the linked pages.