
Configure Two-factor Authentication using Email
Two-factor authentication asks for a one-time code in addition to your password whenever you sign in, so a stolen password alone is not enough to reach your account. This page walks through turning it on with email delivery, where the verification code arrives at the address you sign in with.
Turn on email verification
Section titled “Turn on email verification”-
In the Cloud Voice App web client, click your account name in the top-right corner and open Change Password & Security > Security Settings.
-
Tick the Two-Factor Authentication checkbox.
-
When the Password window appears, type your account password and click Confirm to confirm it is you making the change.
-
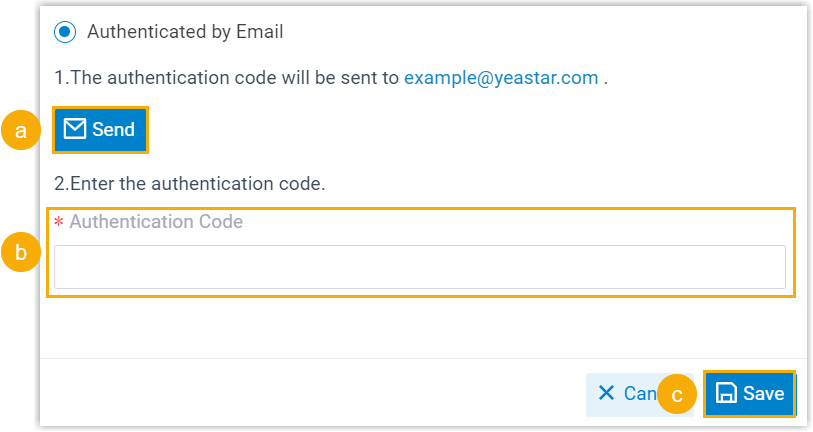
Choose Authenticated by Email, then work through the fields below.
-
Click Send. A six-digit code is emailed to the address you use to log in.
-
Type the code into the Authentication Code field.
-
Click Save.
-
What to expect afterward
Section titled “What to expect afterward”- An Edited successfully. confirmation means two-factor authentication is now active.
- From now on, signing in to any Cloud Voice App client, web, desktop, or mobile, with your extension’s email address and password will also prompt you for a verification code.
If you get locked out
Section titled “If you get locked out”Lost the device you sign in on, or no longer receiving the emailed codes? Ask your system administrator to disable two-factor authentication for your account. Once it is off, you can sign in again with just your email address and password.
Question about this page?
Ask the AI assistant. It starts from this page, then searches the rest of the docs.
Ask Cloud Voice AI
Answers are AI-generated from the docs and may contain mistakes. Verify with the linked pages.