
Add a Company Contact
Company contacts are stored on the server and kept in sync across every copy of your Cloud Voice App. Once you save a contact to a company phonebook, it becomes available to any colleague who has access to that phonebook. This page covers the four ways to create a company contact from the mobile app.
Before you begin
Section titled “Before you begin”Your system administrator must have granted you permission to manage company contacts, or at least the specific phonebooks you want to add contacts to. Without that permission, the options described below will not appear.
Ways to add a company contact
Section titled “Ways to add a company contact”You can build a company contact from scratch or promote an existing entry:
- Add a new contact from the Contacts page
- Add a company contact from your personal contacts
- Add a company contact from your phone contacts
- Add a company contact from your call history
Add a new contact from the Contacts page
Section titled “Add a new contact from the Contacts page”When there is no existing record for a person, enter their details by hand and save them straight to the Company Contacts directory.
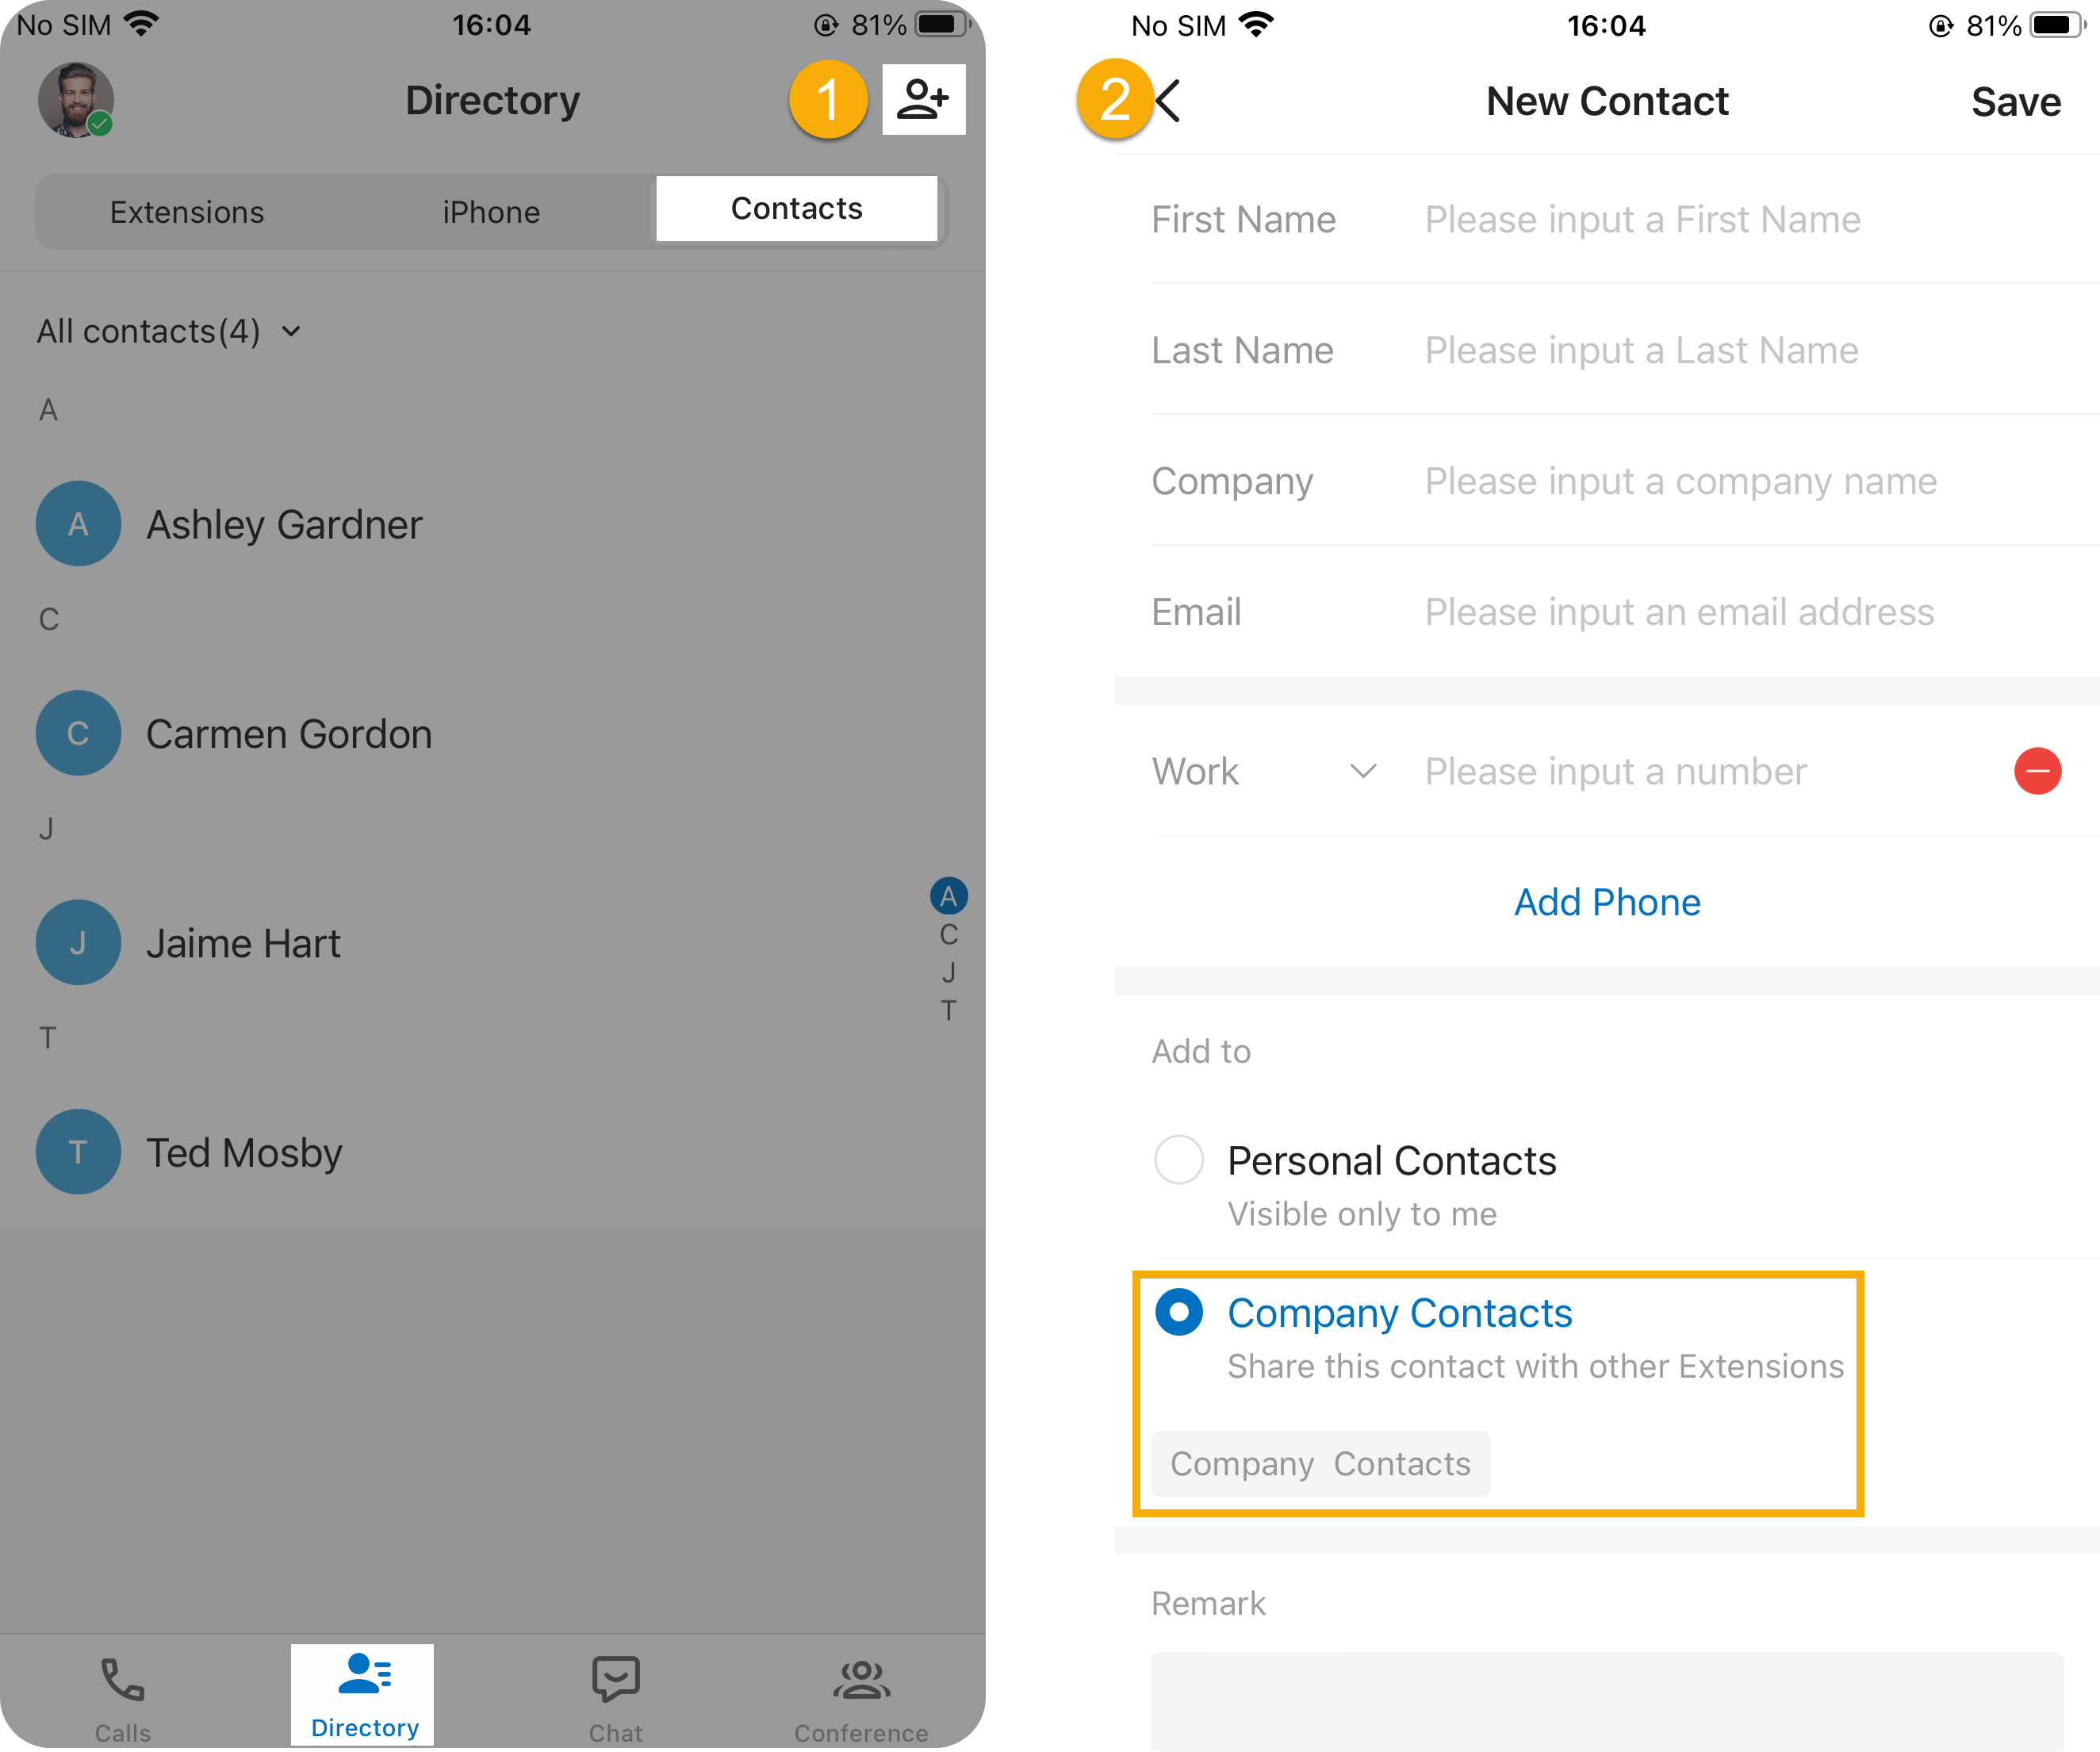
- In the Cloud Voice App, go to Directory > Contacts, then tap the add-contact icon
 in the top-right corner.
 - On the New Contact page, do the following:
- Fill in the contact’s details.
- Under Add to, choose Company Contacts, then pick the phonebook(s) that should hold the contact.
- Optional: Use the Remark field to add a short note about the contact.
- Tap the save option in the top-right corner.
Add a company contact from your personal contacts
Section titled “Add a company contact from your personal contacts”If someone already exists in your personal contacts, you can promote them to the Company Contacts directory so the rest of your team can use the entry too.
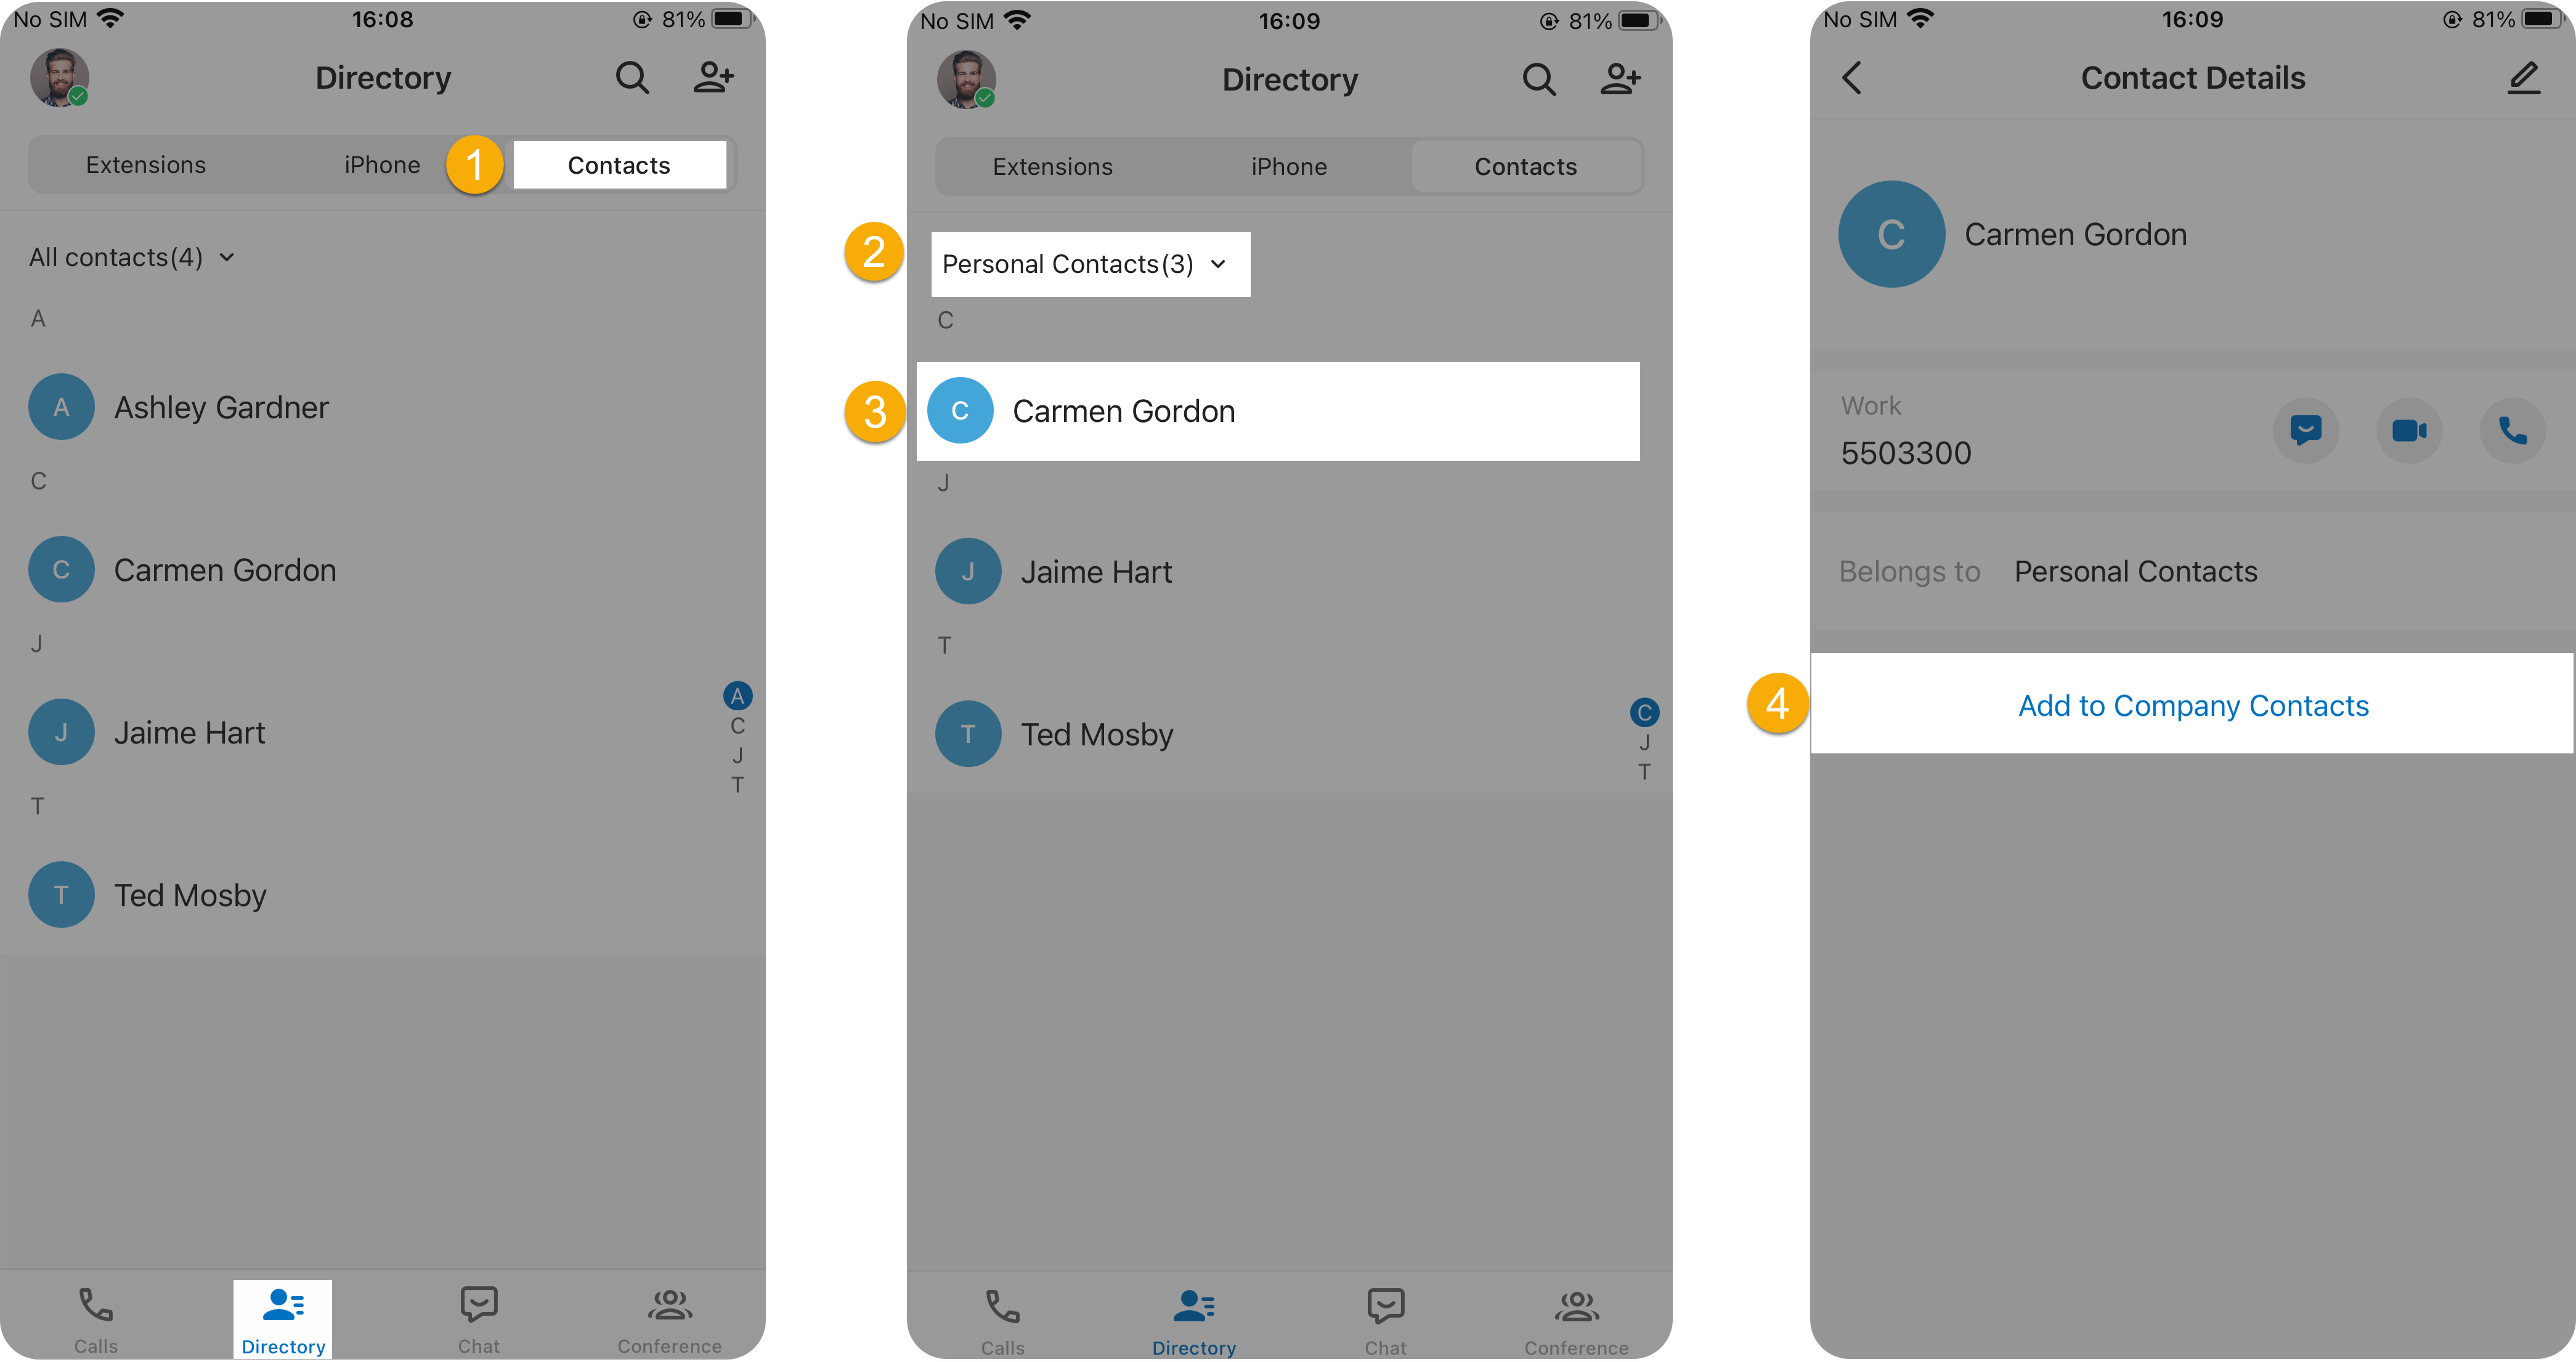
- In the Cloud Voice App, go to Directory > Contacts.
- Tap the selector in the top-left corner and choose Personal Contacts.
- Tap the contact you want to promote.
- On the Contact Details page, tap Add to Company Contacts, then select the phonebook where the contact should live. A confirmation reading “Added successfully” tells you the personal contact is now in the Company Contacts directory.
Add a company contact from your phone contacts
Section titled “Add a company contact from your phone contacts”If you have given the Cloud Voice App permission to read the native contacts on your phone, you can copy one of those contacts directly into the Company Contacts directory.
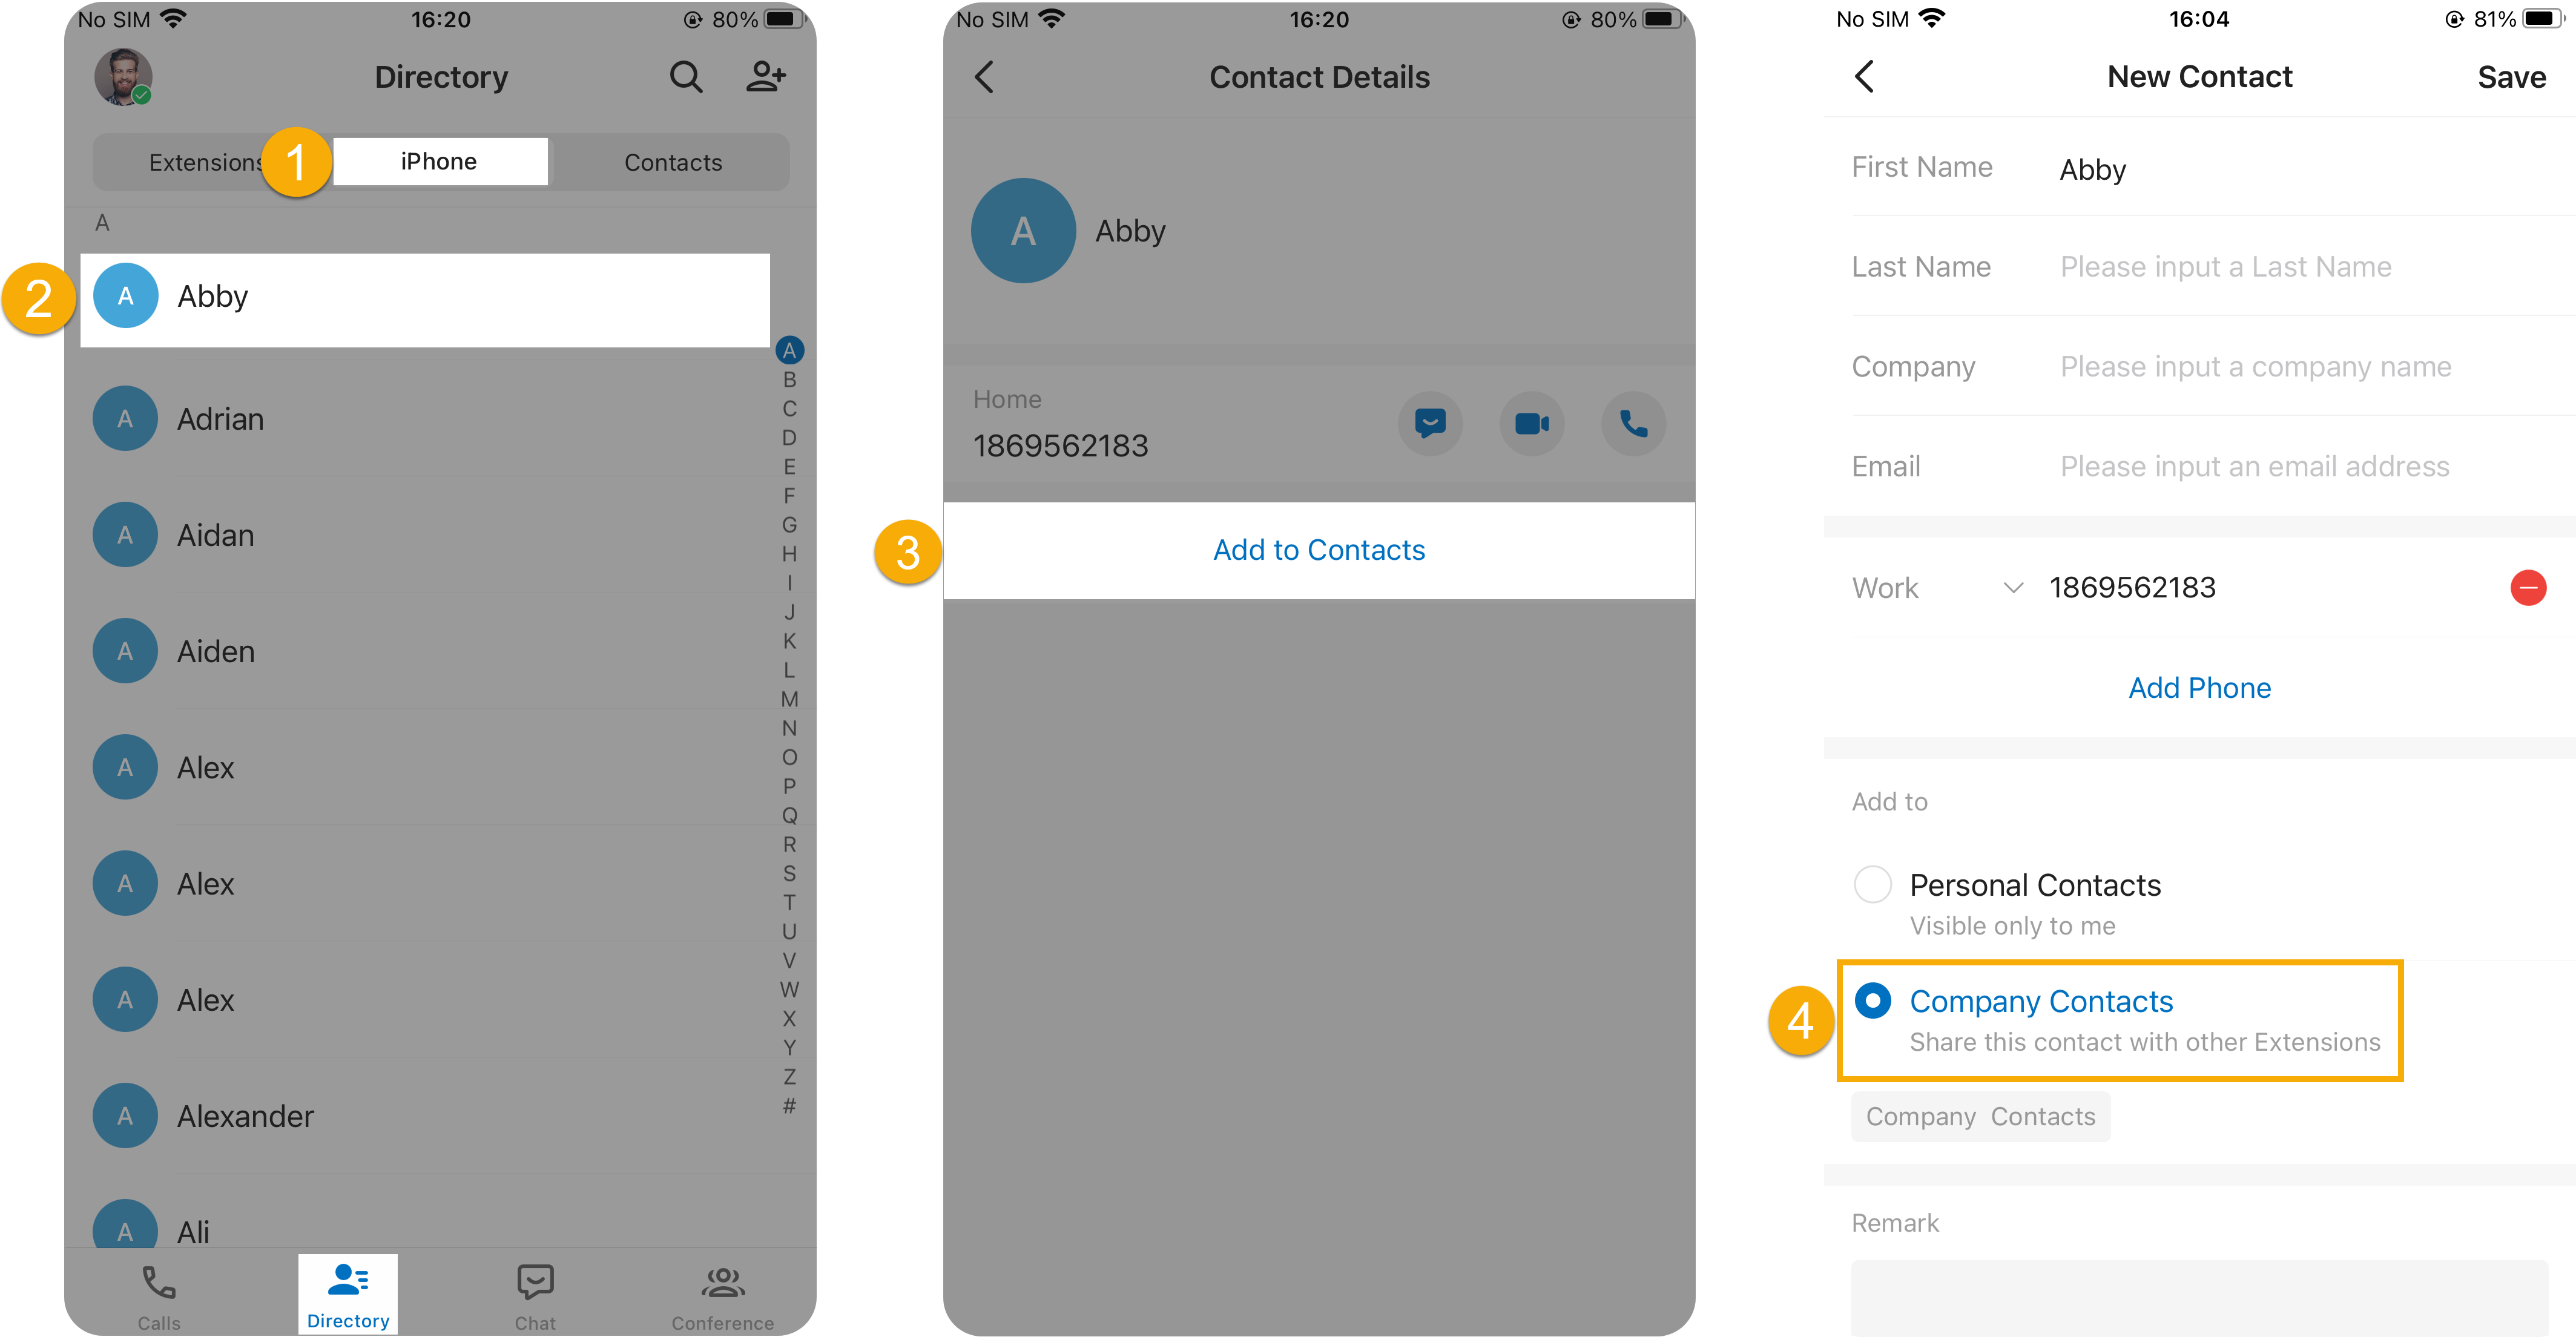
- In the Cloud Voice App, go to Directory > Phone.
- Tap the contact you want to add.
- On the Contact Details page, tap Add to Contacts.
- On the New Contact page, do the following:
- Adjust the contact details and remark if needed.
- Under Add to, choose Company Contacts, then pick the phonebook(s) that should hold the contact.
- Optional: Use the Remark field to add a short note about the contact.
- Tap the save option in the top-right corner.
Add a company contact from your call history
Section titled “Add a company contact from your call history”You can turn an unrecognized number in your call history into a company contact without leaving the call log.
-
In the Cloud Voice App, go to Calls > Call Logs, then tap the details icon
 next to the entry you want.
 -
On the Call History Details page, tap the add icon
 .
. -
In the pop-up, tap Add to Contacts, then choose whether to create a new contact or update an existing one.
To save it as a brand-new company contact:
- Tap New Contact.
- Fill in the contact’s details.
- Under Add to, choose Company Contacts, then pick the phonebook(s) that should hold the contact.
- Optional: Use the Remark field to add a short note about the contact.
- Tap the save option in the top-right corner.
To merge it into an existing company contact:
- Tap Add to Existing Contact.
- On the Add to Contact page, use the selector in the top-left corner to choose Company Contacts or the phonebook where the contact is stored.
- Tap the company contact you want to update.
- On the Edit page, revise the contact’s details and remark as needed.
- Tap the save option in the top-right corner. The contact’s information is updated with the number from the call.
Question about this page?
Ask the AI assistant. It starts from this page, then searches the rest of the docs.
Ask Cloud Voice AI
Answers are AI-generated from the docs and may contain mistakes. Verify with the linked pages.