
Allow the web client to use your microphone and camera
Making and receiving calls in the Cloud Voice App web client requires microphone access, and video calls also need your camera. If you dismissed the browser’s permission prompt or blocked it by mistake, calls will fail until you re-enable access. Follow the steps for your browser below, then reload the tab so the change takes effect.
Google Chrome
Section titled “Google Chrome”How you restore access depends on whether you ever answered Chrome’s original permission prompt.
You haven’t responded to the permission request yet
Section titled “You haven’t responded to the permission request yet”-
Log in to the Cloud Voice App web client.
-
Grant microphone and camera access:
-
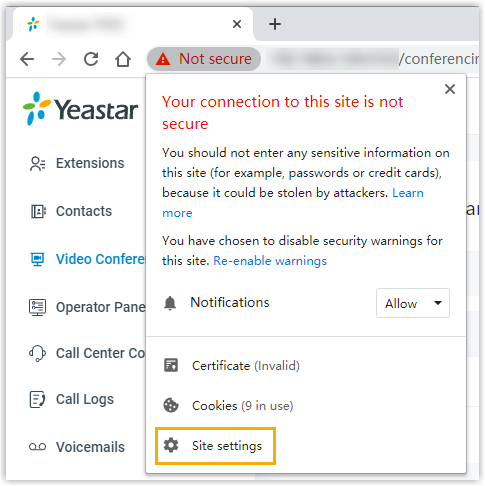
In the Chrome address bar, click the site information icon (
 or
or  ).
). -
In the pop-up, click Site Settings. Chrome opens its settings page for the site.
-
Scroll down to Permissions.
-
Set both Camera and Microphone to Allow.
-
-
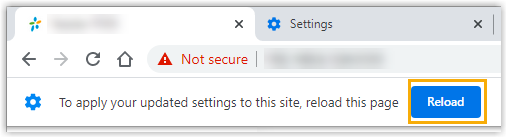
Return to the web client tab and click Reload to apply the change.
You previously blocked access
Section titled “You previously blocked access”-
Log in to the Cloud Voice App web client.
-
Grant microphone and camera access:
-
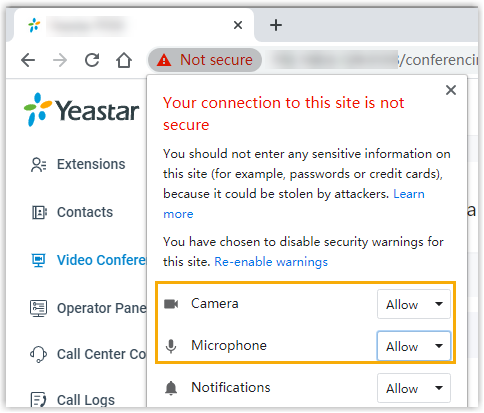
In the address bar, click the site information icon (
or ). -
Set Camera and Microphone to Allow.
-
Click any empty area of the page to confirm.
-
-
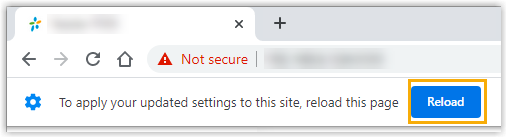
Click Reload to apply the change.
Microsoft Edge
Section titled “Microsoft Edge”-
Log in to the Cloud Voice App web client.
-
Grant microphone and camera access:
-
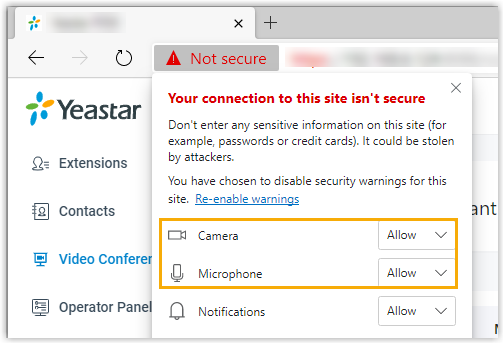
In the address bar, click the site information icon (
or  ).
). -
Set Camera and Microphone to Allow.
-
Click any empty area of the page to confirm.
-
-
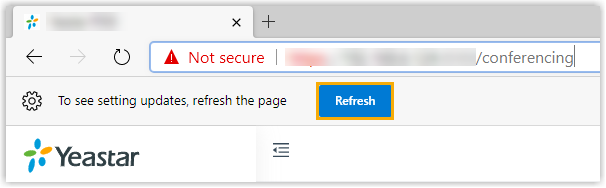
Click Refresh to apply the change.
Use these steps if you previously blocked the web client from using your microphone and camera.
-
Log in to the Cloud Voice App web client.
-
Grant microphone and camera access:
-
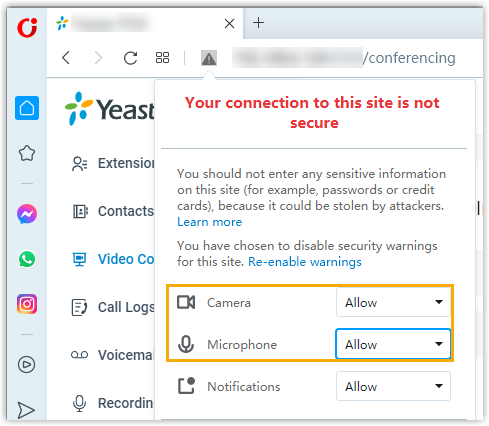
In the Opera address bar, click the site information icon (
 or ).
or ). -
Set Camera and Microphone to Allow.
-
Click any empty area of the page to confirm.
-
-
Click Reload to apply the change.

Question about this page?
Ask the AI assistant. It starts from this page, then searches the rest of the docs.
Ask Cloud Voice AI
Answers are AI-generated from the docs and may contain mistakes. Verify with the linked pages.