
Configure Two-Factor Authentication Using Email
Two-factor authentication (2FA) protects your account with a second verification step beyond your password. When you enable email-based 2FA, a one-time code is sent to your sign-in address and must be entered each time you log in.
Turn on email verification
Section titled “Turn on email verification”-
In the Cloud Voice App desktop client, click your account in the top-right corner and open Change Password & Security > Security Settings.
-
Tick the Two-Factor Authentication checkbox.
-
When the Password window appears, type your account password and click Confirm to authorize the change.
-
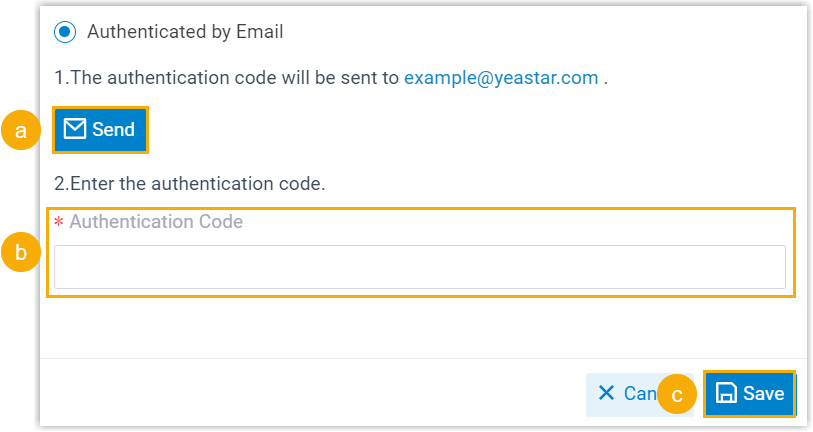
Choose Authenticated by Email and finish the setup as described below.
-
Click Send. A 6-digit code is emailed to the address you sign in with.
-
Enter the code in the Authentication Code field.
-
Click Save.
-
What happens next
Section titled “What happens next”- An “Edited successfully.” confirmation means 2FA is now active on your account.
- From now on, signing in to any Cloud Voice App client (web, desktop, or mobile) with your extension’s email address and password will also prompt you for a verification code.
Locked out?
Section titled “Locked out?”If you can no longer complete the second step, for example because you lost your device or stopped receiving the emailed code, ask your system administrator to disable two-factor authentication on your account. You can then sign in again with just your email address and password.
Question about this page?
Ask the AI assistant. It starts from this page, then searches the rest of the docs.
Ask Cloud Voice AI
Answers are AI-generated from the docs and may contain mistakes. Verify with the linked pages.