
Upgrade the Cloud Voice App Desktop Client
Keeping the desktop client current means you get the newest features and fixes. Whenever a newer release becomes available, the Cloud Voice App desktop client shows a notification that summarizes what has changed. You can apply the update right away, or dismiss the prompt and install it whenever it suits you. If you dismissed the prompt, use the steps below to upgrade the client on your own schedule.
-
Open the client menu for your operating system.
-
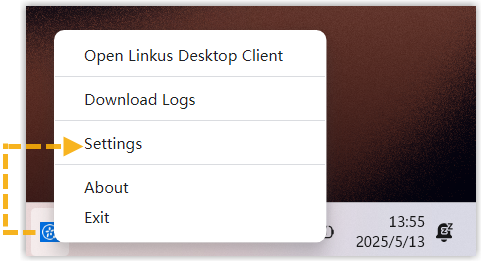
Windows: Right-click the Cloud Voice App icon in the system tray (the row of small icons near the clock, at the far right of the taskbar).

-
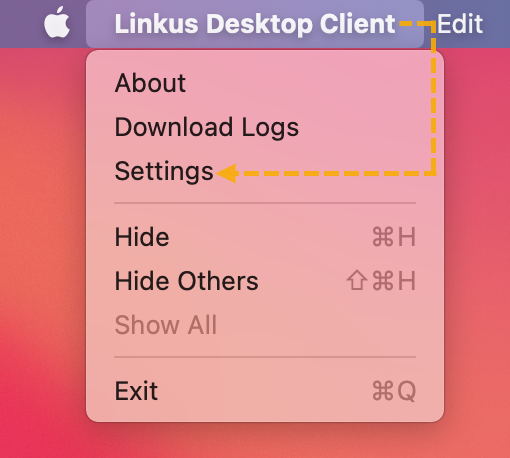
macOS: In the app menu bar (the bar at the very top of the screen, next to the Apple logo), click Cloud Voice App.
-
-
Choose About from the menu.
-
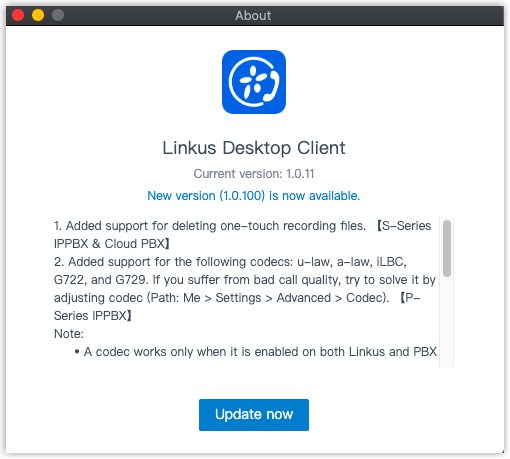
In the window that opens, click Check for updates.
A panel appears listing the highlights of the newest release.
-
Click Update Now.
The client downloads the new installation package.
-
Run the downloaded installer.
Once installation finishes, your Cloud Voice App desktop client is up to date.
Question about this page?
Ask the AI assistant. It starts from this page, then searches the rest of the docs.
Ask Cloud Voice AI
Answers are AI-generated from the docs and may contain mistakes. Verify with the linked pages.