
Add a Personal Contact
Personal contacts are yours alone. Anyone you save this way stays private to your account, so coworkers never see them, and the entries follow you automatically to every Cloud Voice App you sign in to.
The mobile client gives you four ways to create a personal contact. Pick whichever one fits where the person’s details already live.
Enter a contact by hand
Section titled “Enter a contact by hand”When the app has no record of someone, type their details in from scratch and file them under your personal directory.
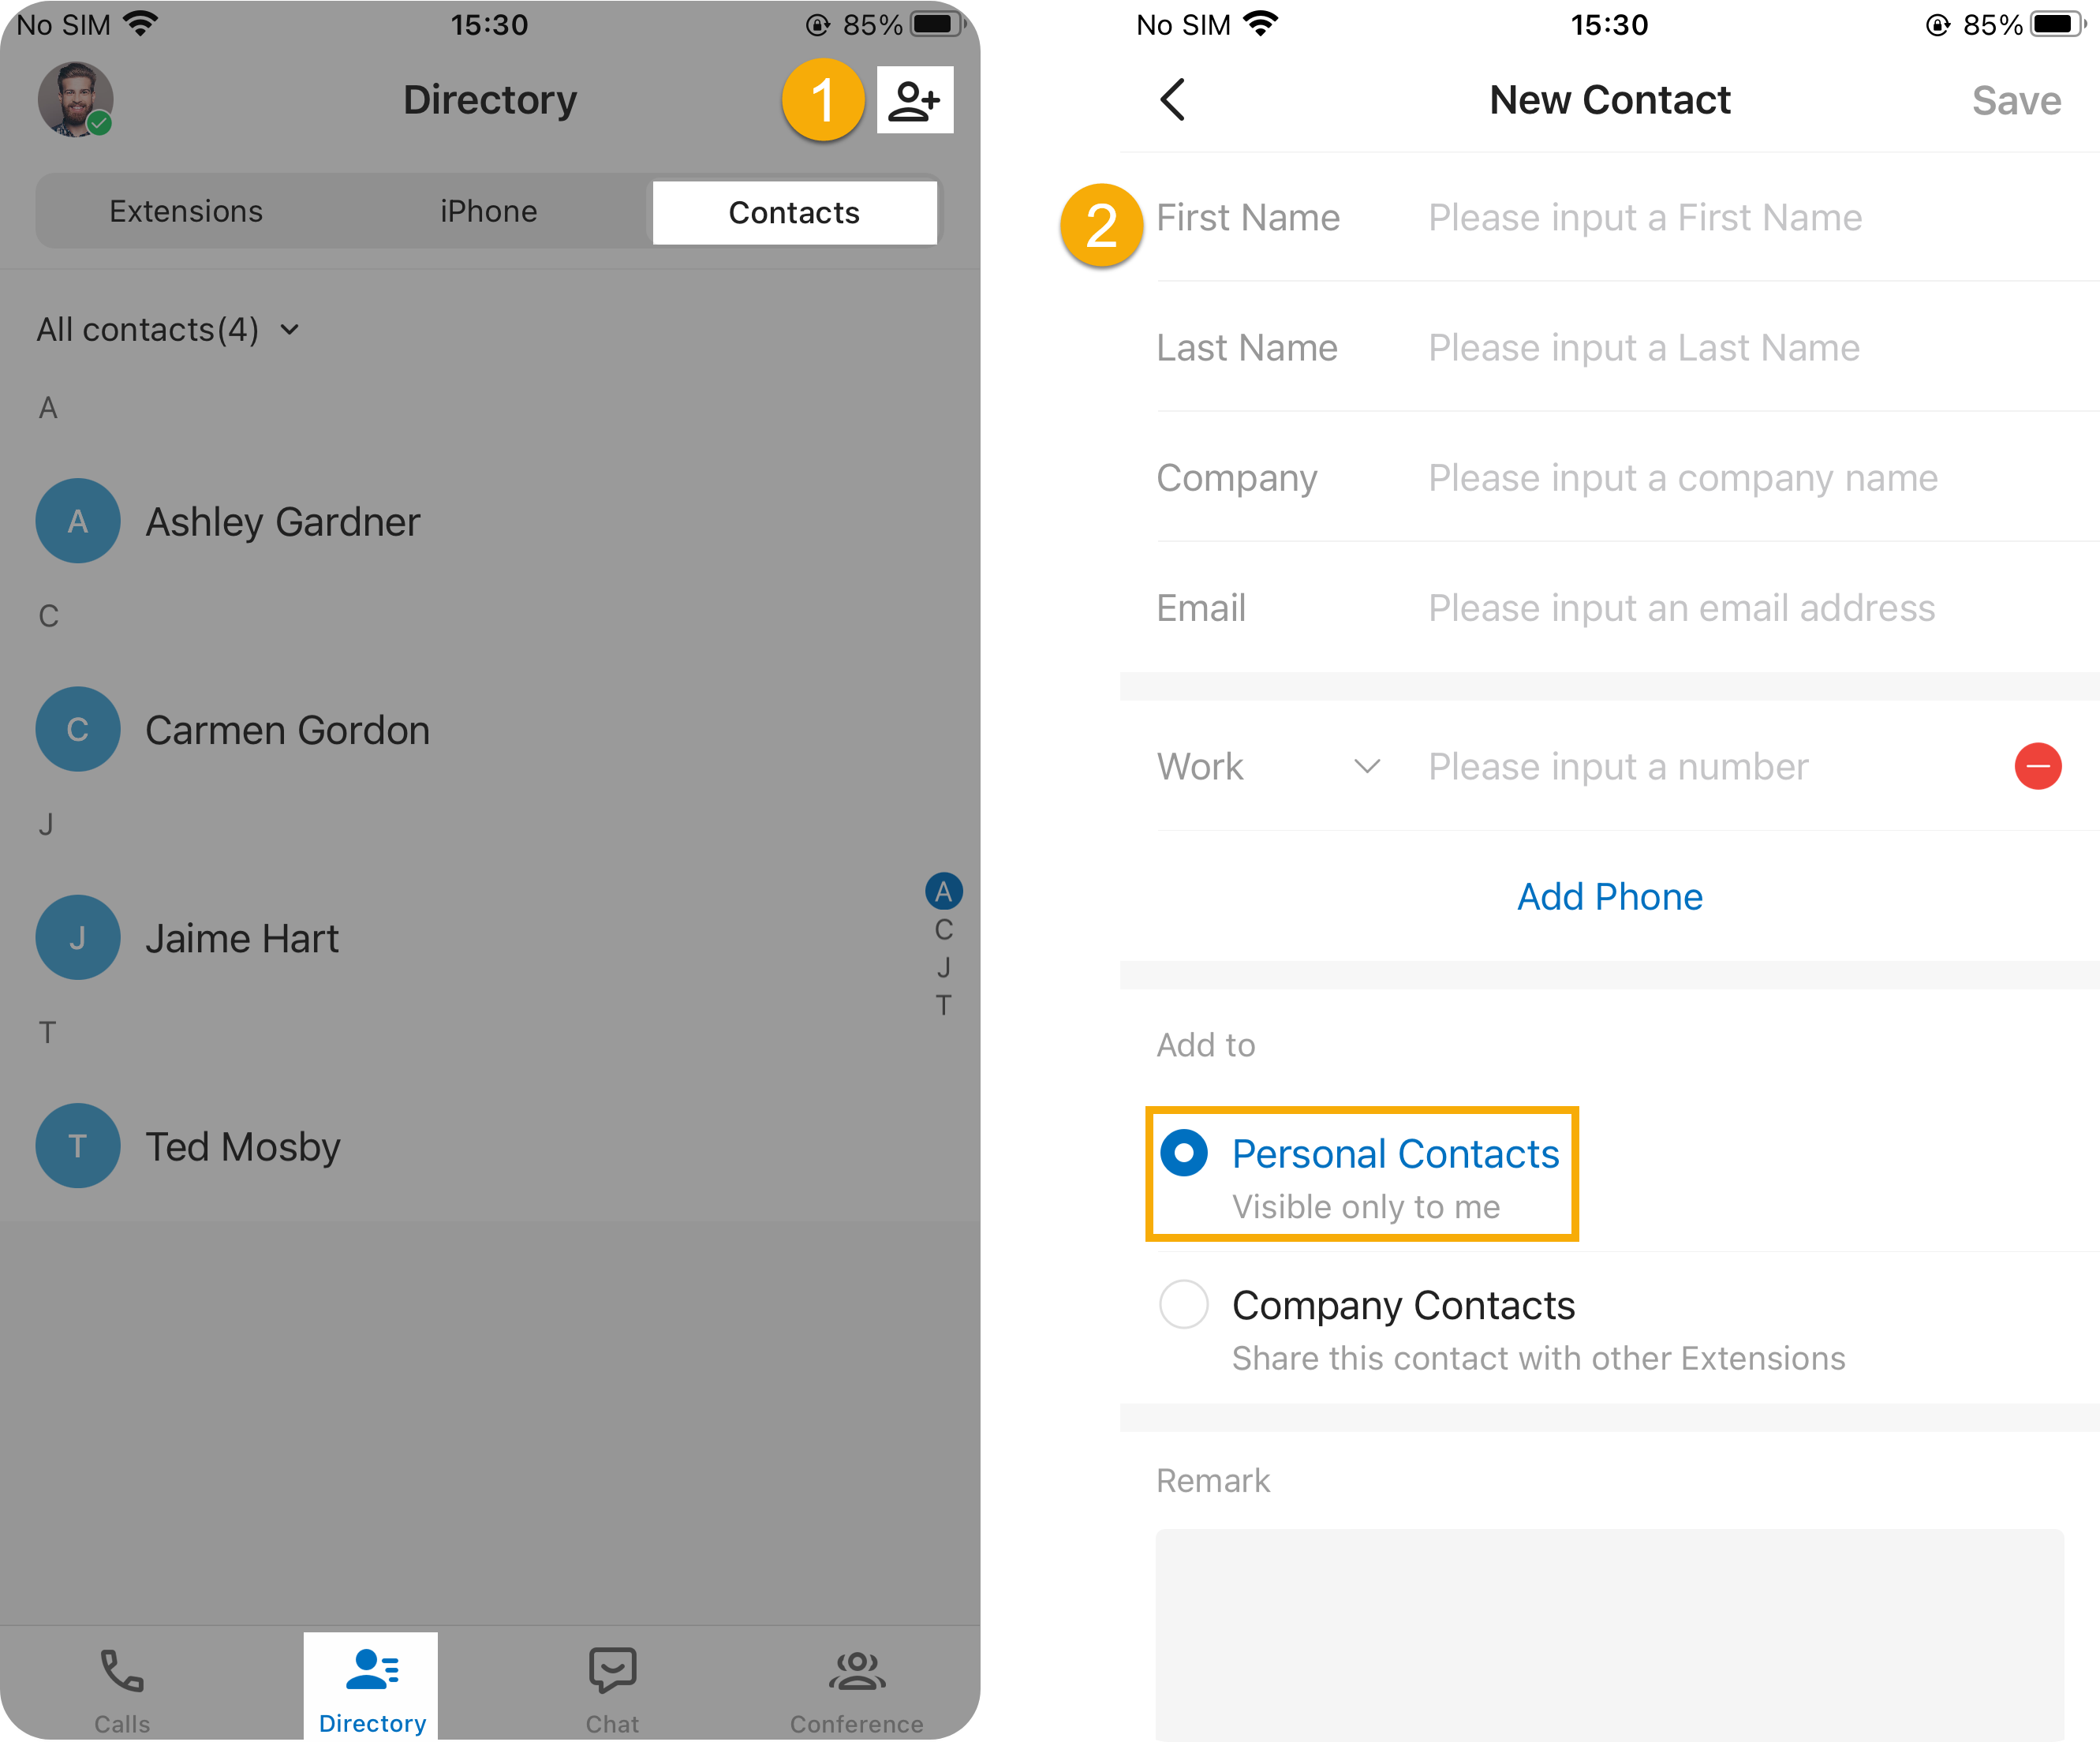
- Open Directory > Contacts, then tap the add-contact icon (
 ) in the top-right corner.
 - On the New Contact page: a. Fill in the contact’s information. b. Under Add to, choose Personal Contacts. c. Optionally, use the Remark field to jot down a short note about the person. d. Tap the save option in the top-right corner.
Copy from your company directory
Section titled “Copy from your company directory”If your administrator has given you permission to manage company contacts, you can lift an existing company entry straight into your personal directory.
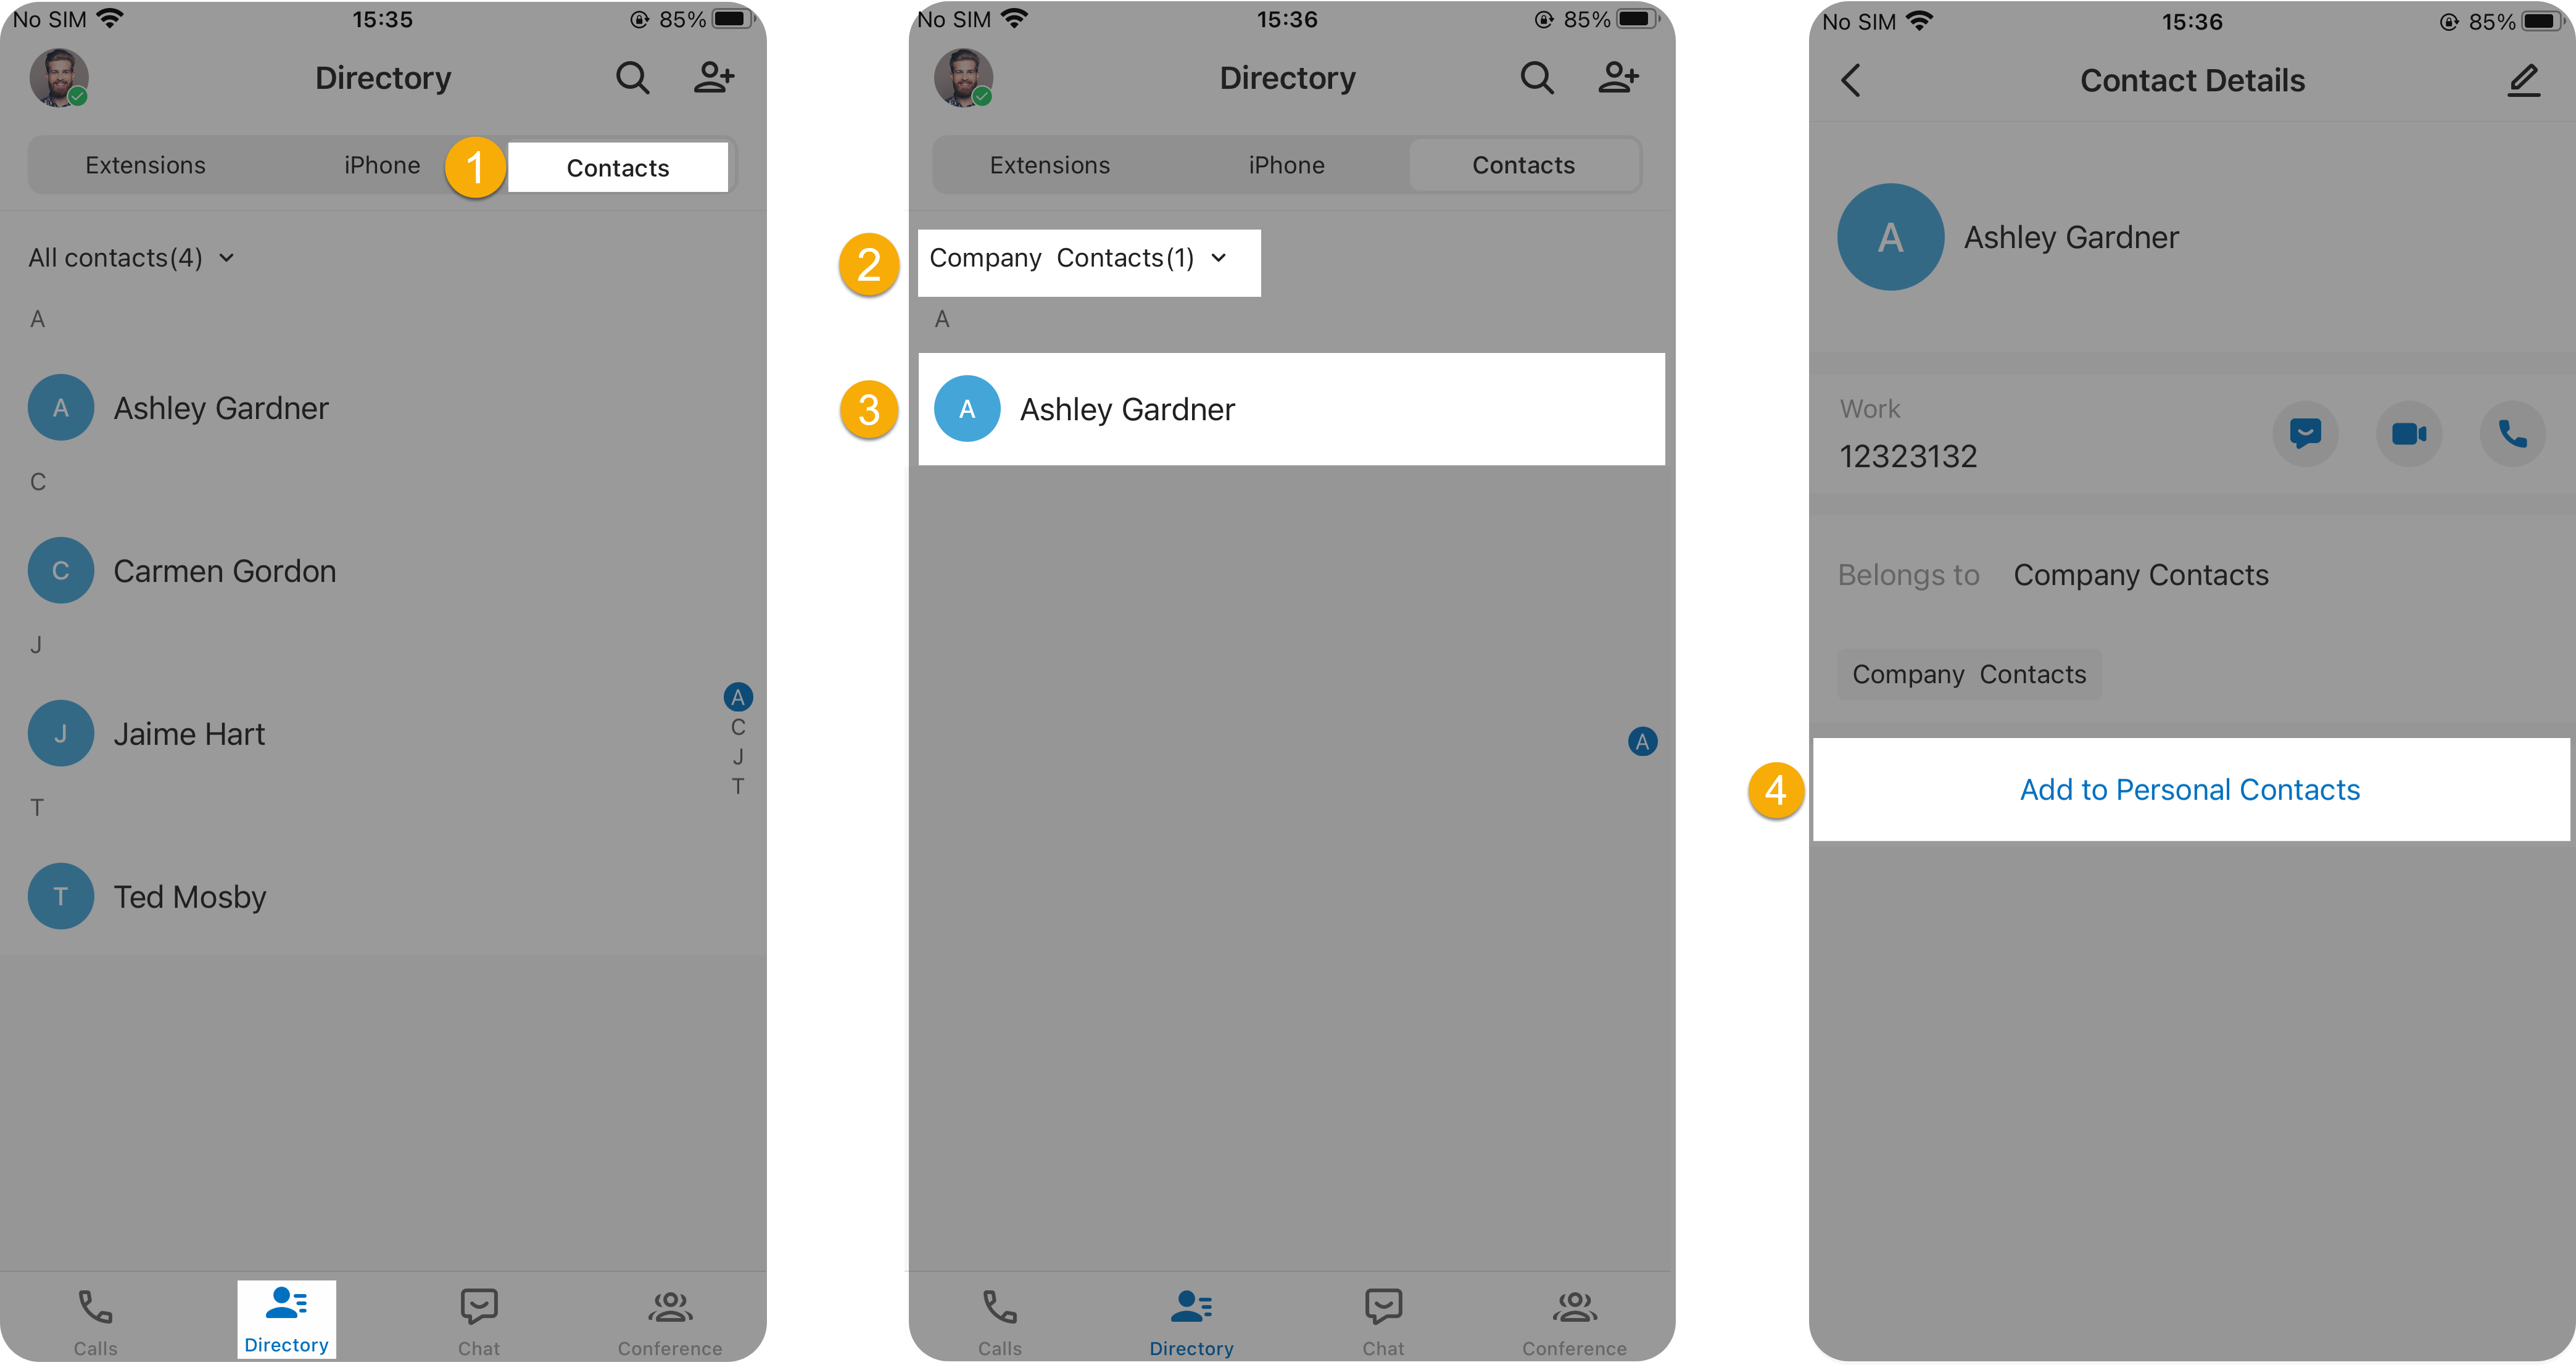
- Open Directory > Contacts.
- In the top-left corner, switch to Company Contacts, or to the phonebook that holds the entry you want.
- Tap the company contact you’re after.
- On the Contact Details page, tap Add to Personal Contacts. An “Added successfully” message confirms the entry is now in your personal directory.
Copy from your phone’s contacts
Section titled “Copy from your phone’s contacts”If you’ve allowed the Cloud Voice App to reach the native contacts on your device, you can pull one of them into your personal directory.
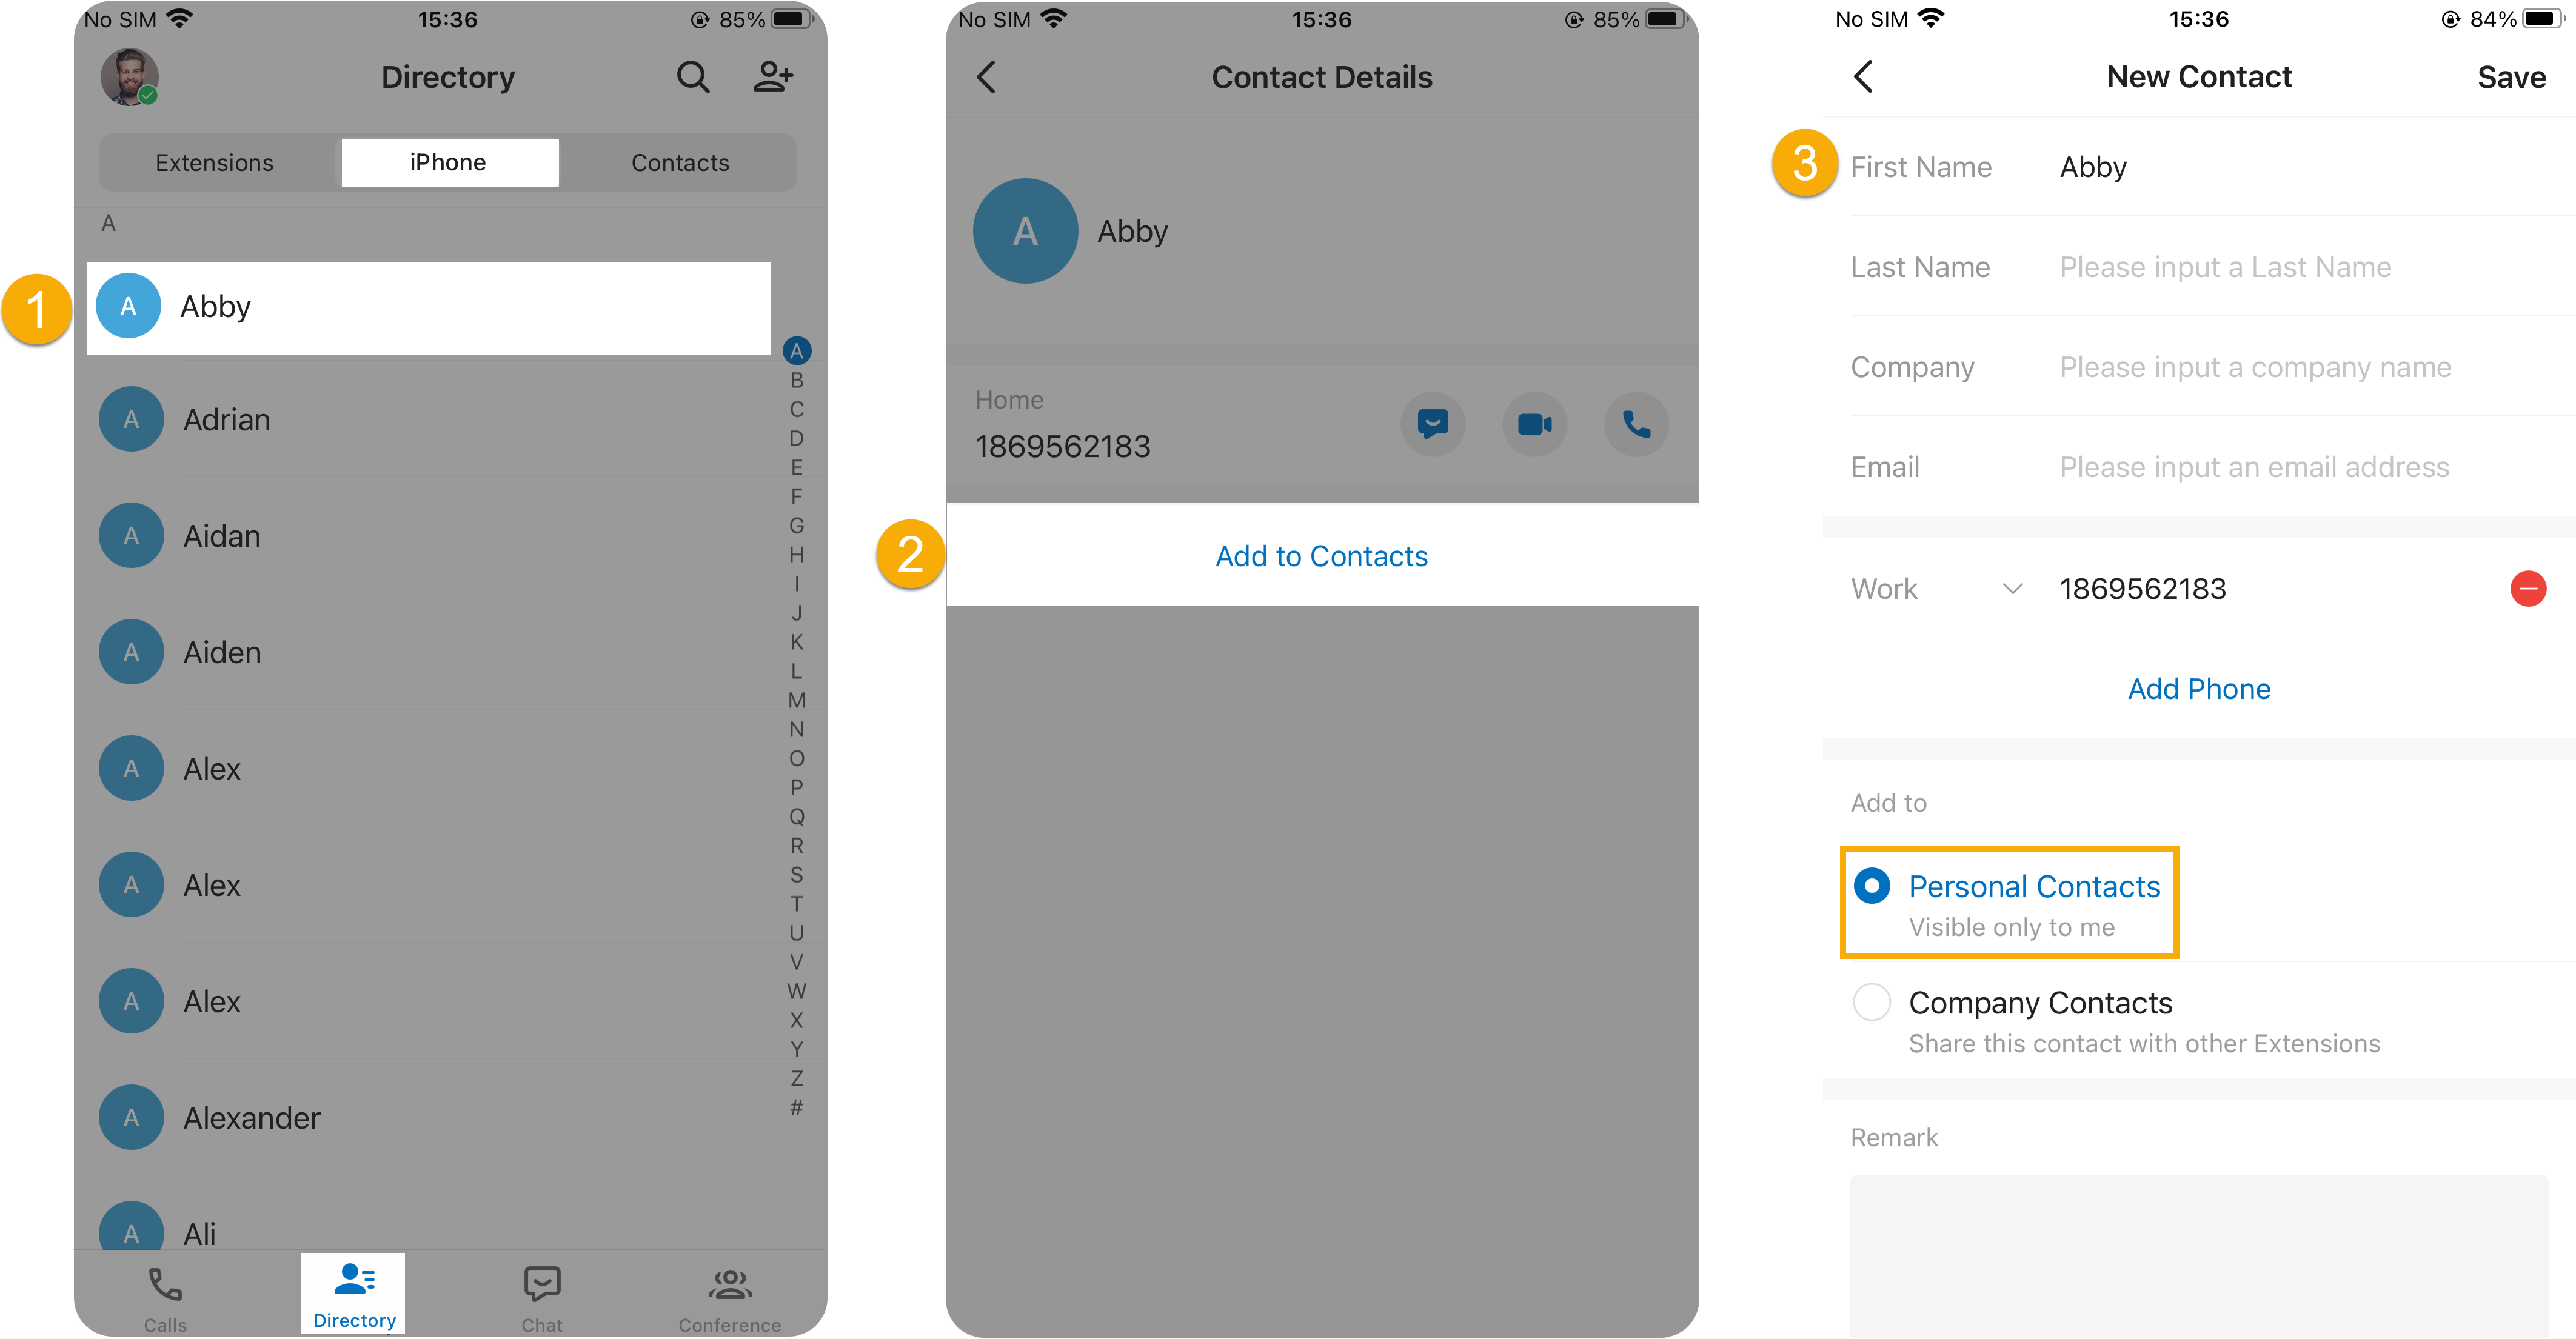
- Open Directory > Phone, then tap the contact you want.
- On the Contact Details page, tap Add to Contacts.
- On the New Contact page: a. Adjust the contact’s details if needed. b. Under Add to, choose Personal Contacts. c. Optionally, add a short note in the Remark field. d. Tap the save option in the top-right corner.
Save a number from your call history
Section titled “Save a number from your call history”An unknown number in your call logs can go straight into your personal directory, either as a brand-new entry or as an update to someone you already have.
- Open Calls > Call Logs, then tap the details icon (
 ) next to the record you want.
 - On the Call History Details page, tap the add icon (
 ).
). - In the pop-up, tap Add to Contacts, then choose how to save the number.
To create a new entry:
- Tap New Contact.
- Enter the contact’s information.
- Under Add to, choose Personal Contacts.
- Optionally, add a short note in the Remark field.
- Tap the save option in the top-right corner.
To merge the number into an existing entry:
- Tap Add to Existing Contact.
- In the top-left corner of the Add to Contact page, select Personal Contacts.
- Tap the personal contact you want to update.
- On the Edit page, revise the contact’s details and remark as needed.
- Tap the save option in the top-right corner. The contact’s information is updated.
Question about this page?
Ask the AI assistant. It starts from this page, then searches the rest of the docs.
Ask Cloud Voice AI
Answers are AI-generated from the docs and may contain mistakes. Verify with the linked pages.