
Configure Audio and Video
The Audio & Video settings let you pick which microphone, speaker, camera, and ringing device the Cloud Voice App Web Client uses, and optionally link a supported headset for hands-on call control.
Before you begin
Section titled “Before you begin”-
Allow your web browser to access the microphone and camera on your computer.
-
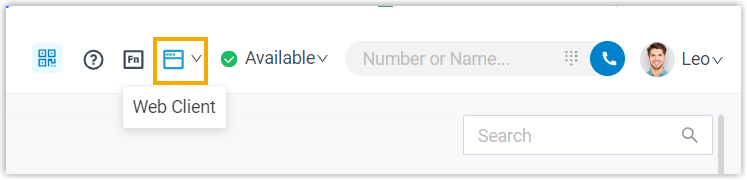
Make sure the Cloud Voice App Web Client is running in Web Client mode.
Configure your devices
Section titled “Configure your devices”-
Sign in to the Cloud Voice App Web Client and go to Preferences > Audio & Video.
The browser prompts you for permission to use your microphone.
-
Grant the Web Client access to your microphone and camera.
a. Select Allow to let the Web Client use your microphone.
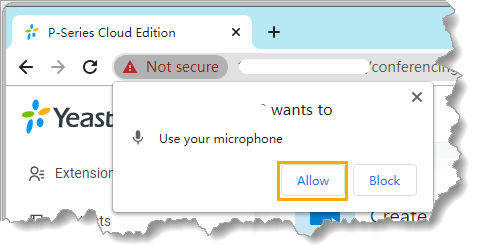
The microphone is now active.
b. Select Allow to let the Web Client use your camera.
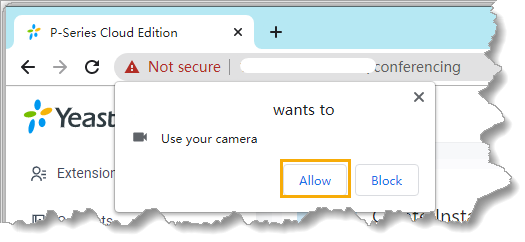
The camera turns on and a live preview of yourself appears on the left side of the page.
-
On the right side of the page, use the Camera, Microphone, Speaker, and Ringing Device drop-down lists to select the device you want for each.
-
If you have a compatible headset, set it up under Headset Integration so you can answer, end, and manage calls directly from the headset. For supported models and setup steps, see Integrate HID-compliant Headsets with Cloud Voice App Web Client or, for earlier app versions, Integrate Headsets with Cloud Voice App Web Client.
-
Select Save.
Question about this page?
Ask the AI assistant. It starts from this page, then searches the rest of the docs.
Ask Cloud Voice AI
Answers are AI-generated from the docs and may contain mistakes. Verify with the linked pages.