
Enable Call Quality Monitoring
Call quality monitoring records the network and audio measurements behind each of your calls, giving technical support the data they need to pinpoint problems faster when something sounds wrong (choppy audio, dropouts, echo, or one-way sound). This page shows how to switch monitoring on for your own extension from the Cloud Voice App desktop client.
Requirements
Section titled “Requirements”Your PBX (Private Branch Exchange, the phone system that routes your calls) server must be running firmware 84.23.0.123 or later. If it is on an older version, the Monitor Call Quality settings will not appear.
Before you begin
Section titled “Before you begin”Your system administrator must have granted your extension permission to enable its own call quality monitoring. Without that permission the option is unavailable, so ask your administrator to grant it first.
Turn on monitoring
Section titled “Turn on monitoring”-
Sign in to the Cloud Voice App desktop client and go to Preferences > Features.
-
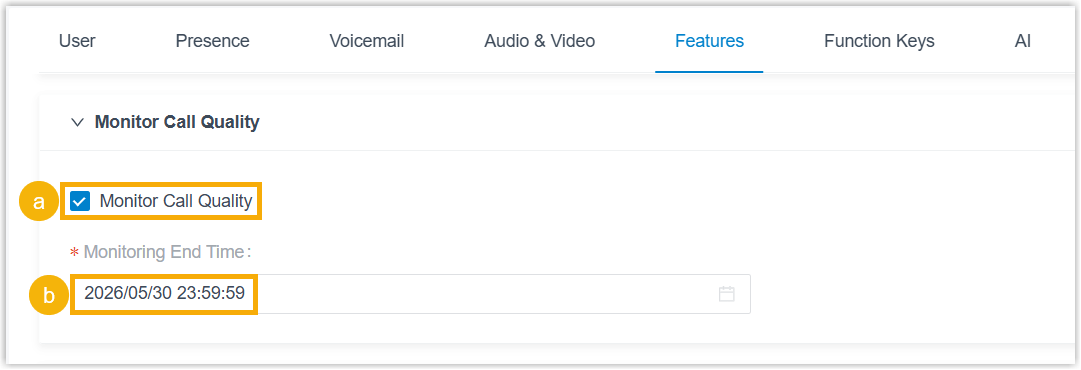
Under Monitor Call Quality, adjust the following settings.
-
Select the Monitor Call Quality checkbox.
-
Open the Monitoring End Time drop-down list and choose when monitoring should stop.
-
-
Select Save.
Result
Section titled “Result”From now on, whenever you place or take a call in the Cloud Voice App desktop client (while monitoring is active), quality data is gathered in the background and turned into a report automatically. Each report is tied to its call, and you can open it from the matching entry in your call history.
For details on opening a report and reading its metrics, see Access the Call Quality Monitoring Report.
Question about this page?
Ask the AI assistant. It starts from this page, then searches the rest of the docs.
Ask Cloud Voice AI
Answers are AI-generated from the docs and may contain mistakes. Verify with the linked pages.